
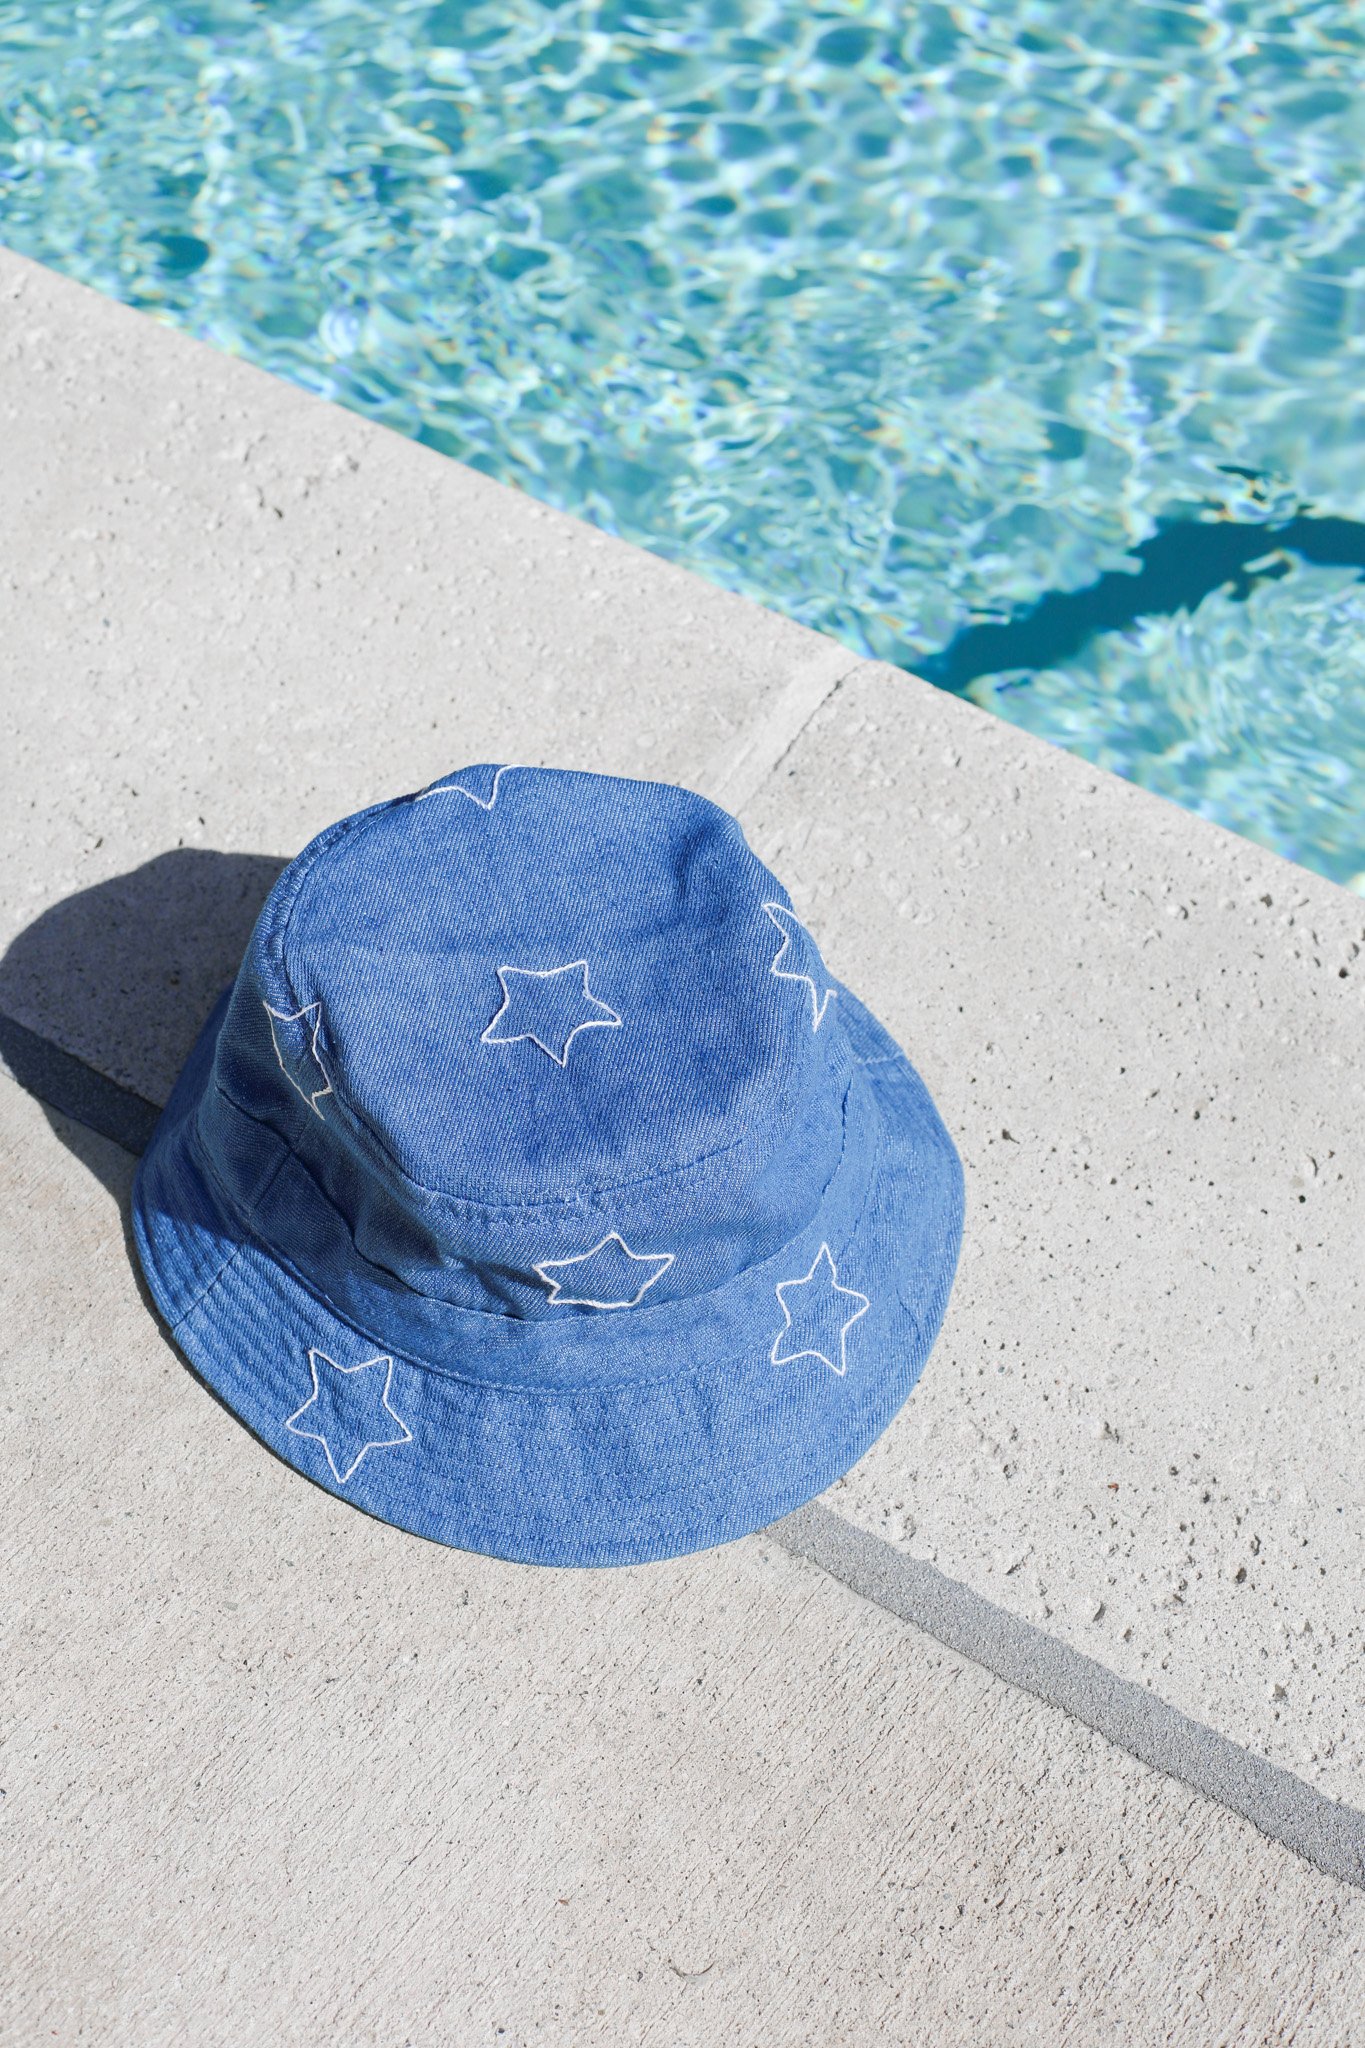
Embroidered 4th of July Bucket Hat
I don’t know about you, but summer is one of my favorite times of the year to start a new hobby. And one hobby that I started a few years back that I’ve still been enjoying and finding super useful for many DIY projects is embroidering. It is a very satisfying hobby because you can make some really beautiful creations that are fairly simple and also very inexpensive. It is also the perfect craft to do while watching TV or listening to an audiobook at the pool. Not a lot of supplies are needed but you can be as creative as you would like!
If you’re looking to get into embroidering on a very beginner level, this simple embroidered bucket hat is the perfect place to start! It only requires one (very simple) type of embroidery stitch, and you don’t even need an embroidery hoop. Just a hat, some embroidery floss, and a needle.
And, of course, I decided to theme this project for the upcoming holiday. Making this the perfect craft to do this upcoming 4 day weekend if you want to create a fun and unique accessory to wear this 4th of July! Find out how I embellished this “star-studded” bucket hat below!

Affiliate disclosure: This post may contain affiliate links. When you buy from these links, I may earn a small commission, at no additional cost to you. As an Amazon Associate, I may earn commissions from qualifying purchases from Amazon.com. Thank you for your support!
HOW TO EMBROIDER A BUCKET HAT FOR THE FOURTH OF JULY

Supplies:
Embroidery floss (I ended up just using white)
Scissors
Pen
Star shape (I used a random star embellishment that I had, but you could just print a star shape too)
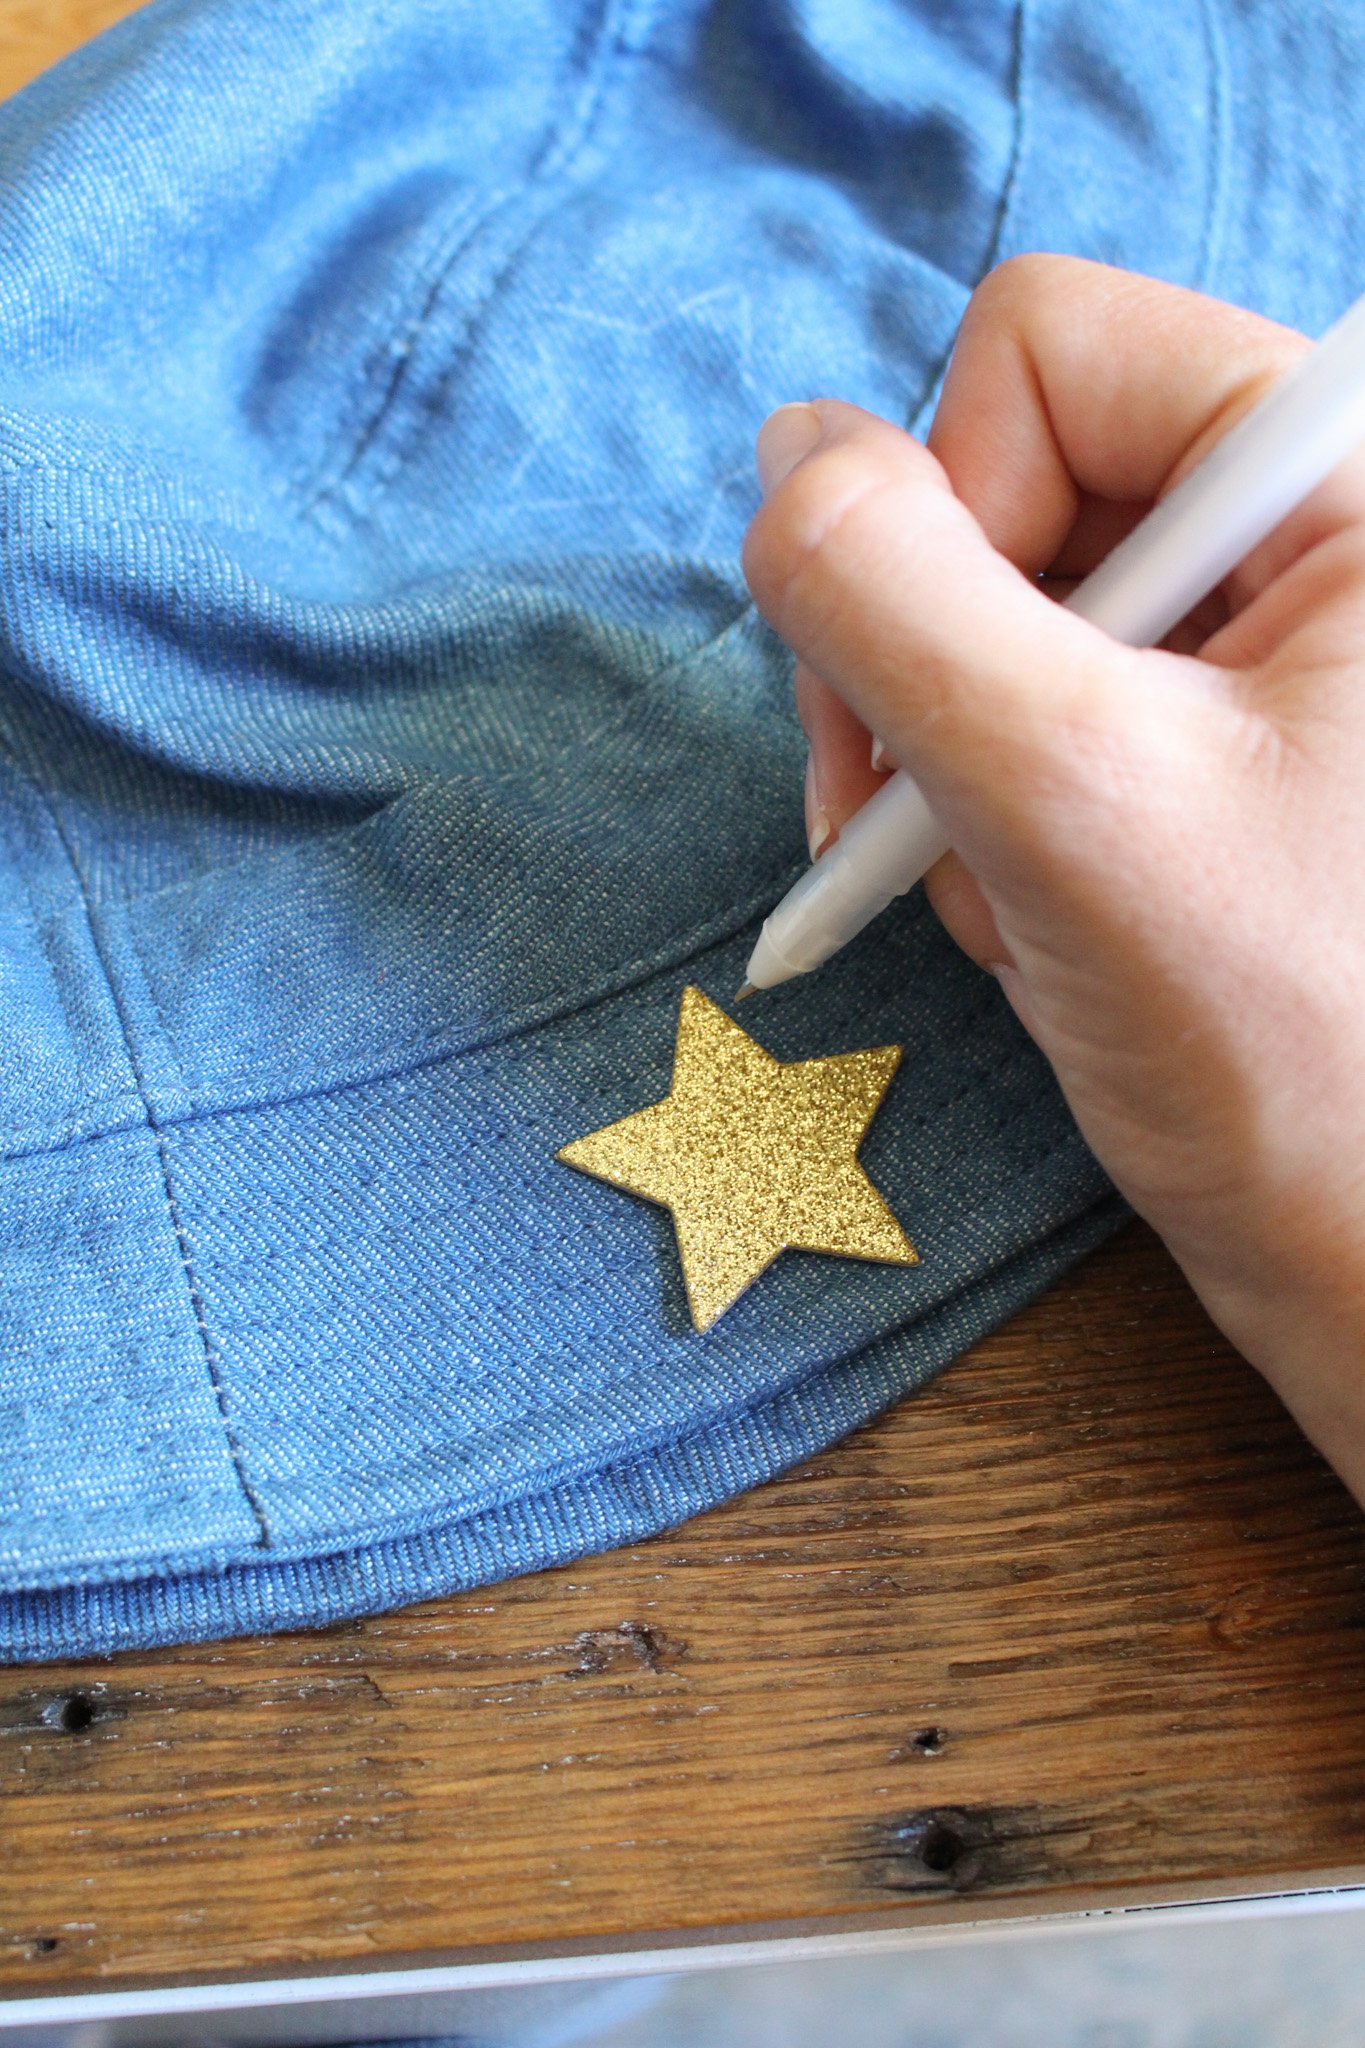

Start by drawing your stars with a pen all around the surface of your bucket hat. I had some random glitter star embellishments in my craft supplies that I used as a guide, but you could totally just print out a star shape online onto some thick cardstock. Then cut out the shape to use as a template. My star was about 1.5” in diameter for reference.
I used a white gel pen so I could see the outline better against the dark denim of the hat, but I think you could also just use a thin black pen. The lines will hopefully be covered up by your embroidery floss in the end. Be sure to zig zag the star shapes around the perimeter and try to evenly space them out for a more uniform look.
Next, you are going to thread your floss onto your needle. Standard embroidery floss is made up of 6 thin pieces of thread per strand. For this project, I wanted my lines to be fairly thin so I ended up only using 3 strands on my needle. So before you begin, cut a piece of floss about arm length then peel 3 pieces of strands off until you are just left with half of the strand. Now thread this floss onto your embroidery needle and tie a double knot at the other end of the floss.

Now it is time to begin embroidering. Pull your needle up through your hat from the inside at any point on your star shape. Pull the thread all the way through until the knot at the end is secured on the inside of the hat.
Now begin sewing a simple stem stitch. Here is a great video to show you how to do an embroidery stem stitch. You are going to be creating a thick line of embroidery floss that almost looks like it is twisting. It’s difficult to explain in text, which is why I think that video is so helpful, but once you get the hang of it, it is one of the most simple stitches in embroidery.
Now follow the lines of the start shape creating a white outline on the denim hat. Once you complete your star, make sure your last stitch was back down into the hat and tie a double knot on the back to secure. Trim an excess floss.
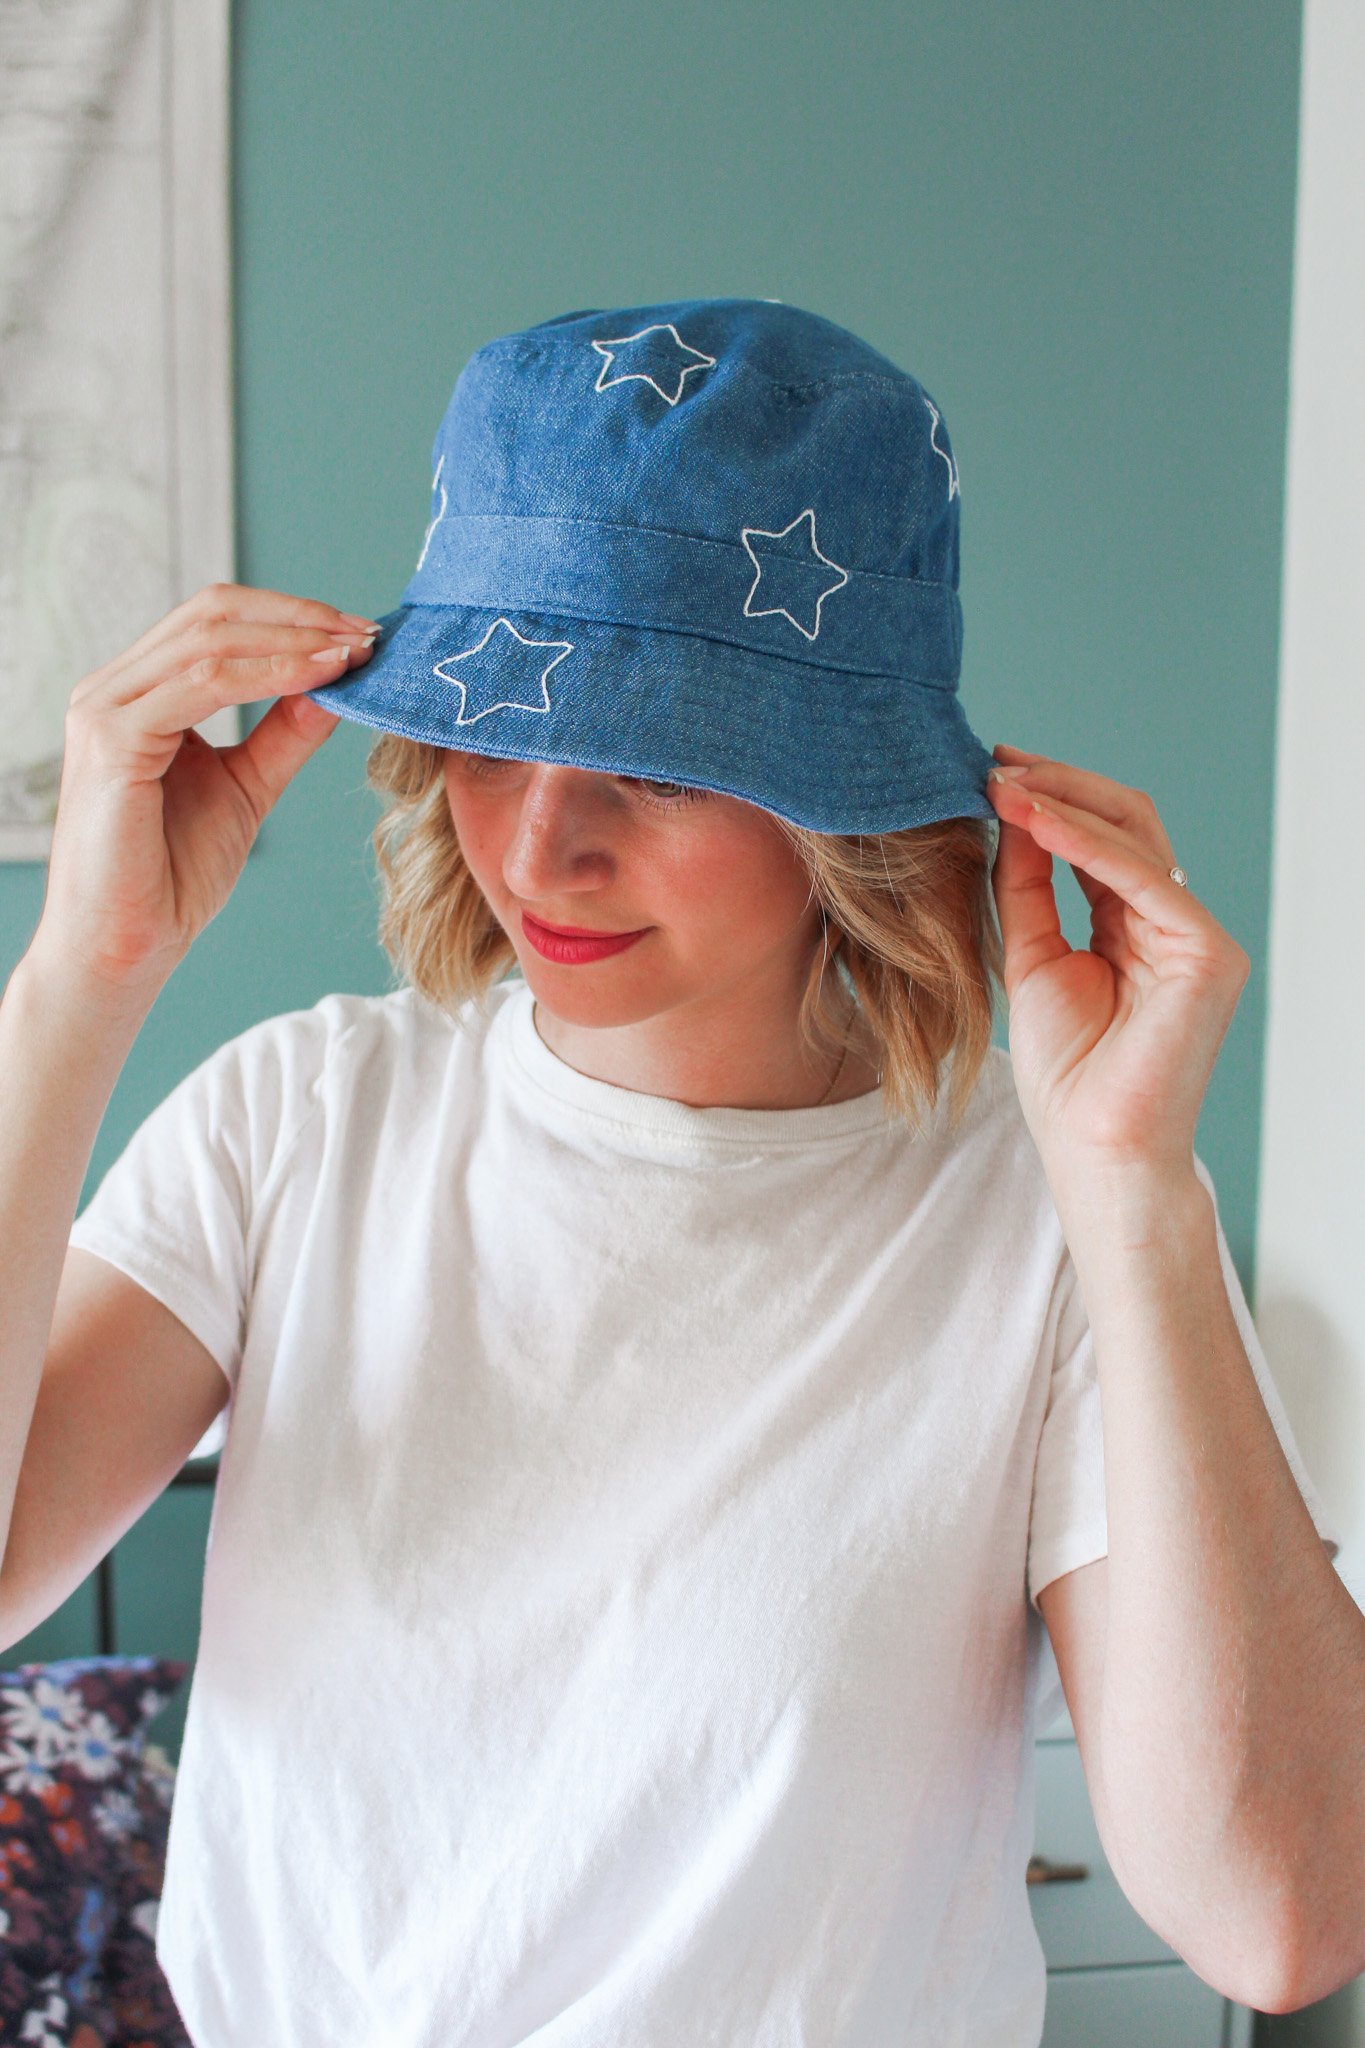
Then continue onto the next star. Repeat with however many stars you want! Here’s a look at the final hat…
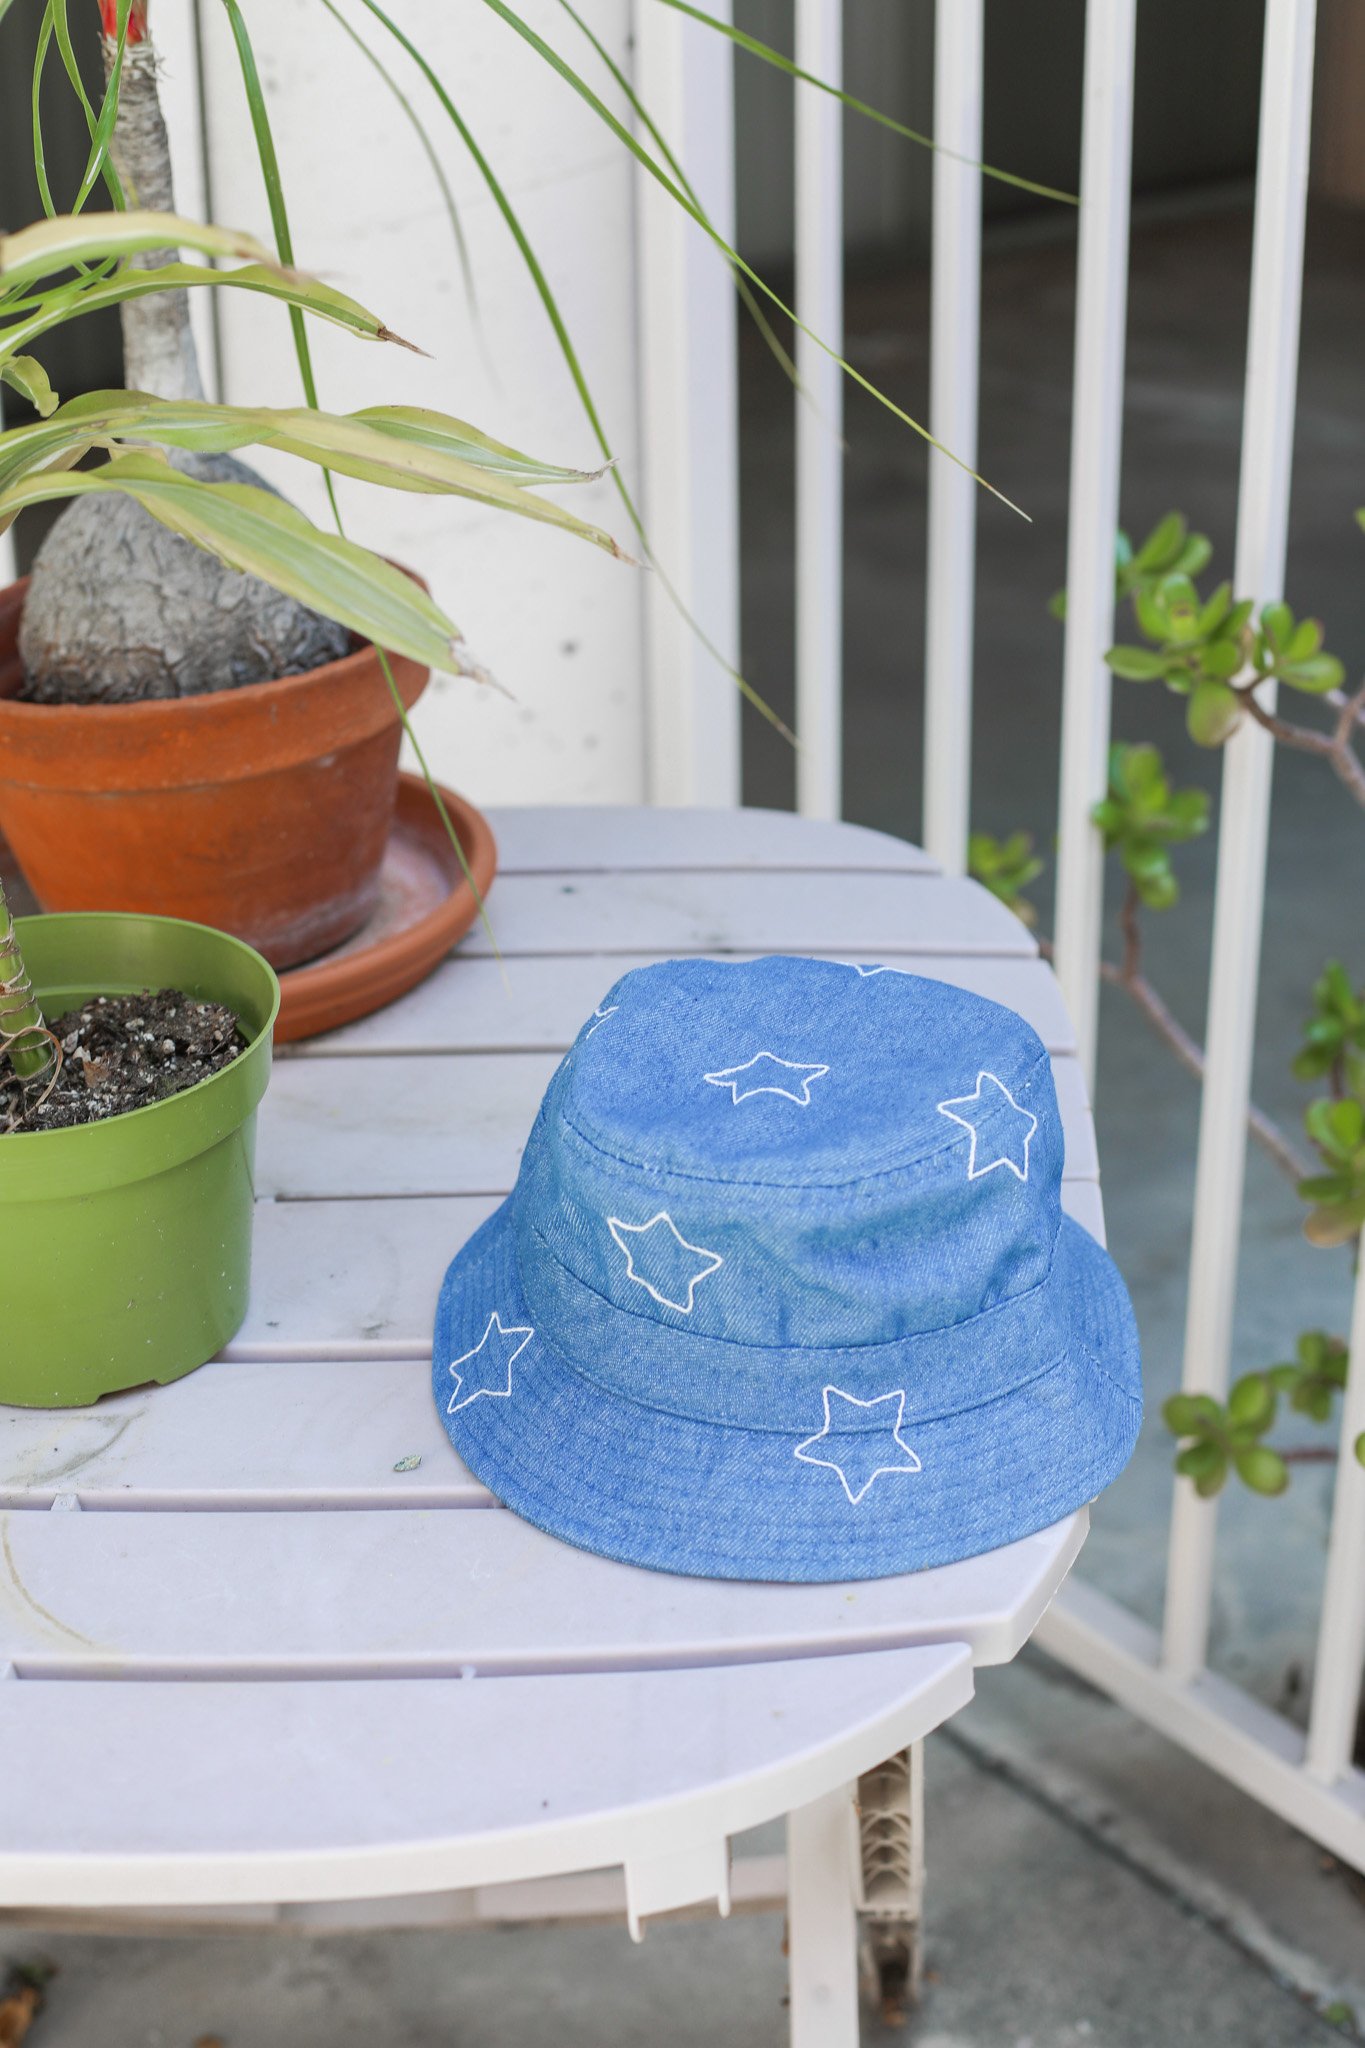
I love how simple and minimal the lines of the star shapes turned out. It feels like a very subtle 4th of July accessory and you can totally brag to your friends and family that you made it! :)

If this embroidery project has inspired you to pick up embroidering as a hobby this summer, check out a few of our other embroidery projects:
DIY Embroidered Travel Journals
Spiderweb Embroidered Coasters (if you’re already itching for some Halloween vibes…)
Now all that is left is to find a pool to spend the day beside on Tuesday! Hope you have a wonderful 4th of July!
xo Rachael

