
DIY Embroidered Travel Journals
I don’t know about you, but I’m the type of traveler that likes to have ideas of things to do, what to see, places to eat, & recommendations all prepared ahead of time so that I can fully relax on vacation. And I don’t mean a minute-to-minute itinerary that must be followed. I just hate the feeling of your travel group sitting around in the airbnb on your laptops searching for where to eat when half the group is already hangry…never happened to you before? Just our family?
Well with our upcoming family trip to visit my sister who is studying abroad in Italy, I have already begun my lists of the must-see spots. And what better way to have access to these lists than in my pocket when we are out exploring the streets of Sorrento. So I came up with this cute way to embellish a plain pocket notebook that will double as a keepsake following my trip.
I think these are perfect little journals to use while traveling to keep notes to remember what you did each day or where you visited. I think it would also be fun to glue in all your ticket stubs, photos, maps, menus, etc that you collected on your travels for a nice keepsake mini scrapbook. Follow along below for a tutorial!

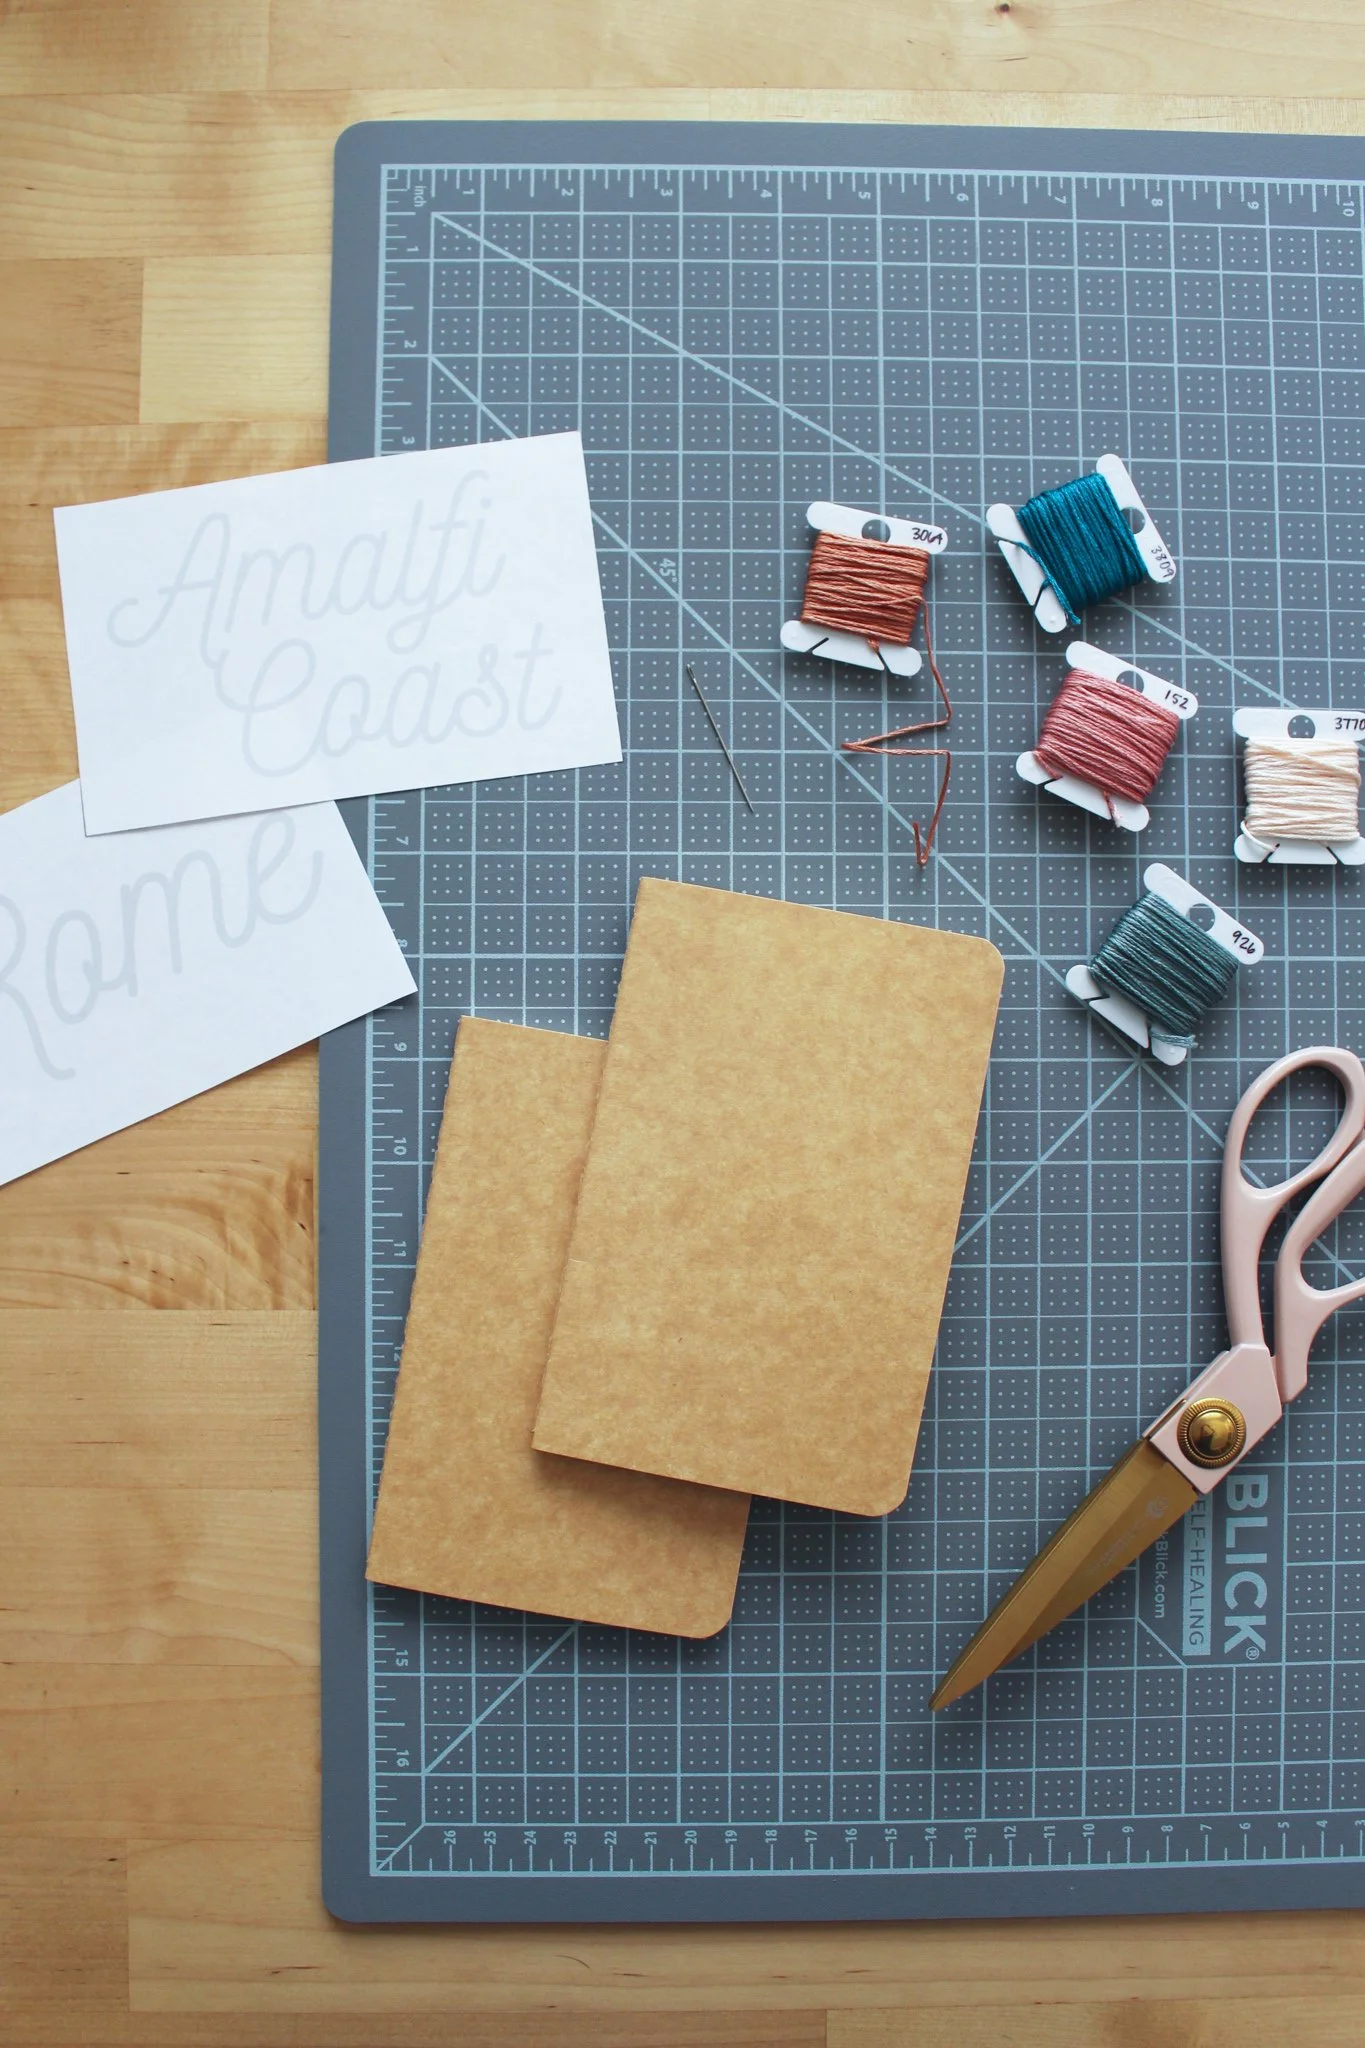
STEP 1 - To begin, you will need to create and print your text that you will be embroidering. For my project, I used illustrator (but you could easily just use word or pages) and I created a new blank artboard that was the same size as my notebooks (3” x 5” landscape). Then I added a text box with my city name and I used the font Nickainley Normal because I wanted that unique script design. You can use whatever font you’d like, just make sure it is a thinner font because you are going to be embroidering thin lines. I found it helpful to also create a rectangle around the edge of my document so I knew where to cut it out after I printed.
Before printing, make the text a light grey color (this will make the next step easier).
If you have nice calligraphy and want to sketch your own font, you can totally do that too! Just cut a piece of paper the size of the front of your notebook and lightly sketch out your letters.

STEP 2 - Now use a pen or pencil to mark evenly spaced dots along the letters, careful to stay centered inside the font width the whole time for an even line. These are going to be your stitch marks. When you arrive at intersections between lines (for example, where the line crosses inside the A) make sure the dot is centered at the intersection so it can be used for both the vertical and horizontal embroidery lines. My dots are about 1/8” apart, but you can just eyeball this as you go, no need to get the ruler out.

STEP 3 - Open your notebook so the front cover is separated from the rest, and lay the notebook open on top of a scrap piece of cardboard. Tape your text paper onto the notebook cover with drafting or painters tape to hold it securely in place. Make sure your text is centered wherever you want it on the notebook.
STEP 4 - Now using your embroidery needle, punch a hole into the paper at each marked dot. Make sure you punch hard enough that the needle goes through both the paper and the front cover of the notebook (this is why you have the cardboard down, so you do not damage the surface below). You are creating your stitch holes.
*TIP! If you have a hard time handling the embroidery needle (like if its too slippery to push through the paper), I stuck the non-sharp end into the end of a wine cork so I had something to grip as I punched all the holes.
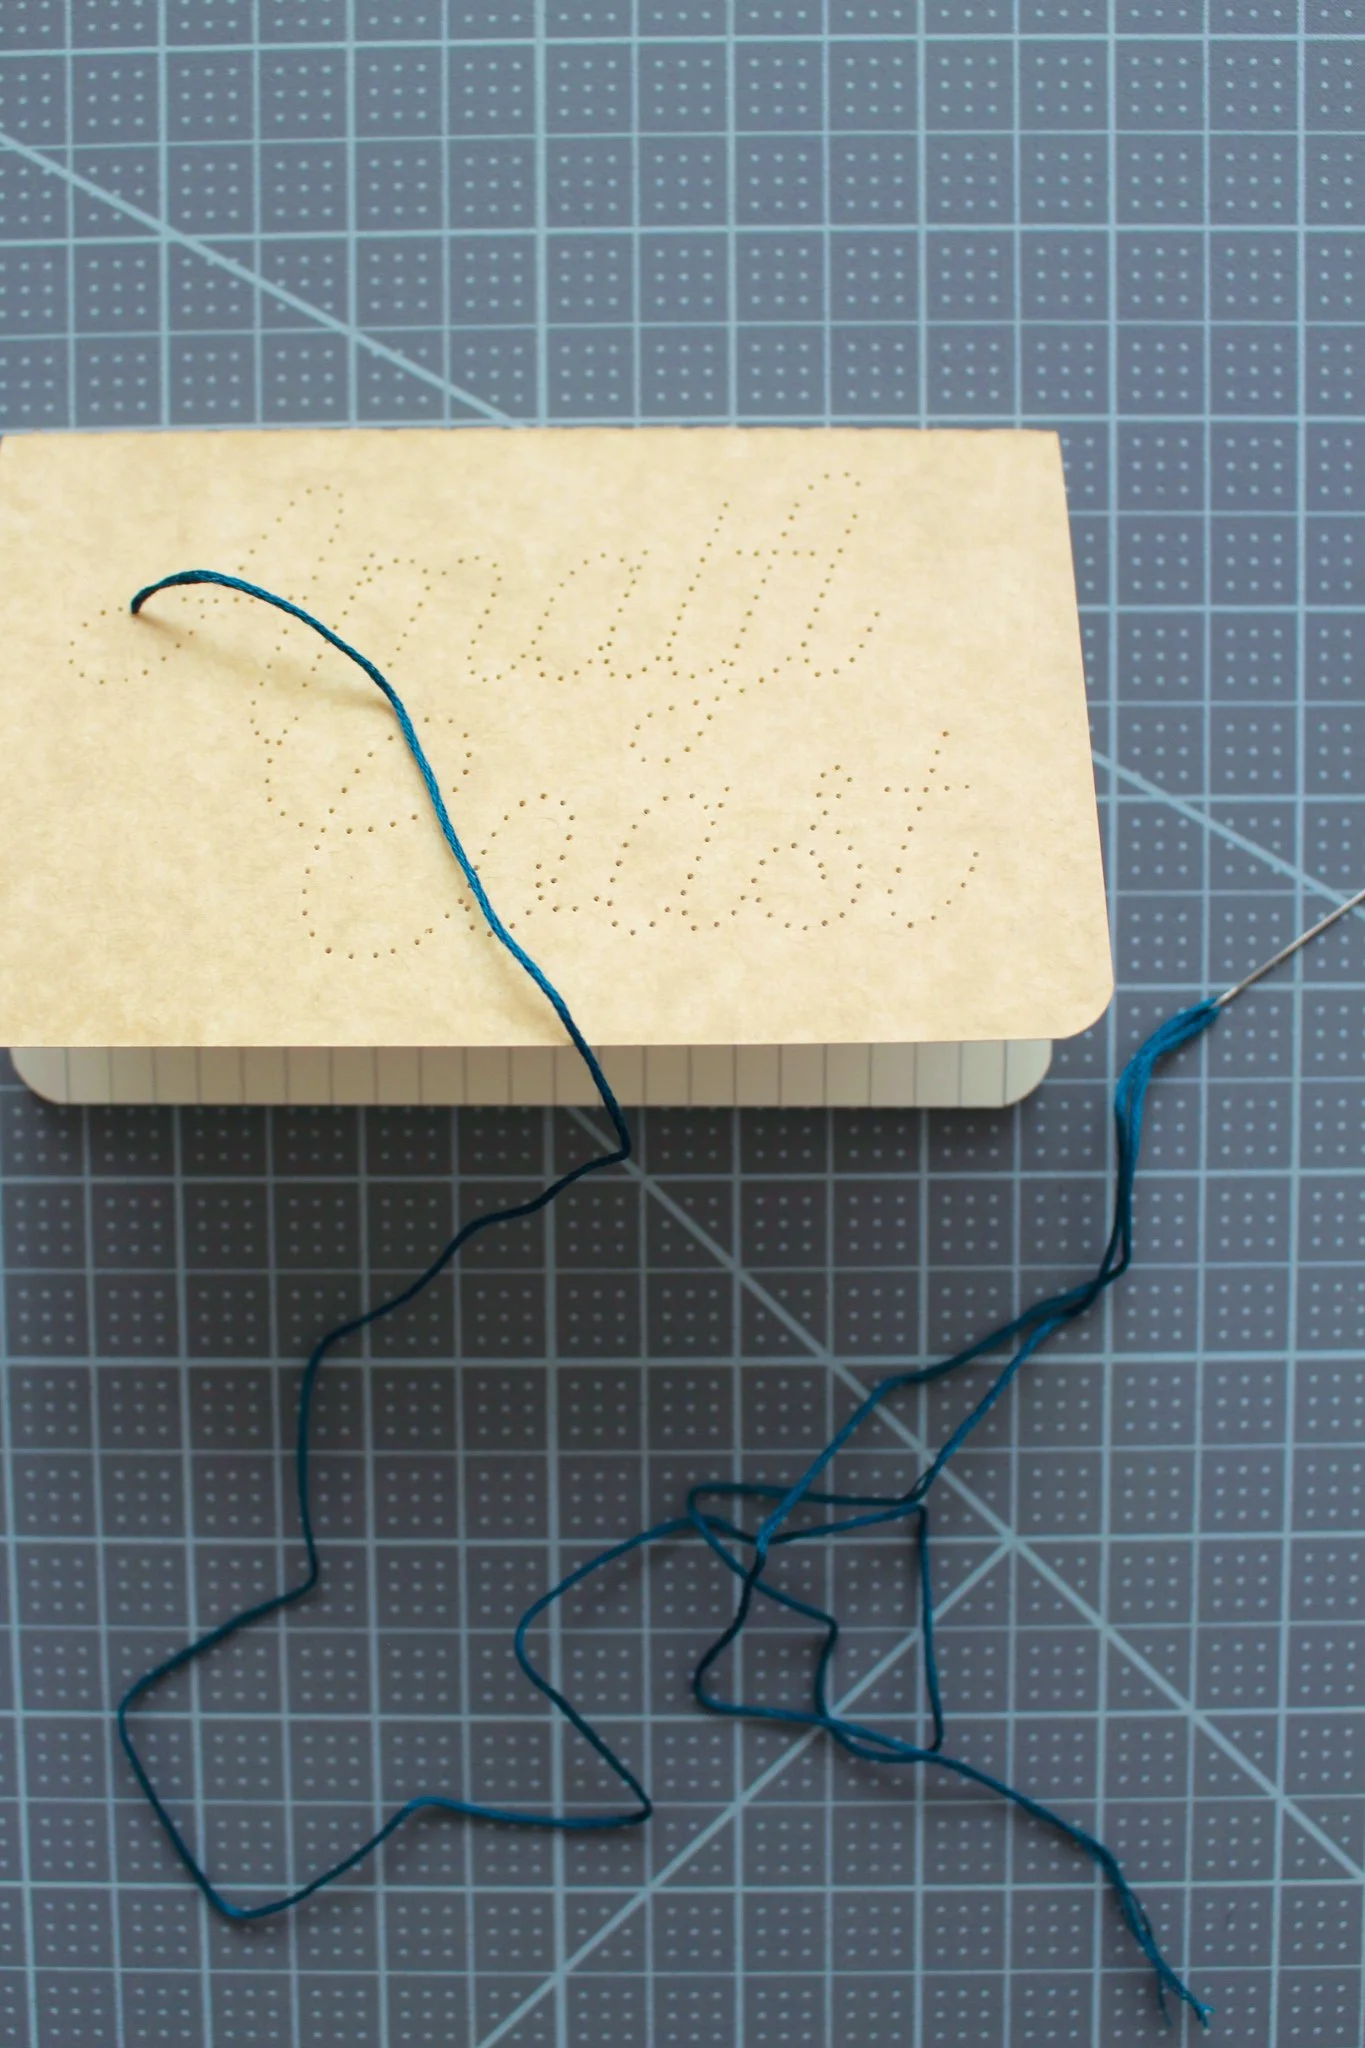

STEP 5 - Once all of your holes are punched, your notebook cover should look like the image above. Pick out your embroidery floss color of choice and cut a reasonable size piece to work with (maybe about 24” at most). Tie a double knot at the end of the floss and thread the other end through your embroidery needle.
Now start your stitching by working from the inside out (so your knot is inside the front cover). Thread up through the notebook cover at your first visible hole. Then thread back down through the cover at your second hole. Next, thread back up at the third hole, but then thread back down through the second hole again to create a back stitch. Continue this process for the remainder of your holes, threading up through the next hole and down through the previous. You will be creating a solid line of thread as shown in the image above.
If at any point you run out of floss, just tie a double knot, cut the remaining, and start the process again with a new piece. Just make sure your knots are all on the inside of the front cover and not visible from the outside. Same goes for starting a new letter or new line direction, no need to cut the floss, just make sure your last stitch is down through the cover and then you can cross to a new line on the inside and come up through a new hole.

STEP 6 - Once all your stitching is complete, you will have your city name clearly spelled out across the notebook cover. Great job! You can stop here if you are happy with your work! The only problem I found was that the front cover tends to stay open now that all your knots/floss are on the inside of the cover.
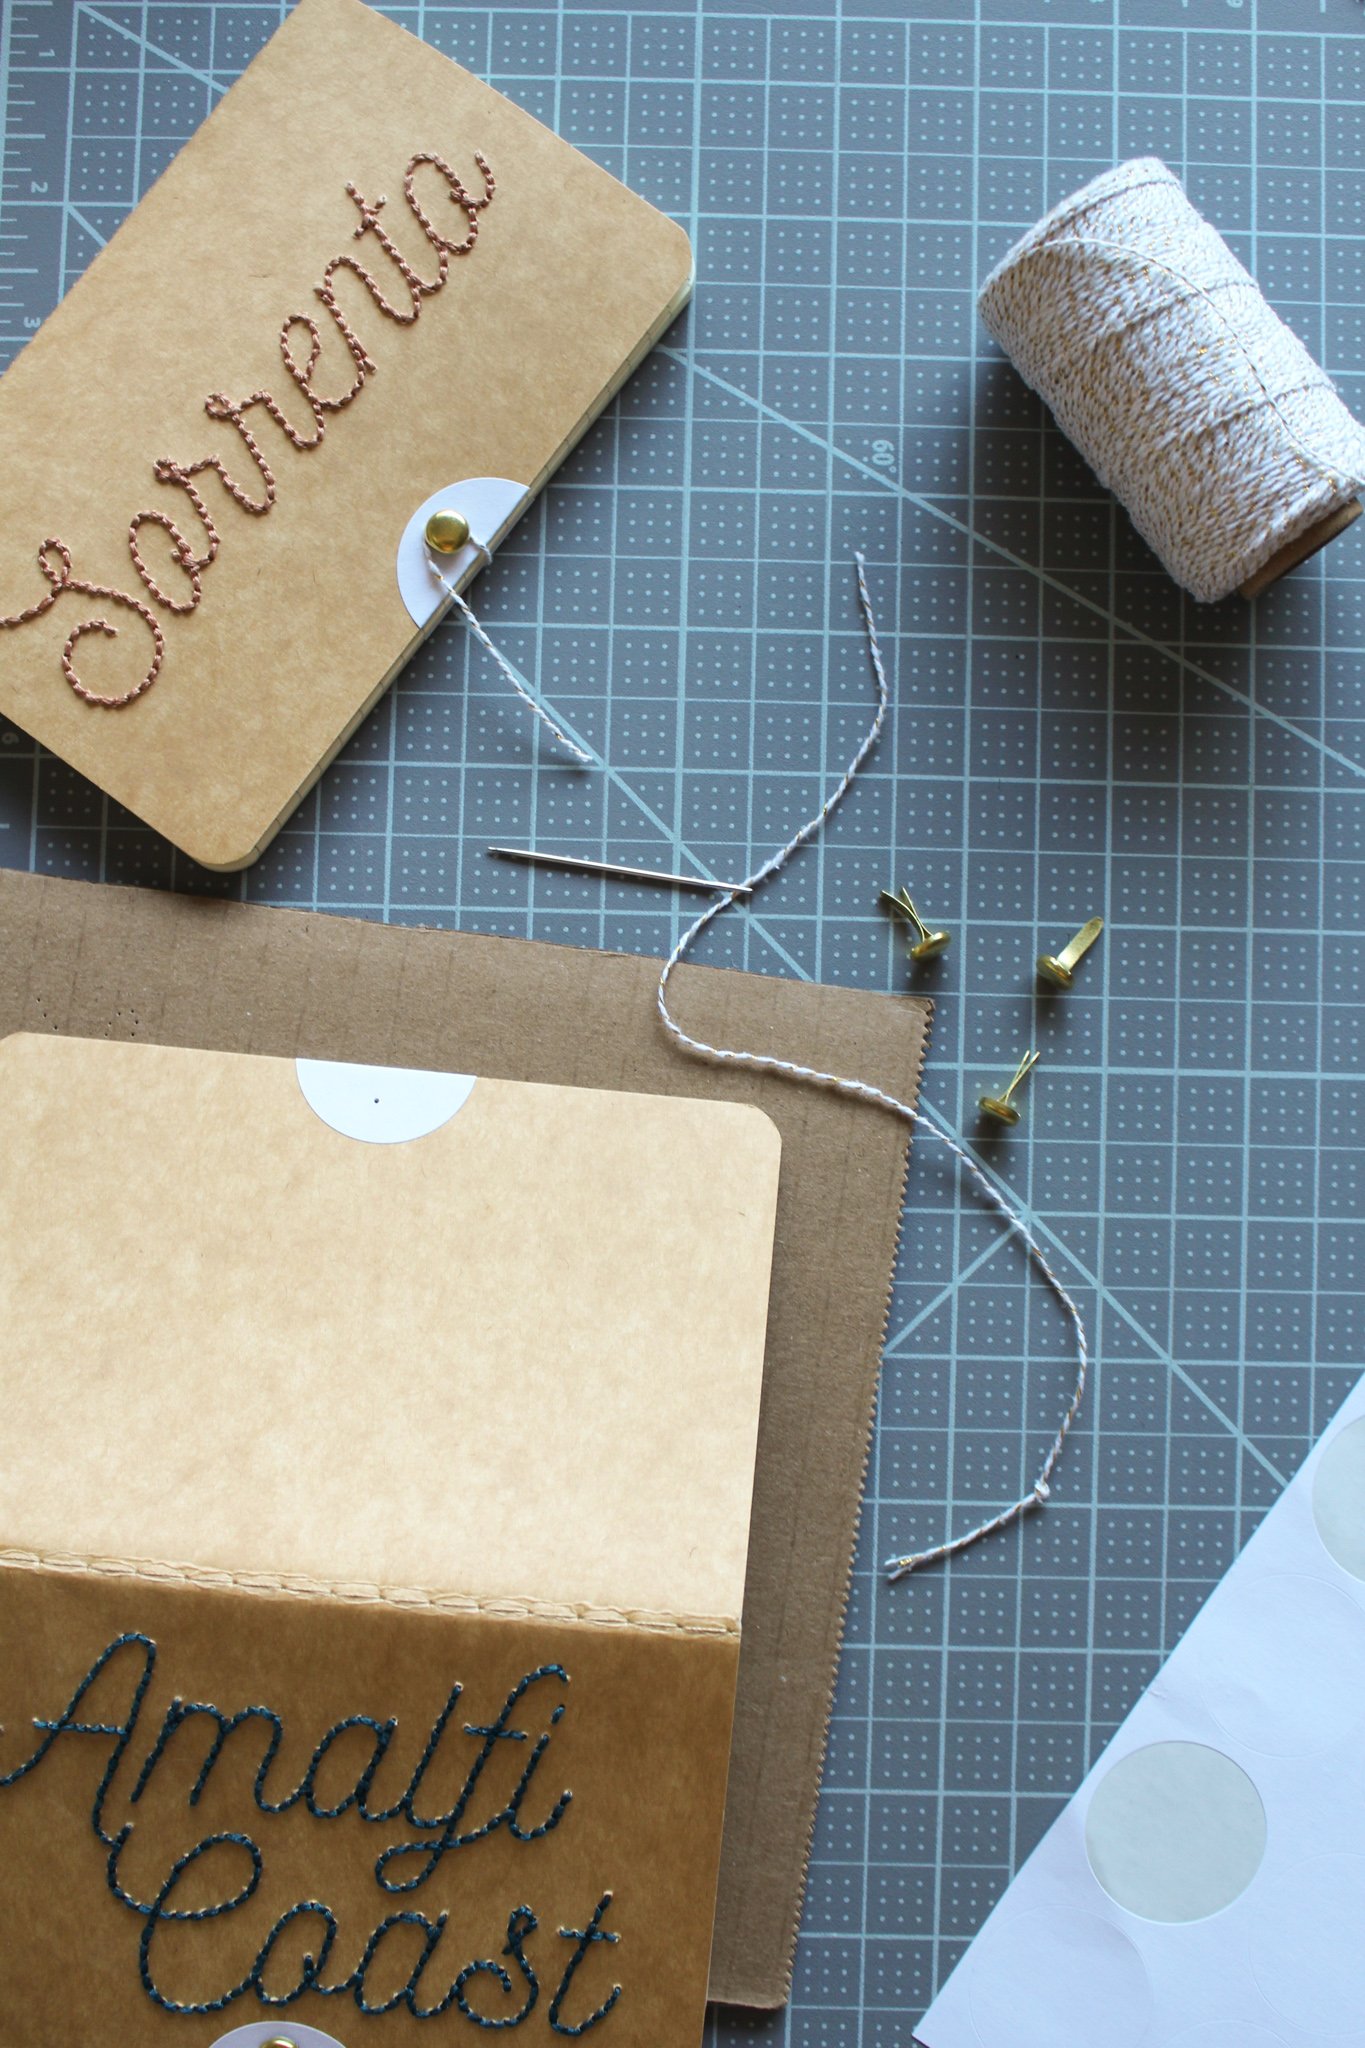
To avoid this and to keep the notebook flat, I wanted to create an easy closure. To begin this process, I added a round white sticker to the bottom of the front cover (you can measure the halfway point or just eye ball this). Press down half the sticker to the front and the other half to the inside of the cover. This will be extra reenforcement for the brad you will be adding.
Next use a small hole punch and punch a hole through the cover & sticker where you want the brad. Then push the brad through the hole and open up the arms on the inside of the cover to secure. Don’t secure the brad too tight against the cover, you will want room for your string closure.
STEP 7 - Repeat the process of adding the round white sticker to the back cover of the notebook the same way. This time, use your embroidery needle to punch a hole through the center of the back sticker. Then grab some more embroidery floss or any kind of thin twine or ribbon and tie a double knot at the end and thread through your needle.
Punch the needle through the hole from the inside of the back cover to the outside so your knot is securely inside the back cover. Remove the embroidery needle. Then bring the hanging string around to the front and tie the string in a circle around the brad a few times. Cut any extra string. Your notebook is now securely closed!

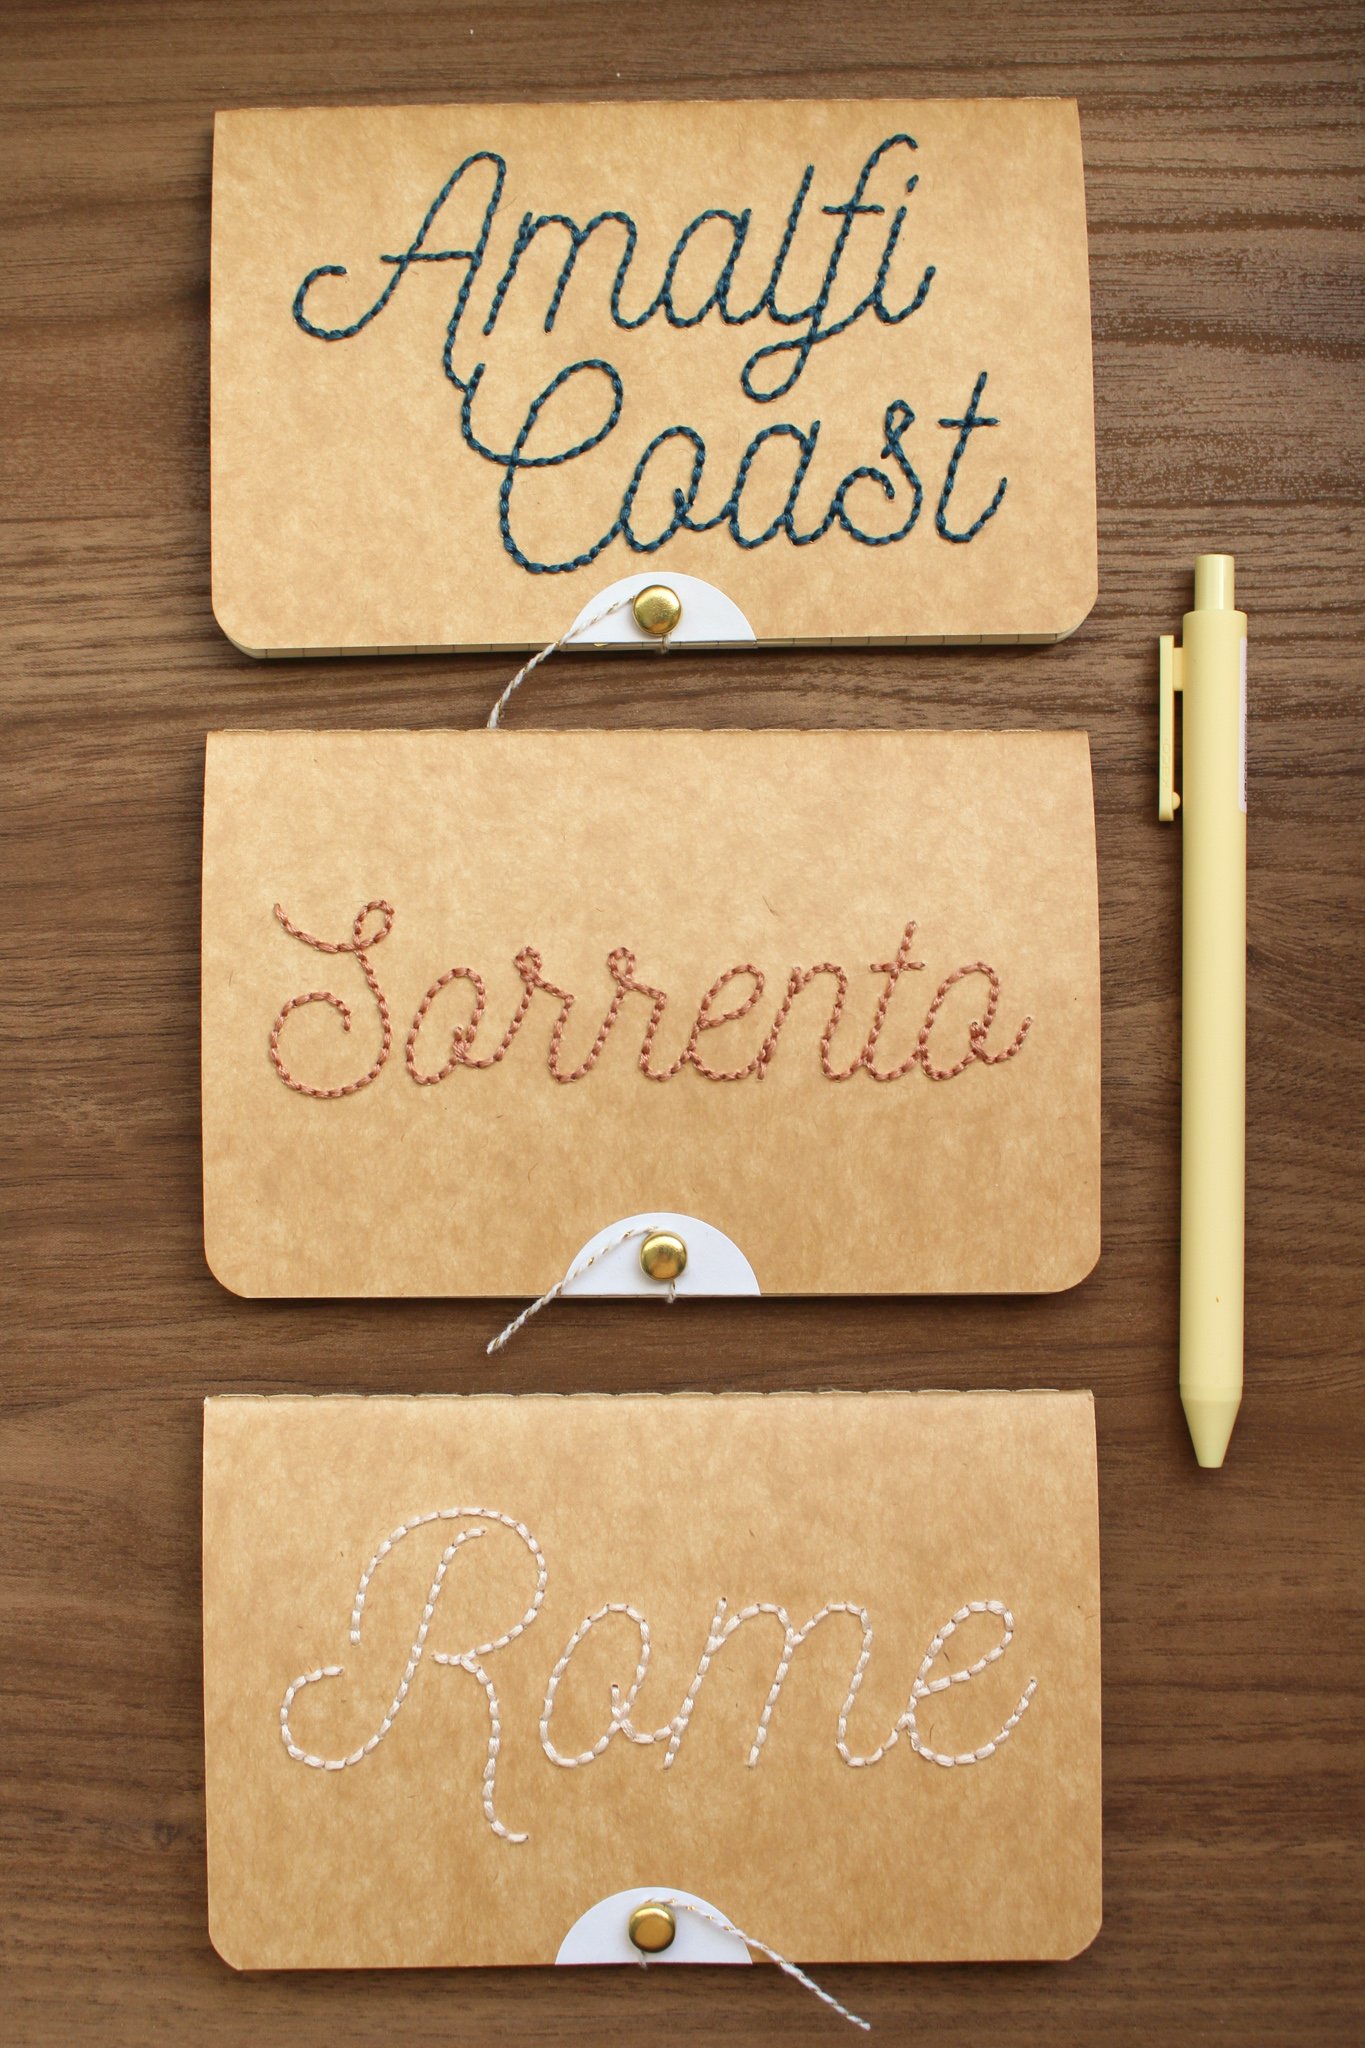
And ta-da! You have yourself an embroidered notebook.
You could do this same process with whatever words you want, here are a few ideas that would be cute to make for yourself or gift to someone!
A favorite quote
Menu or recipes - you could keep different notebooks with different types of recipes (like desserts, appetizers, soups, etc.)
Drink recipes - you could make a set for a friend with different liquor names (whiskey, gin, tequila, etc) and write in different drink recipes for each liquor
School subjects
Months or years - to keep as a daily journal or a one line a day type of journal
“Dream Journal”
And the list goes on and on!

Hope you enjoyed this project! What words would you embroider on your notebook?
xo Rachael

