
Embroidered Compact Mirror
If the fall weather has you curled up on the couch binge watching Netflix and sipping on warm apple cider, embroidering is the perfect craft for you! I don’t know about you all, but I’m a perpetual multitasker. I’m someone who has to stay busy while watching TV. And I find embroidering such a relaxing and rewarding activity. I picked up the hobby during quarantine, a period when I spent (ahem) a significant amount of quality time with my Netflix account. And as I got better and better at the different stitches, I knew I wanted to make things that could be useful more than just a pretty wall hanging.
So this brings me to one of my favorite DIY gifts that I’ve made. Here’s how to make your own embroidered compact pocket mirrors!
You will need:
Embroidery Floss
4” Embroidery Hoop
Embroidery Needles
Cotton Fabric
Compact Mirror w/metal disc


Step 1: Create your design or find an image online to use for your design. I created this cute sun face on procreate!
Step 2: Using the metal disc as a guide, draw a circle on your fabric to give you an idea of how large your embroidering space should fill.

Step 3: Trace your image onto the fabric. I found that a mechanical pencil worked well on this white fabric. I used the light from my iPad screen to display my image through the fabric for this project, but in the past I’ve also printed my design on computer paper and taped it up on a window during the daylight and traced onto the fabric that way as well.
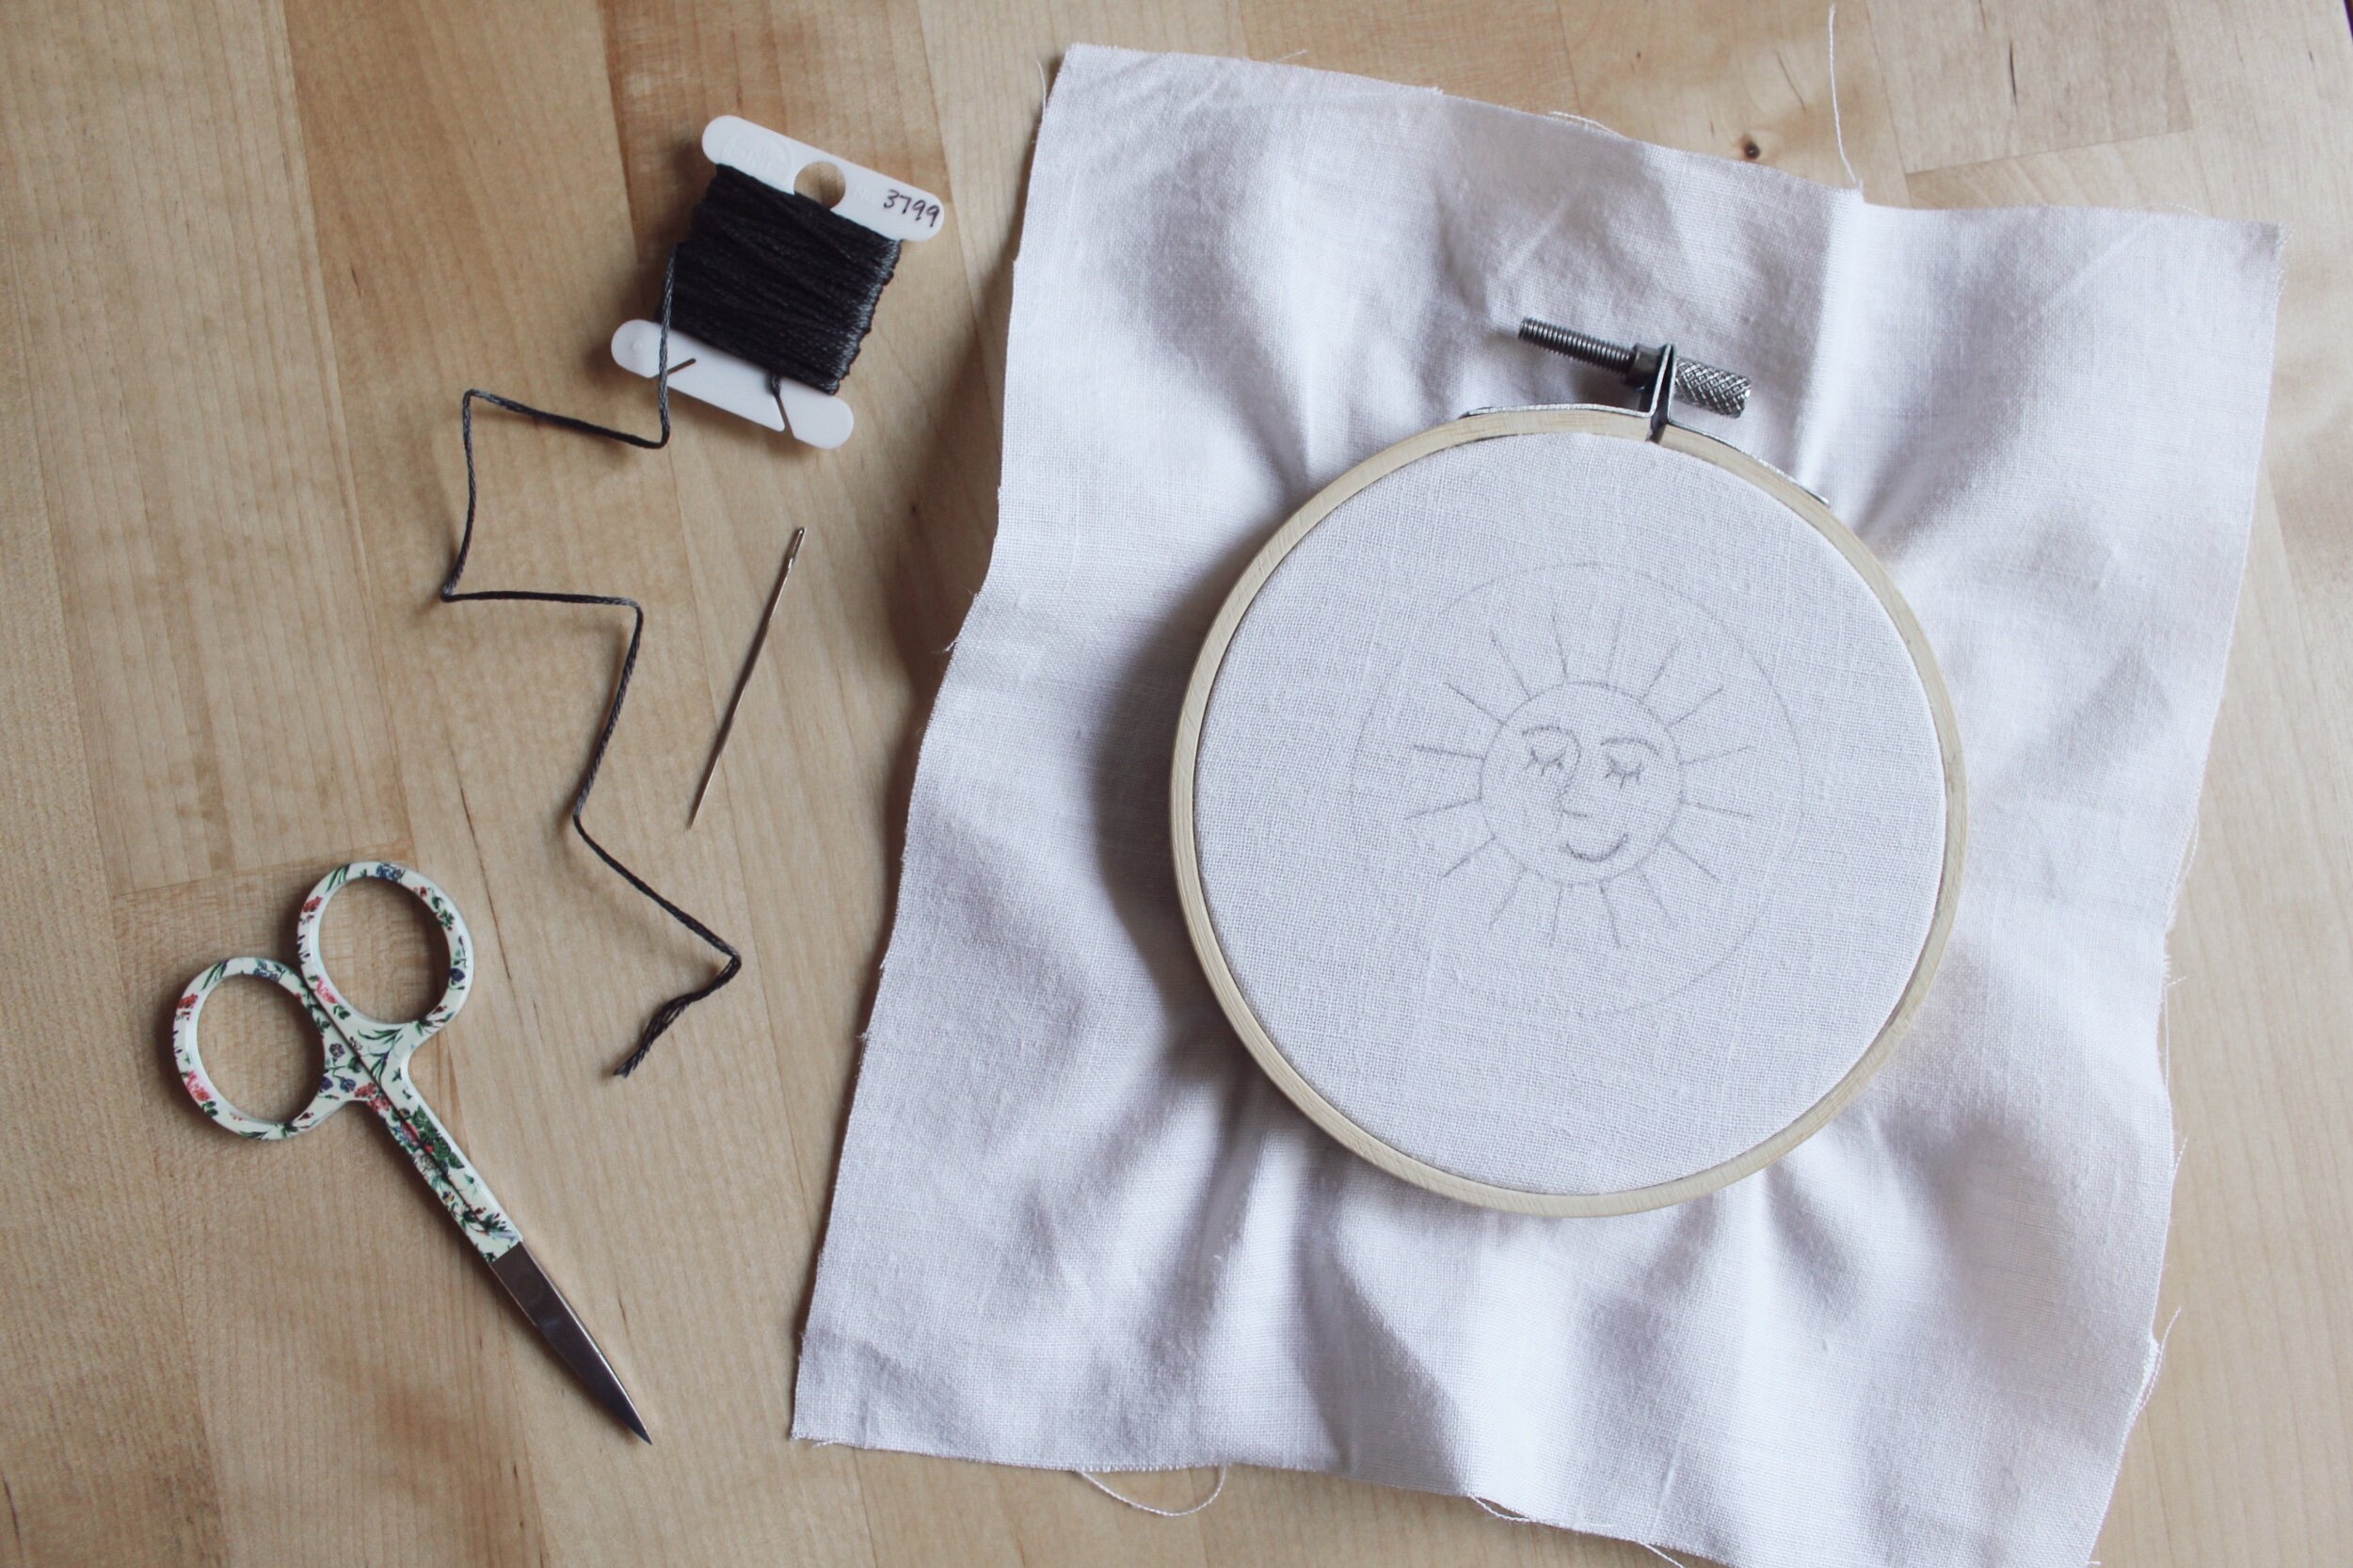
Step 4: Once you have your design drawn onto your fabric, stretch your fabric onto your embroidering hoop and tighten until the fabric is pulled taut.
Step 5: Let the embroidering begin! There are so many different stitches you can use in the world of embroidery. My favorites are the back stitch and the stem stitch. If this is your first time embroidering, I would recommend watching a few YouTube tutorials on how to create each stitch. I would also recommend practicing your stitches first on a scrap piece of fabric until you get the hang of it.
For this project, I used the stem stitch to create the outline, the sun’s rays, and the facial features. And then I used the simple back stitch to fill in the sun’s color. I also divided my thread in half while making my stitches, so I used 6 Strand Embroidery floss, but I pulled it apart and only used 3 strands for my specific thickness.


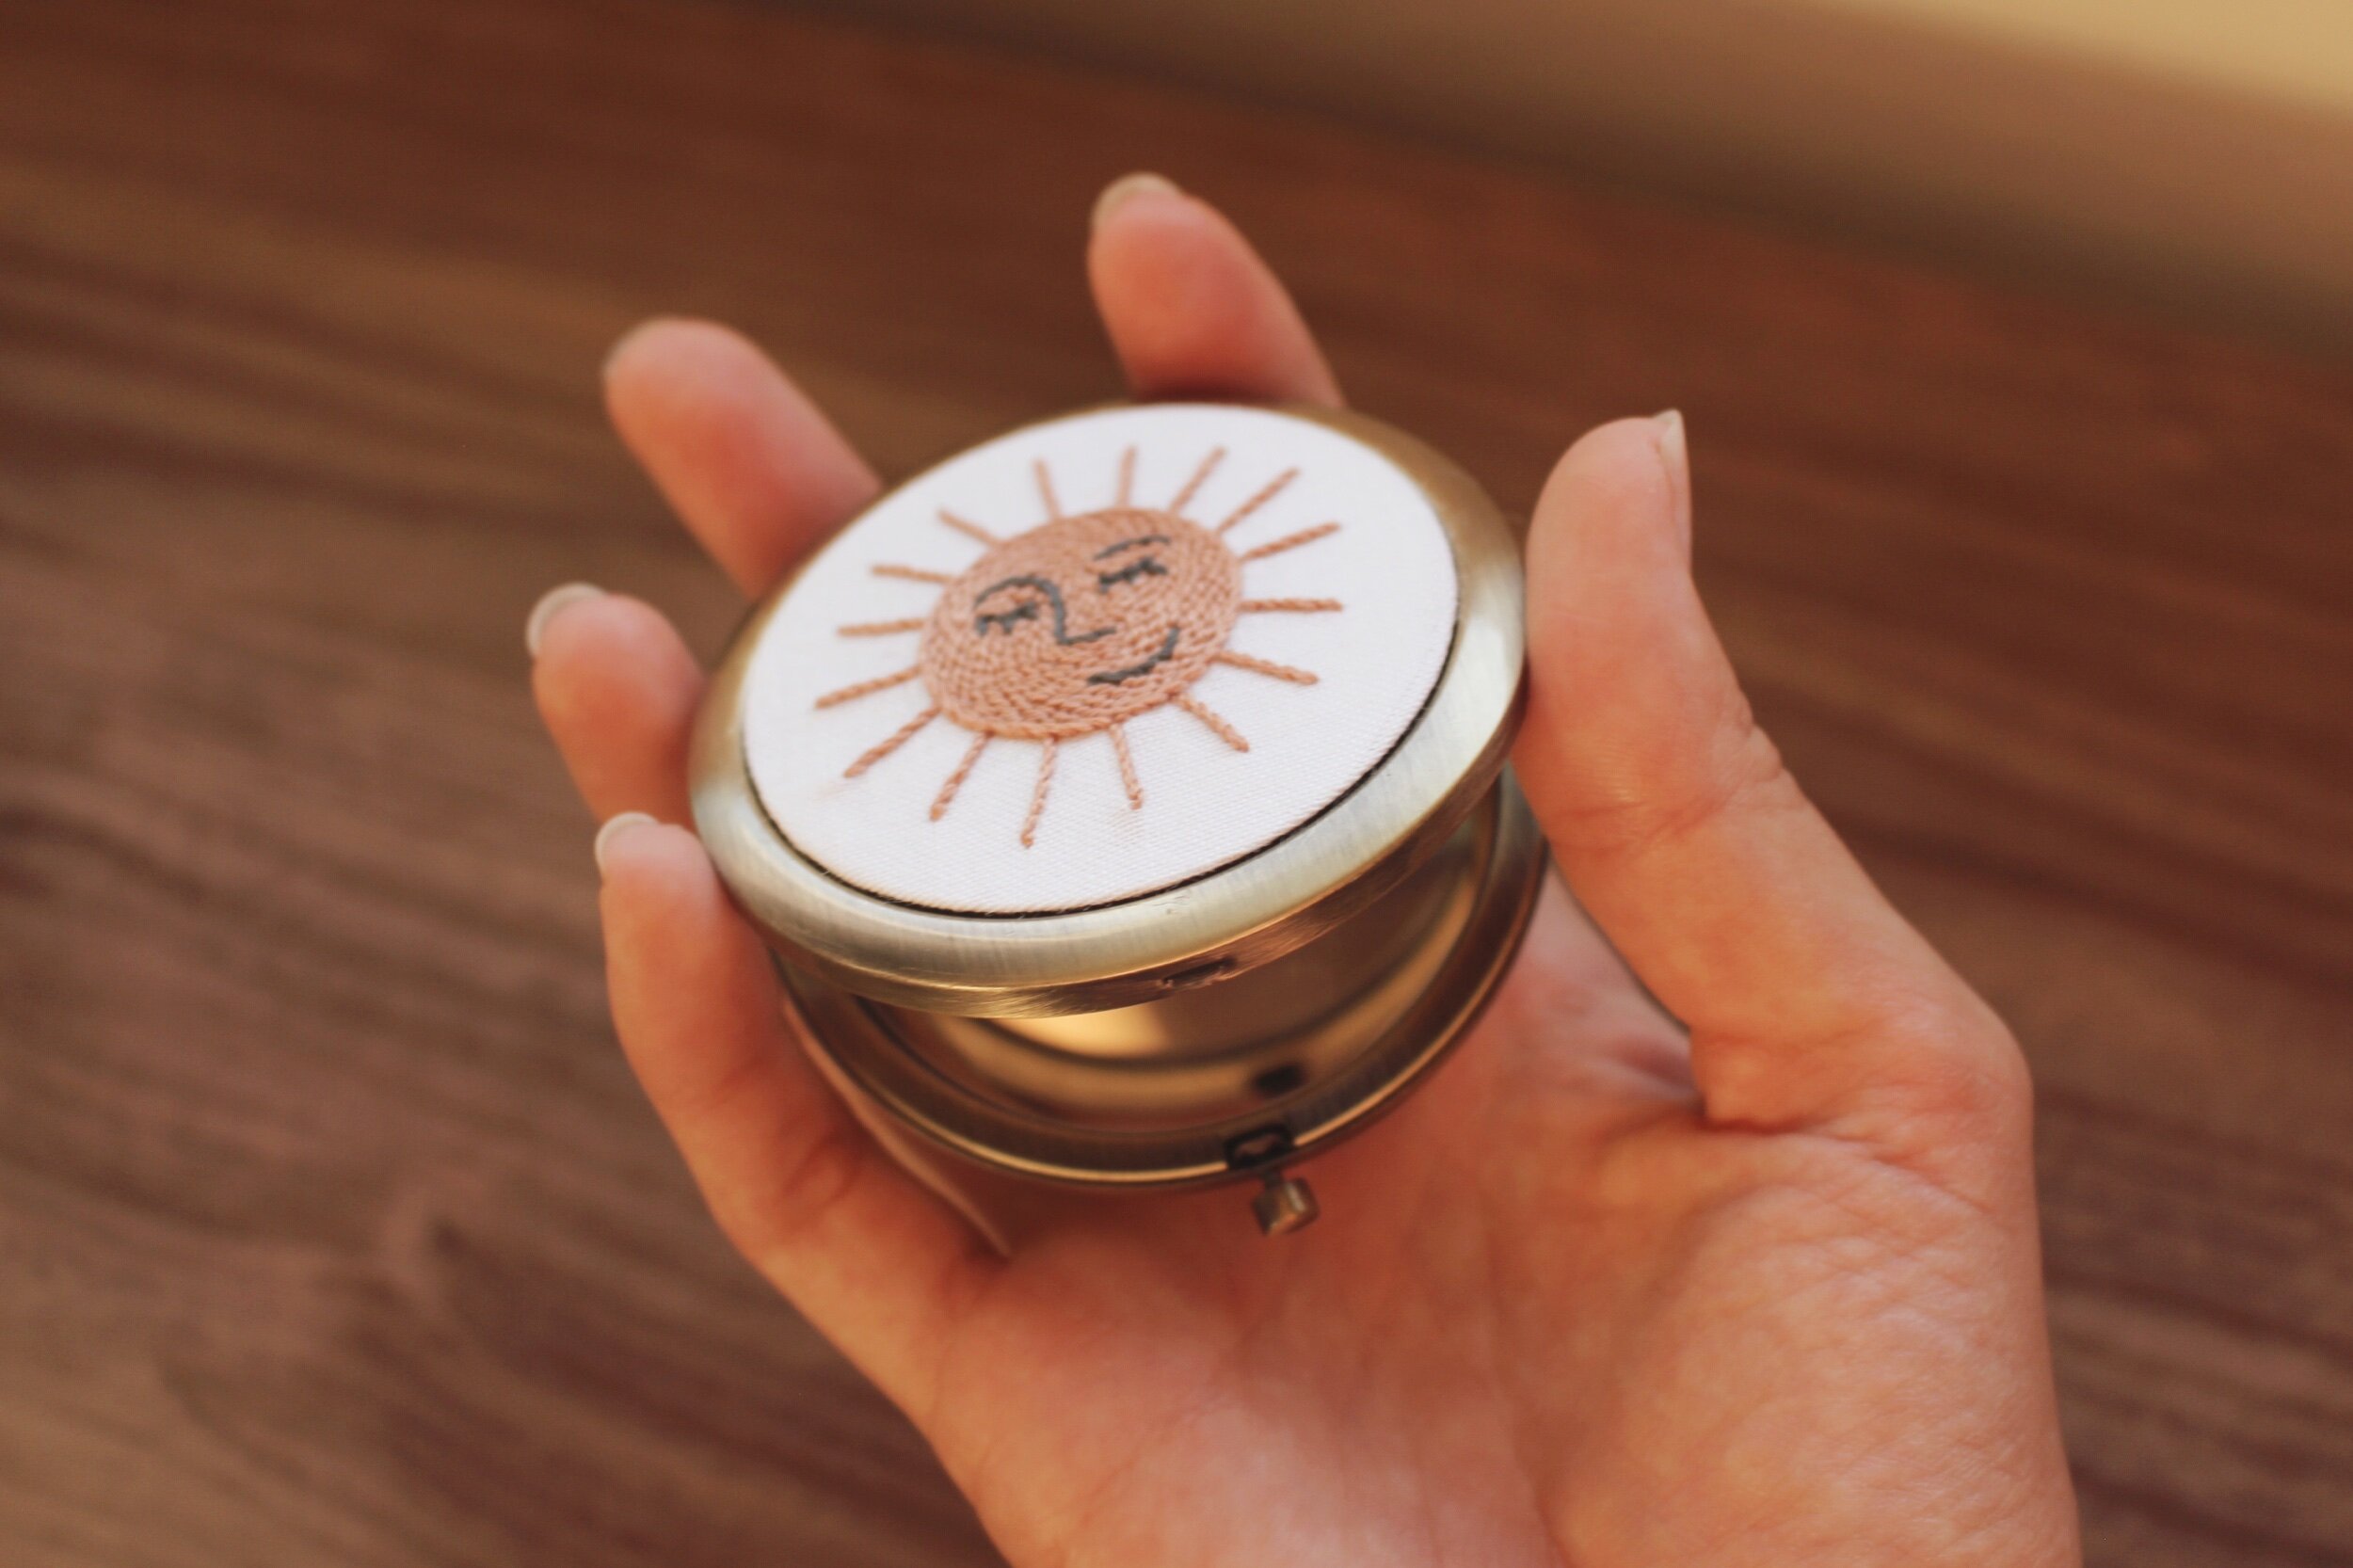
Step 6: Once your design is complete, remove the fabric from the embroidery hoop and cut down the circle of fabric so that there is just about a half inch extra fabric on all sides.
Step 7: Next, tie a knot in the end of some extra embroidery floss and thread the floss up through your fabric about 1/4 in from the edge. Create a very simple running stitch around the circle until you get back to where you started the stitch. Do not tie a knot and do not remove the needle yet.
Step 8: Turn over your fabric so your design is facing down. Place your metal disc on the back of your fabric. As if you’re closing a drawstring bag, gently pull the end of your floss and your fabric should begin to close around your metal disc. This step is extremely satisfying :)

Step 9: Once your material is securely wrapped around the metal disc, you are going to sew back and forth across the back diameter of the disc. You’re creating a web of string pulling the fabric closed in either direction. This will just help secure the backing of the fabric closed. When you feel it’s secured strongly enough, create a knot to complete the stitch. It should look like the image above once you’re done.

Step 10: Use hot glue to secure the embroidered disc to the compact mirror. I found the best way to do this was to add the glue to the mirror then quickly press the embroidered disc down to the center and hold for 15 seconds. I also kept something heavy on top of the mirror overnight while the glue was drying. And you’re done!


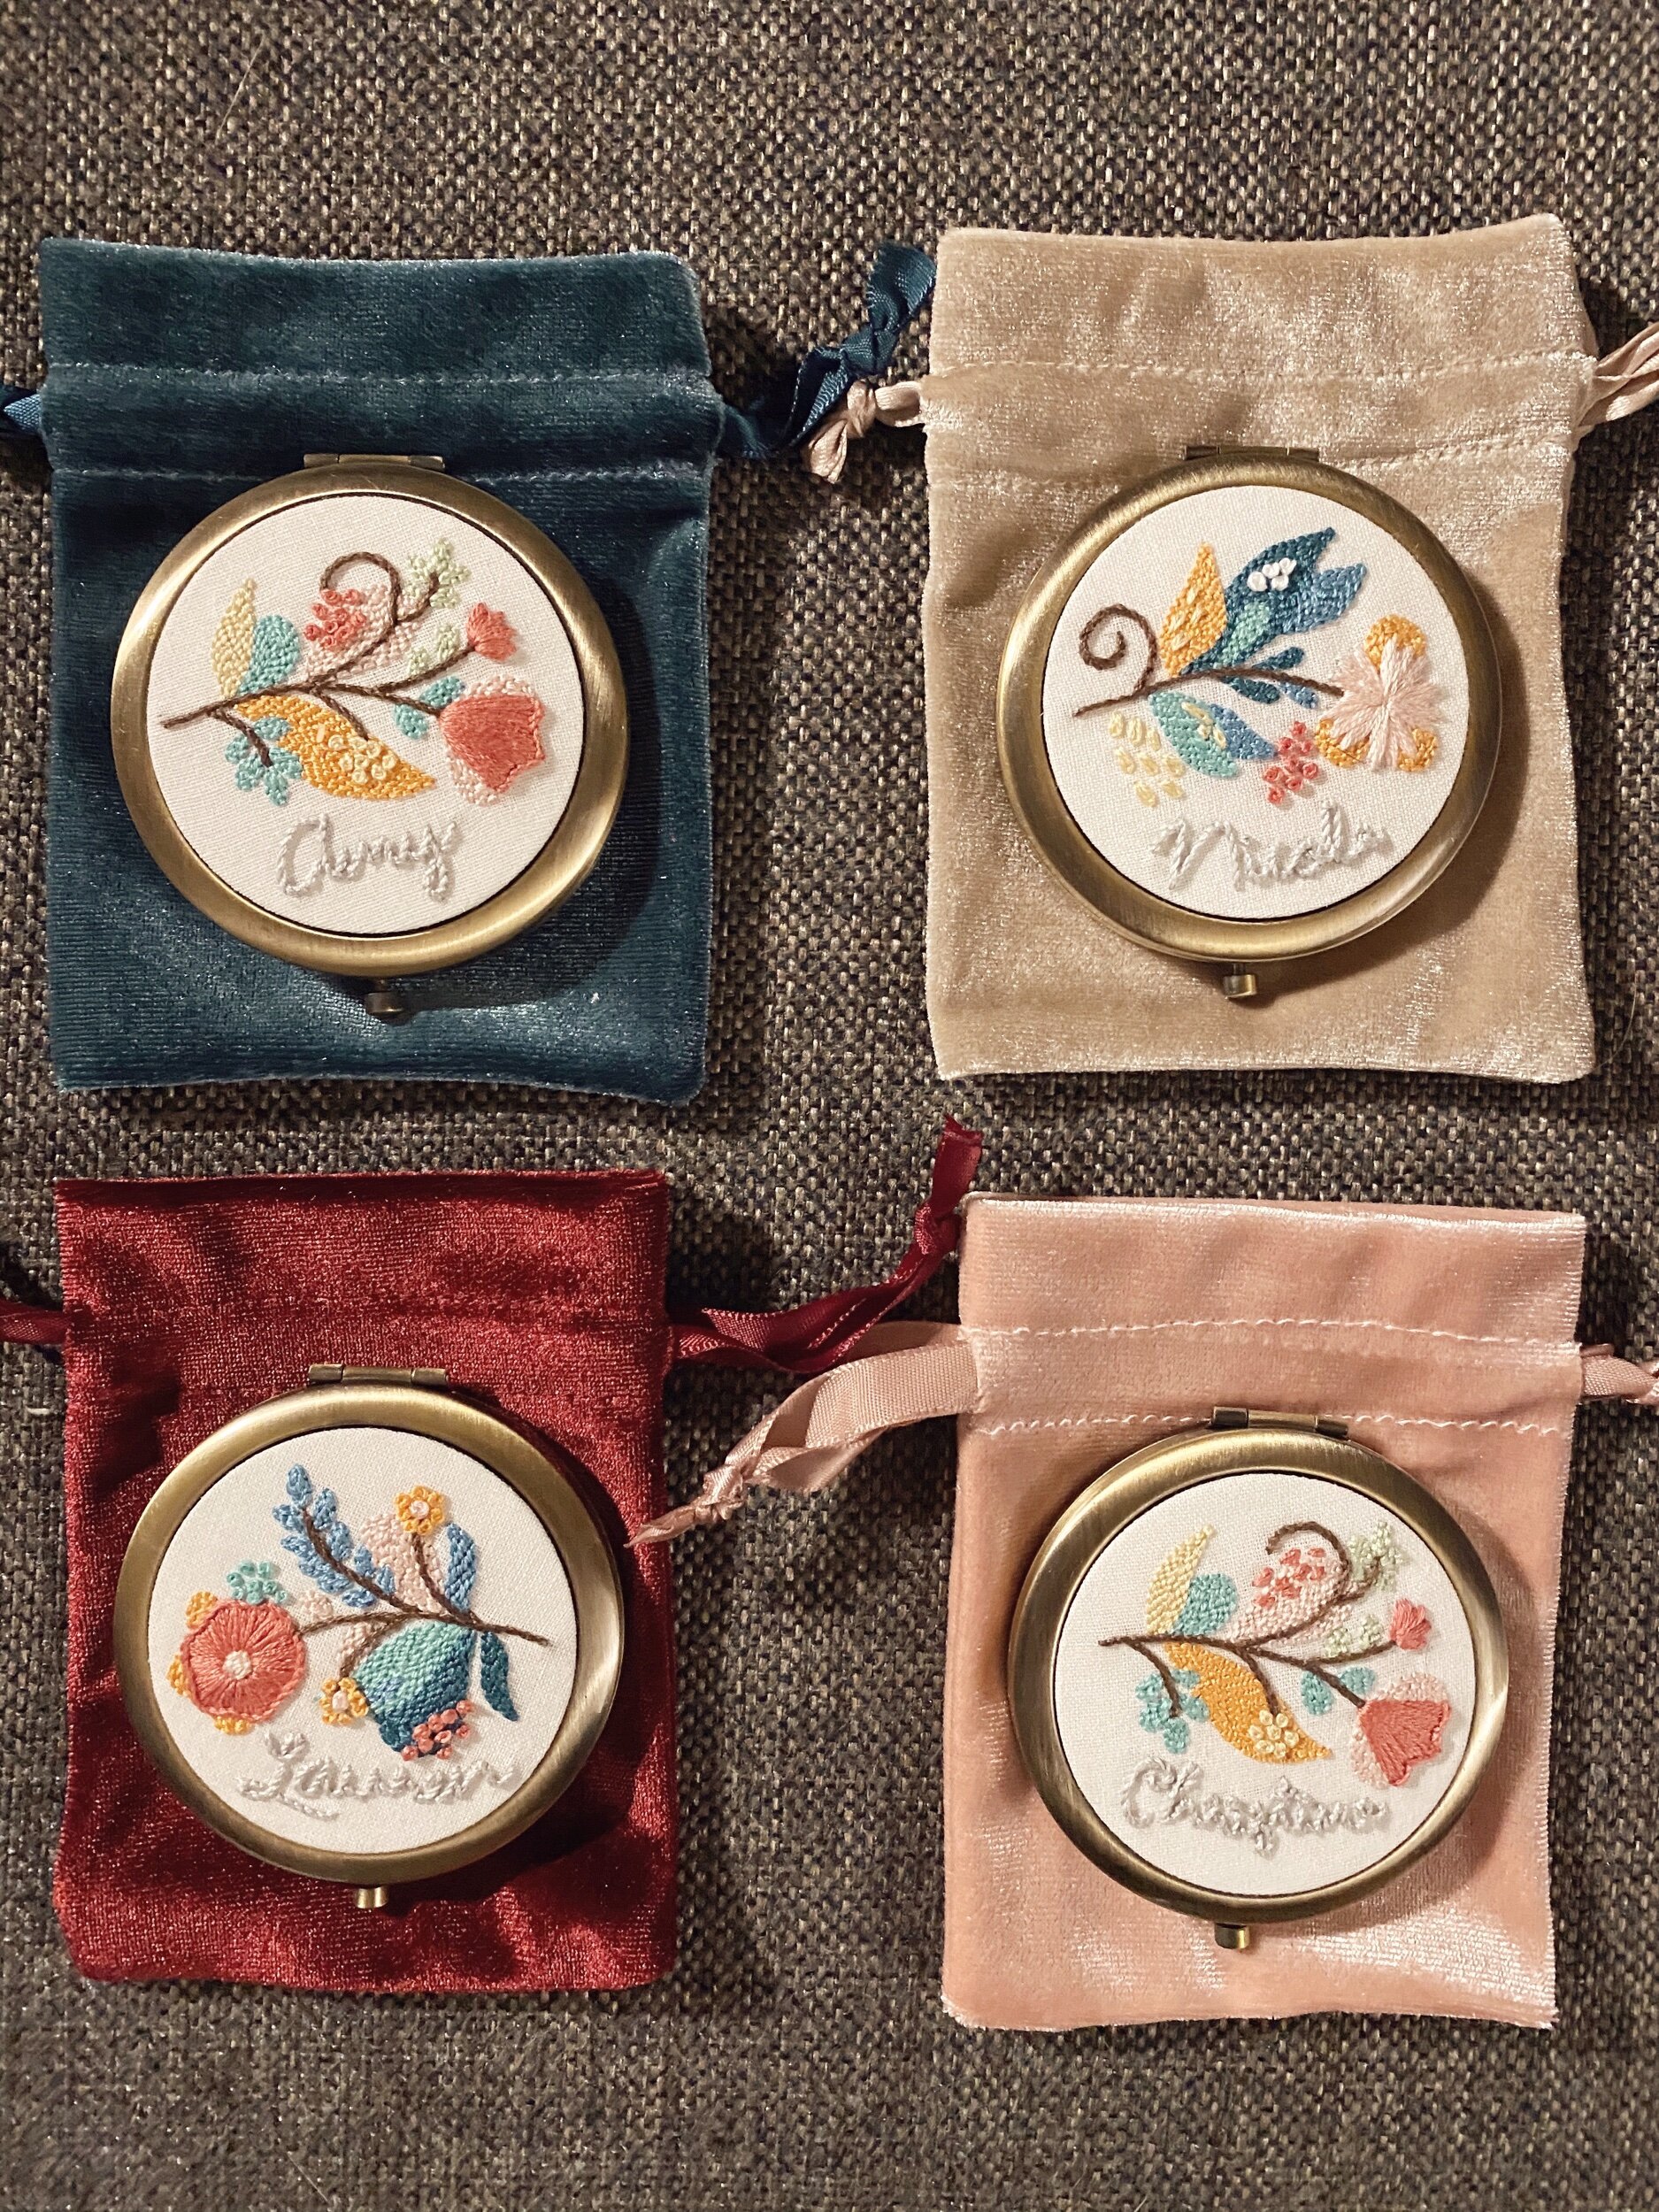
I think these little pocket mirrors make such a sweet personalized gift and they’re really fast and simple to make! Last Christmas I surprised all the ladies in my life with a personalized embroidered mirror with these sweet floral designs and their name! This would also be perfect as a bridesmaid gift :)
What have you all been crafting these days?
Xo Rachael

