
Shrinky Dinks Ornament Gift Tags (& Printable Template!)
Ahhh the magic of childhood crafts. In the past we posted a tutorial on how to use the iconic childhood craft supply, Perler beads, to create a fun and unique earring holder (check it out here). But this season I wanted to challenge myself to create another fun project from a nostalgic childhood craft item, the beloved Shrinky Dinks!
This magical plastic material can be drawn, painted, or colored on and then baked to shrink into a solid work of art. A lot of people use Shrinky Dinks to make things like key chains or jewelry. But I thought it would be fun and seasonally festive to use this material to create some charming holiday gift tags that can be used over and over again. Find out how I made them below and download our free printable retro ornament template to make your own!
Affiliate disclosure: This post contains several affiliate links. As an Amazon Associate, I may earn commissions from qualifying purchases from Amazon.com. Thank you for your support!
HOW TO MAKE ORNAMENT GIFT TAGS WITH SHRINKY DINKS (AND FREE PRINTABLE TEMPLATE!)
Shrinky Dinks Ornament Gift Tags Supplies:
Black paint pens (this type worked great for me!)
Acrylic paint (assorted colors)
Paint brushes
Masking tape
Scissors
Hole punch
Aluminum foil or parchment paper
Oven
Ribbon, string, or twine
ETI’s Retro Ornament Gift Tag templates (download below!)
STEP 1: Download the ETI Retro Ornament Gift Tag printable (above) and print!
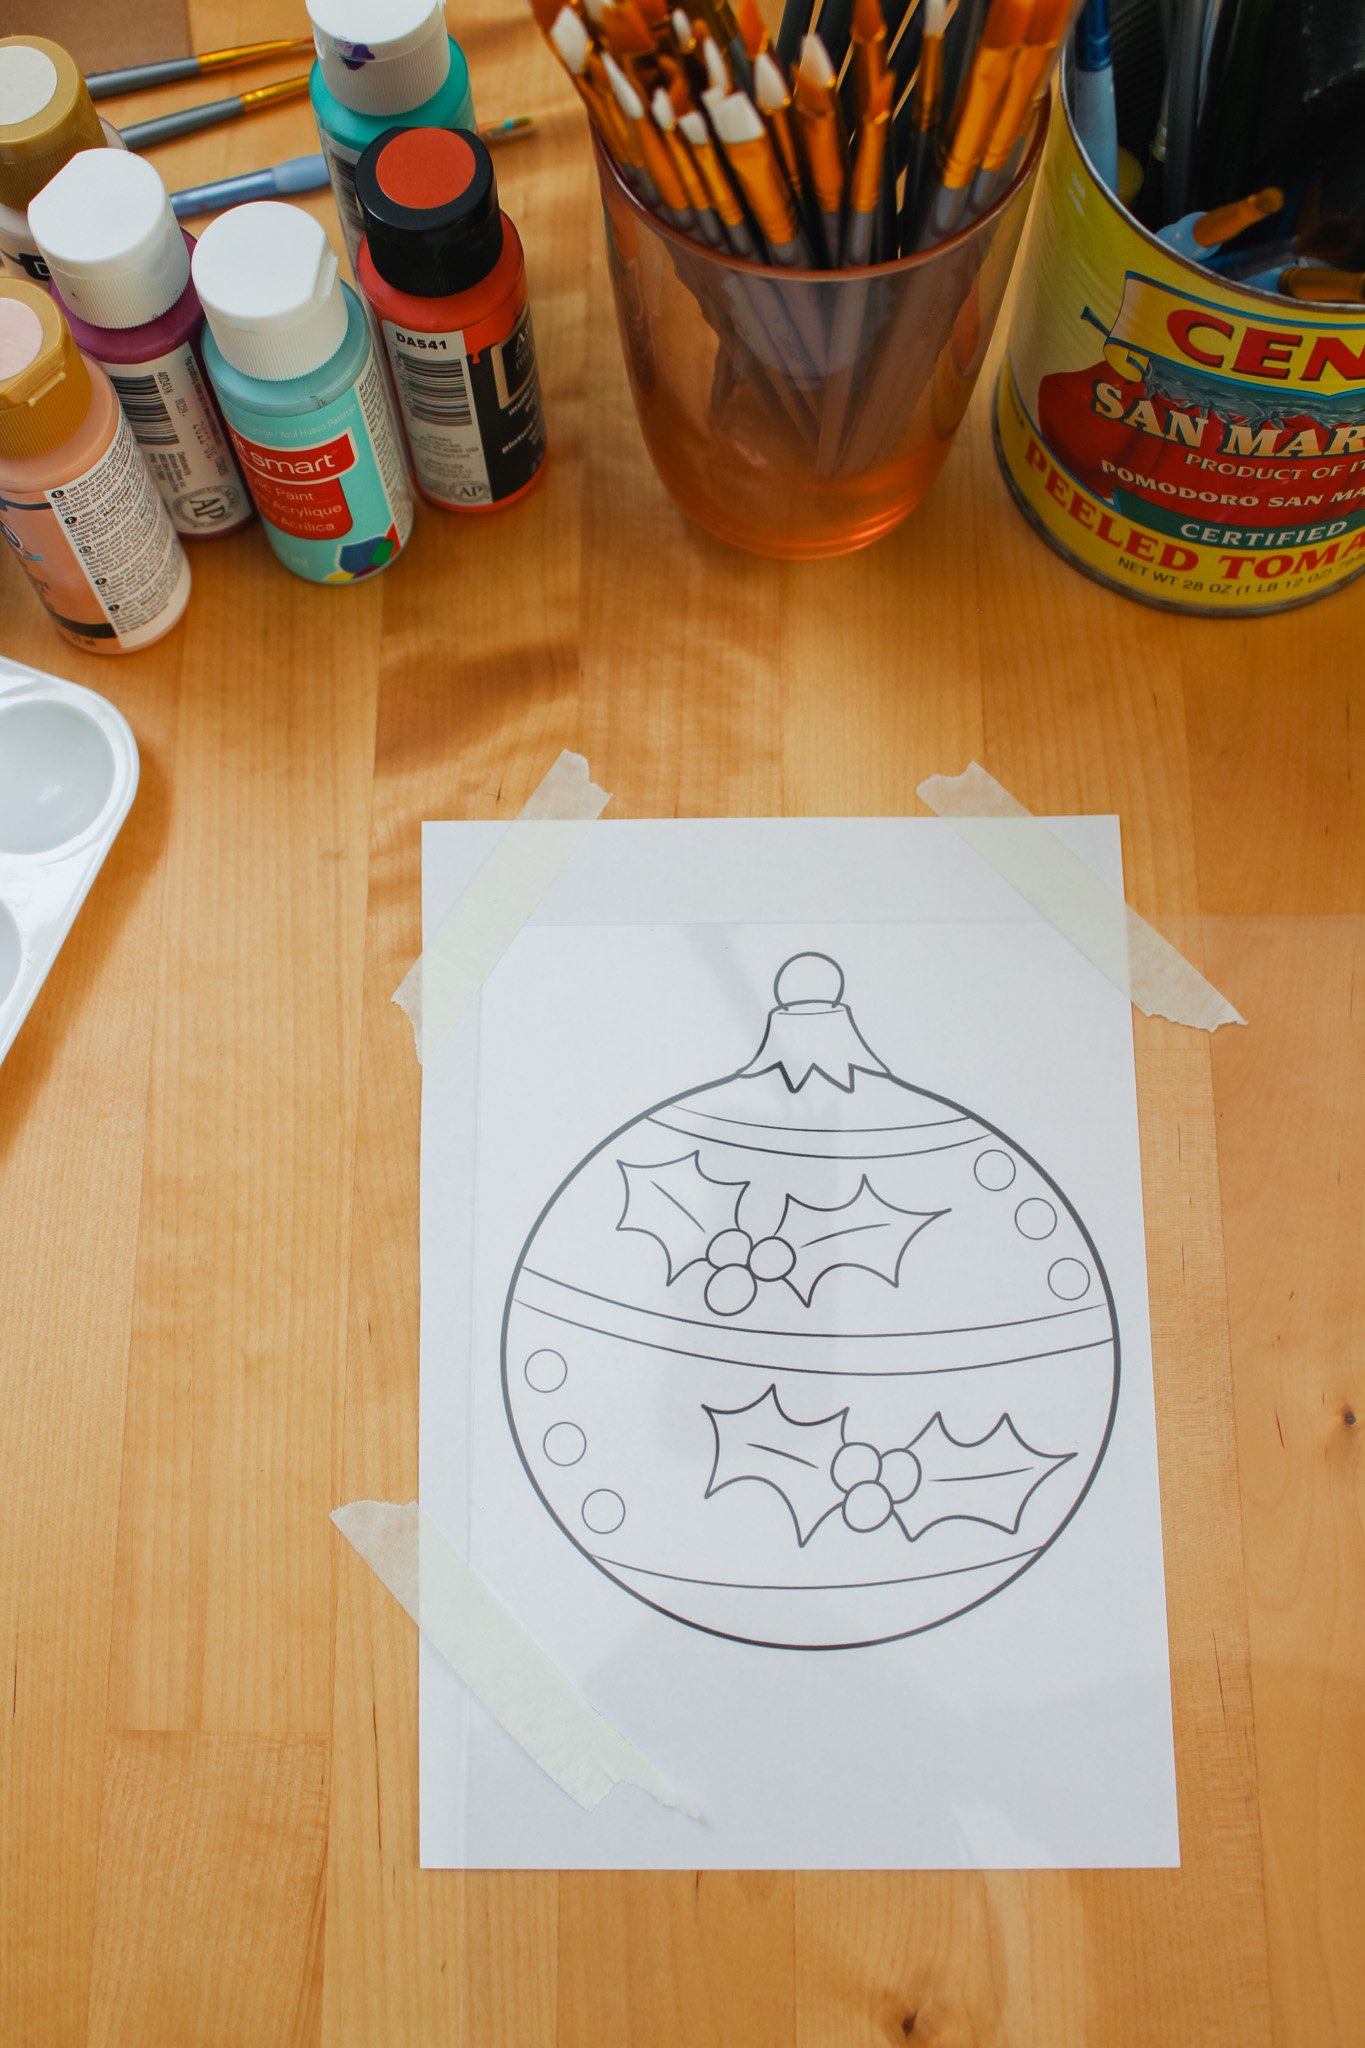
STEP 2: Lay the printable template of your choice on your work surface. Place one clear piece of Shrinky Dinks material on top of the template and use masking tape to tape it in place.
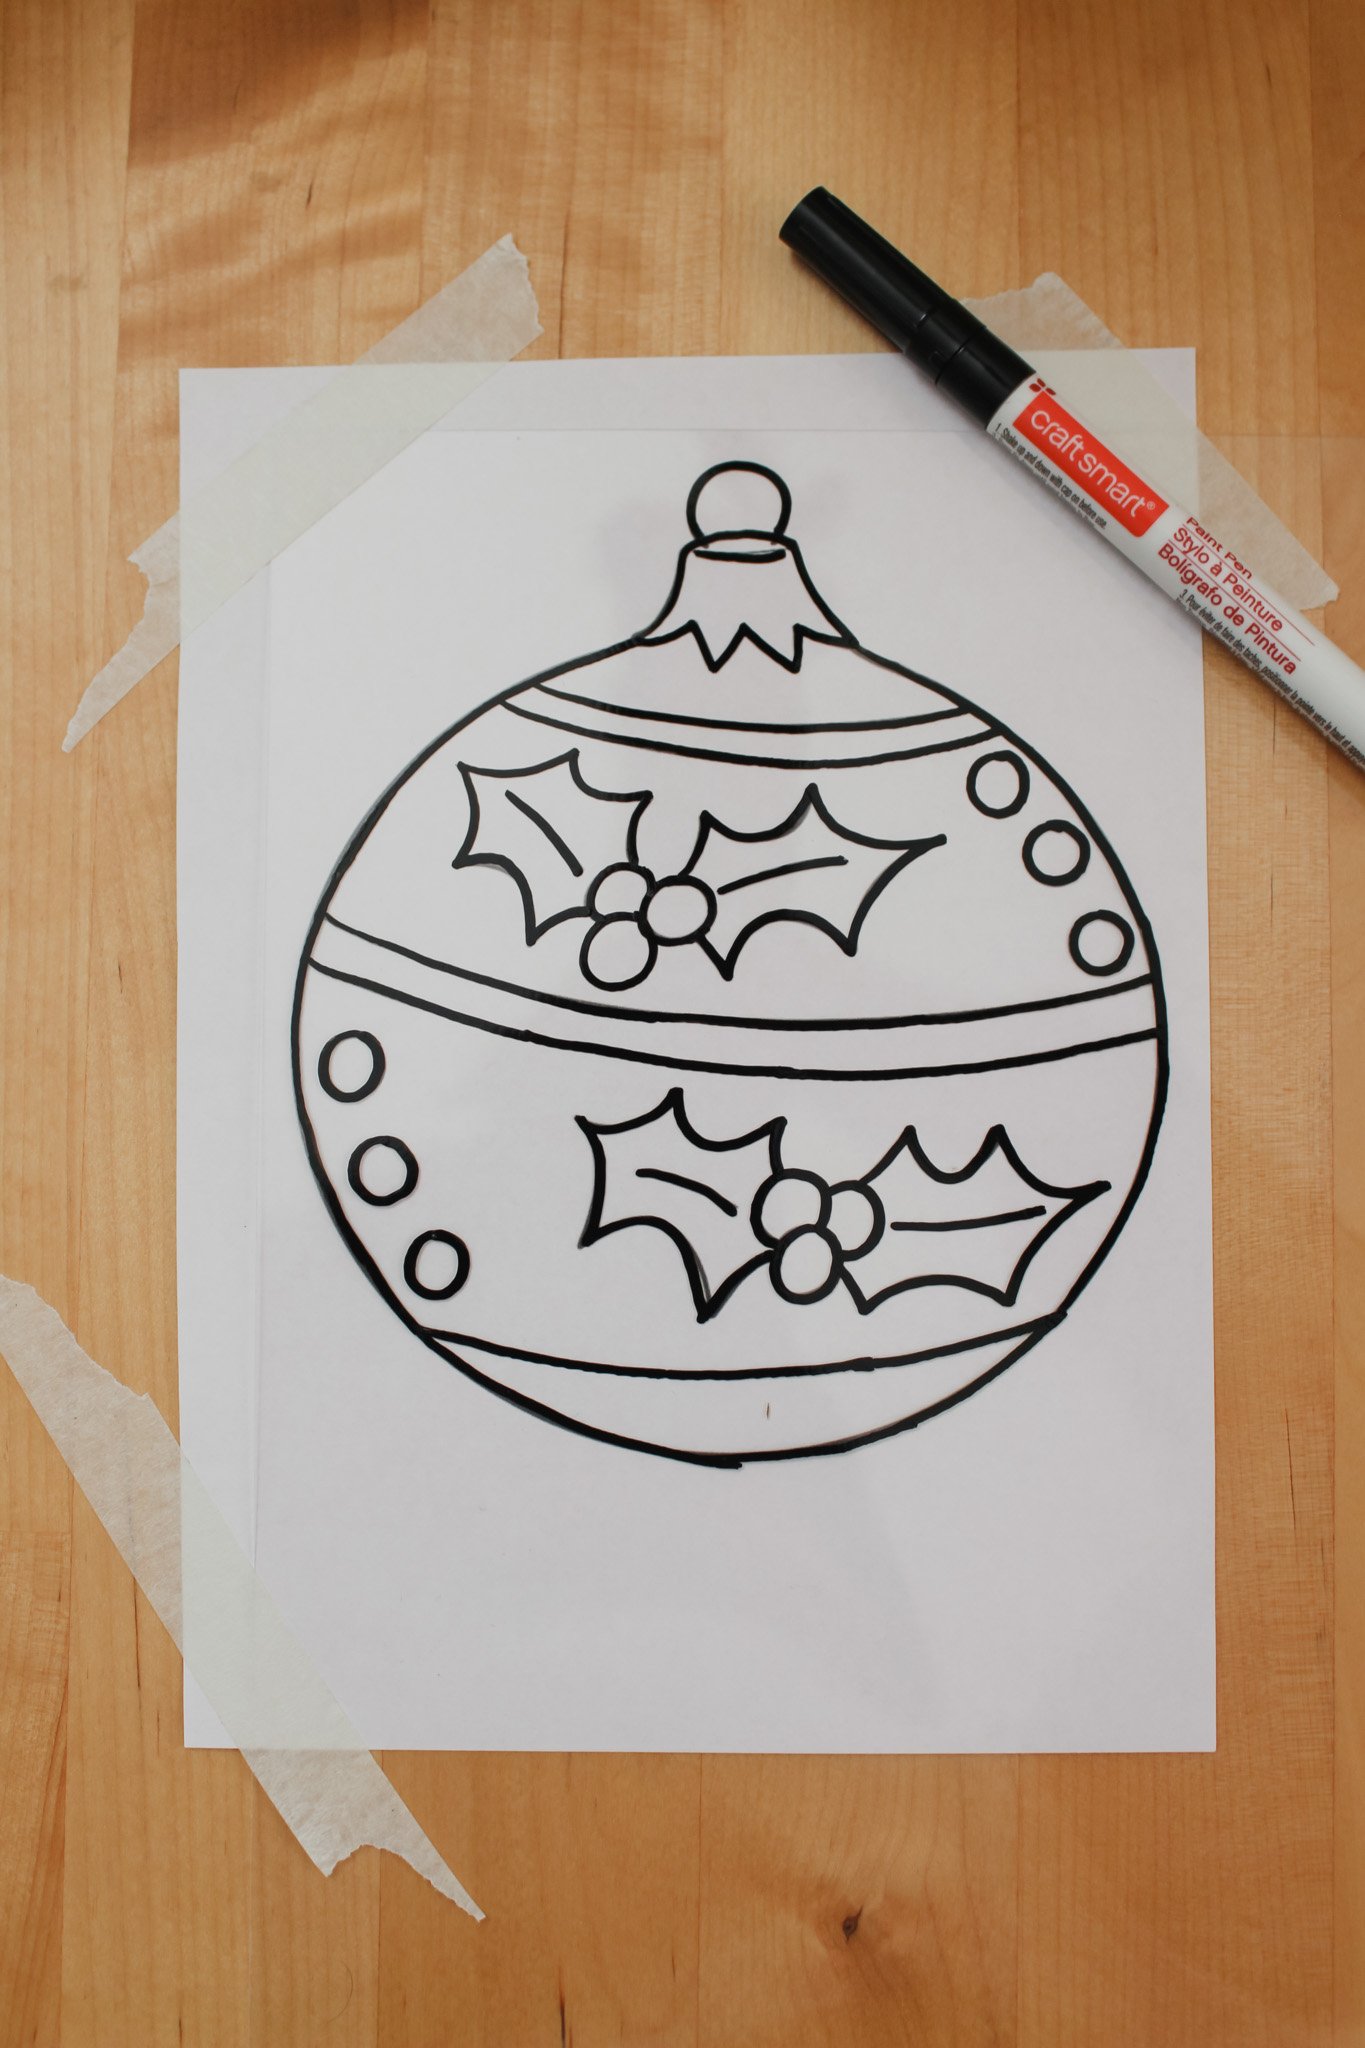
STEP 3: Carefully trace the outline and any details of the ornament that you want showing in your black paint pen. Try to do an even solid line. Allow the paint pen to dry for about 15 minutes.
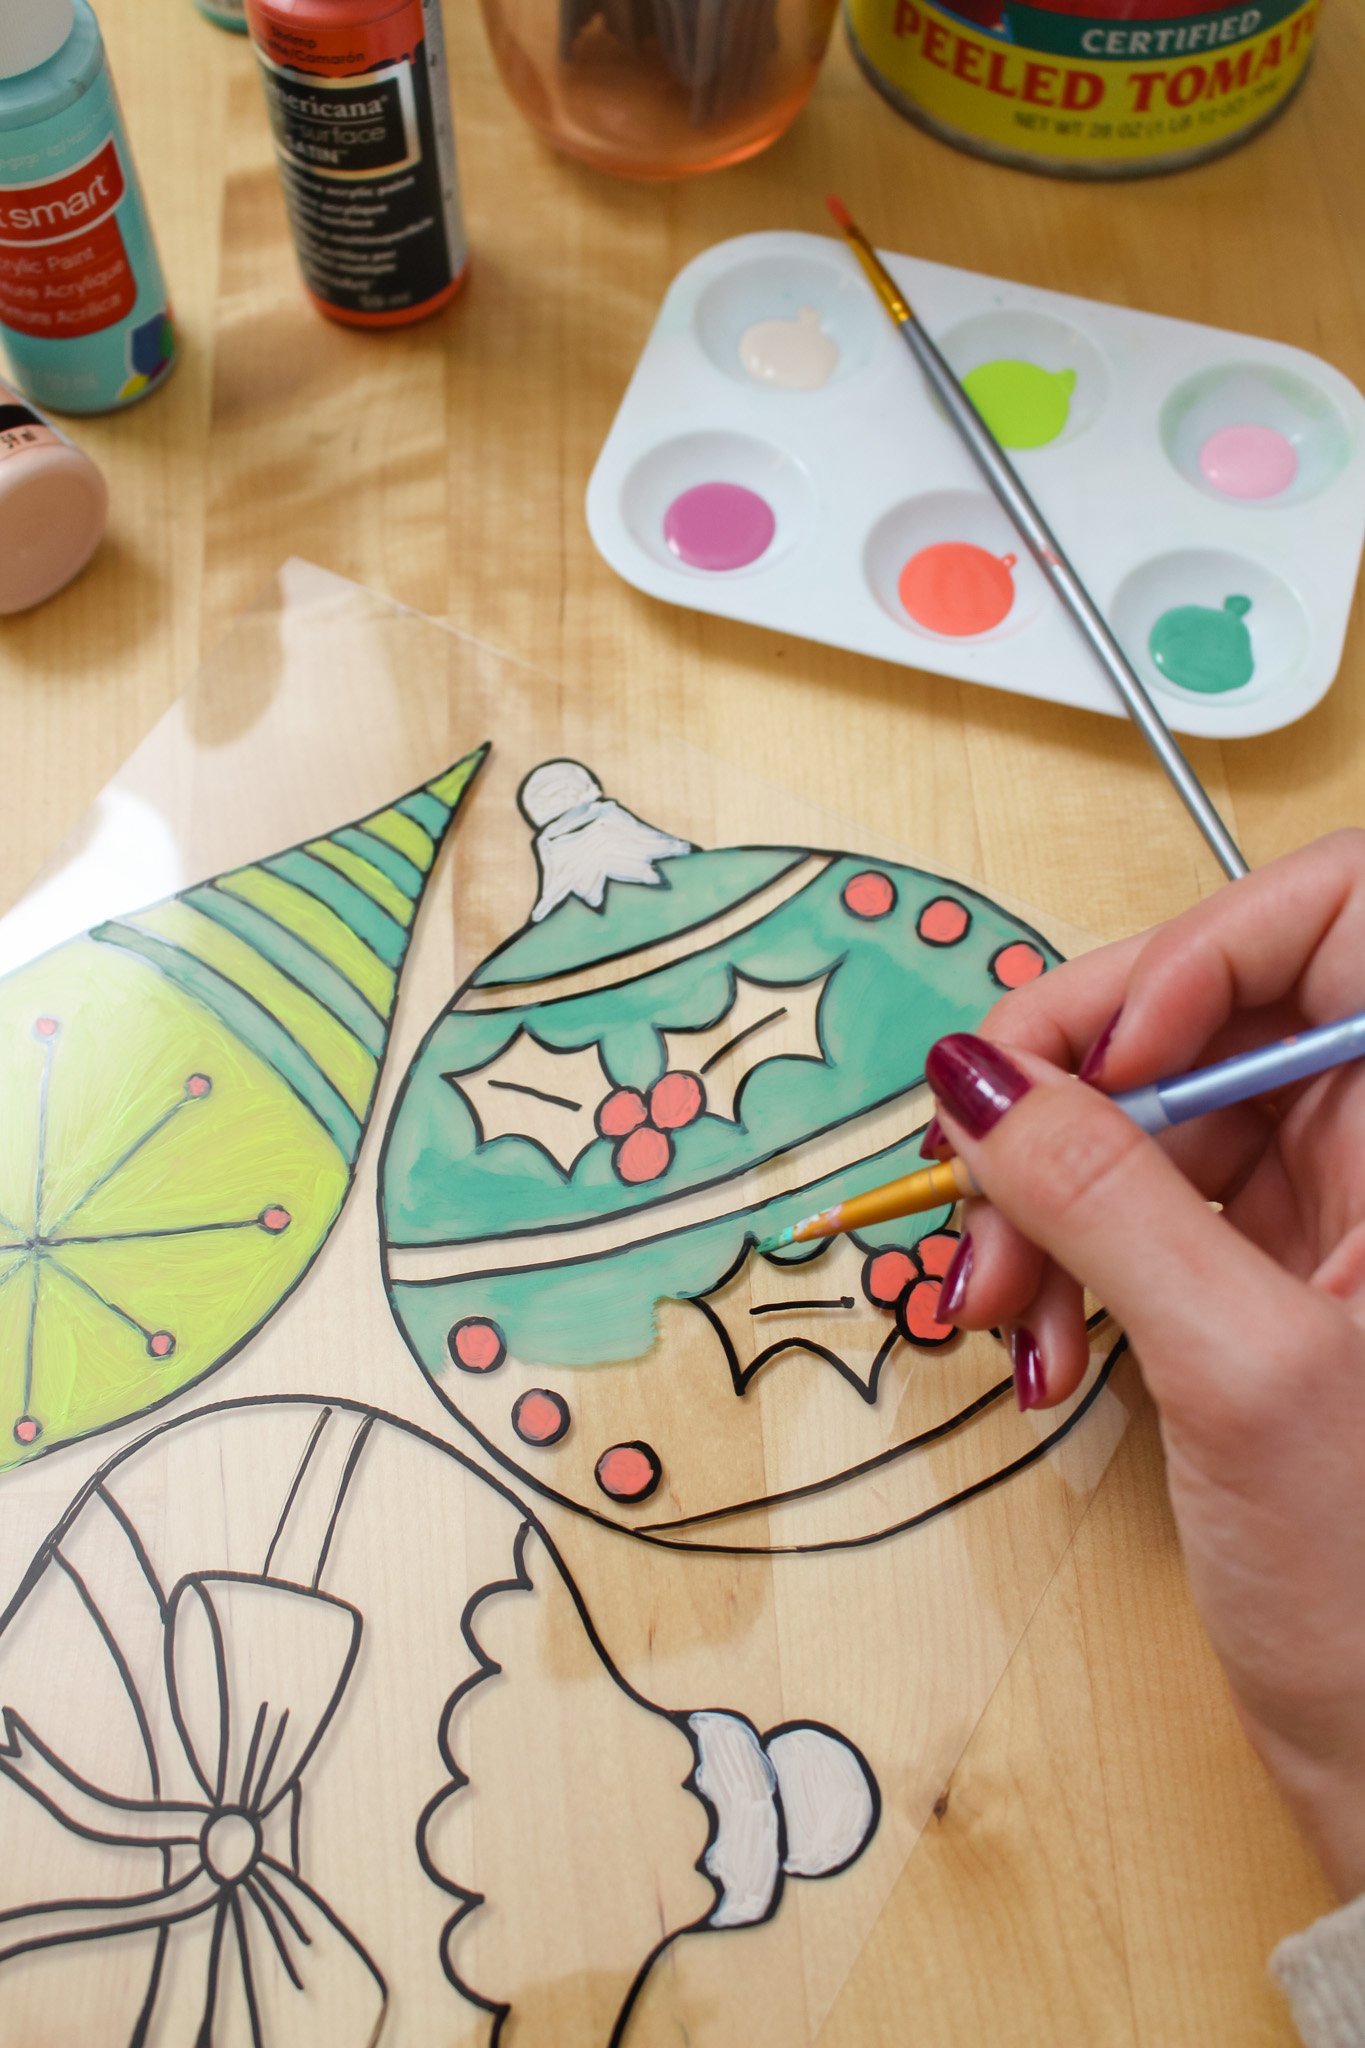
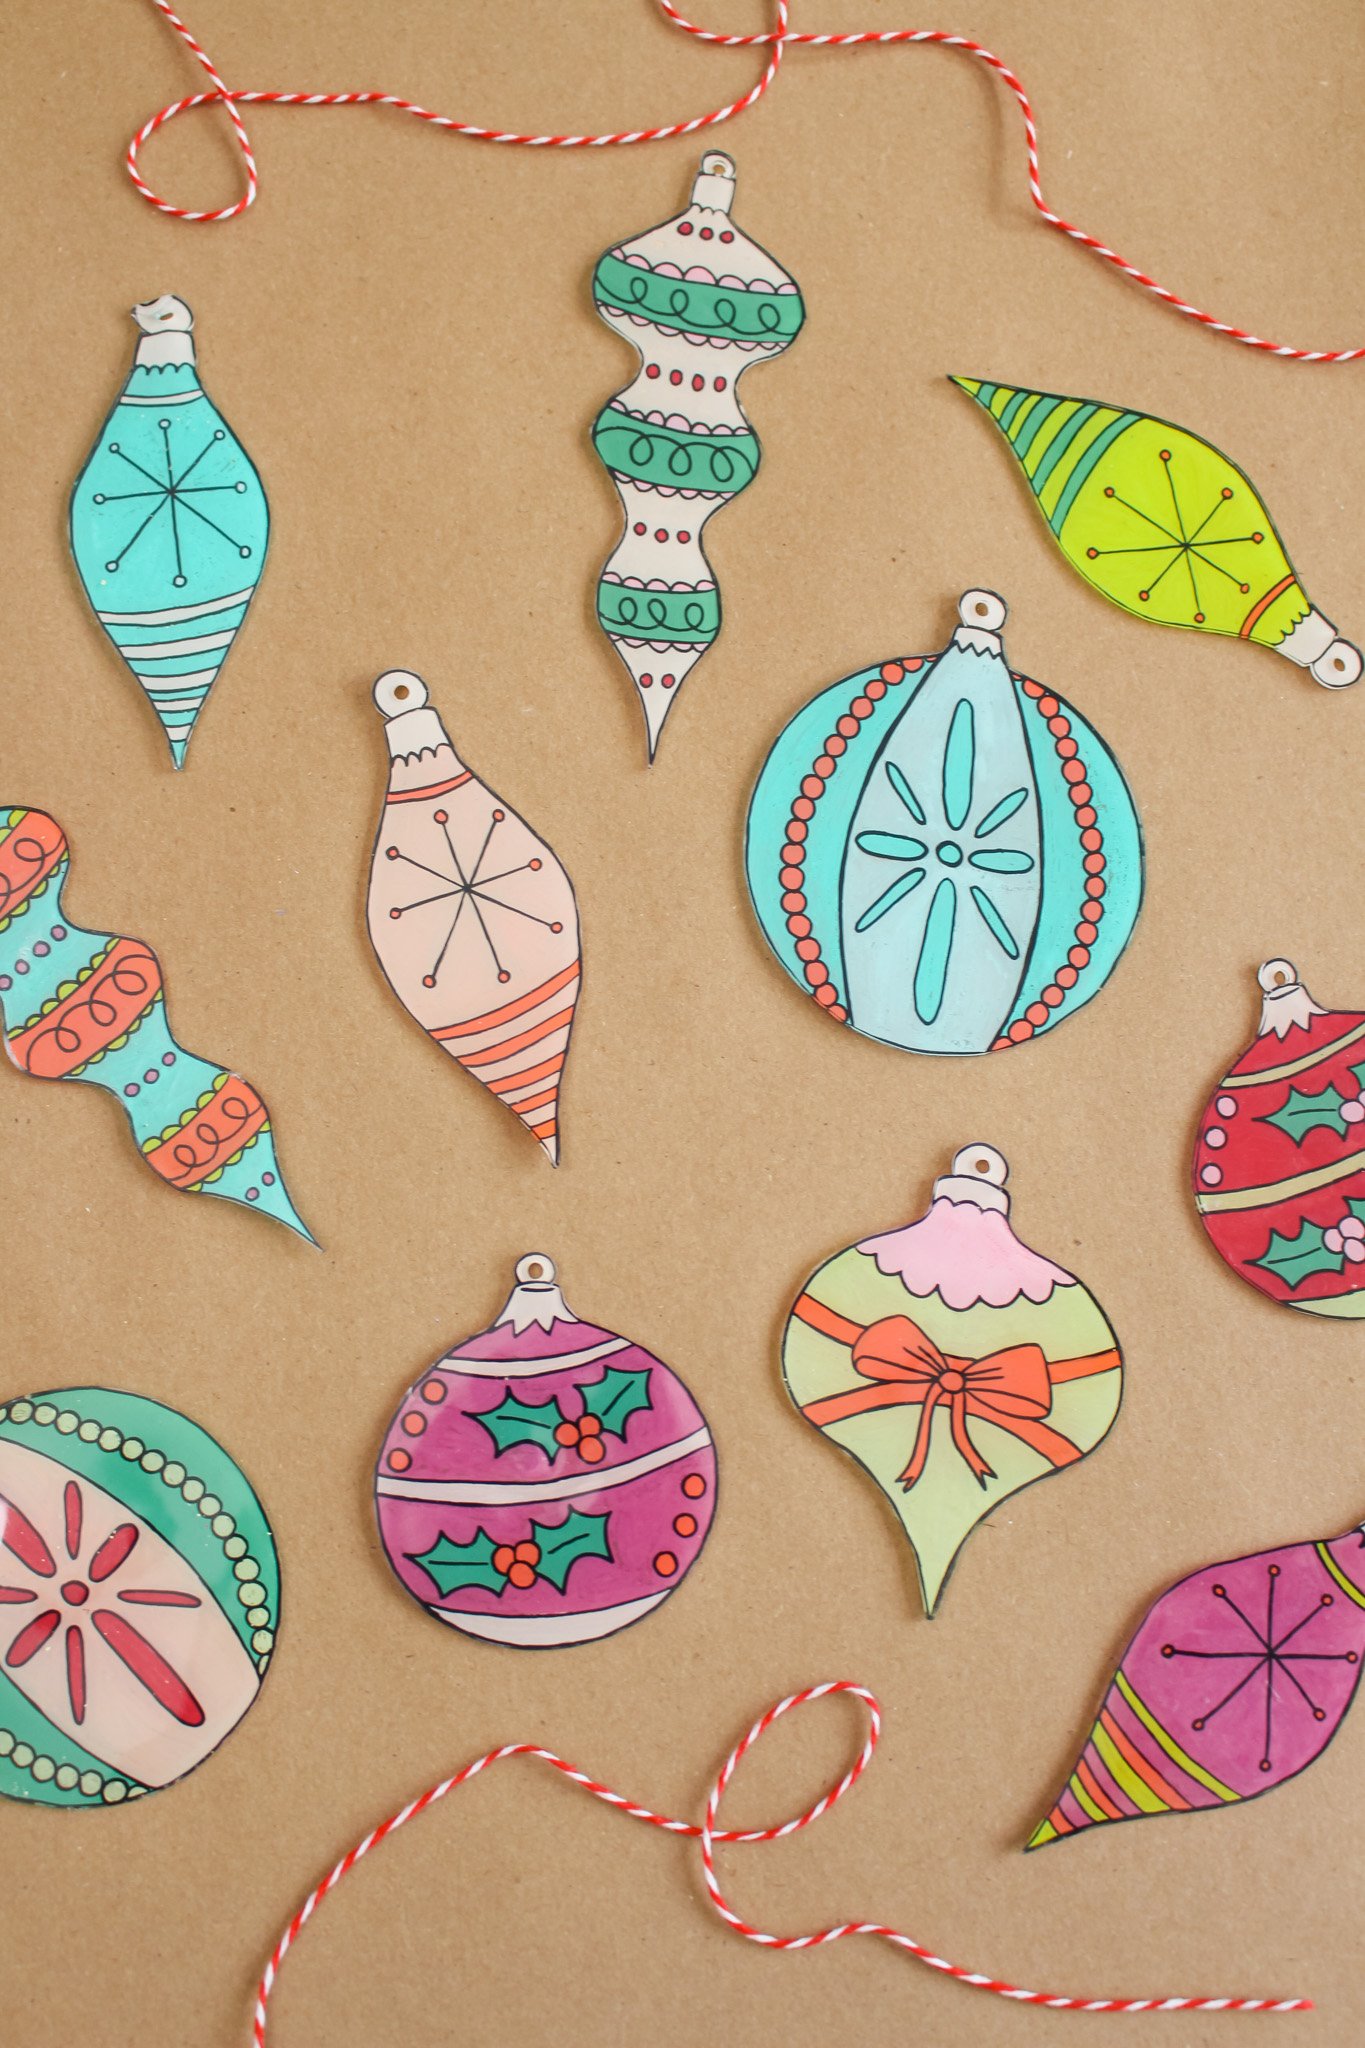
STEP 4: Now comes the fun part! Go in with your paint brushes and colored acrylic paints and color in your ornament, adding as much detail as you would like! You only need to do one light even coat of each color. It may look streaky or blotchy but this will be hidden once the ornament shrinks in the oven. Also feel free to get paint on top of the black lines. The front side is what you will be displaying and since the black was painted first it will give the edges/lines a clean, neat look.
**Tip! It’s better to do less paint! I did 3 coats of paint the first time to try and make the color super opaque and it got all crusty in the oven. Just keep one thin even layer.
STEP 5: Preheat your oven or toaster oven to 325 degrees F.
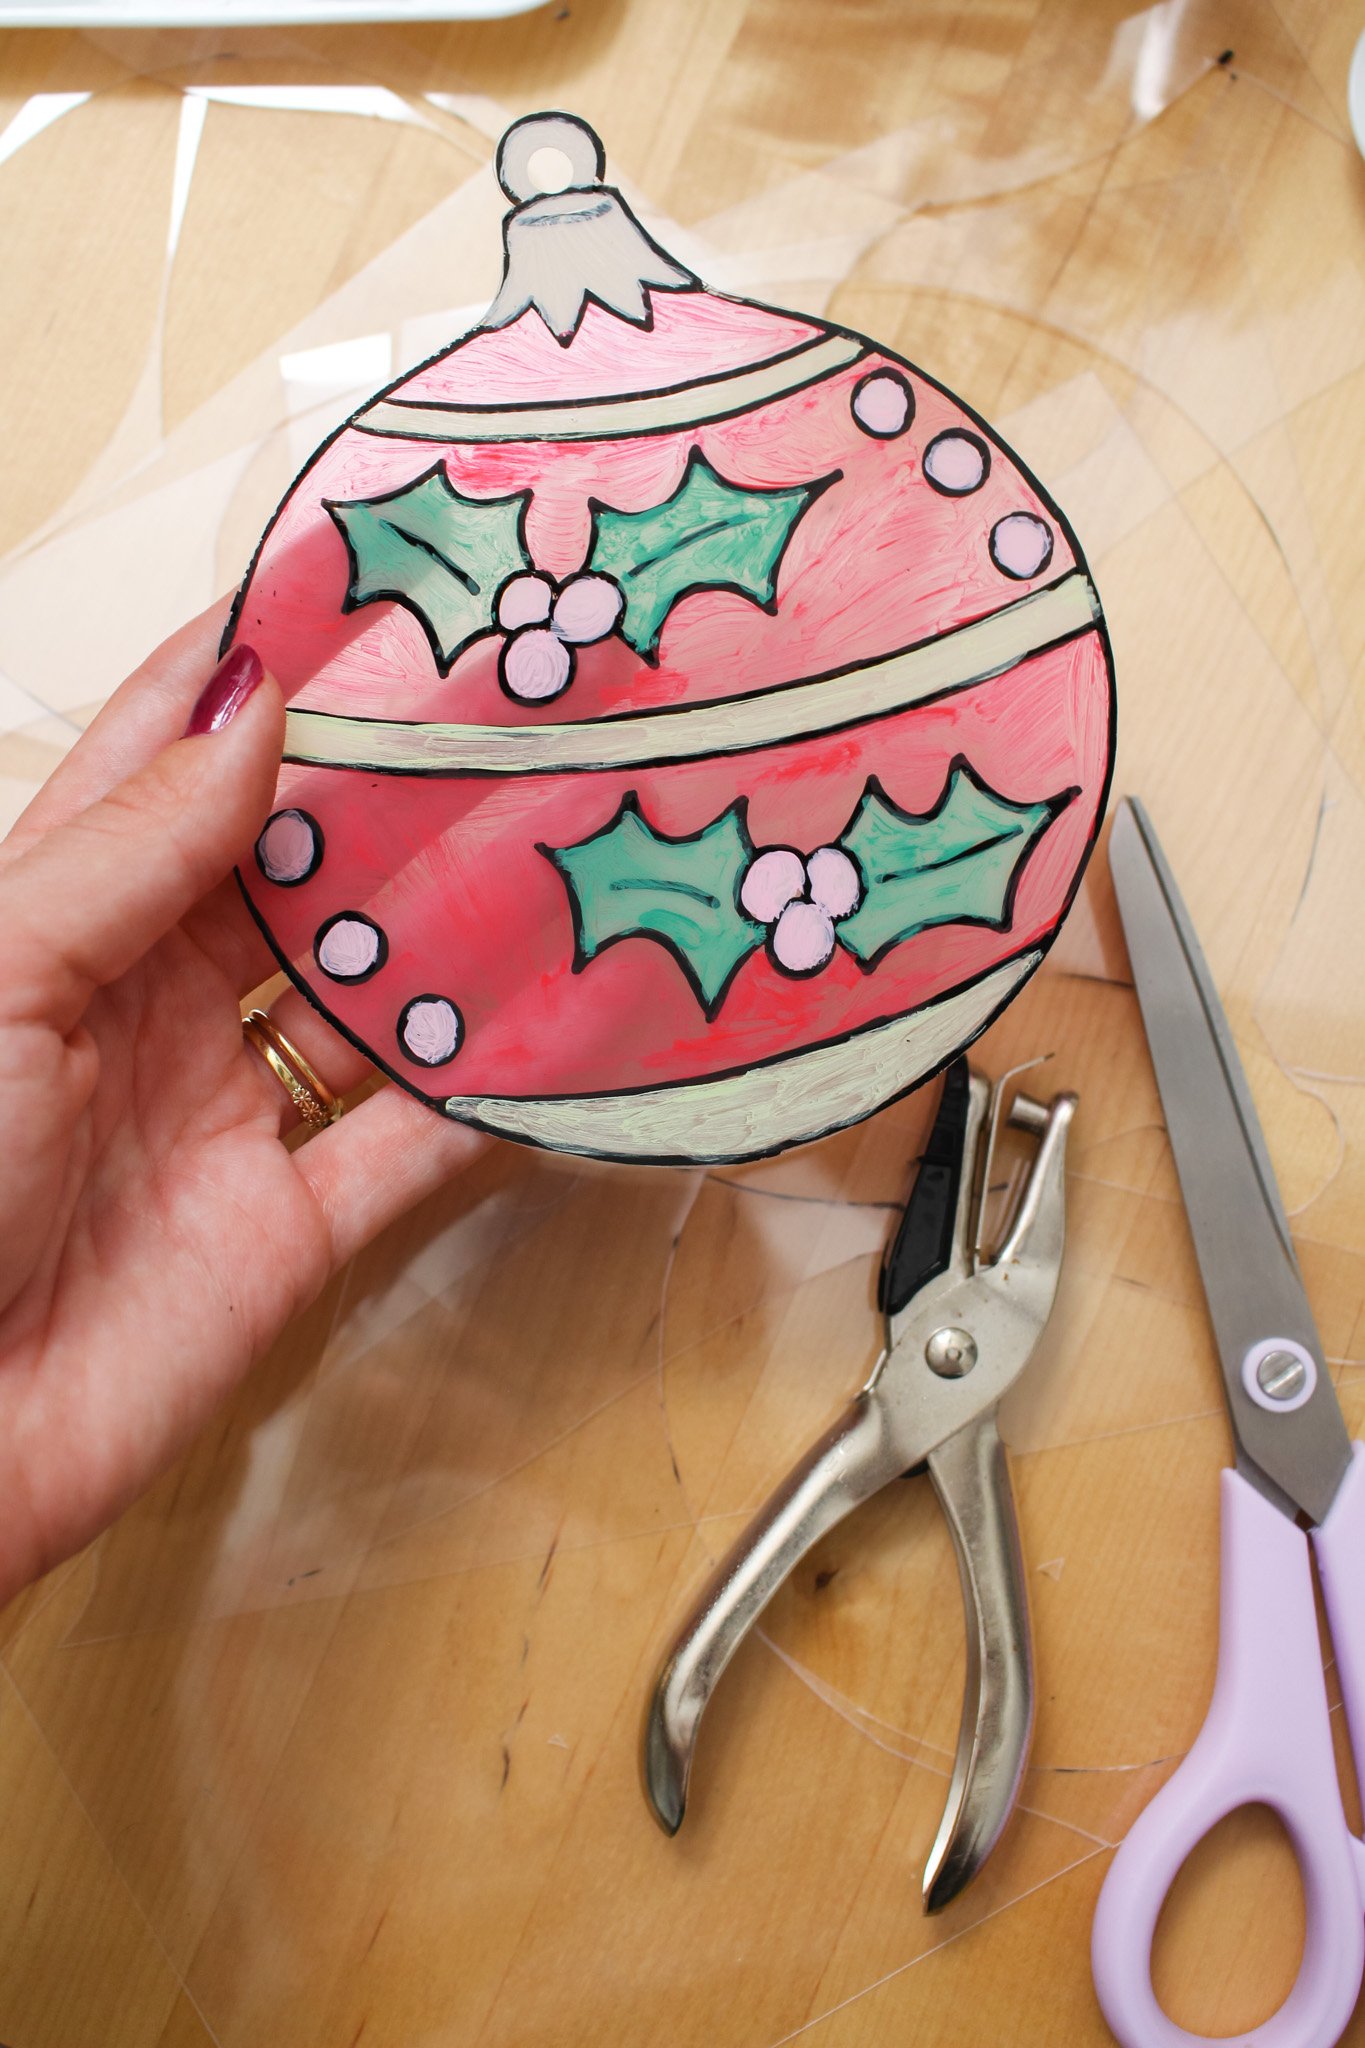
STEP 6: Once your ornament is painted to your liking and has time for the paint to completely dry, cut out the outline of the ornament with a pair of scissors, cutting as close to your black line as possible.
STEP 7: Use a standard sized hole punch to punch a hole in the middle of the ornament’s hook at the top — this will be what you will string your ribbon through to attach your gift tag.
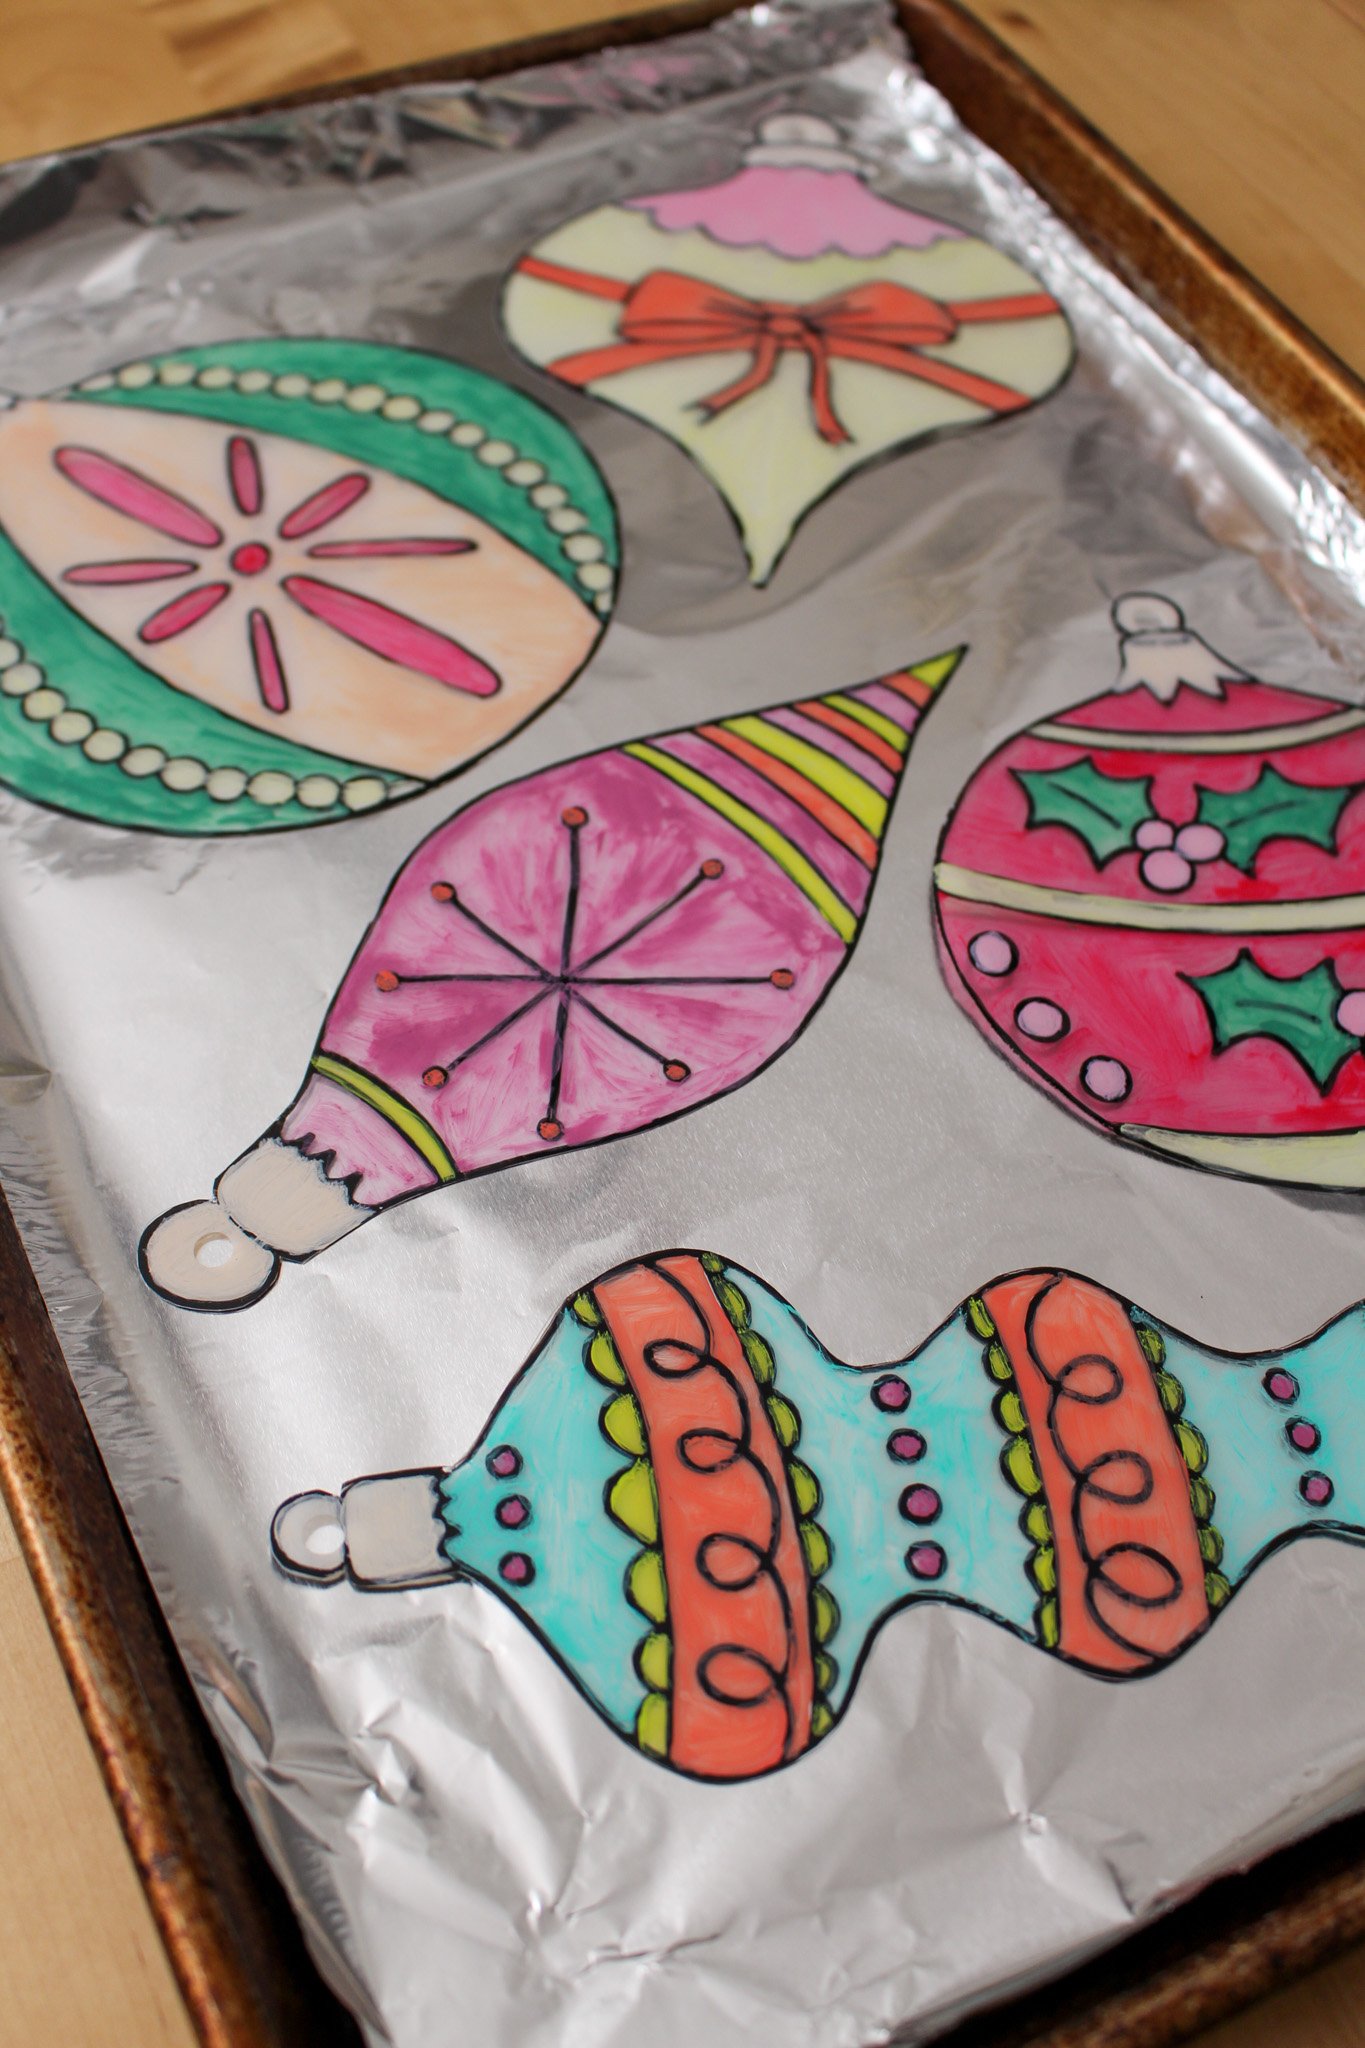
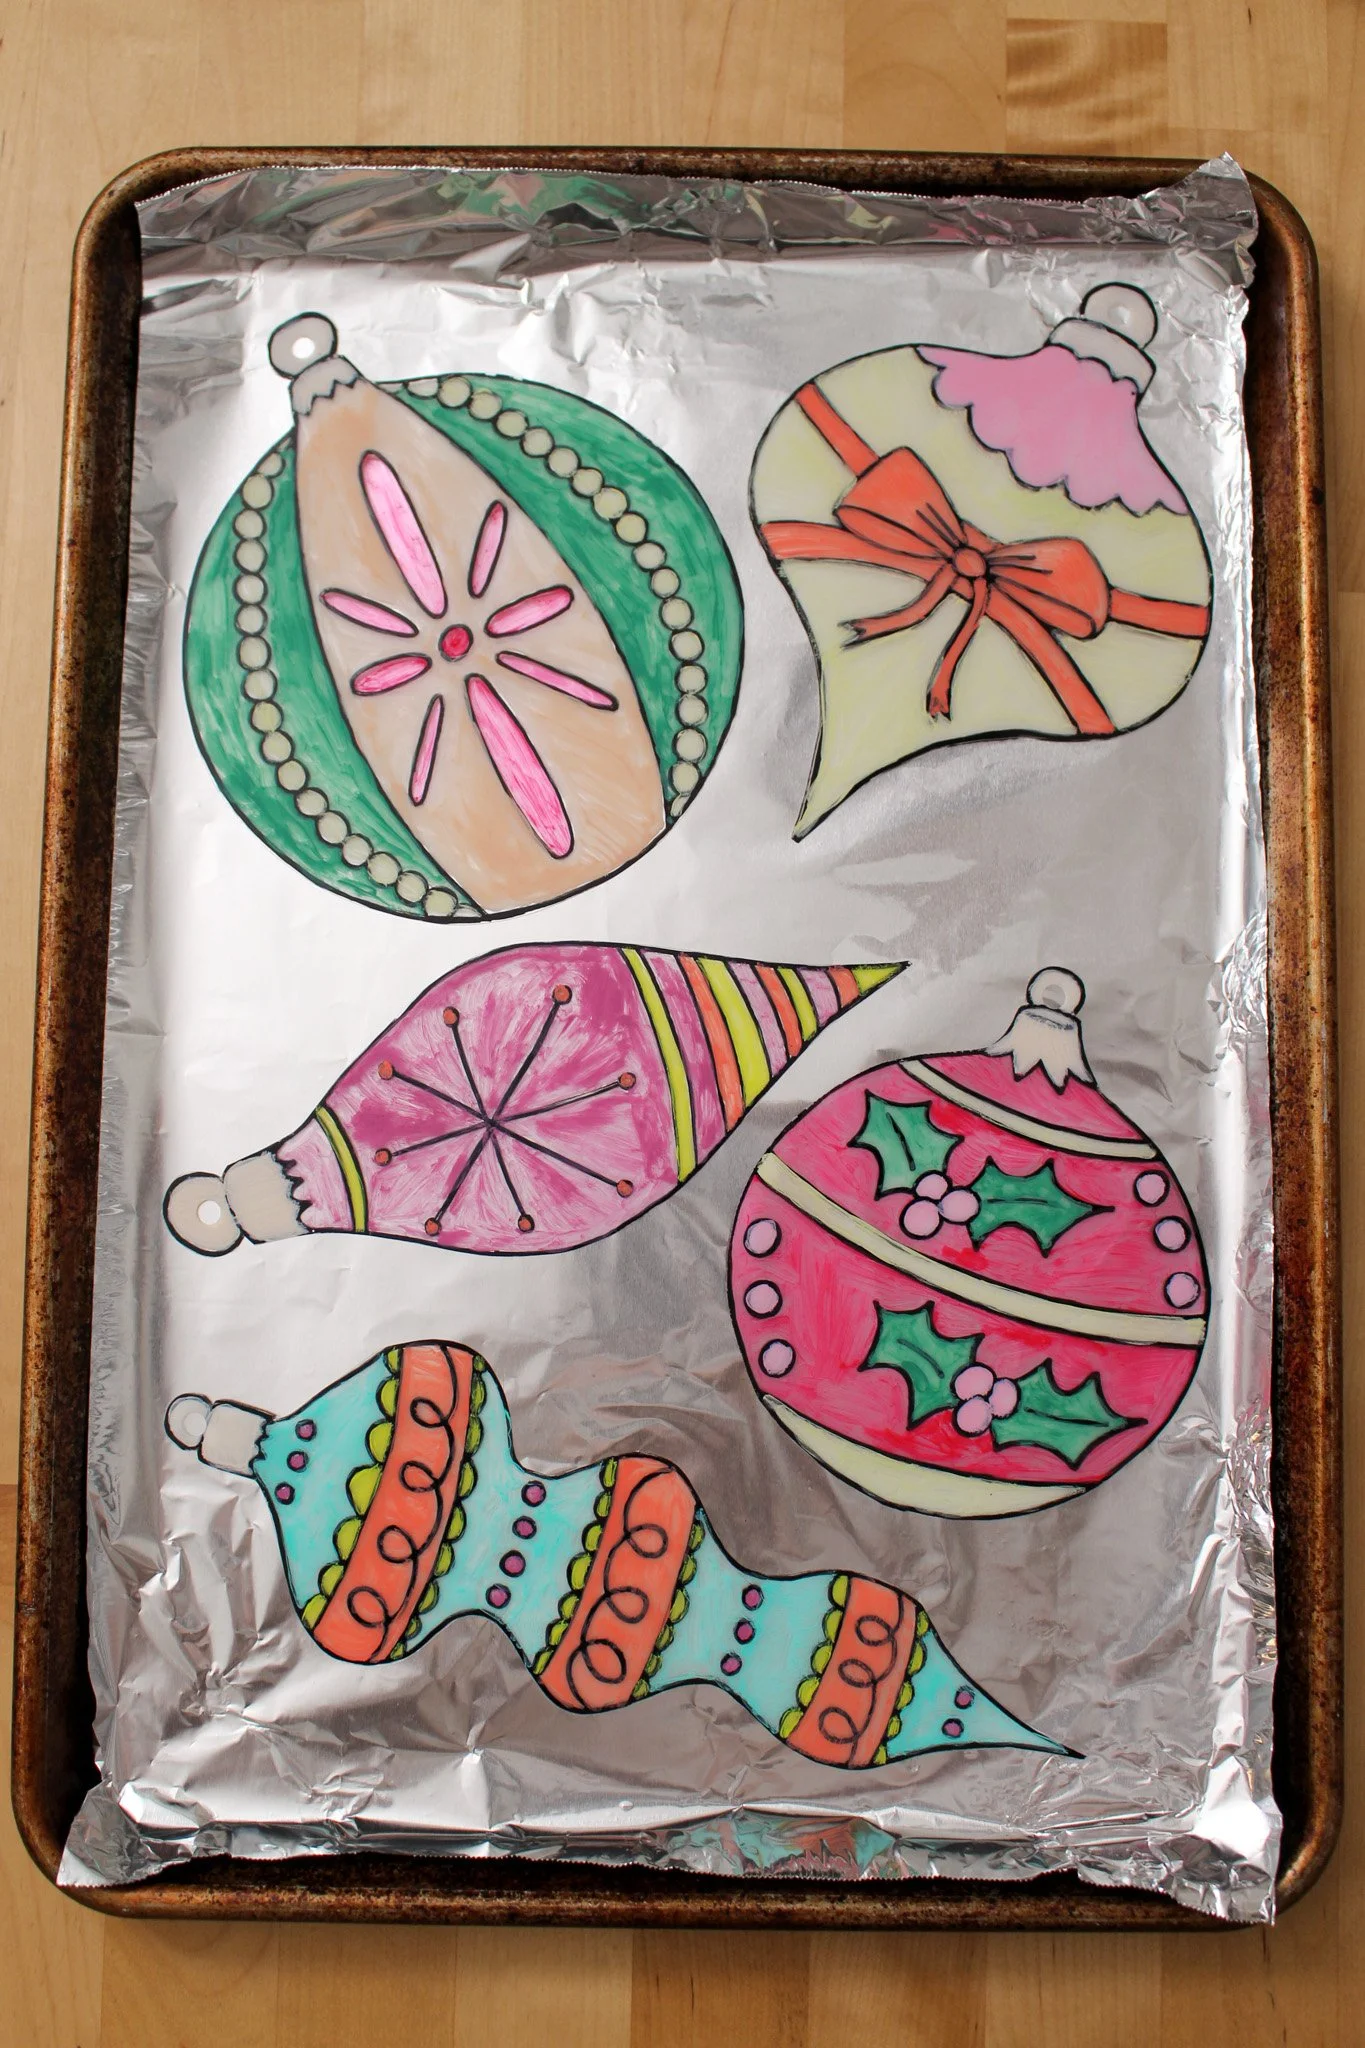
STEP 7: Cover a baking sheet with a piece of tin foil or parchment paper. Place your Shrinky Dink ornament on the baking sheet and place inside the pre-heated oven. Allow to bake for exactly 2 minutes.
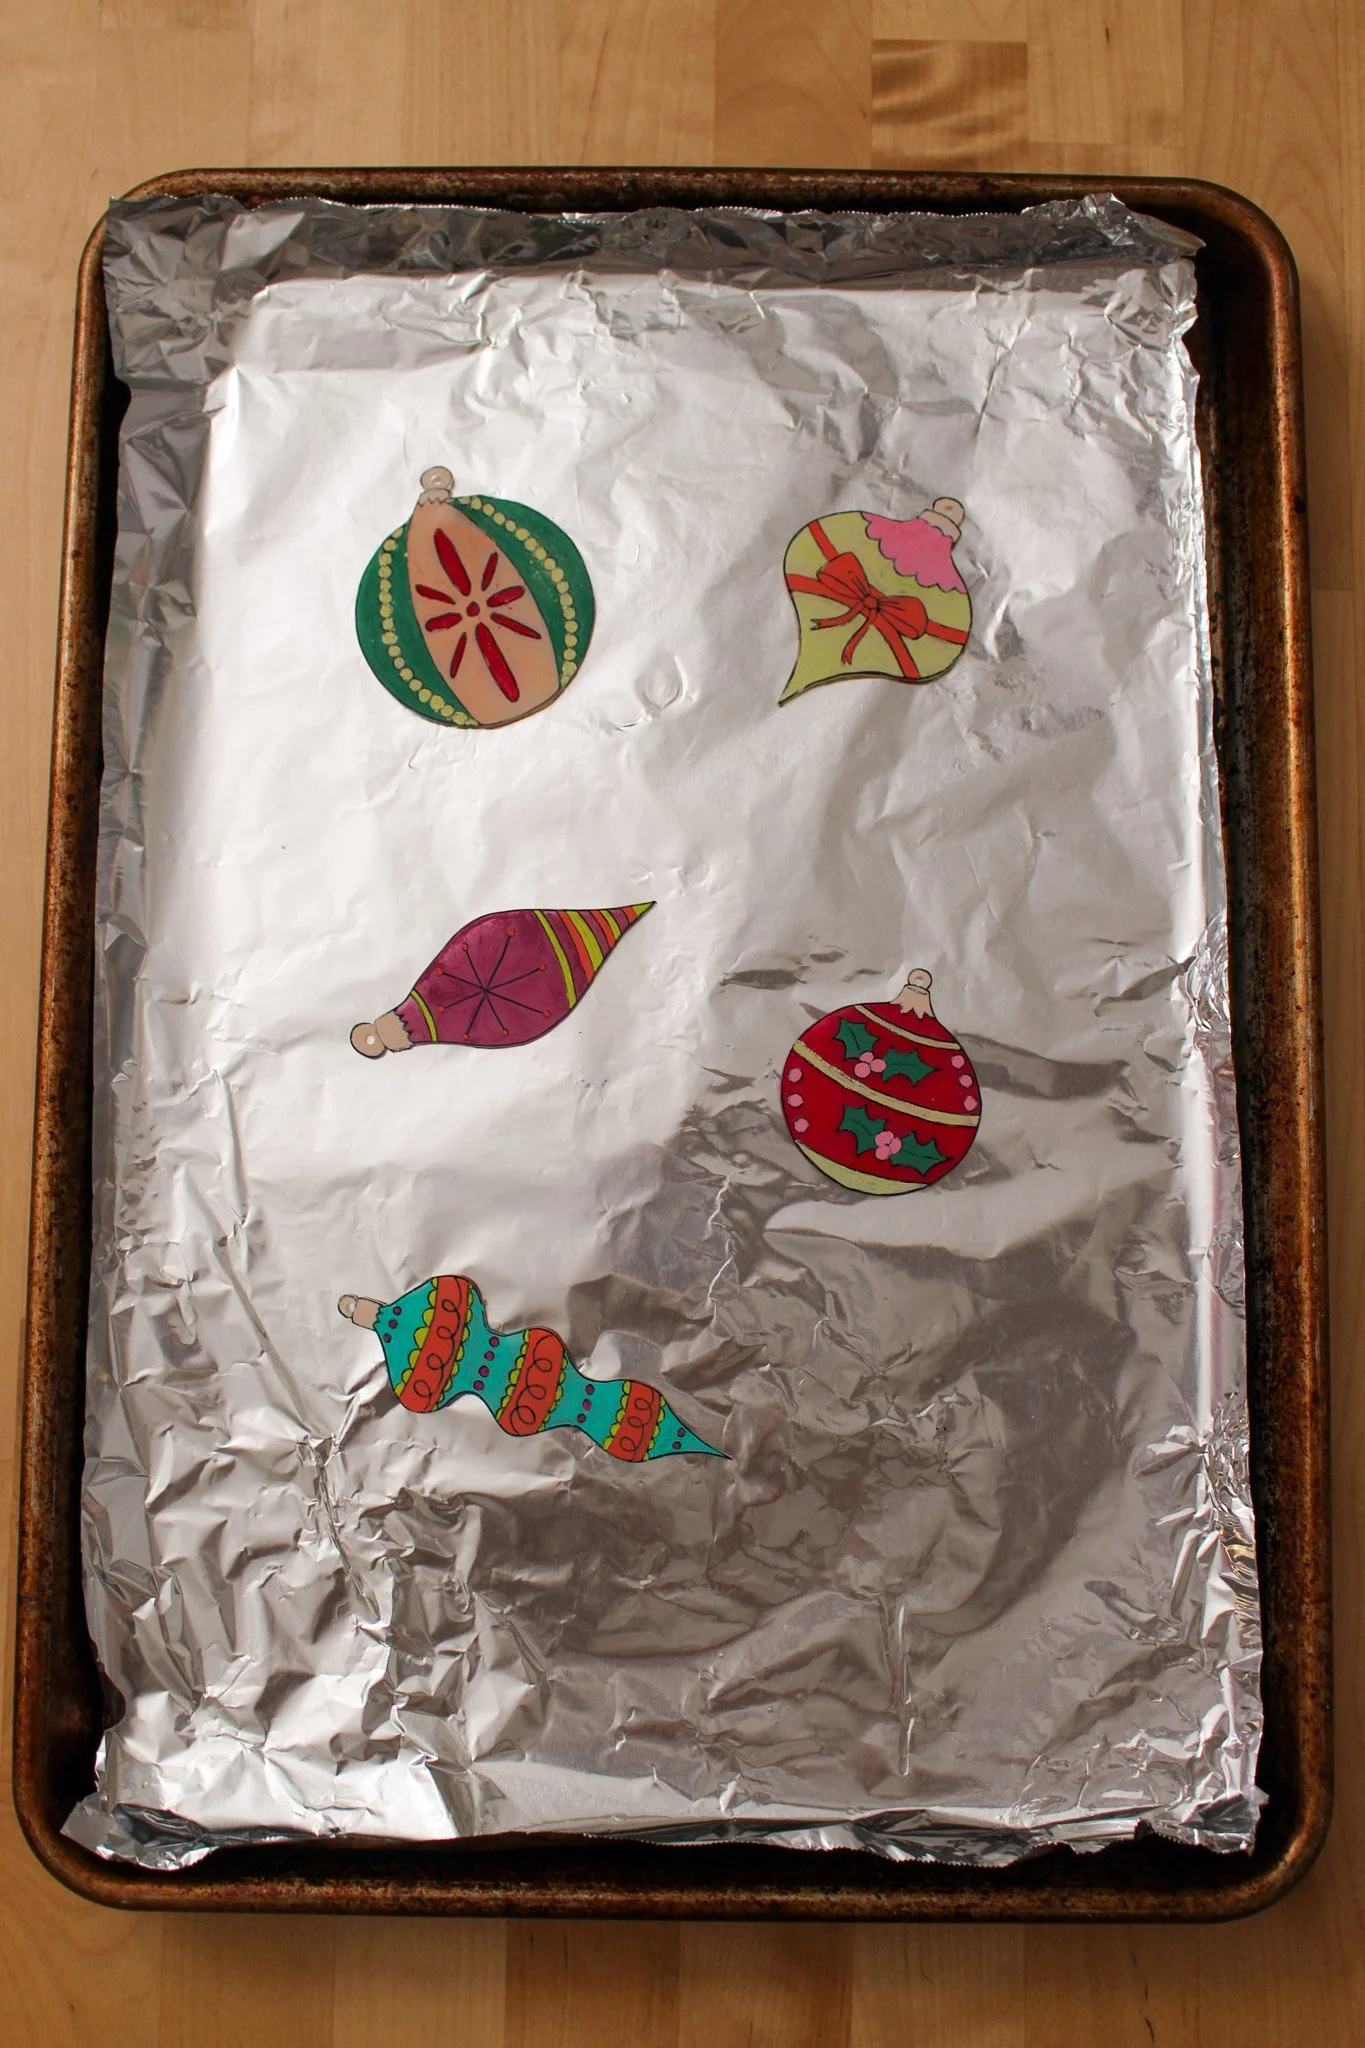
STEP 8: Pull the baking sheet out of the oven and if the ornament is not laying flat, quickly cover it with something flat (like a glass lid or plate) for about 20 seconds and it should flatter out and harden.
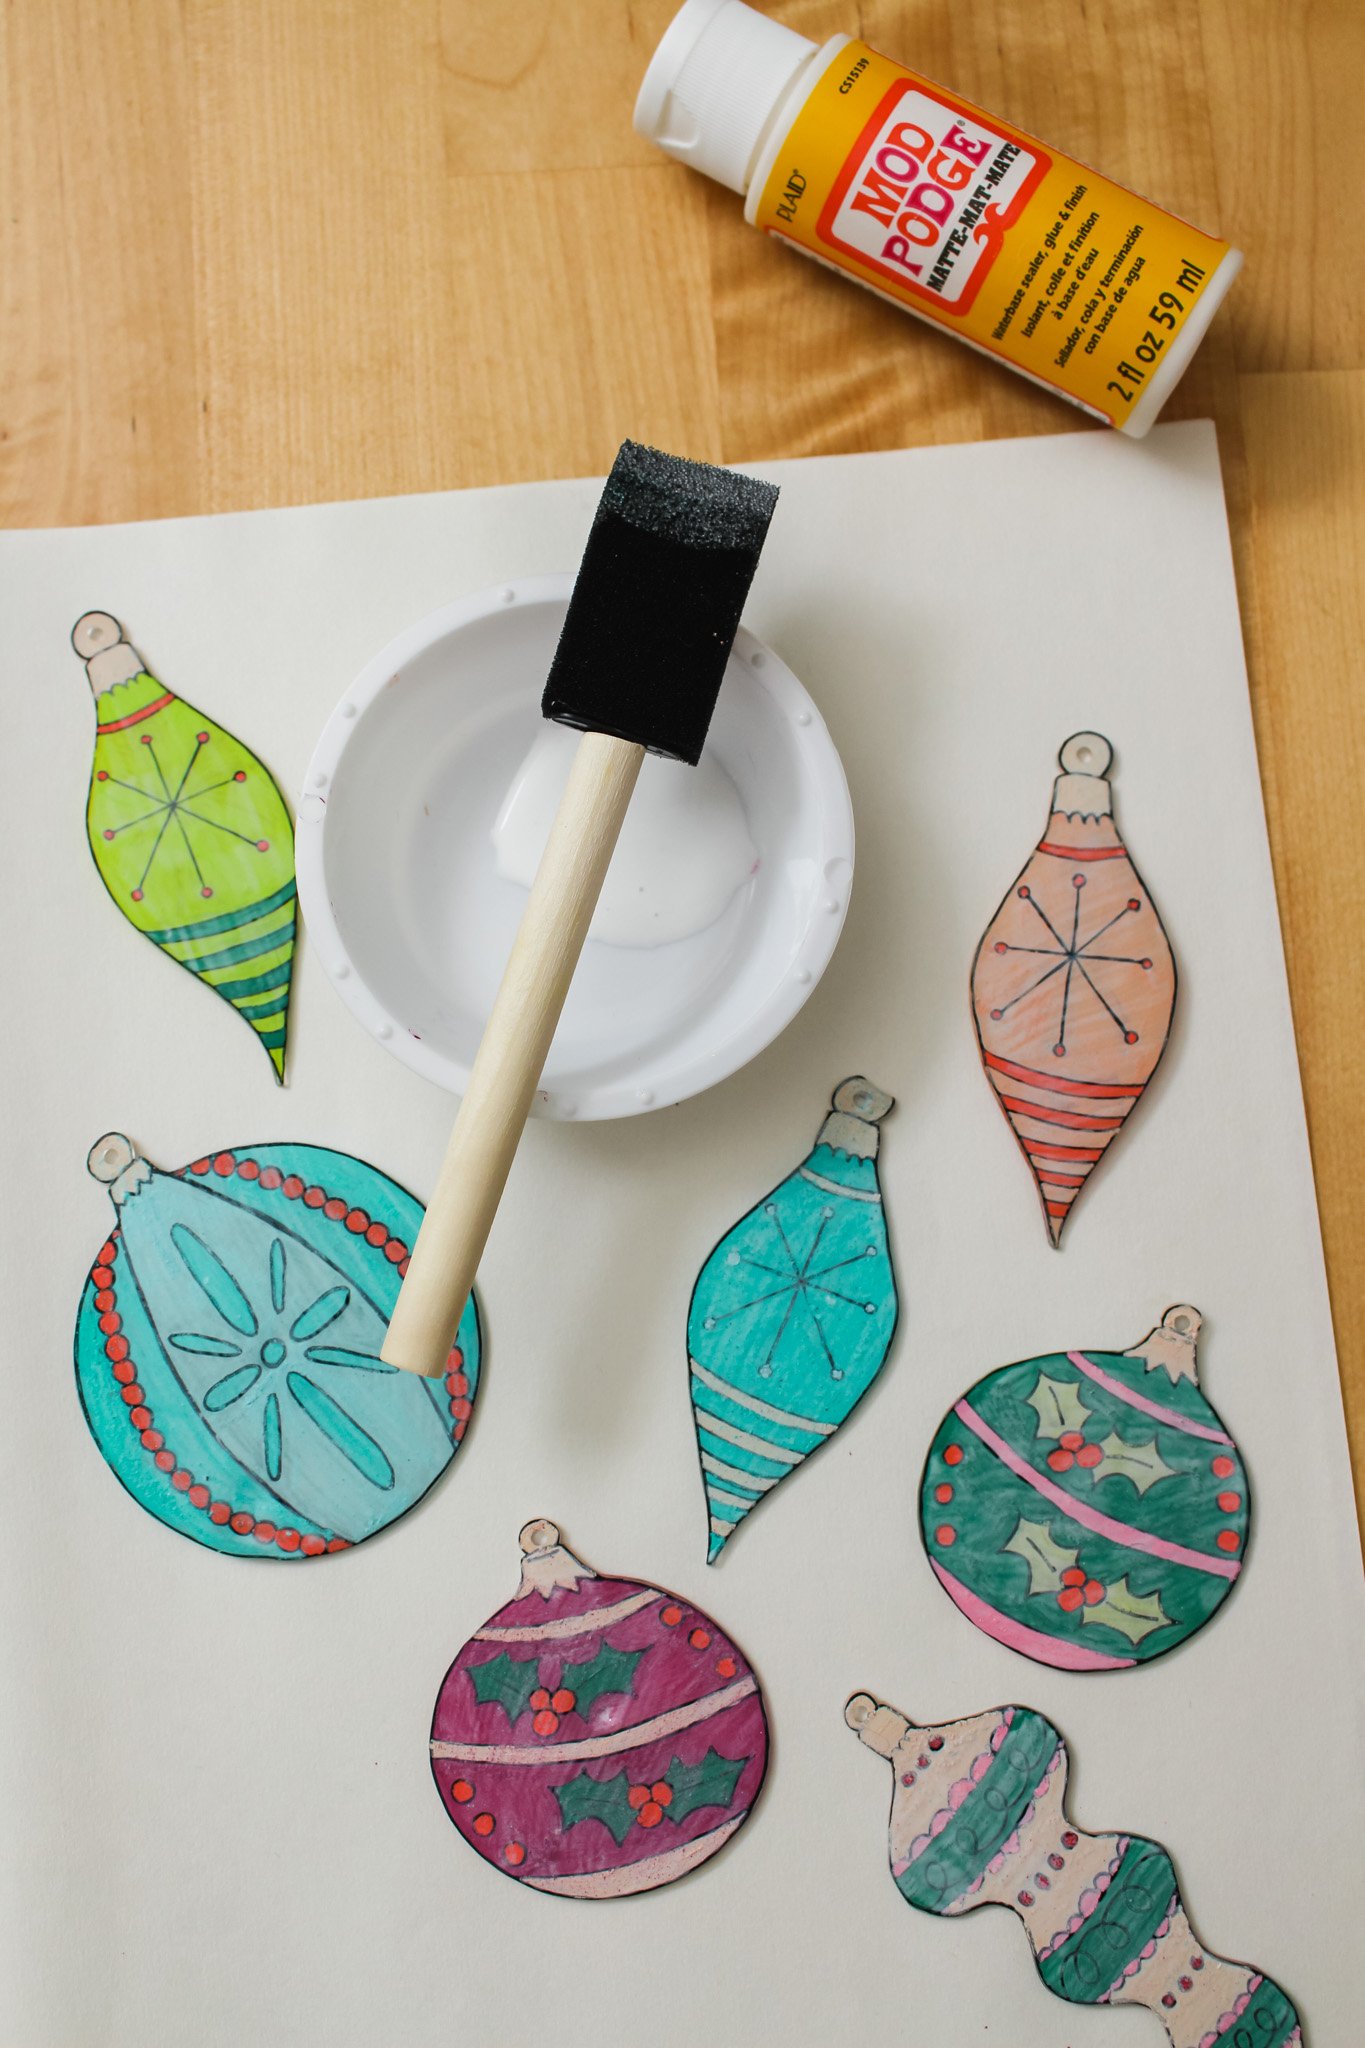
STEP 9: Allow your ornament to cool (it cools super quick!) and then give the back side of the ornament (the side with the paint) a quick coat of Mod Podge to seal in your layer of paint.

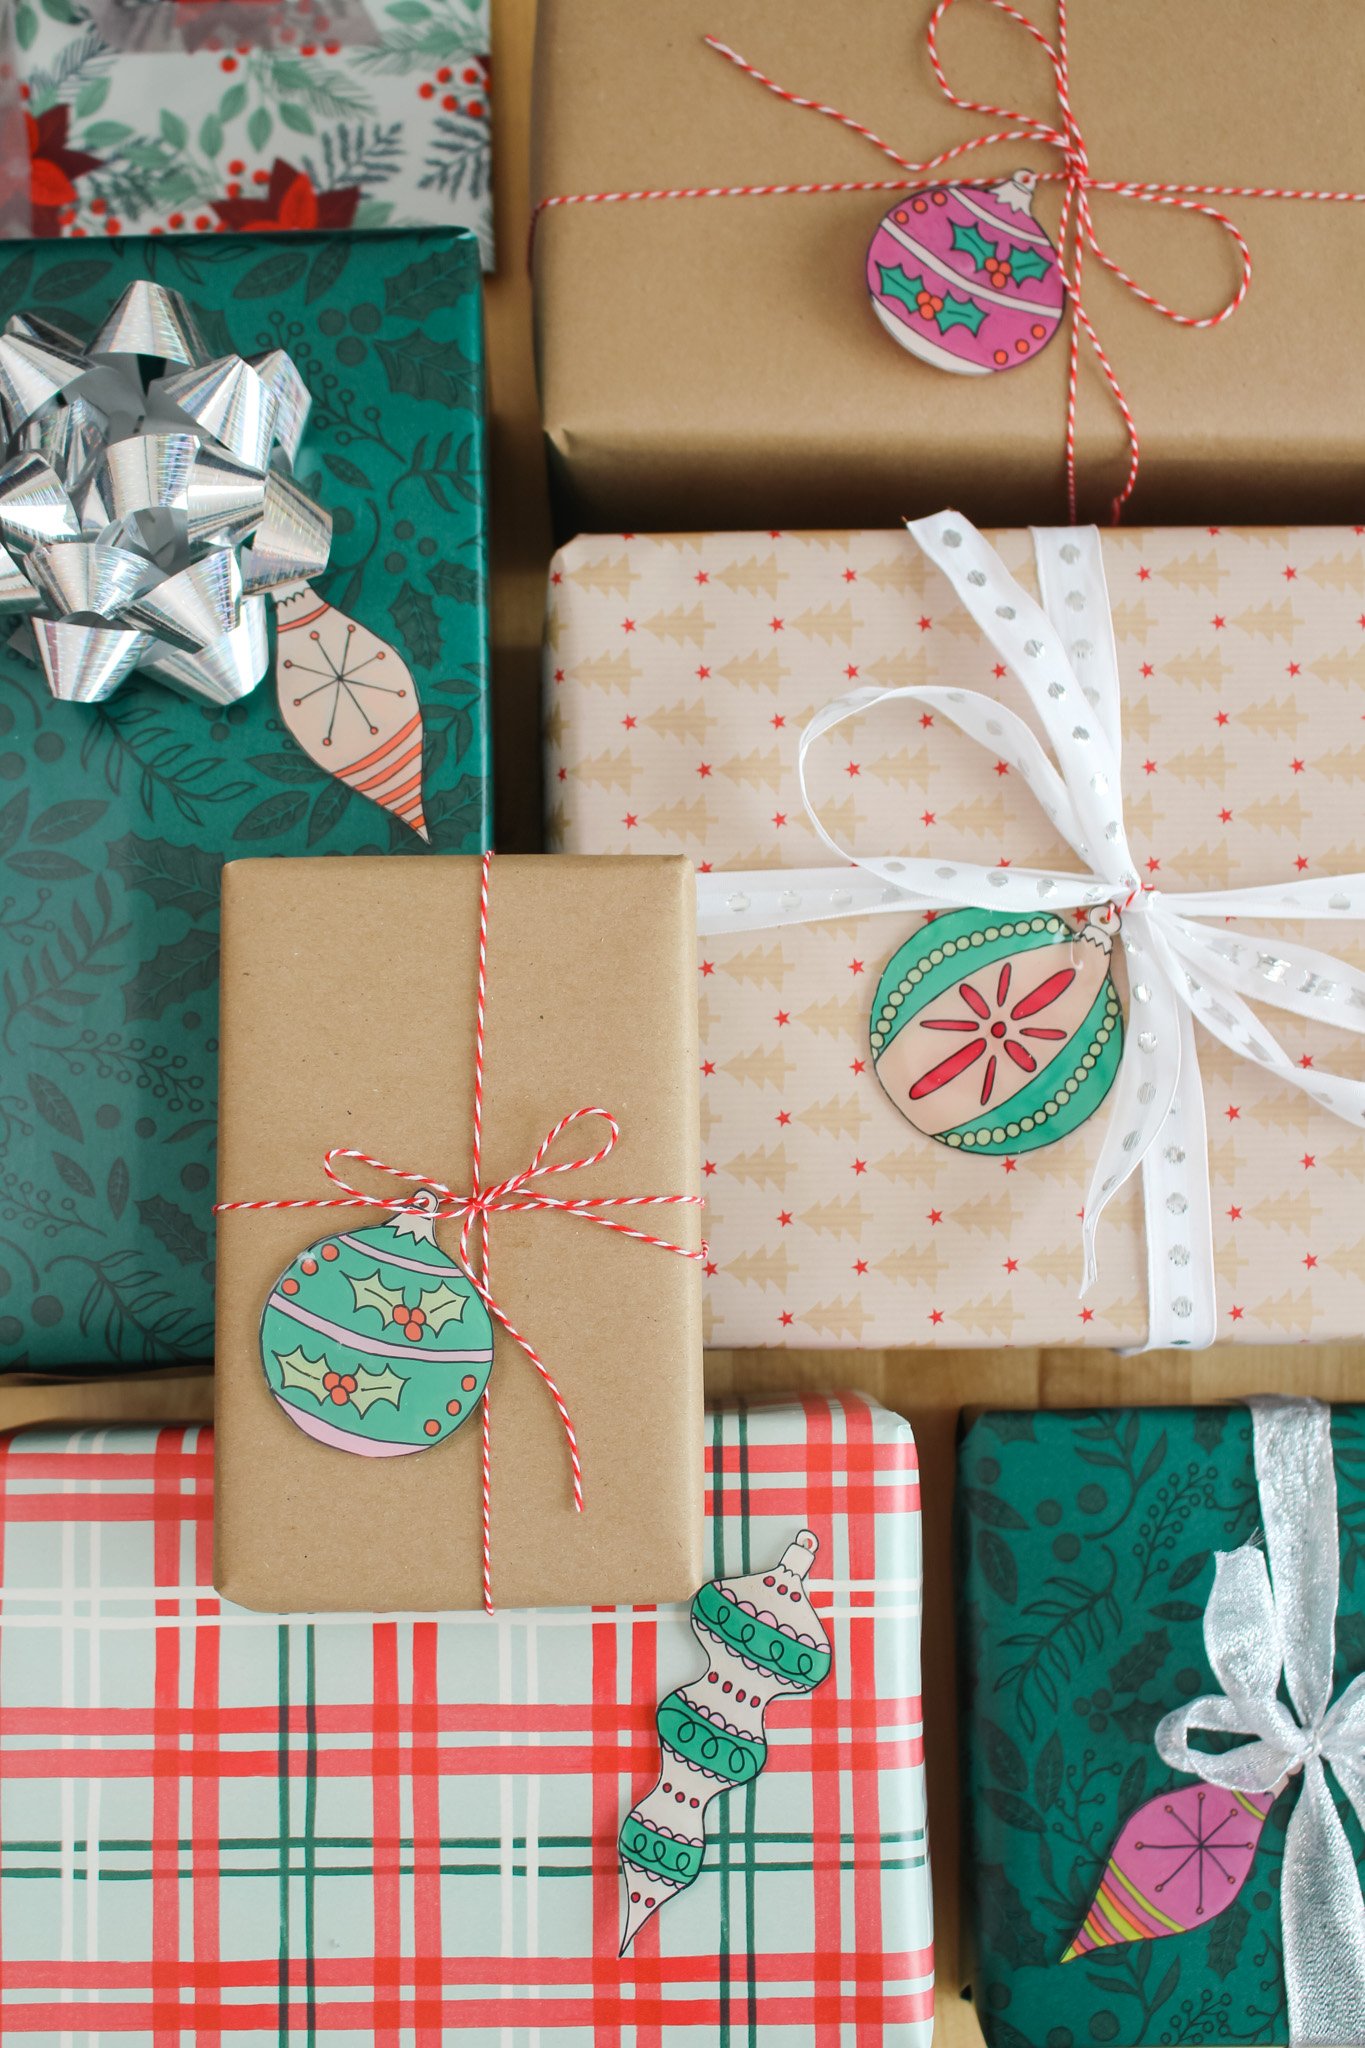
STEP 10: String a piece of ribbon or twine through the ornaments hook and now you have a fun, handmade embellishment for adorning your gift wrap this year or even for hanging on the tree!
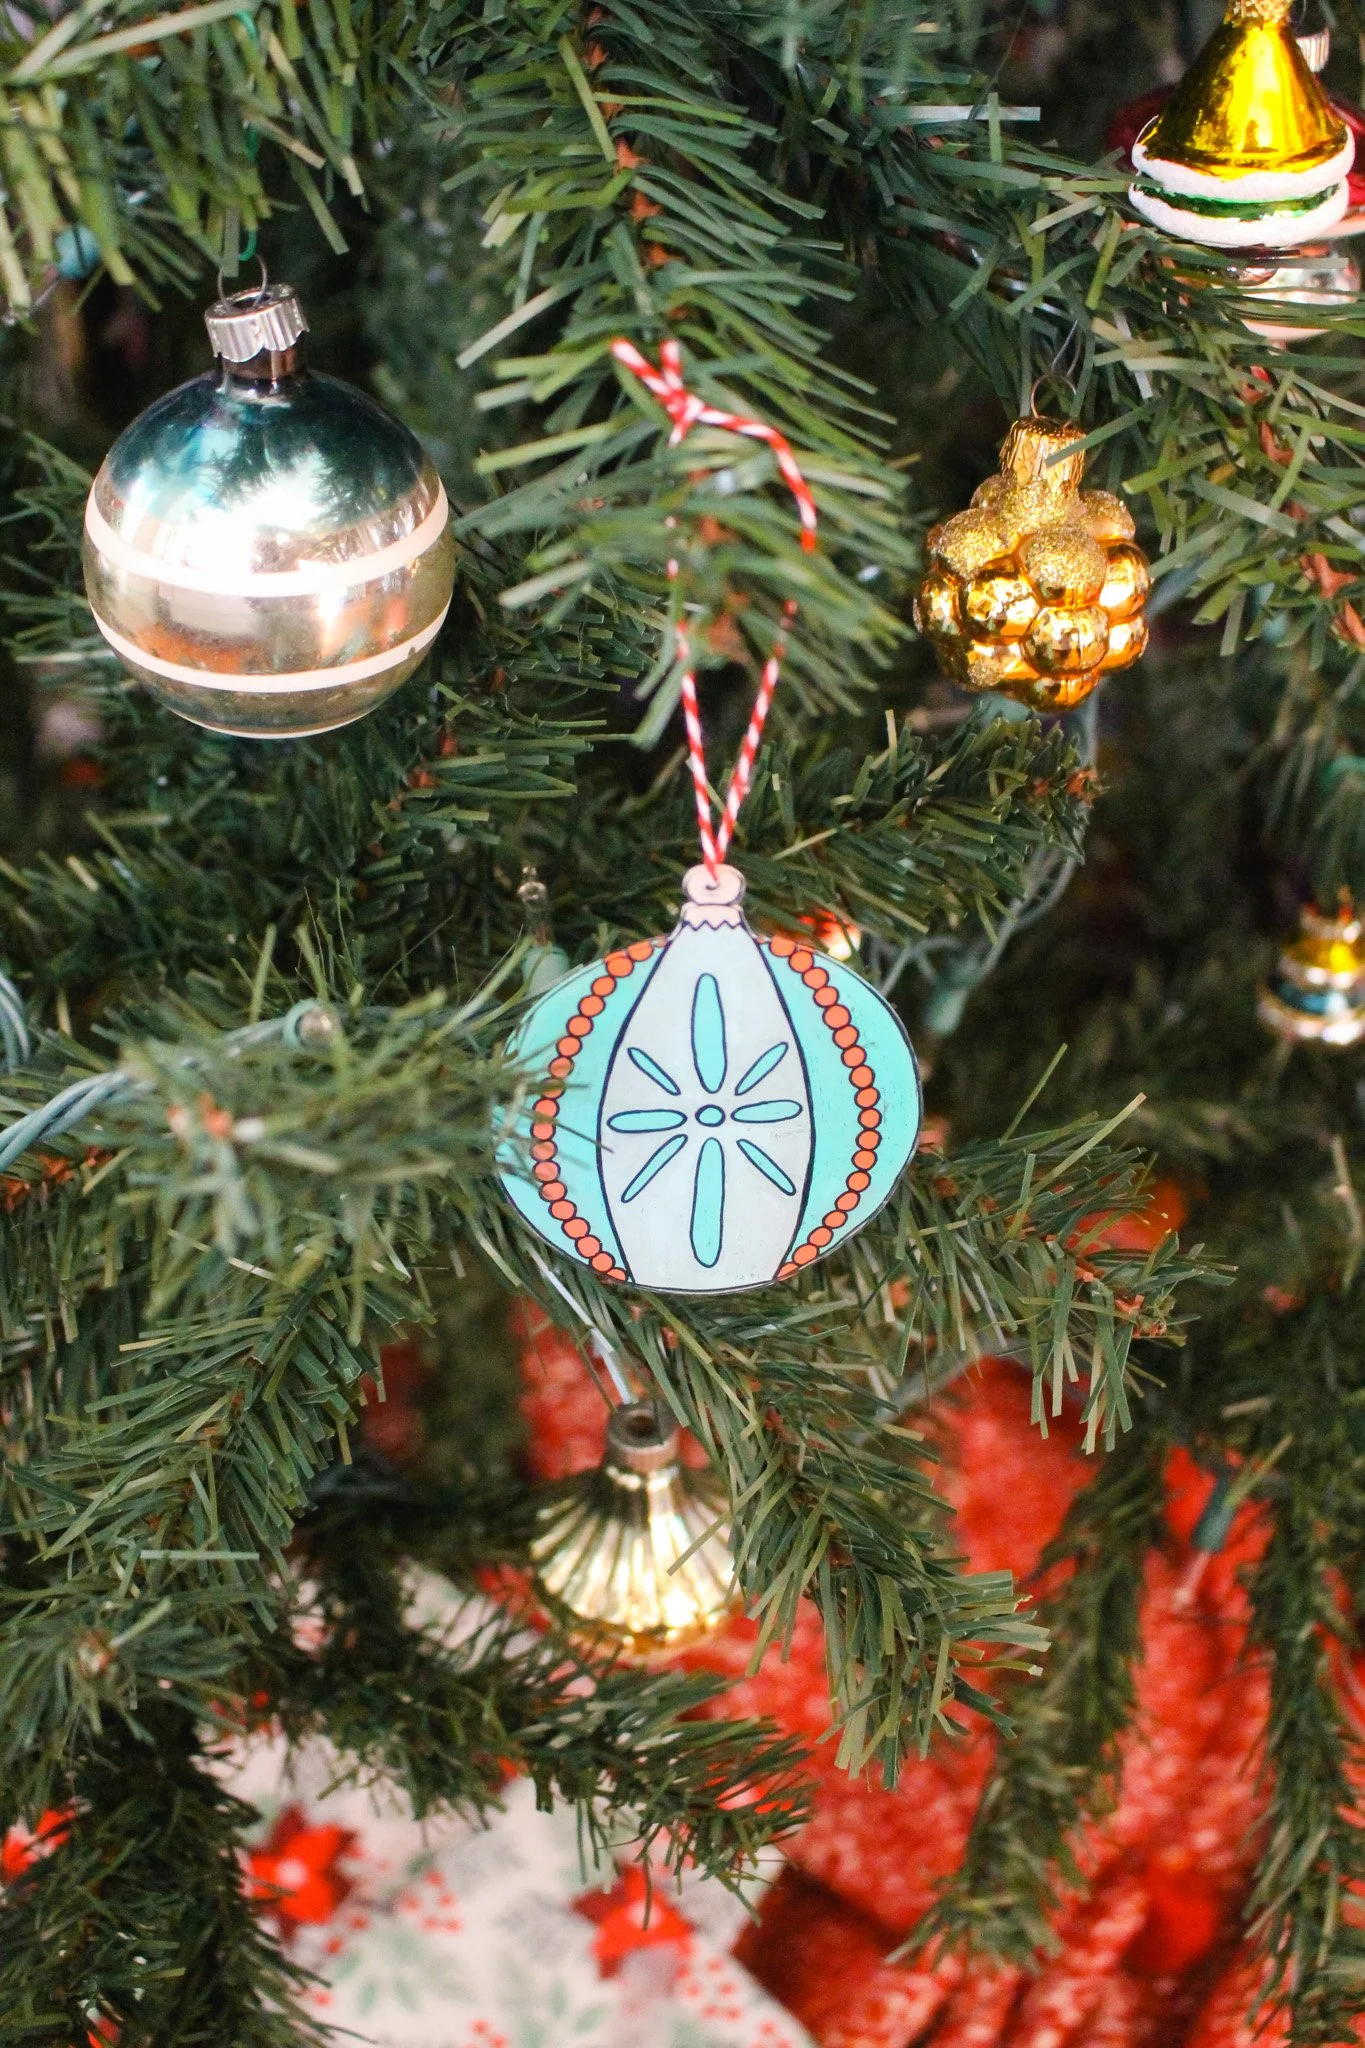
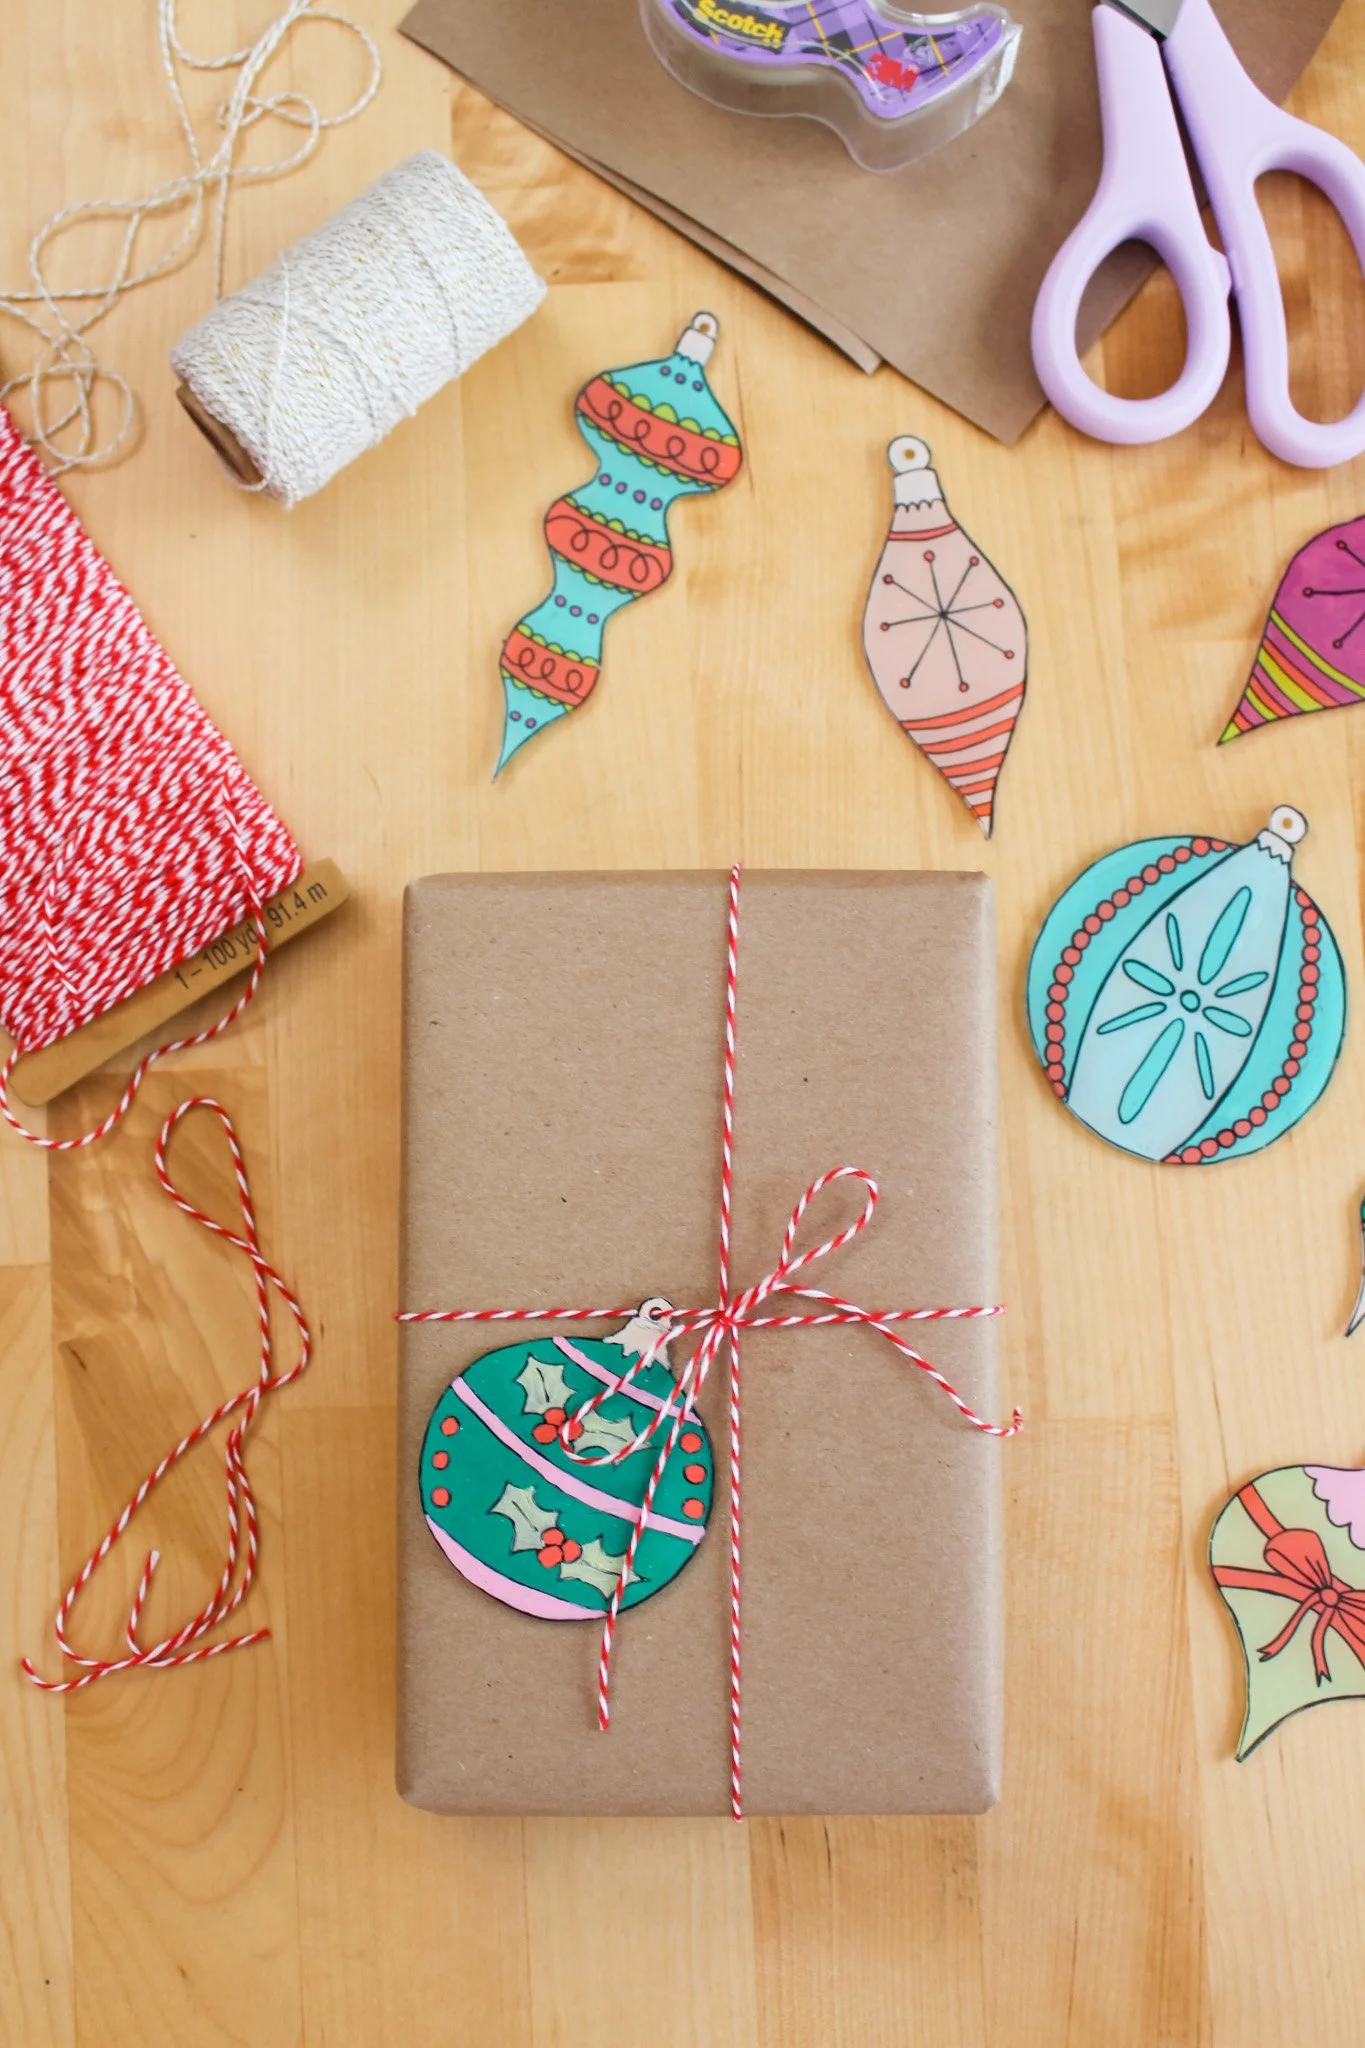
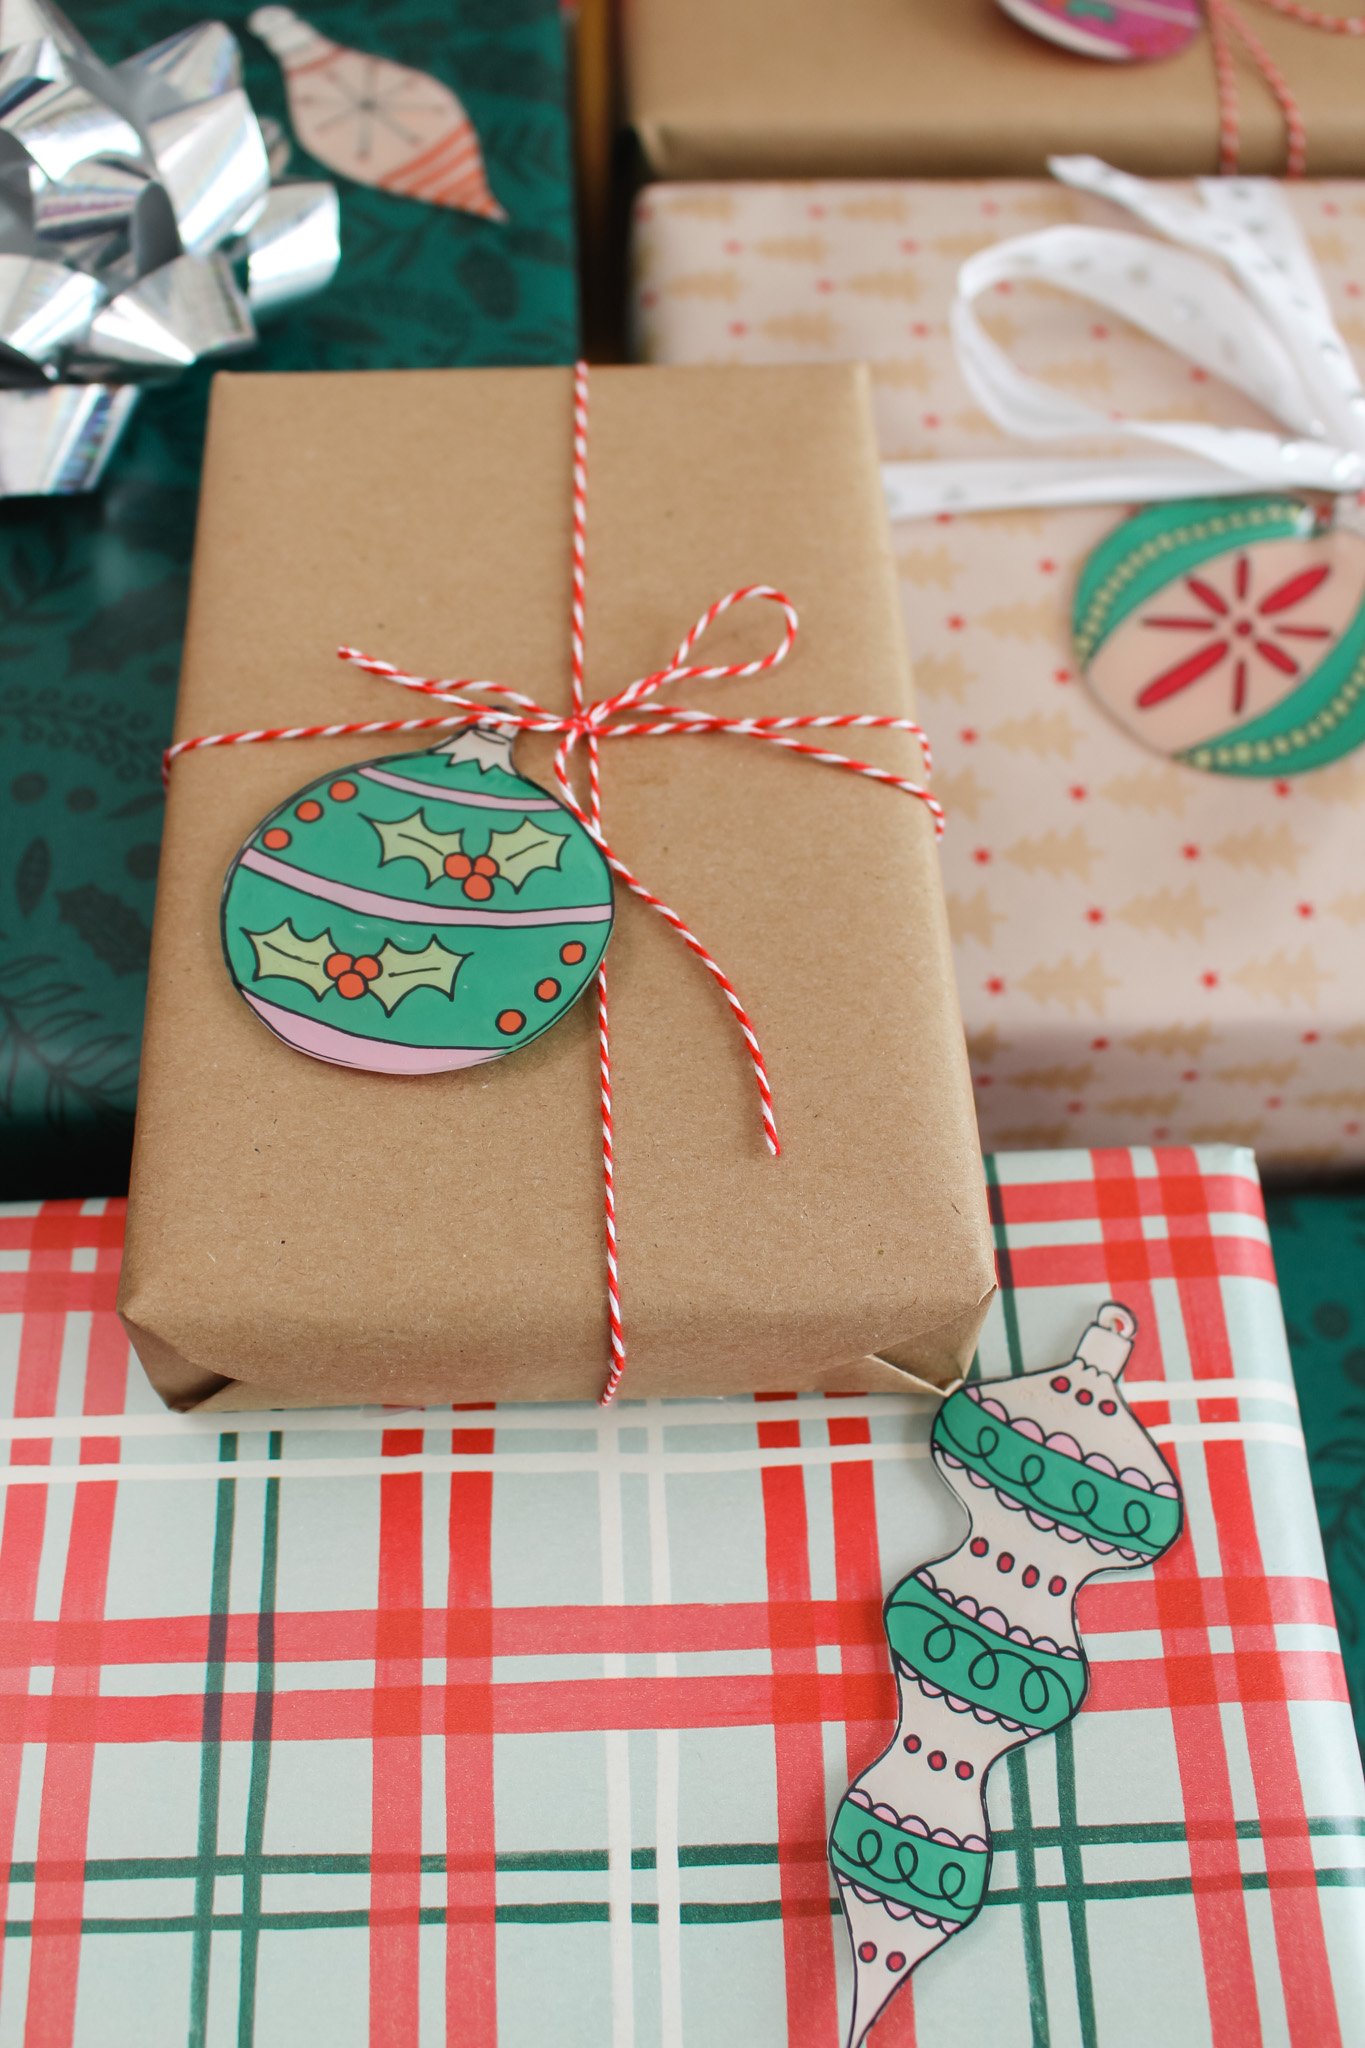
I can’t wait to use these gift tags year after year! You can even create your own designs or use your own paint color palette to correspond with your wrapping paper. And once you gift this gift tag to a friend, they can totally use it as an ornament on their Christmas tree! The gift that keeps on giving :)
If you try out this DIY be sure to let us know on Instagram - tag us @entertainidea or #entertaintheidea! Hope you all are having a lovely holiday season.
xo Rachael

