
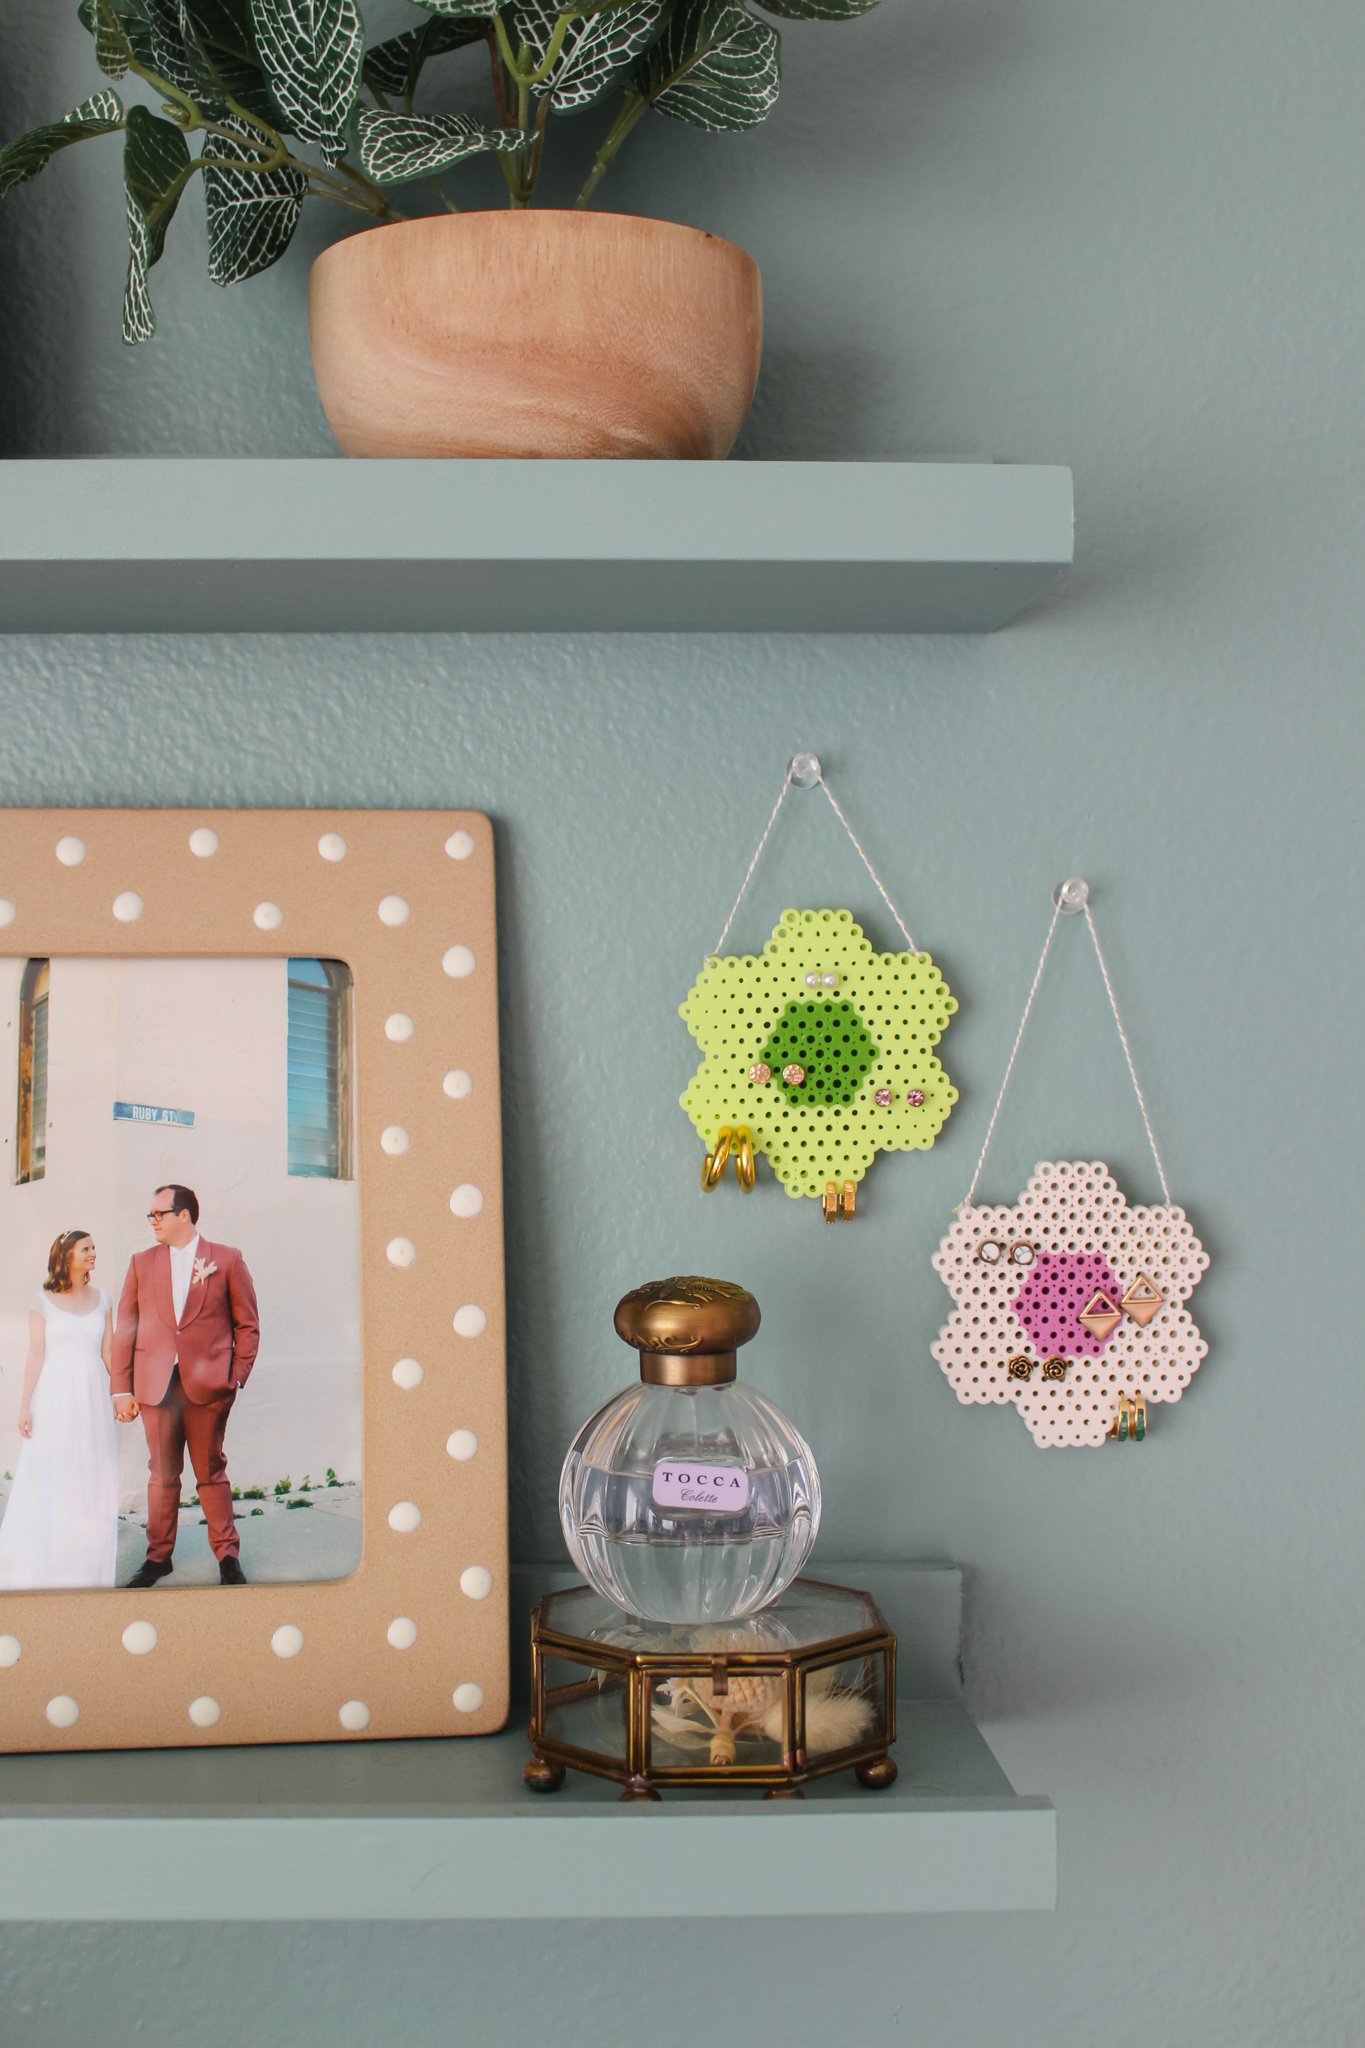
Perler Bead Earring Holder
Today we are back with another easy summer craft, a childhood favorite of yesteryears! Nothing screams arts & crafts nostalgia like the iconic Perler beads or fuse beads. This childhood craft staple was such a fun project that required lots of creativity in planning out your design and lots of quiet time (for the benefit of our parents & babysitters I’m sure) of monotonously placing tiny beads on a pegboard.
If you’re looking for a bit of relaxation, and also a new functional decor piece to store your jewelry, look no further than our tutorial below on how to make these fun daisy flower earring holders out of Perler beads! Happy Crafting!
Affiliate disclosure: This post contains several affiliate links. As an Amazon Associate, I may earn commissions from qualifying purchases from Amazon.com. Thank you for your support!

You will need:
Perler beads (I used this tropical color pack)
Perler bead pegboard (the large hexagon shape in this pack works best — or any Perler bead pegboard where the pegs are situated in the same arrangement where the rows of pegs are off centered every other row)
Masking tape
Scissors
Iron & ironing board
Parchment paper
String, ribbon, or baker’s twine
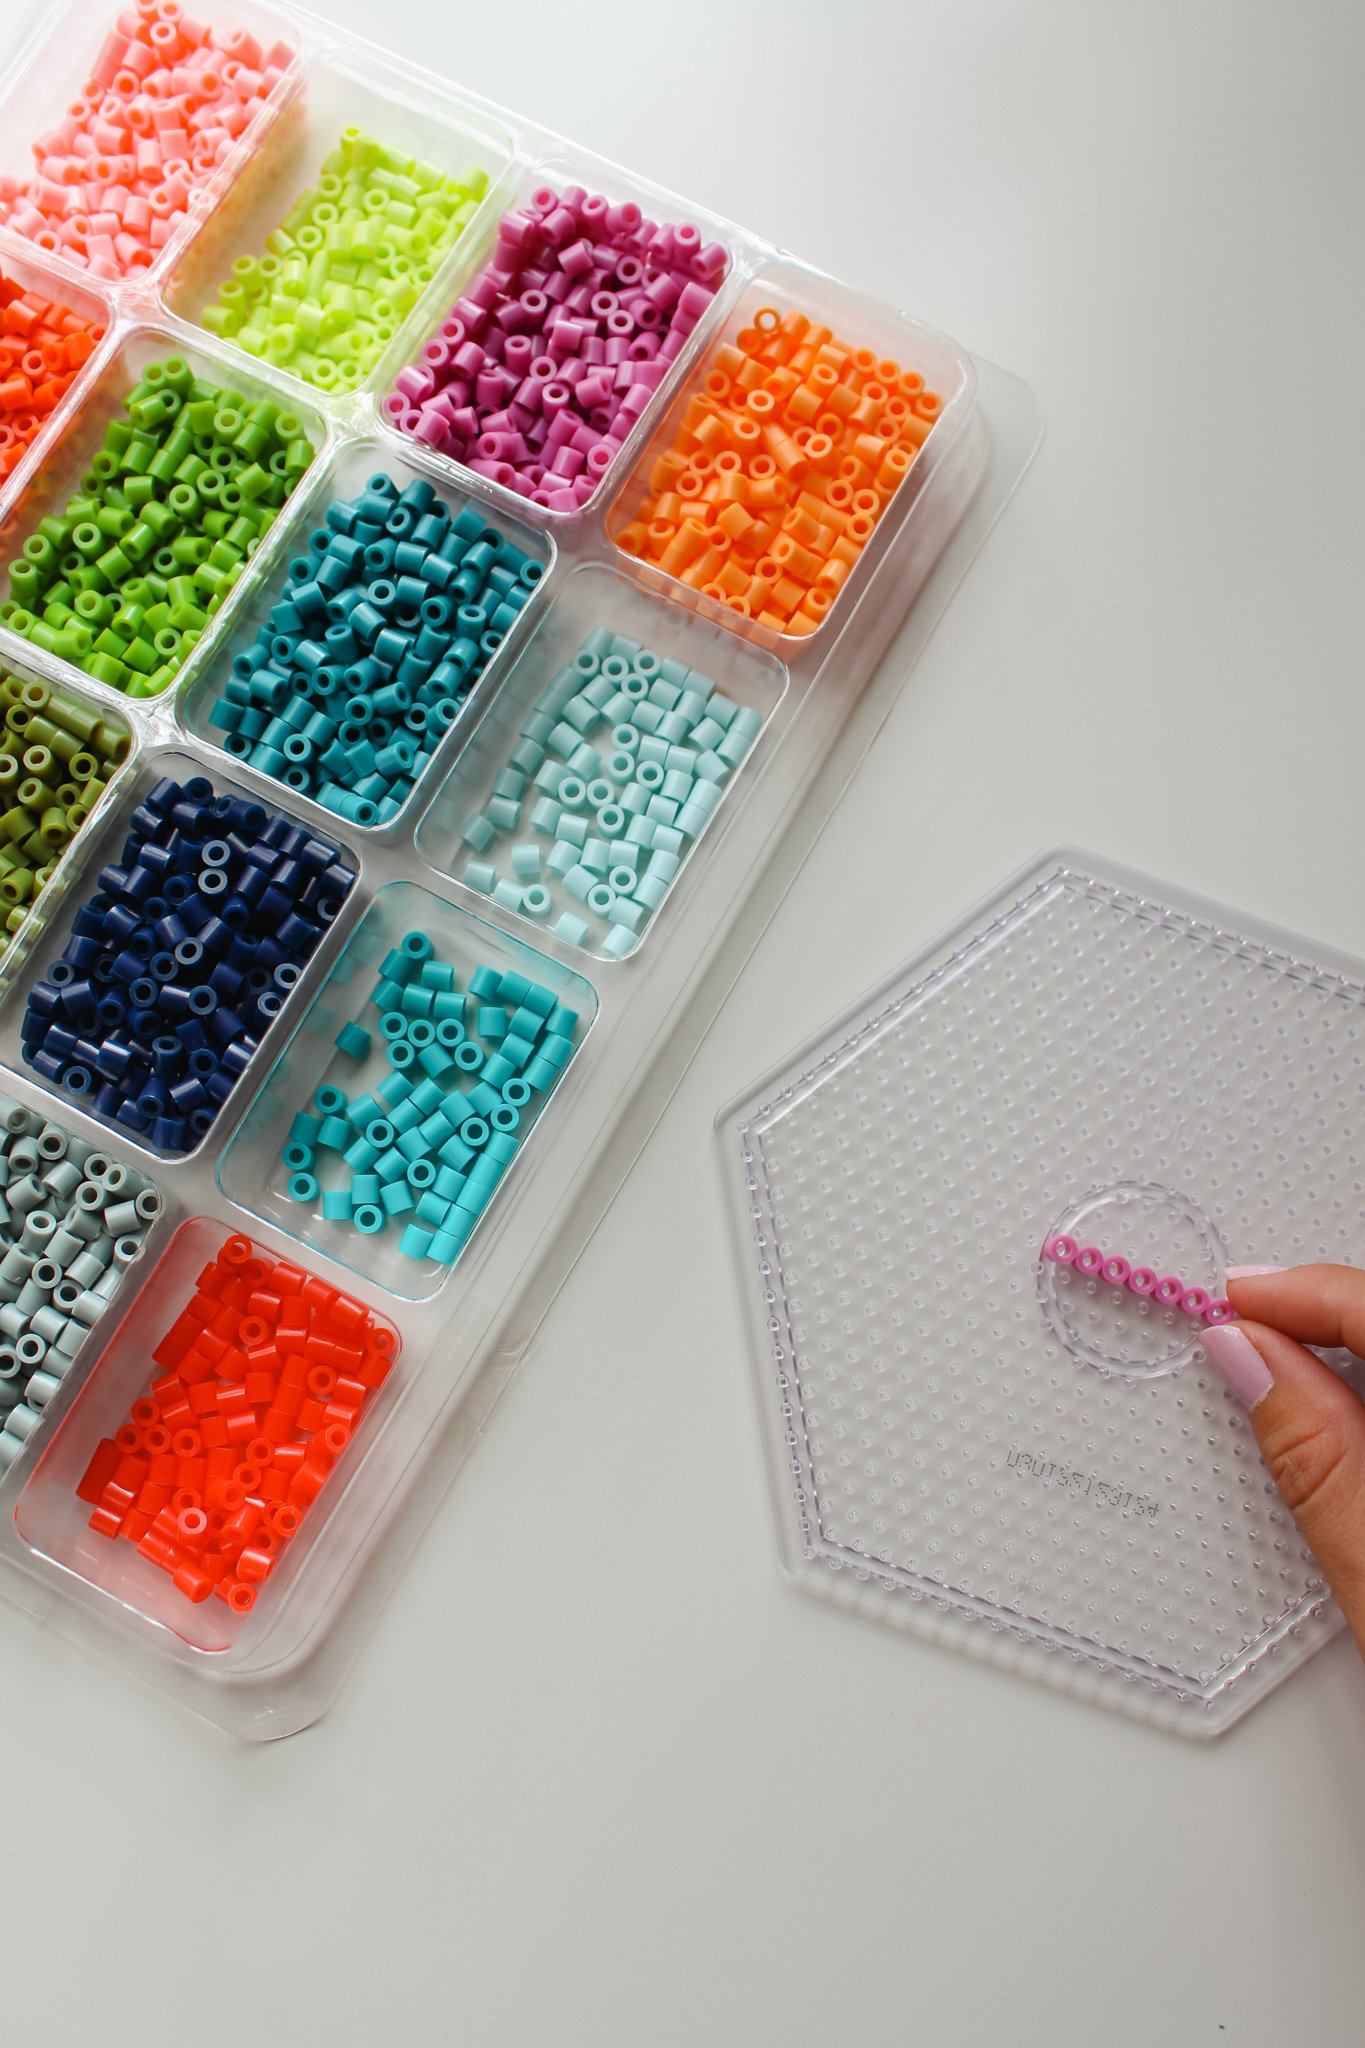
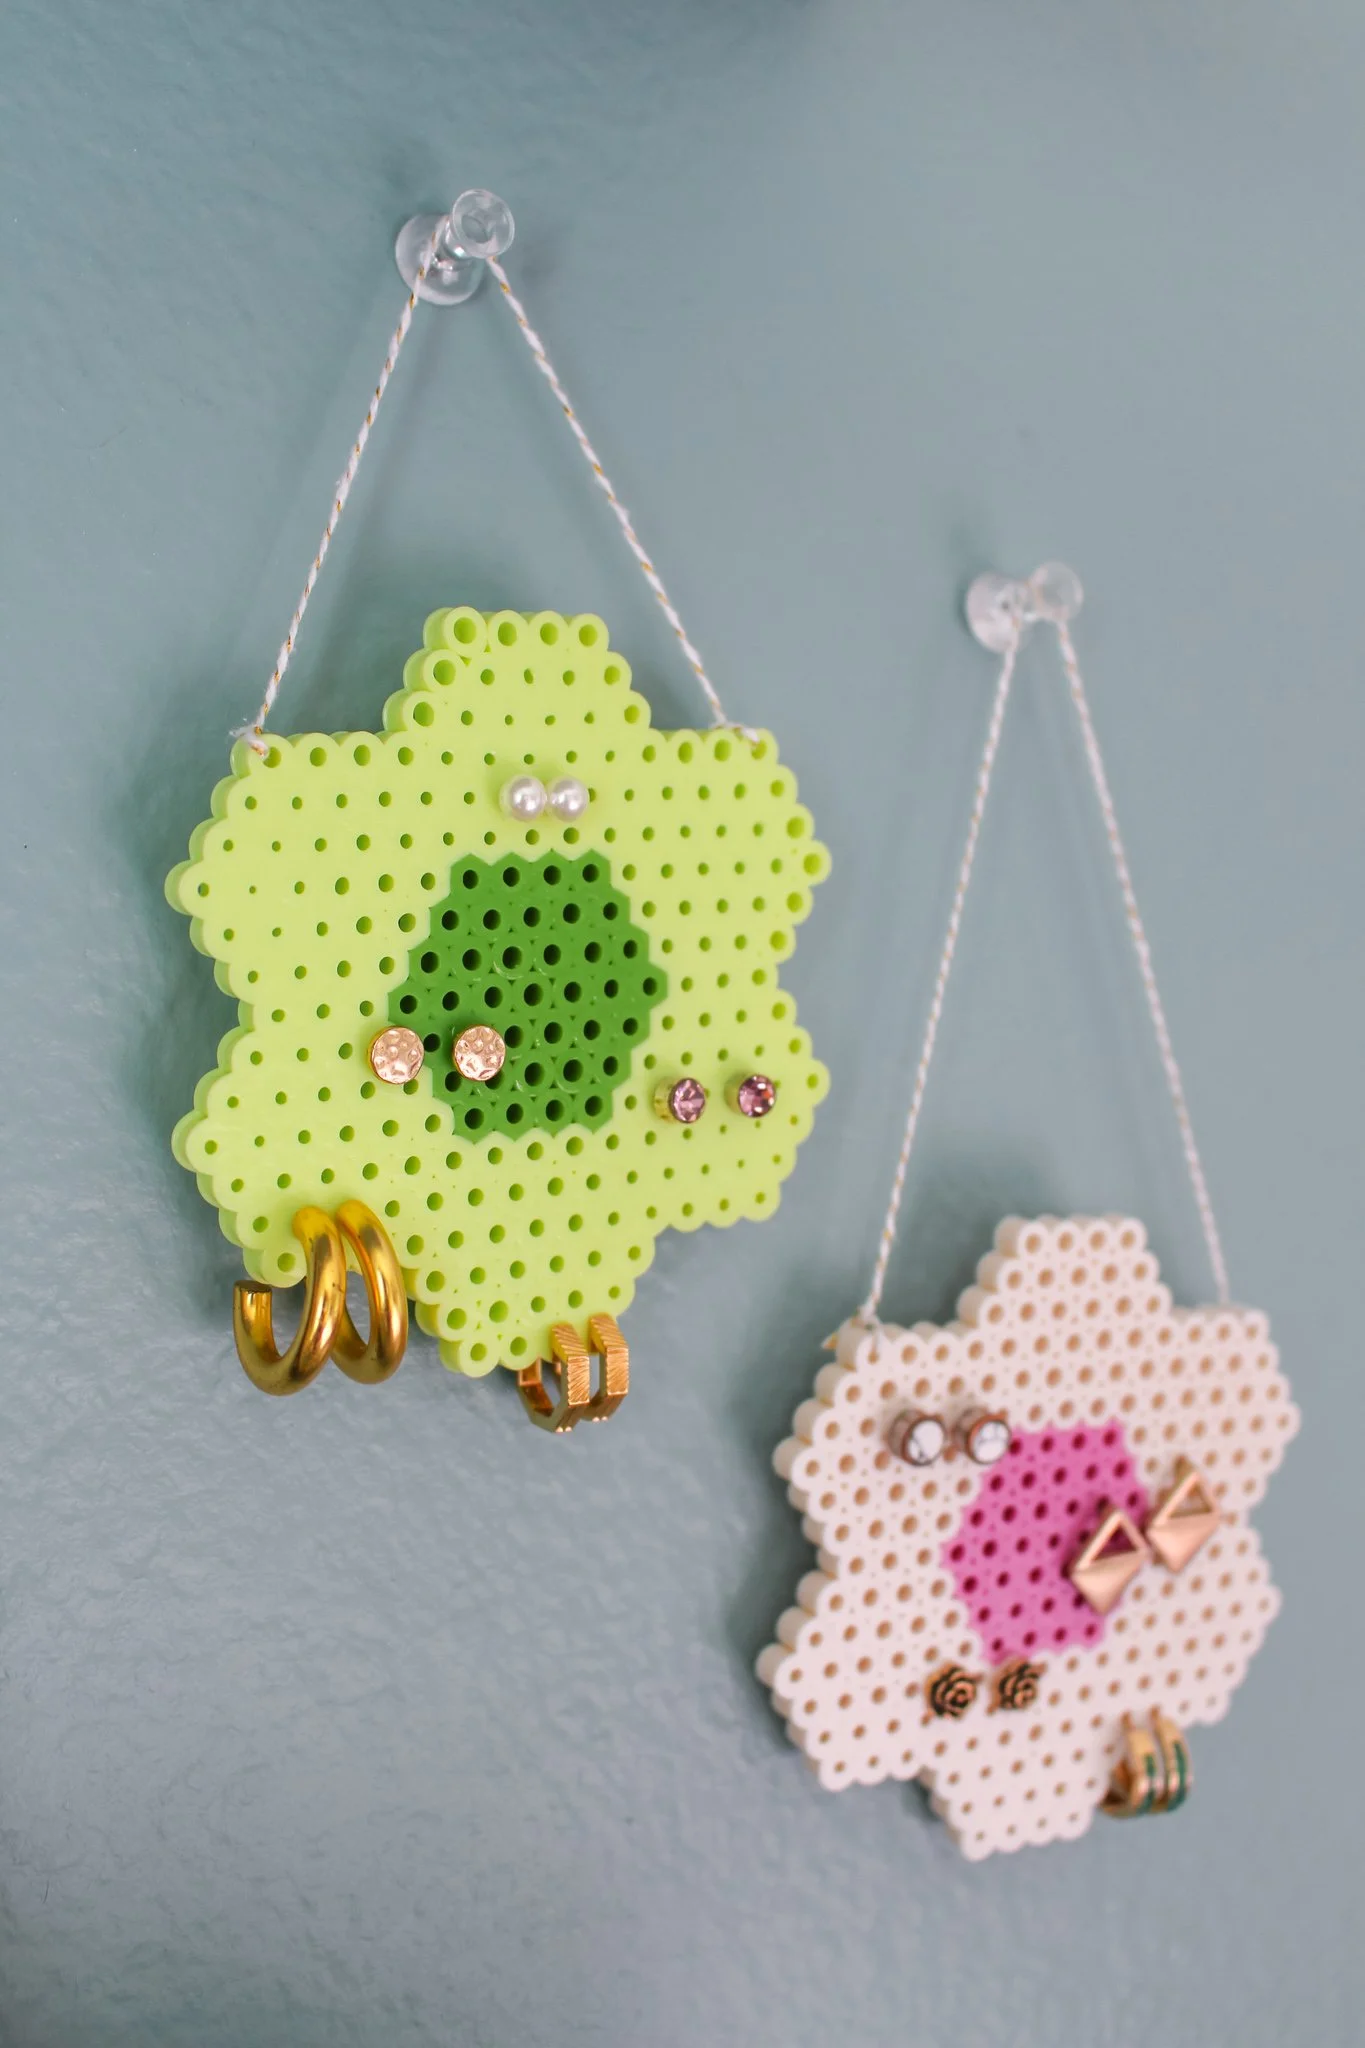
STEP 1: Pick out two colors for your daisy flower pattern. Starting with your center color, place 7 beads in a row in the very center.


STEP 2: Now working upwards and downwards, adding a row of beads that is one less than the row before to create this hexagon shape. So the rows will have 4 beads, 5 beads, 6 beads, 7 beads, 6 beads, 5 beads, 4 beads.
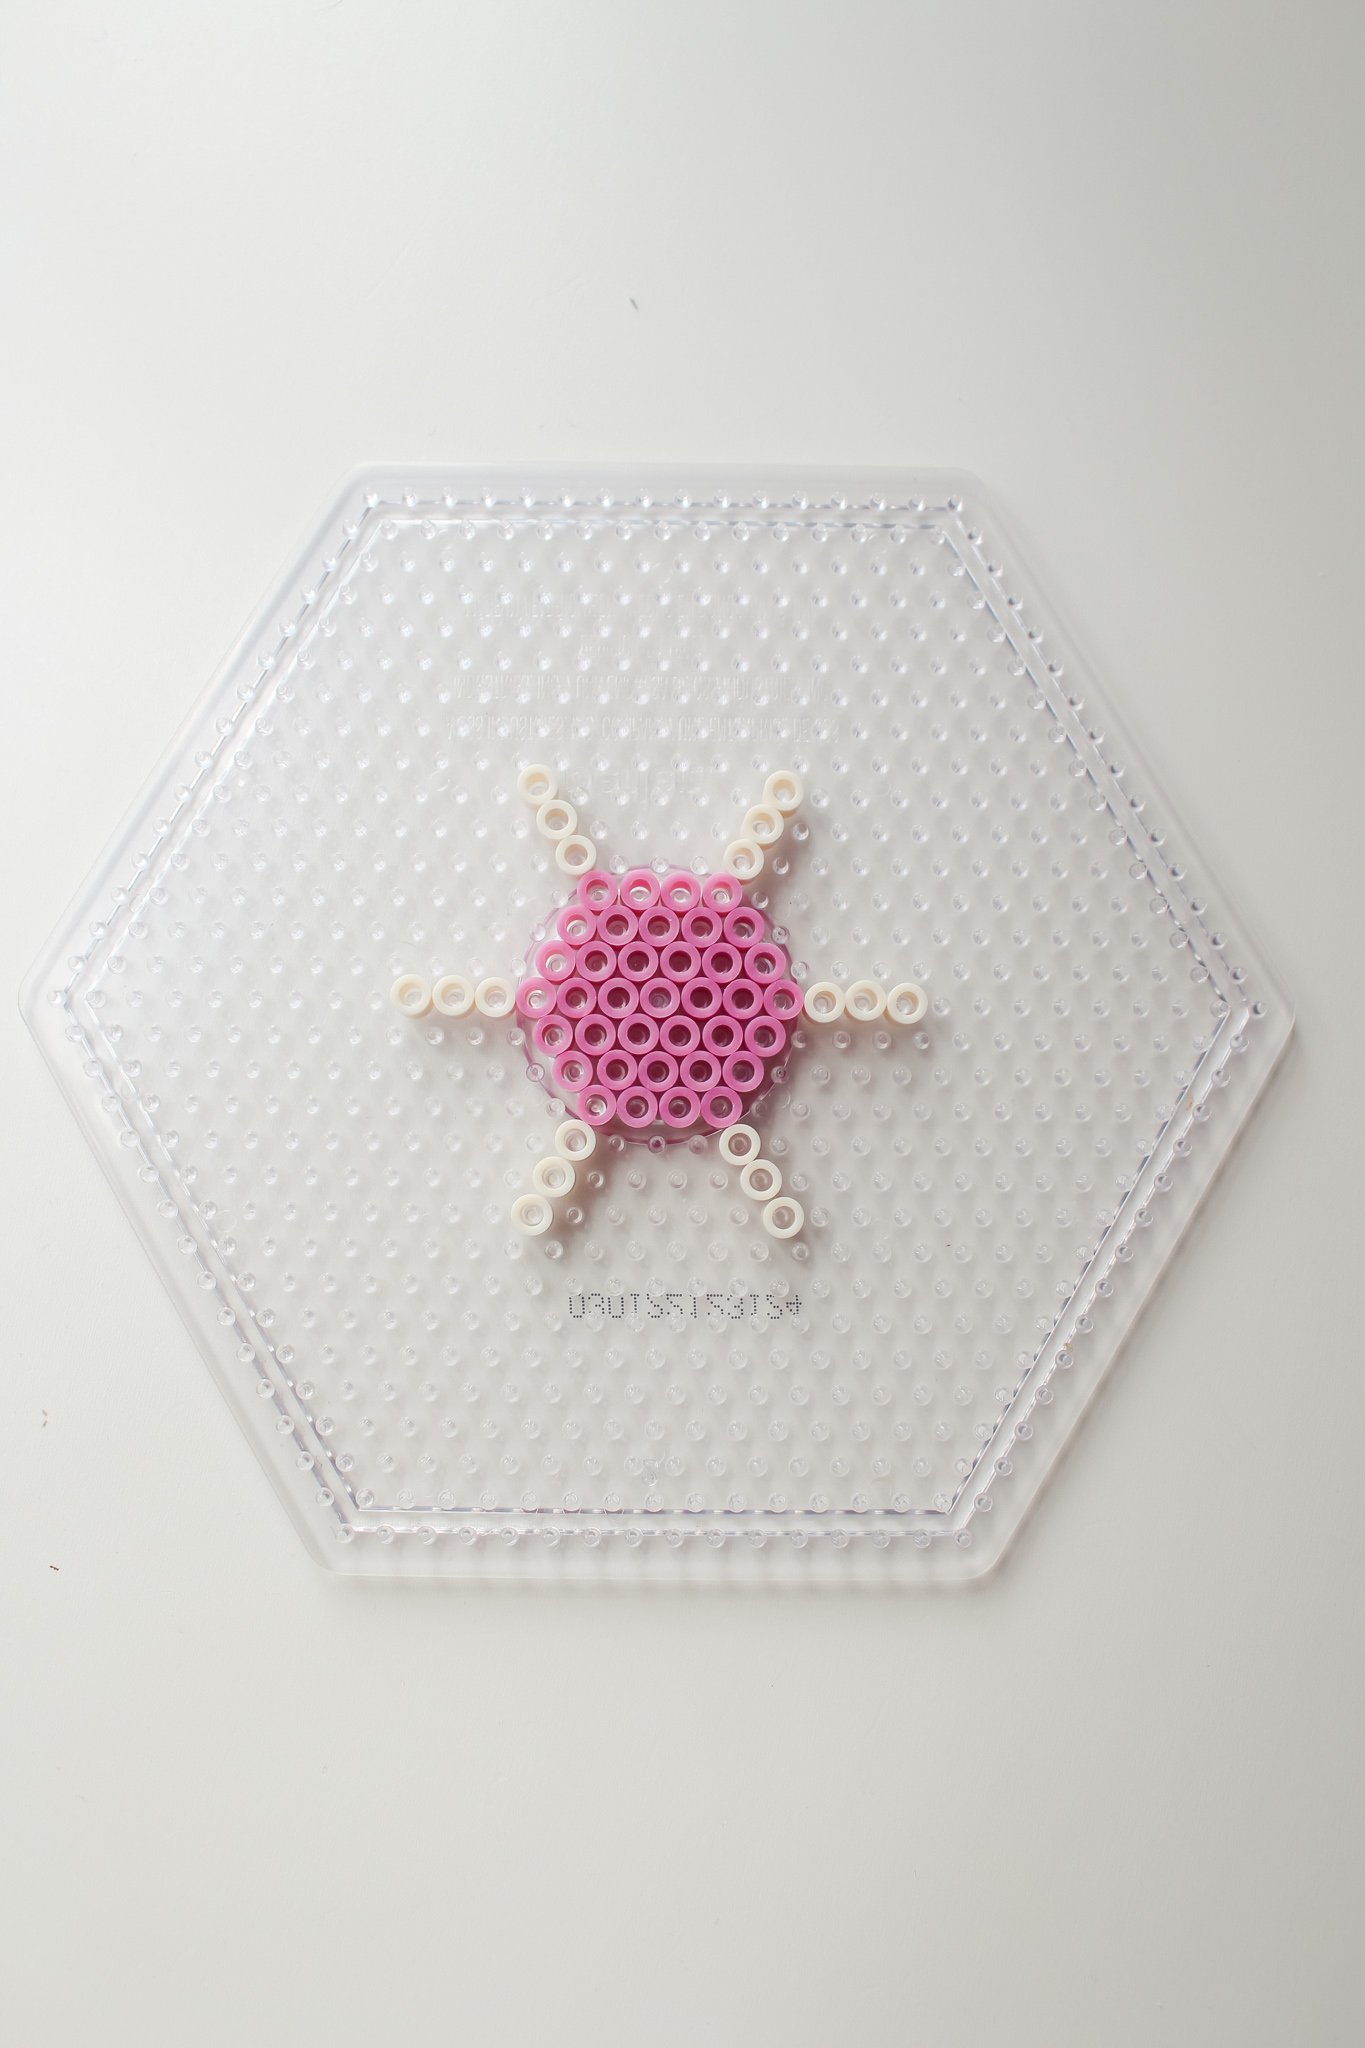

STEP 3: At each corner point of your hexagon, place a line outward of 3 beads in your petal color.
STEP 4: Now complete the hexagon shape for each petal.

STEP 5: Fill in the hexagon petals with beads to complete your flower shape.

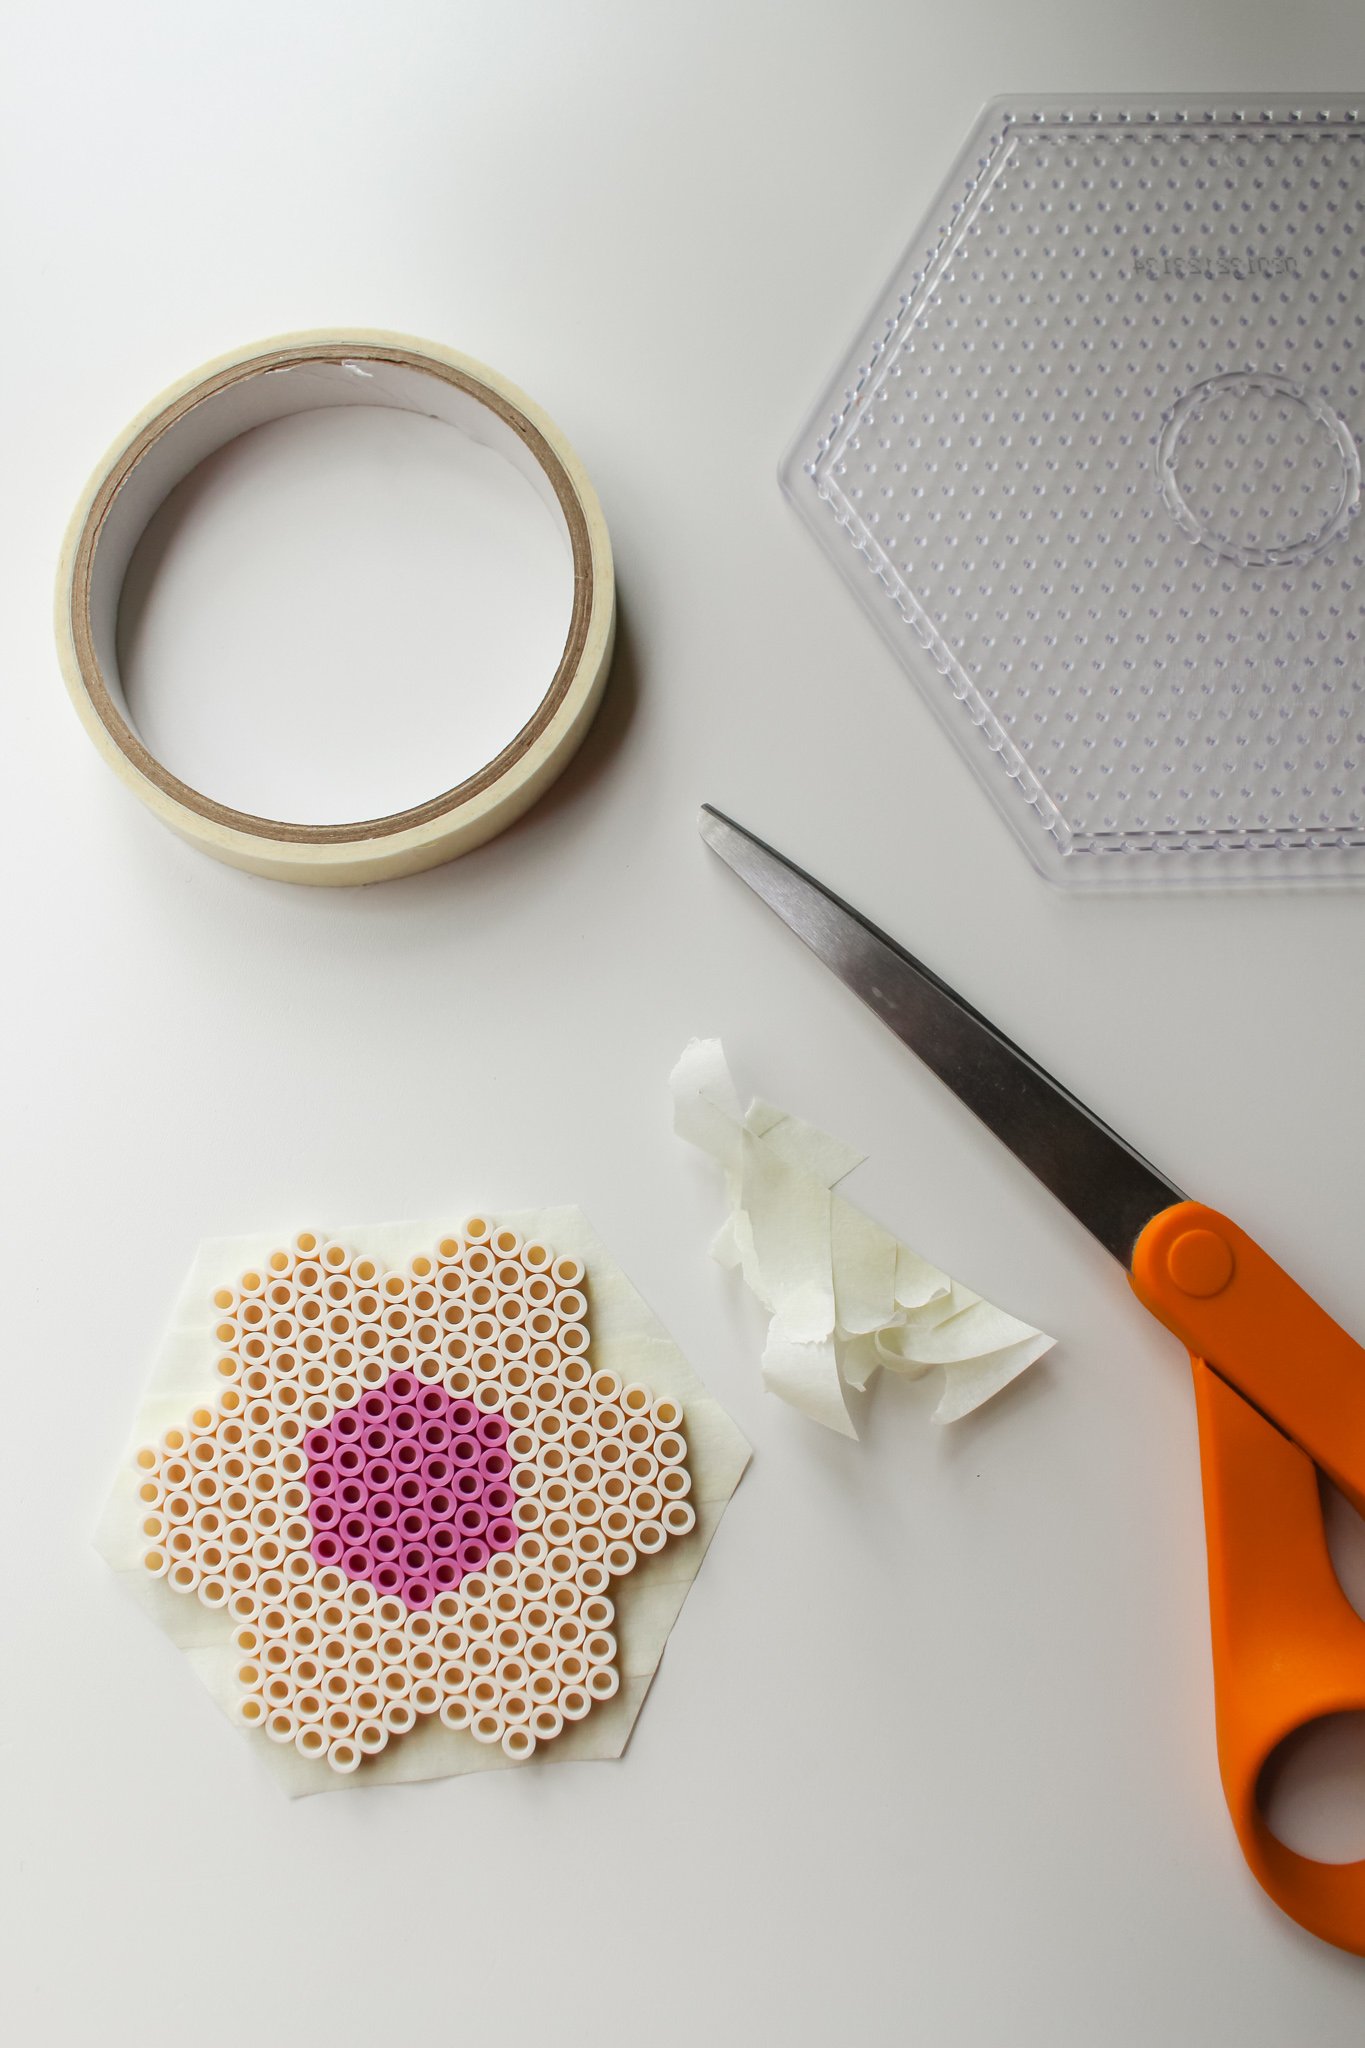
STEP 6: Cut several pieces of masking tape to cover the entire surface of your flower shape. Press down firmly against the beads to ensure every one is stuck down. Now gently turn your pegboard over so the beaded flower is removed from the board. Use your scissors to cut off any excess masking tape along the edges.
**TIP: This step is to make sure you don’t melt your pegboard with your iron, it is optional, you could technically leave the beads on the pegboard while you carefully iron one side, but I found this masking tape step useful!


STEP 7: Heat up your iron on high heat. Lay your beaded flower (masking tape side down) on your ironing board. Place a piece of parchment paper on top of the beads and carefully iron over the face of the flower to gently meld your Perler beads together.
Be sure to keep the iron moving around in circles to make sure the beads don’t overly melt in one spot. You only need to use the iron for a few second and then lift up the parchment paper as you go to check if some areas need more heat. I found the edges were the trickiest spots so I had to go over them a few times.
You’re attempting to give the entire surface a very consistent amount of heat, enough to melt the beads together but not enough to close up your holes. It may take a few tries, my first attempt was a disaster and I had to start over with a whole new set of beads!
STEP 8: Once your first side is melded together to your liking, pull off the parchment paper and turn the flower over. Carefully remove the masking tape from the back side. Then repeat STEP 7 with the parchment paper and iron on the back side of your flower shape.
While the shape cools, lay a heavy book or object over the beads and then turn it over and do the same to the back side to keep the flower flat while cooling.

STEP 9: Lastly, you will want to create some way to display your earring holder, so for my project I decided to hang a few of these flowers from tacks on my wall. So I cut a piece of twine and pulled the ends through two different holes on the petals (as shown below), tying a knot on both sides.
STEP 10: Push your earrings through the holes in the Perler beads and add the earring backings to the back side. Hoop earrings work best dangled from the bottom hoops of the flower. Then your earring holders are ready to display on your wall!


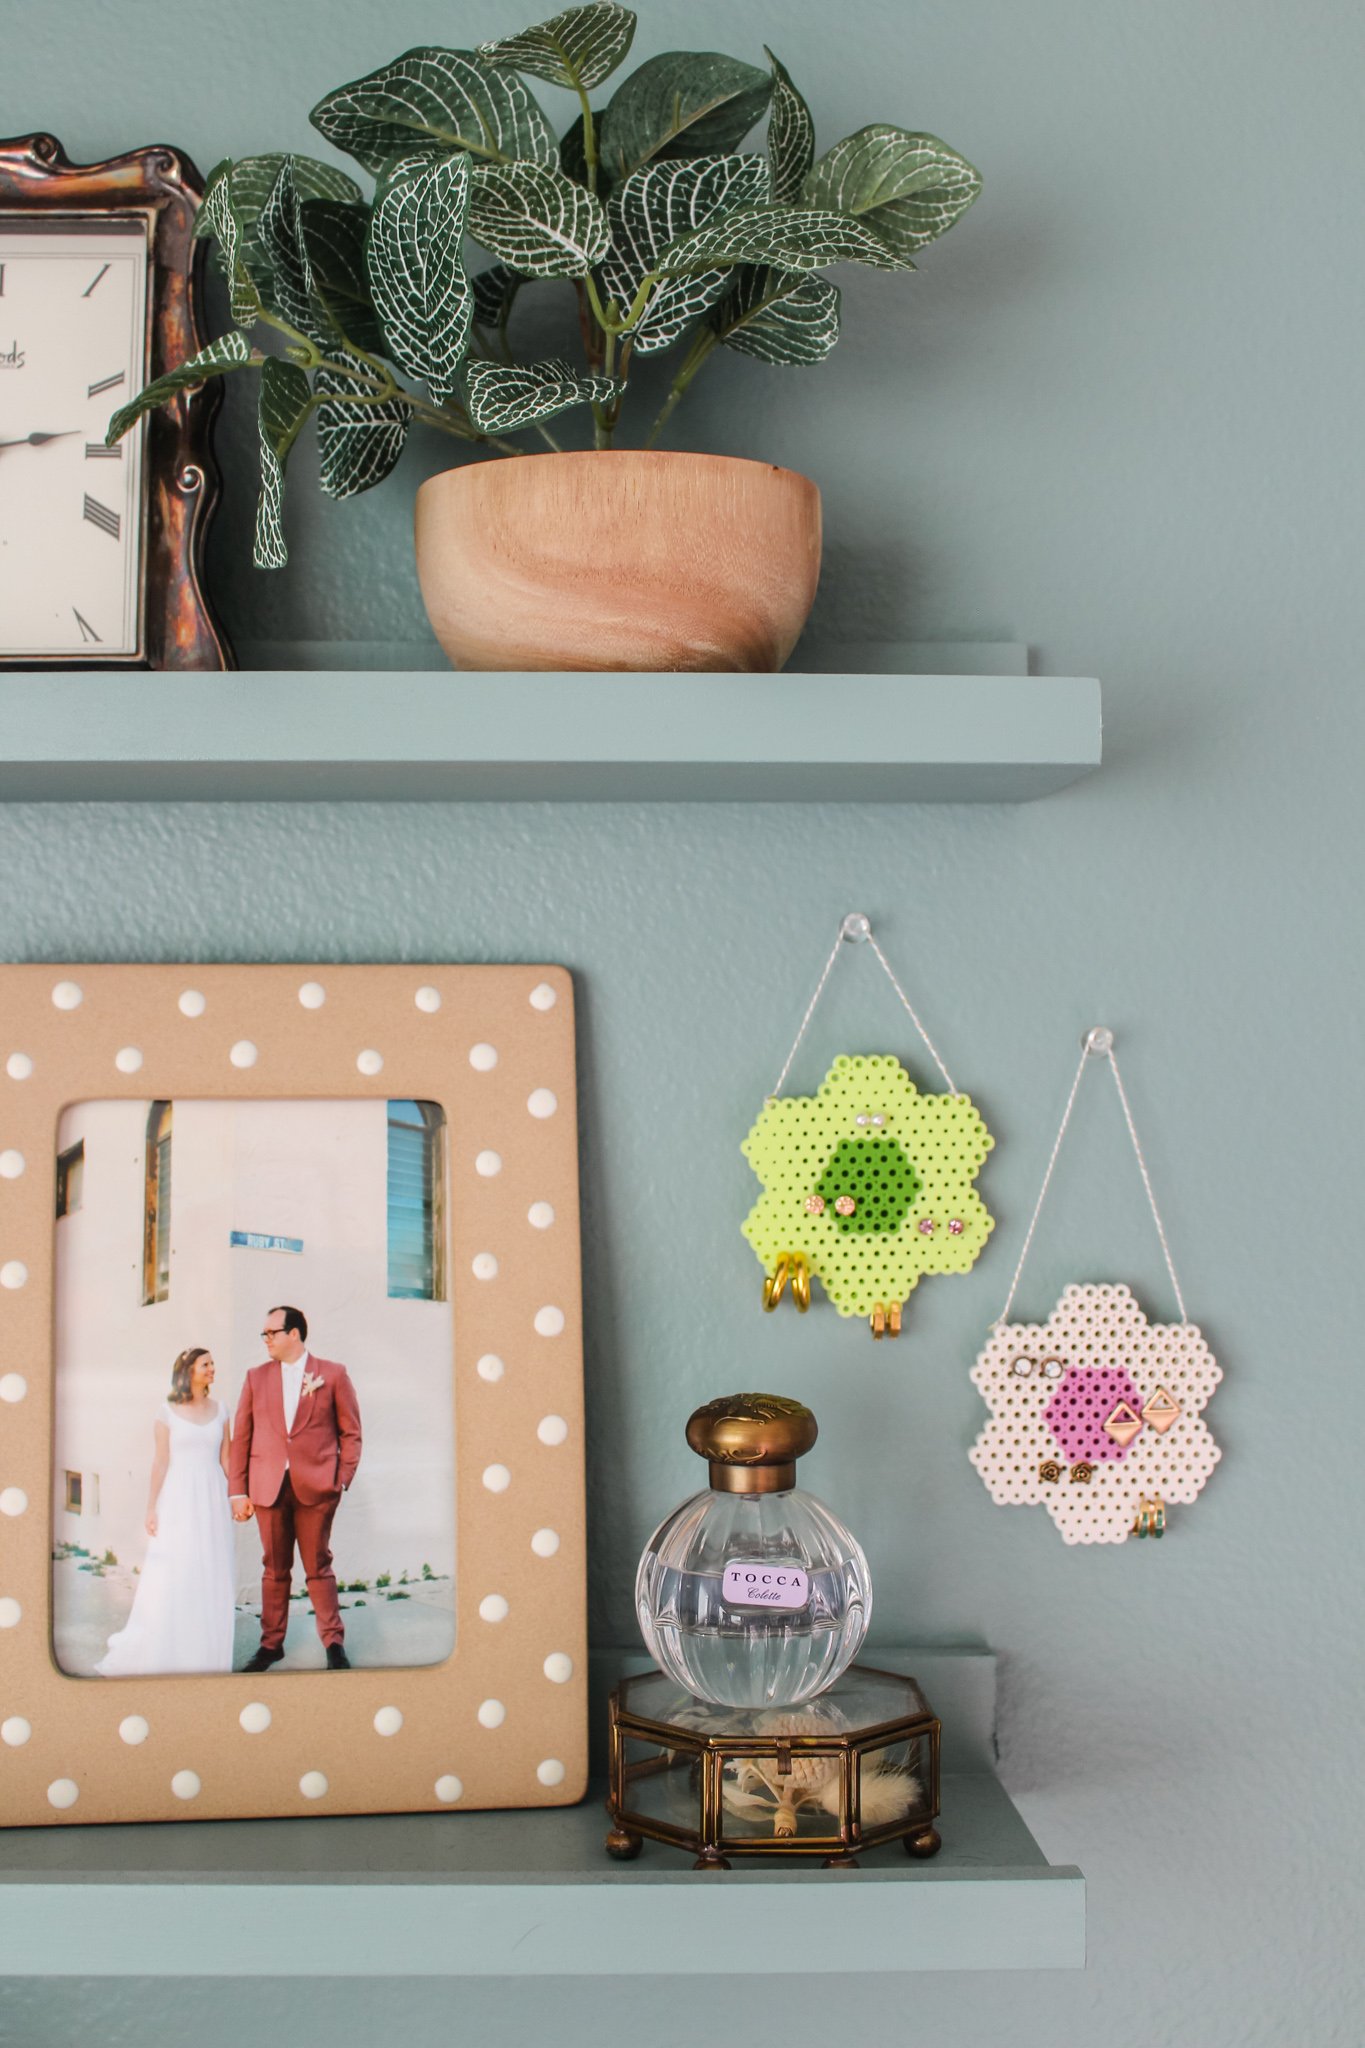
I love how these little earring holders turned out! Now I wanna go shop for some new earrings to display :P
If you try out this project or something similar, be sure to show us on instagram! @entertainidea or tag #entertaintheidea. Can’t wait to see!
xo Rachael

