
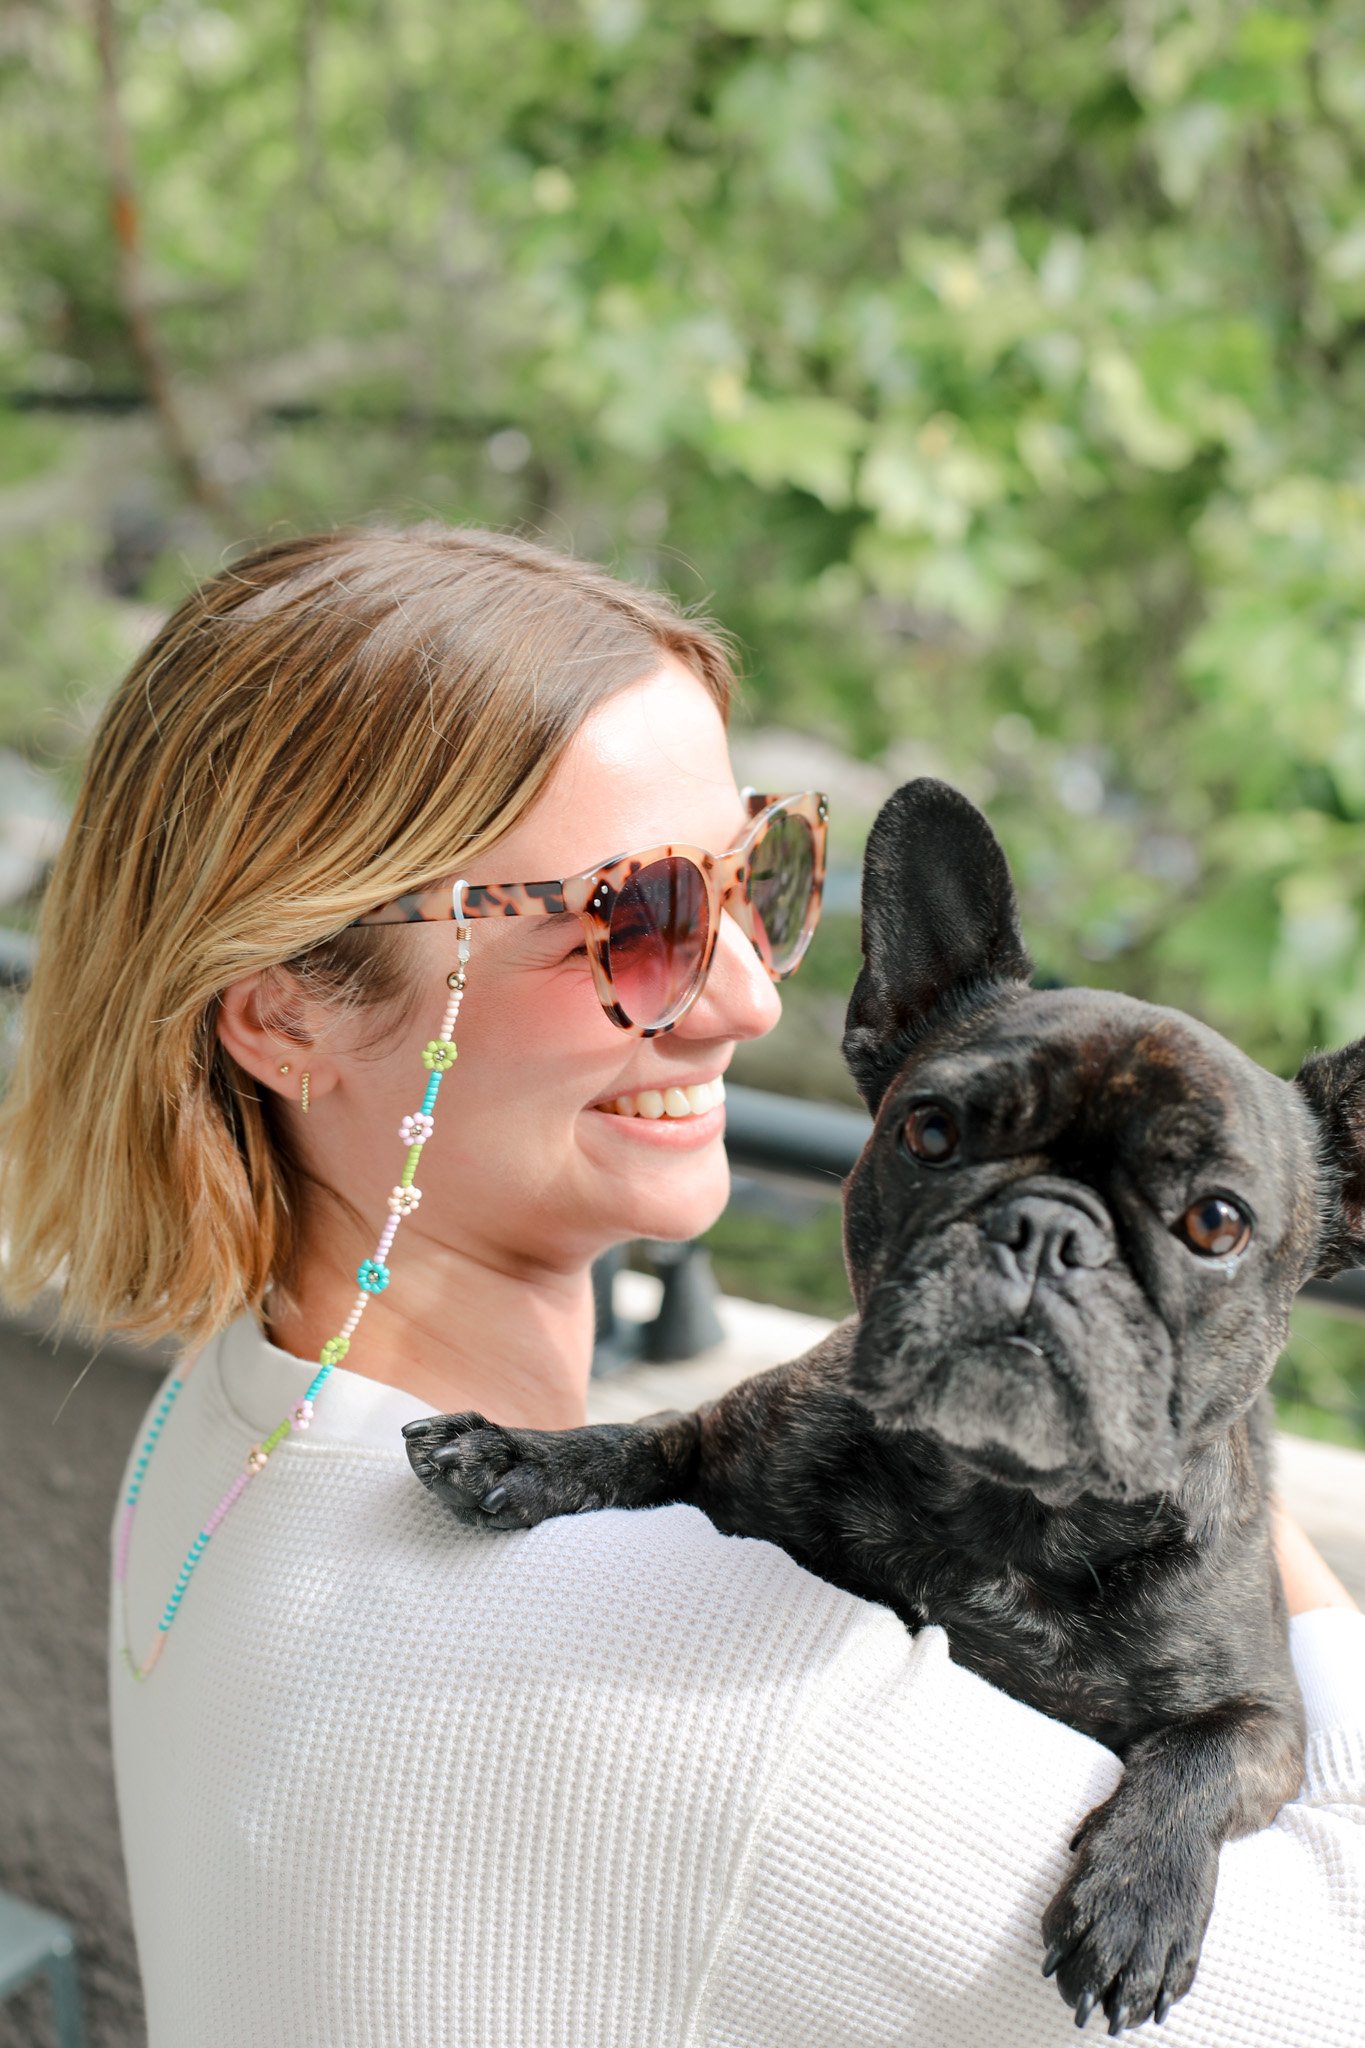
DIY Beaded Daisy Sunglasses Chain
With the sunny weather approaching, it is important to always have your sunglasses within arms reach. So check out today’s DIY project idea to learn how to make your own beaded sunglasses chain!
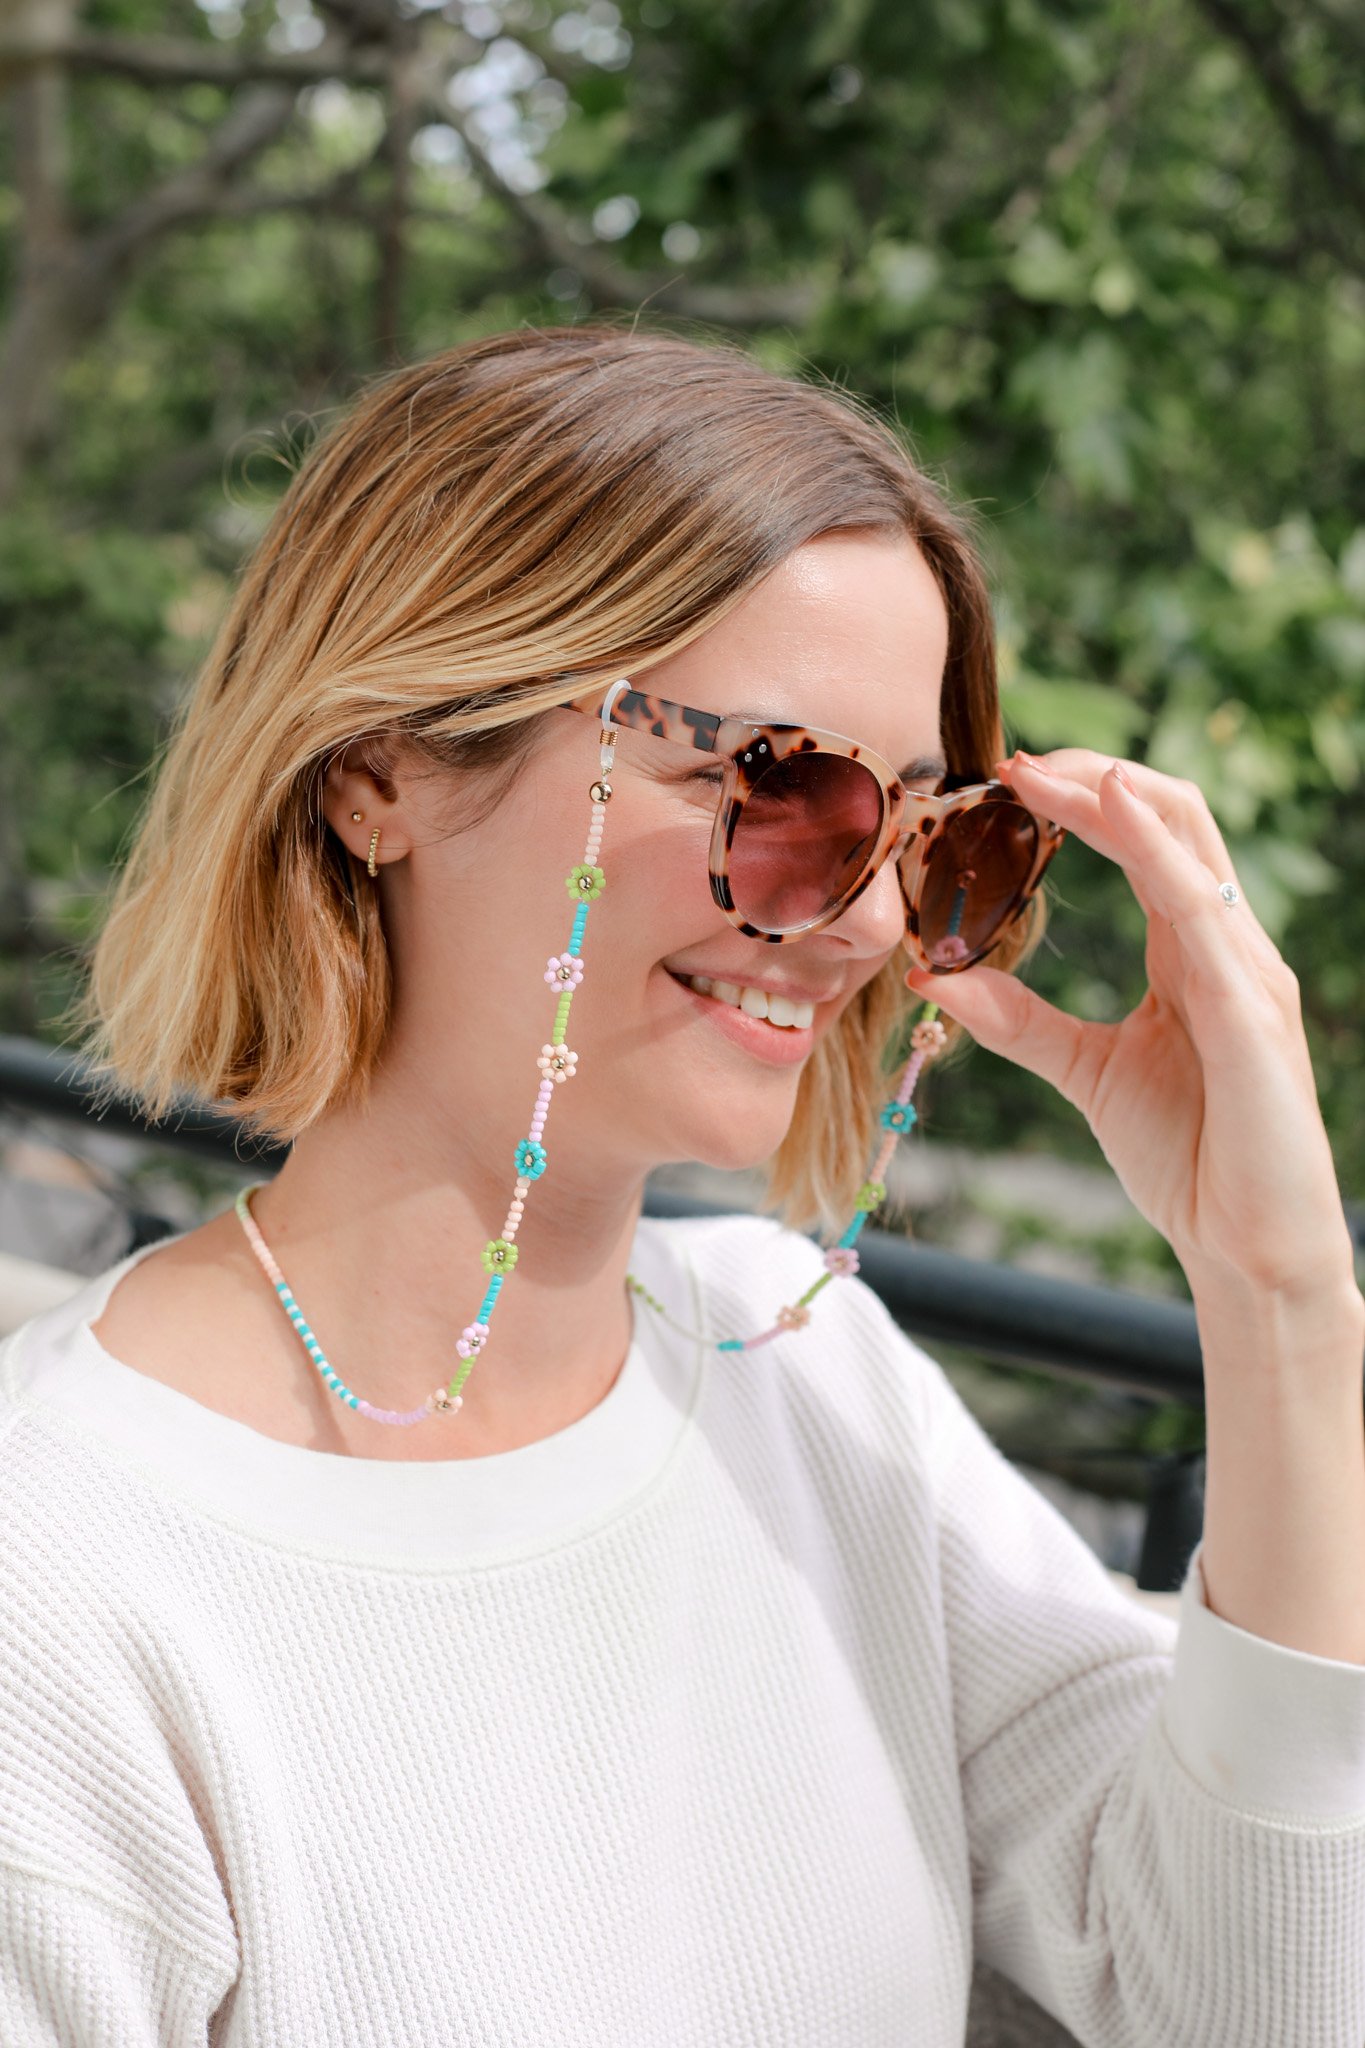
We all know that everyone has their own stockpile of beads at home at the moment with all the Taylor Swift Eras Tour friendship bracelets being made and dispersed. So put those extra beads to good use with another useful summer accessory. Follow along below to see how I made this beaded daisy sunglasses chain.
Affiliate disclosure: This post contains several affiliate links. As an Amazon Associate, I may earn commissions from qualifying purchases from Amazon.com. Thank you for your support!
HOW TO MAKE YOUR OWN BEADED DAISY SUNGLASSES CHAIN

Supplies:
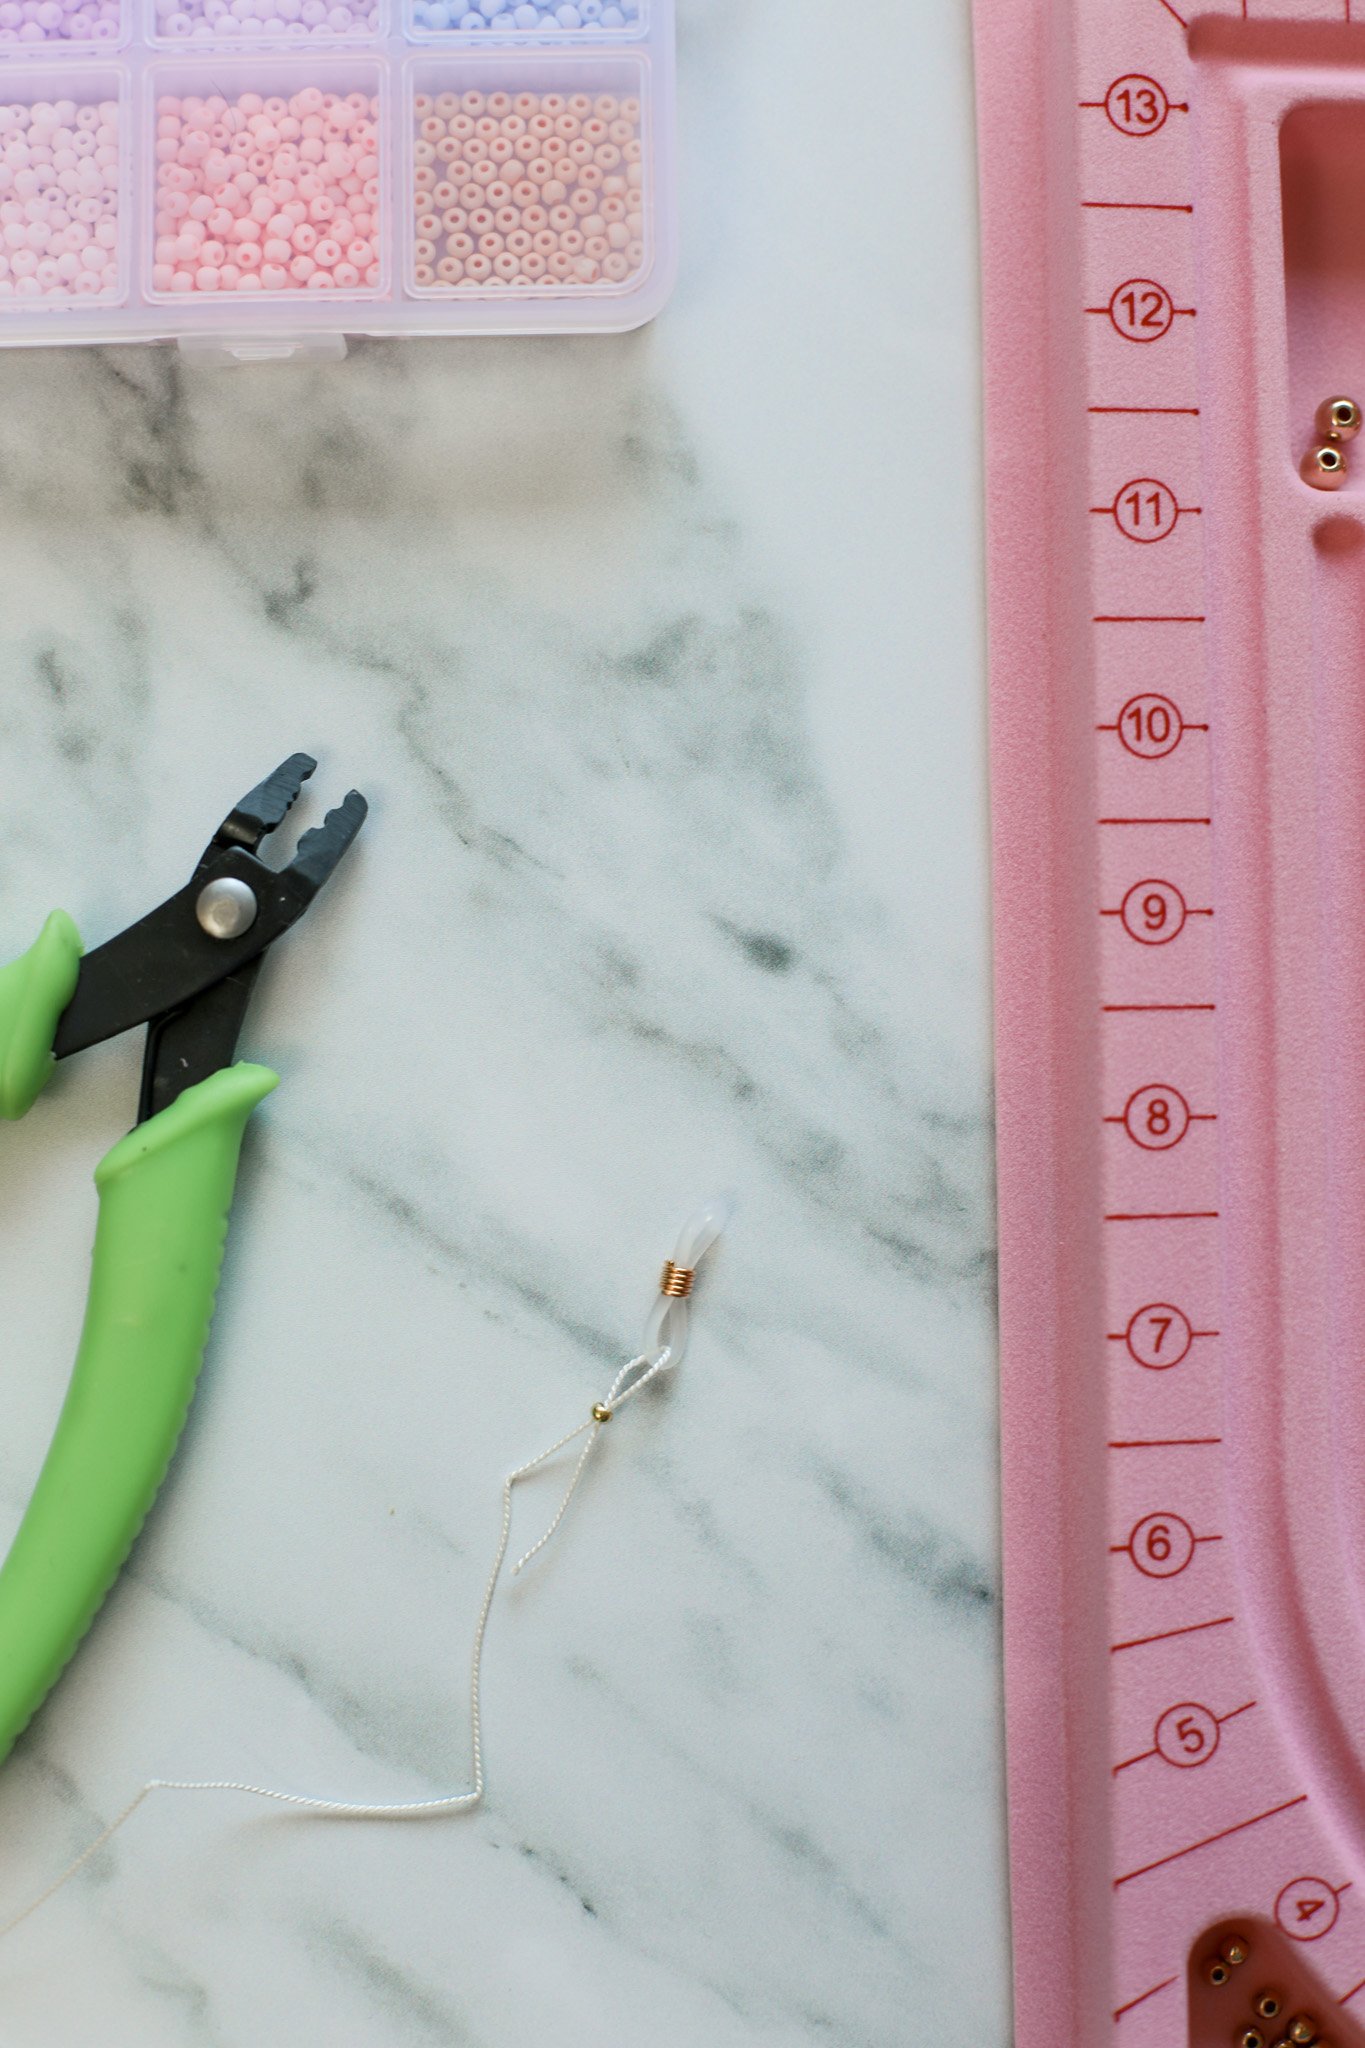
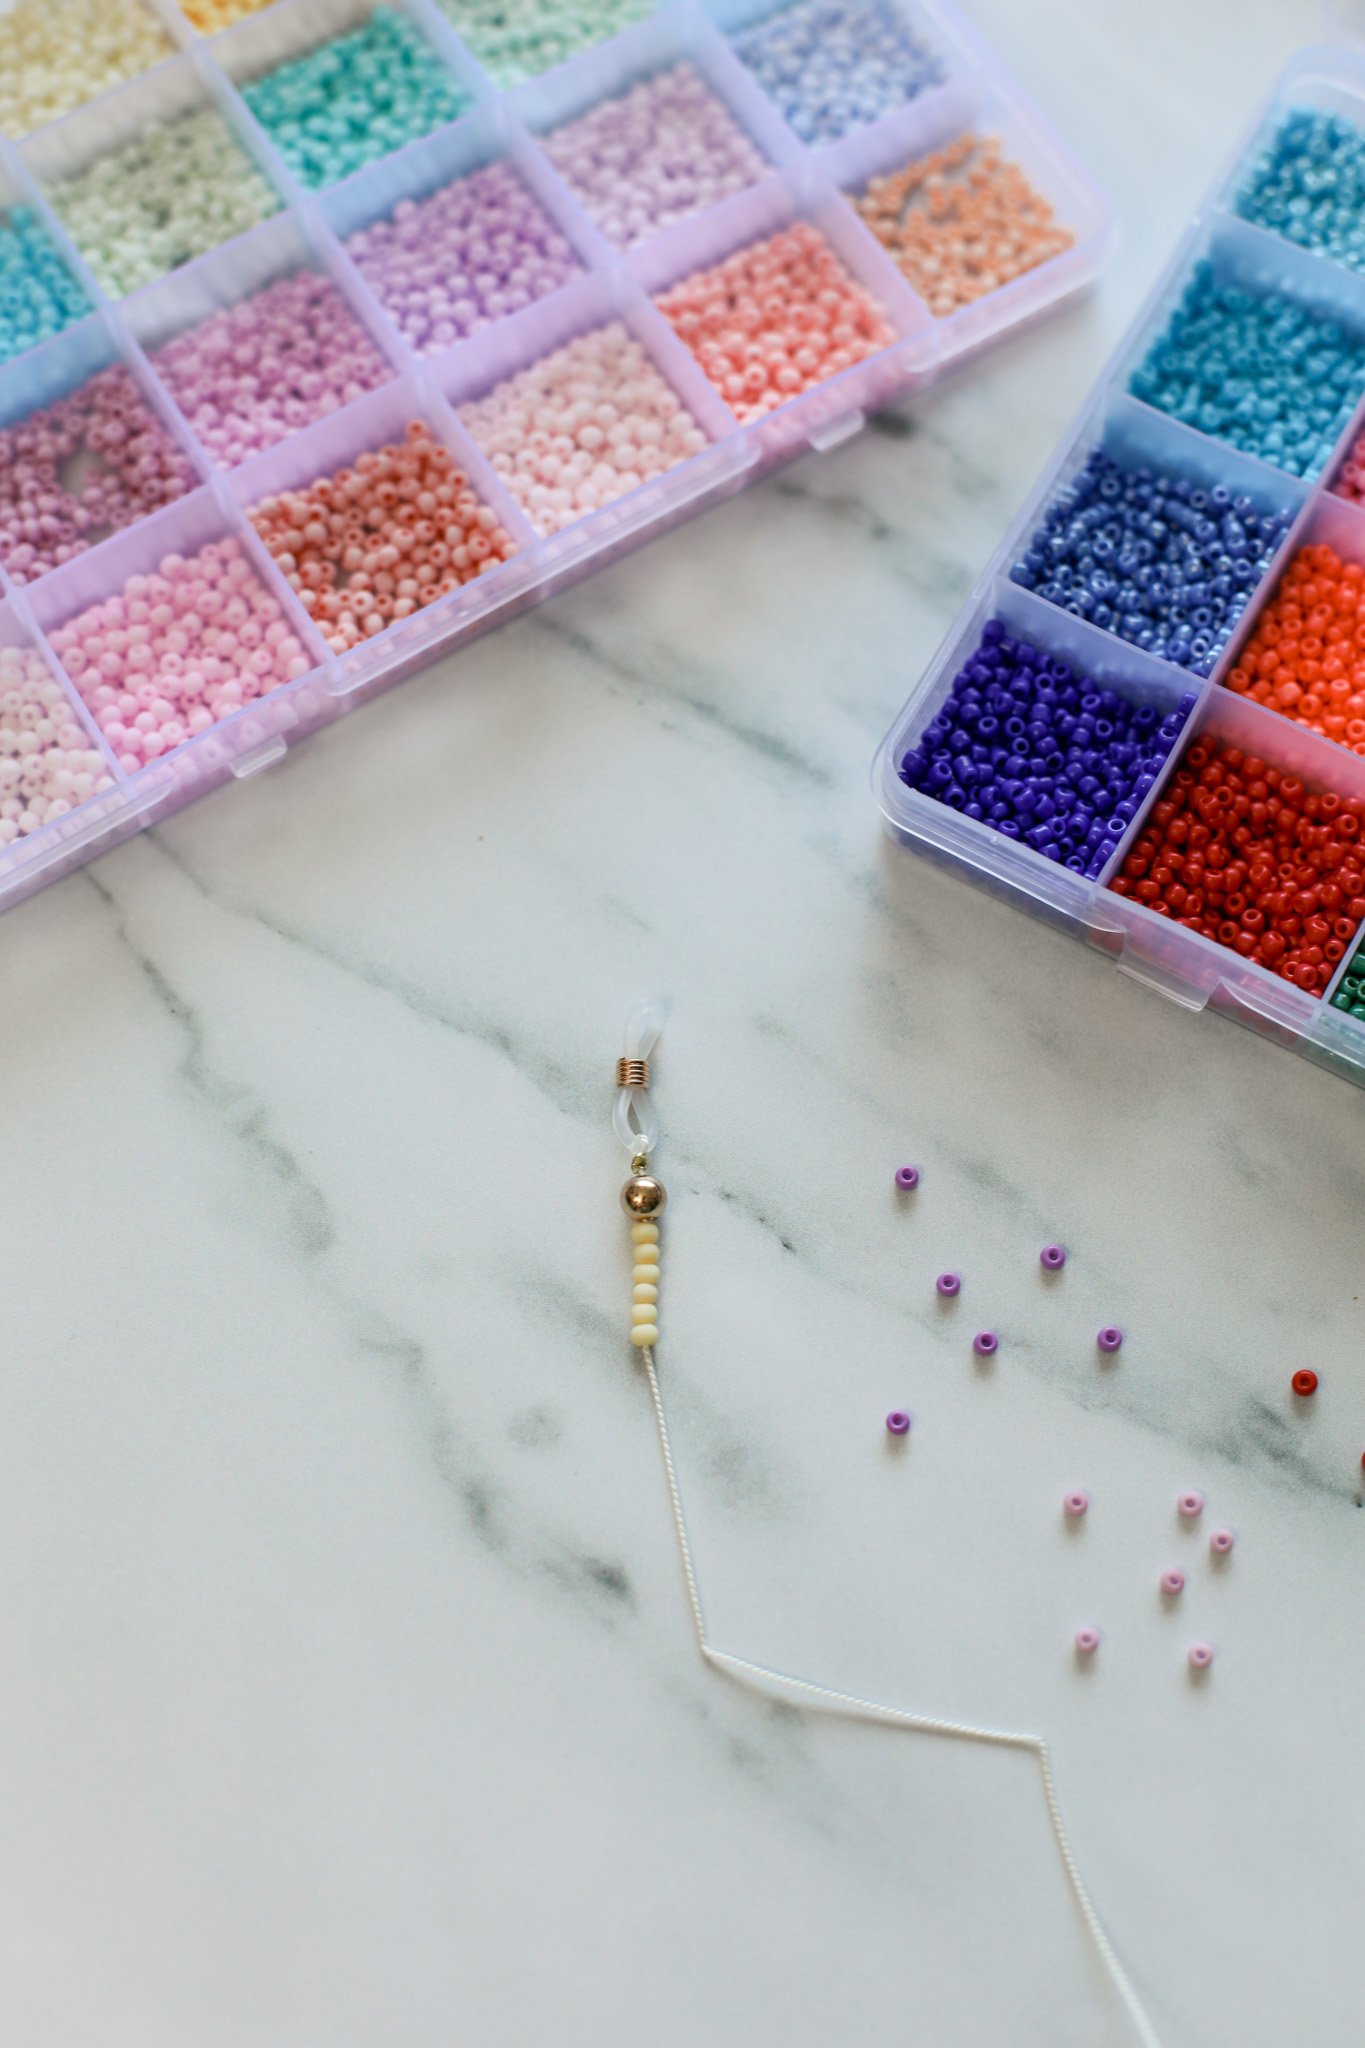
Beads — 3mm size works the best for this project — I ordered this assorted kit and this pretty pastel colored kit for my colored beads & I used a few pieces from this gold bead kit
Silk bead cord (#6)
3mm crimp beads
Super glue
Bead board (optional!)
I love working with this particular silk bead cord because it has a built in beading needle that makes working with these tiny beads much smoother.
To begin, unravel your entire 2 meter length of the silk bead cord. Thread the needle of the cord through one of your crimp beads then immediately through one side of your eyeglass chain end piece, and then back down through the original crimp bead. Pull the crimp bead and the eyeglass chain end piece all the way to the very bottom of your cord so that there is only a small tail remaining at the end.
Use your crimping tool to flatten the crimp bead and secure it in place so the eyeglass chain end piece will not move. To do this, line up the second hole of your crimping tool with the crimp bead and press down to indent the bead. Now turn the indented crimp bead to the side so that it looks like a “C” and place the “C” in the first hole of your crimping tool and press down again. This should securely fasten your crimp bead and hold your clasp ending in place.
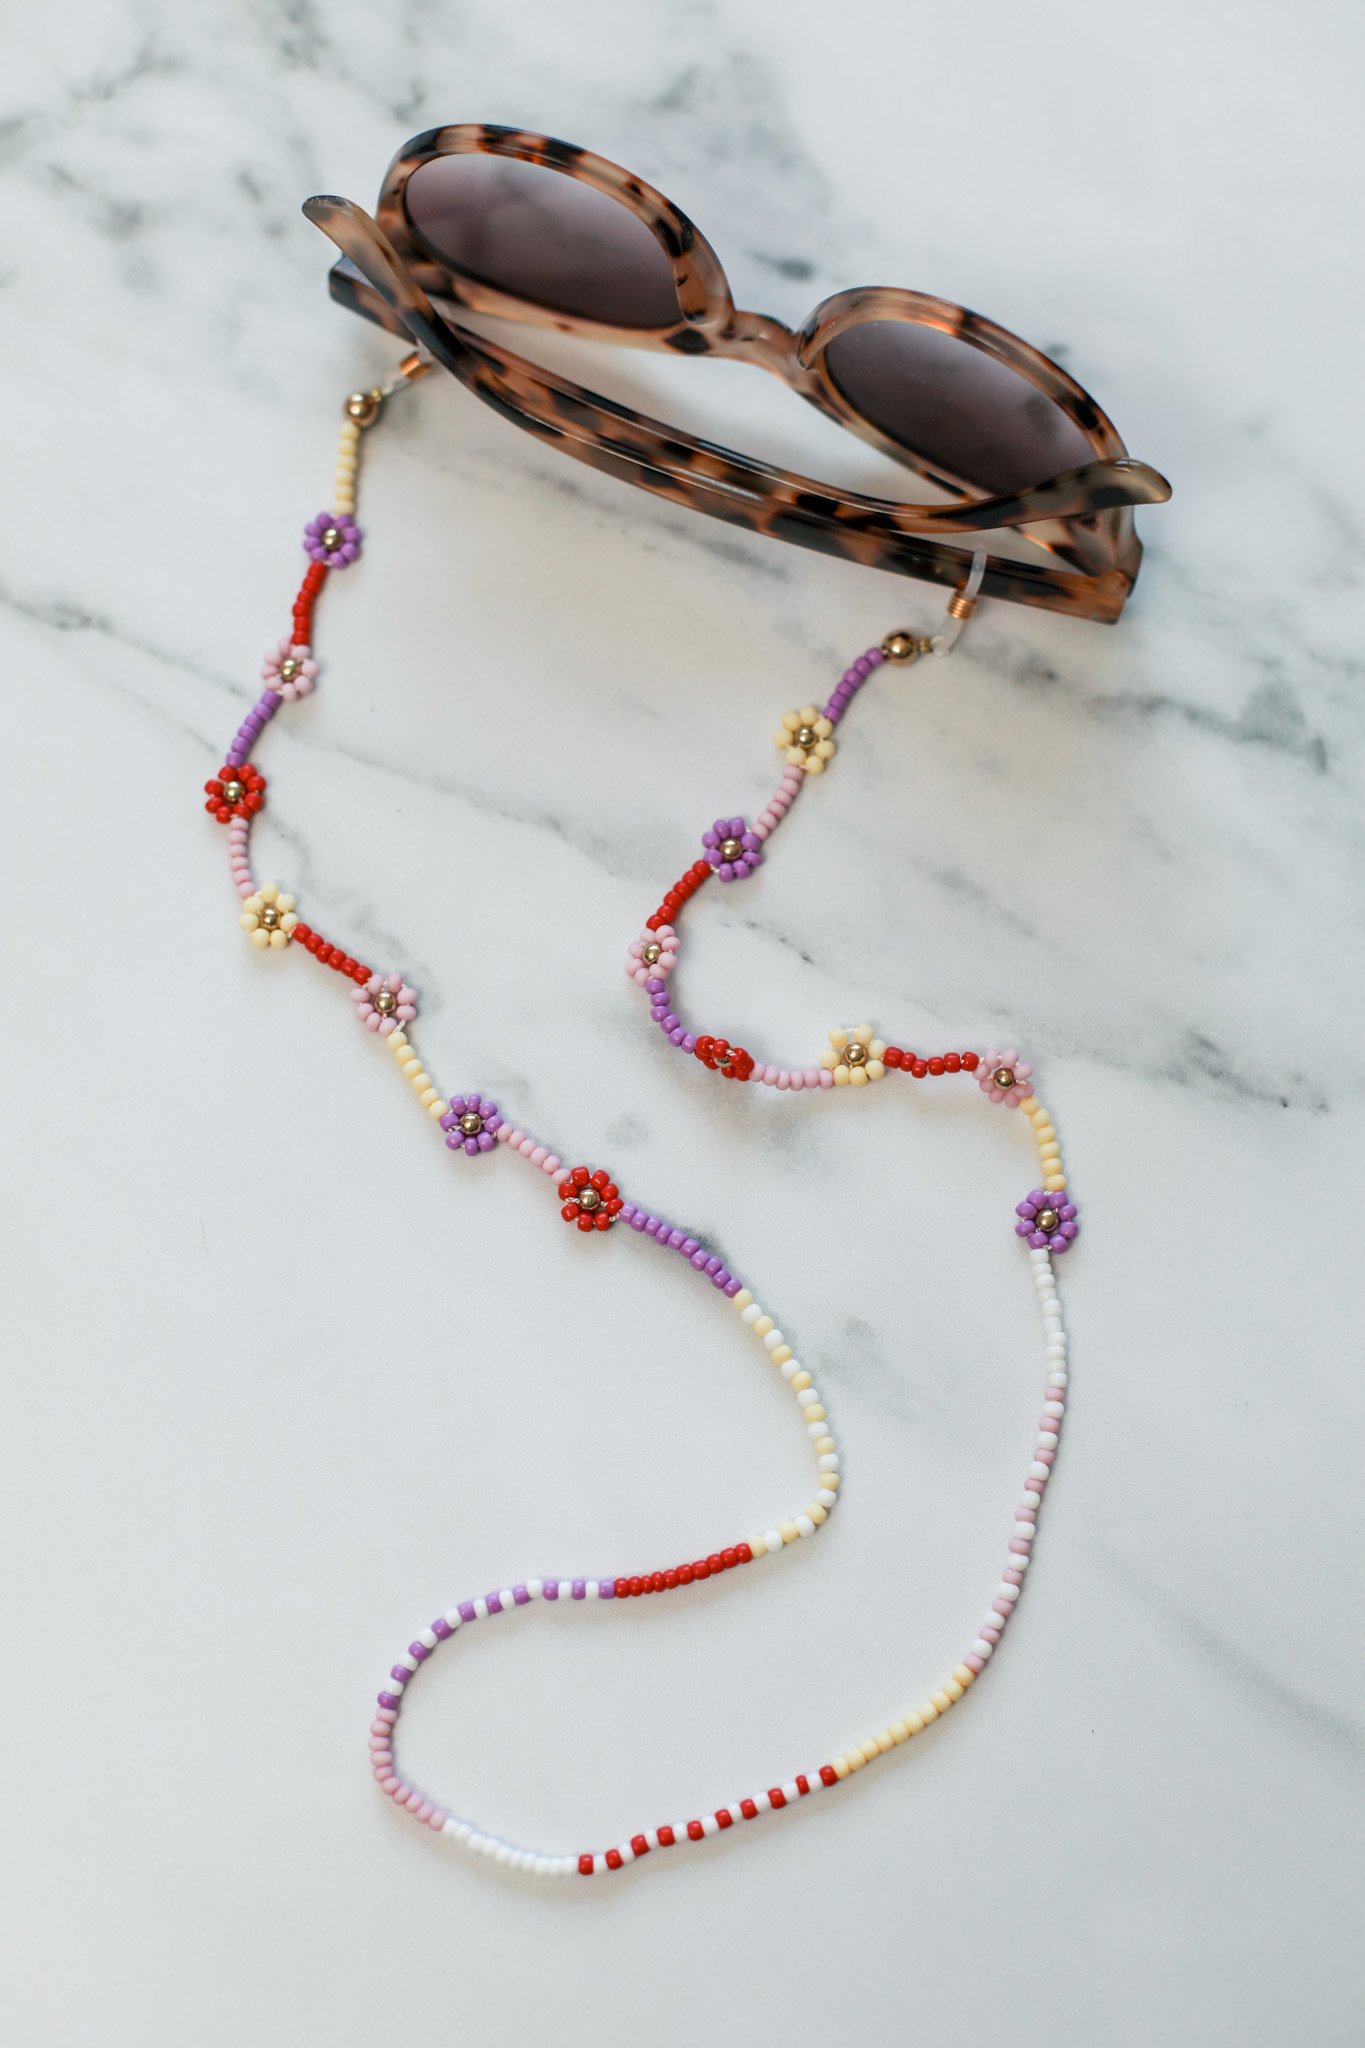
Now it is time to begin beading! You obviously do not have to follow my exact color palette or pattern but I will explain the pattern that I used below.
Begin beading with one large gold bead then follow with 6 yellow beads.


To start the first daisy flower, string on 5 purple beads and 1 gold bead. Now bring your needle back through the first purple bead in the direction towards the original yellow beads. Pull the thread tightly. You may need to help guide your beads in place, but now your 5 purple beads should make up the top half of the daisy flower with the gold bead positioned in the middle.
Thread on 3 more purple beads to be positioned below the gold bead, then pull your needle back through the 5th purple bead on the right to secure the circle.
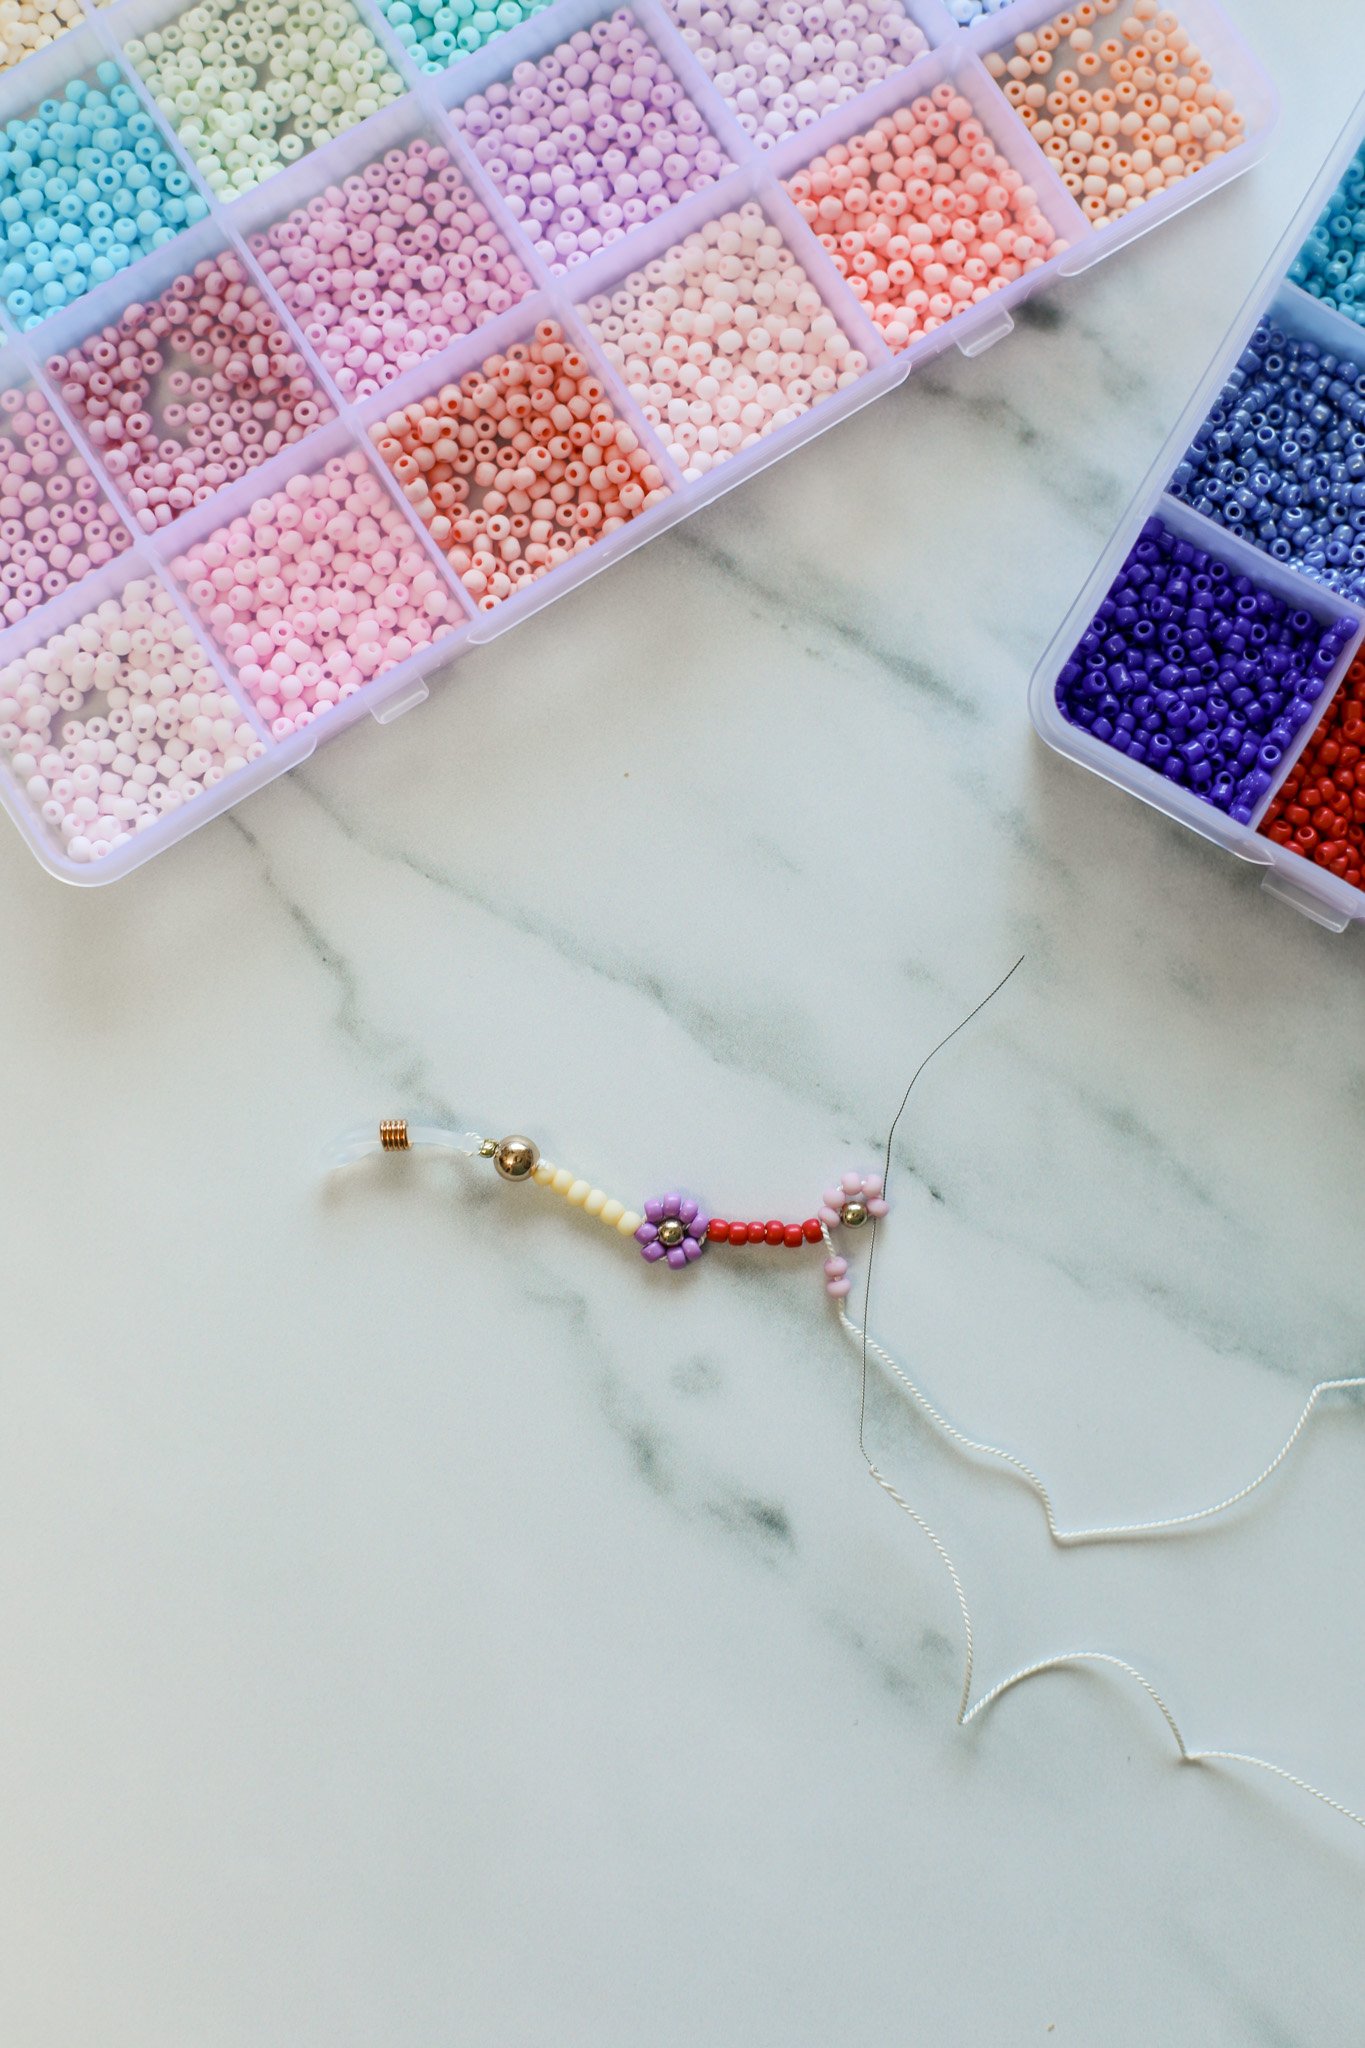
Continue beading a line of 6 red beads. Then start your second daisy flower, this time with the pastel pink beads. **Note: these pastel beads ended up being a little larger in size than the other solid beads, so I only used a total of 7 beads on these flowers as opposed to the 8 beads around the purple daisy.

My pattern ended up being a total of 7 daisy flowers with 6 color beads in between each flower. And then about 12” of just plain beading for the piece of the sunglasses chain that will be around the back of my neck. Then I repeated the daisy pattern on the other side.

Once I finished repeating the daisy pattern, my sunglasses chain was roughly 26" in length total between the two eyeglass chain end pieces.
To end the chain, bead on one last large gold bead. Then bead on a final crimp bead and eyeglass chain end piece. Bring your needle back through the crimp bead in the direction of the large gold bead. Pull the end of your thread tight. Then use your crimping tool to indent the crimp bead. Trim off any extra cord and you can push any exposed tail piece into the large gold bead. And your sunglasses chain is secured!

One final step, which is totally optional (but helps me feel better), is to add a small dot of super glue to the two crimp beads on either end of your sunglasses chain. I just like to make sure that this piece isn’t going to break at all and send beads flying all over the place while wearing my new accessory!

And there you have it… an adorable AND useful summer accessory! Beading makes for a fun summer activity to do by the pool or in the park, so grab one of these flocked bead boards if you want to get real serious with your beading hobby this season. It will help to keep your beads organized and stop them from rolling around on your work surface.
Looking for more beading ideas now that you have all the beads & supplies? Check out a few of our other bead projects, like our DIY Pumpkin Beaded Bracelet tutorial or find out how to make these fun DIY Checkered Beaded Hair Clips.
Happy crafting! xo Rachael

