
Personalize a Gallery Wall With Fabric Wrapped Frames
I have been putting off this gallery wall project long enough! Do you all do the same thing where you get excited about some artwork you found but then get overwhelmed with acquiring the right size frames and finding coordinating artwork that all looks good together? Building a gallery wall can be an overwhelming home decor project. And one of the biggest factors is just the cost of picture frames!
Finding frames at thrift stores and flea markets is the most cost effective way to build a nice collection, but finding the exact sizes you need can be next to impossible. So my next cheapest alternative is to buy inexpensive frames from IKEA. But they are definitely lacking a sense of personality and style. So today I’m going to show you how I personalized my basic frames by wrapping them in colorful fabric!
HOW TO PERSONALIZE A GALLERY WALL WITH FABRIC WRAPPED FRAMES

You will need:
Fabric (any pattern/color of your choice, I think cotton fabric works well — you will not want a fabric with any stretch)
Frame (I usually get cheap frames at IKEA, Michaels, or Target)
Fabric rotary cutter & cutting mat
Metal ruler
Fabric scissors
Mod Podge
Sponge brush
Bear with me, as this was a bit of trial and error process and really depends on your specific size/frame specifications. But here is my best attempt at explaining the tutorial! :P
To prepare, remove the backing and glass of your picture frame. I would also recommend giving your fabric an iron so that everything is flat and wrinkle free.


To begin you will want to cut 4 strips of fabric — one for each side of the frame — so that they are more manageable pieces to work with. I cut my pieces to be about 1 in longer on each side than the length of the frame. And for the width you will need it to be able to wrap fully around the width of the frame.
*TIP: Keep the pattern of the fabric in mind when you are preparing the fabric pieces. If there is a repeated pattern, you may want the pattern on the top and bottom to continue on the sides. Or you may want it to be opposite. For my striped fabric, I wanted the stripes to run horizontal down the whole frame. So I had to cut two pieces with the stripes running horizontal and two with the stripes running vertical.

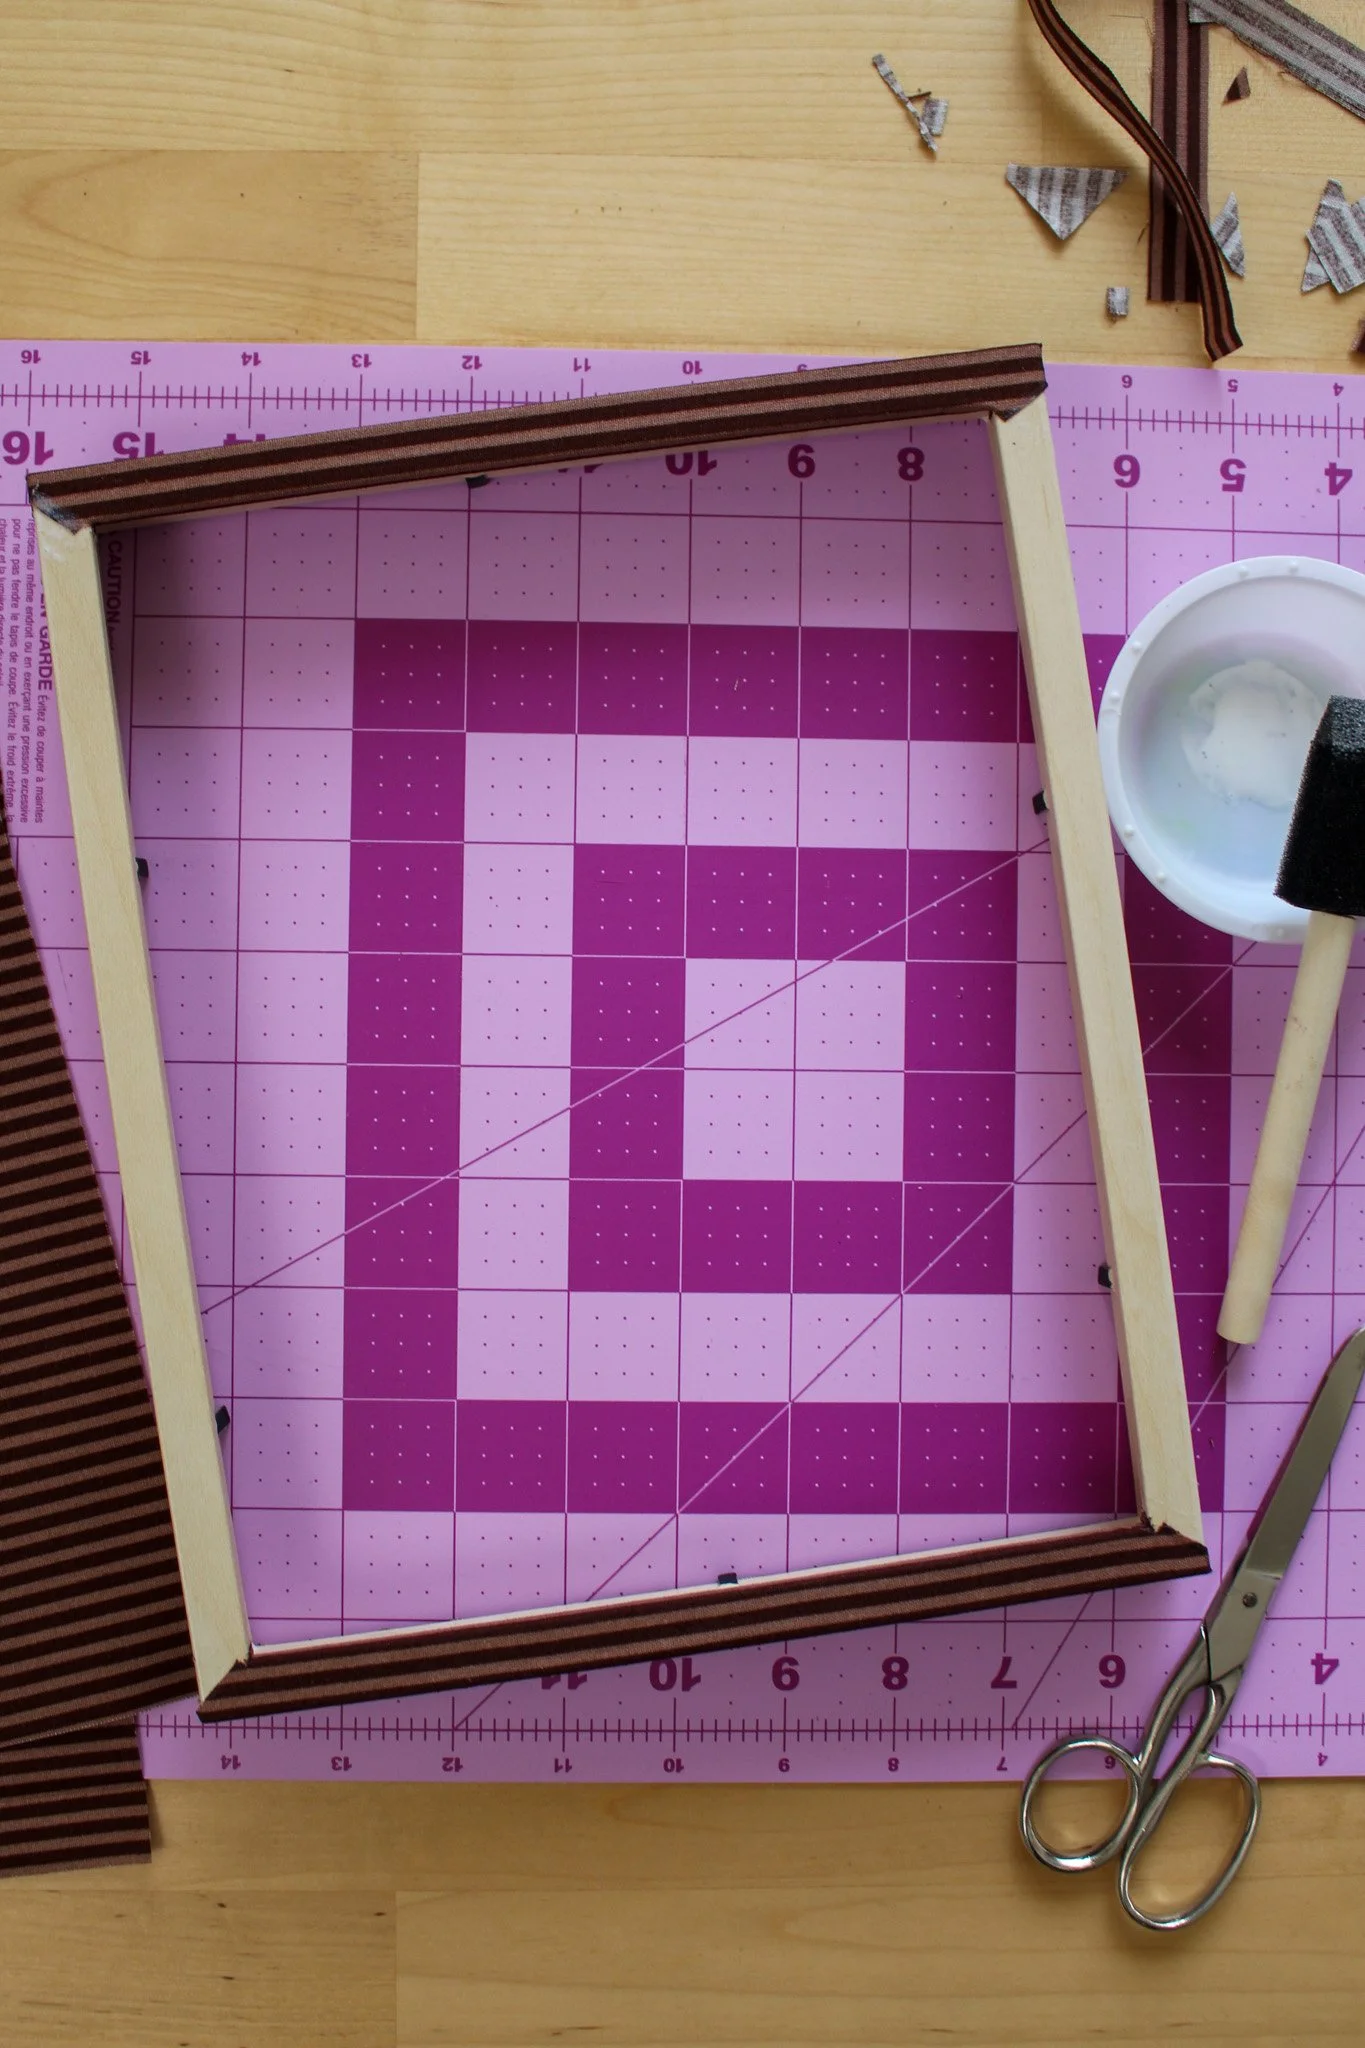
Now you’re going to work on one side at a time. So begin with the top of your frame. Use your sponge brush to paint on an even layer of Mod Podge to the front face.


Turn the frame over and lay your frame face down on the backside of your fabric strip with the majority of fabric left hanging above and just enough to wrap around the front below. Again, if you’re working with a fabric pattern you will want to try to line up the pattern the best at possible with the edge of the frame to keep the pattern straight. Trim the fabric strip edges with your fabric scissors so it is just a little longer than the frame side.
Add another layer of Mod Podge to the outside face of the frame and wrap the fabric over this edge of the frame. Carefully smooth out any bubbles with your fingers while adhering the fabric to the frame.
Pick up the frame and turn it so it is standing up (like the image above). Cut at a 45 degree angle in the corners of the front fabric flap.

Add another layer of Mod Podge to the inside rim of the frame. Pull the fabric around to this edge and smooth it out to adhere to the Mod Podge.

Once the fabric is adhered, go in with another layer of Mod Podge on the outside of the fabric to make sure the edge is well secured and to keep the fabric from fraying. The Mod Podge will dry clear so you won’t even see this.

Now you’re going to repeat this process with the back side of the frame. Before you do this though, go ahead and trim the piece of remaining fabric so that you just have enough remaining to pull around to the back edge of the frame.
Paint your Mod Podge along the back edge. Pull the fabric up around the edge and press down to adhere. Go in with another layer of Mod Podge on the outside to make sure this edge is secured.


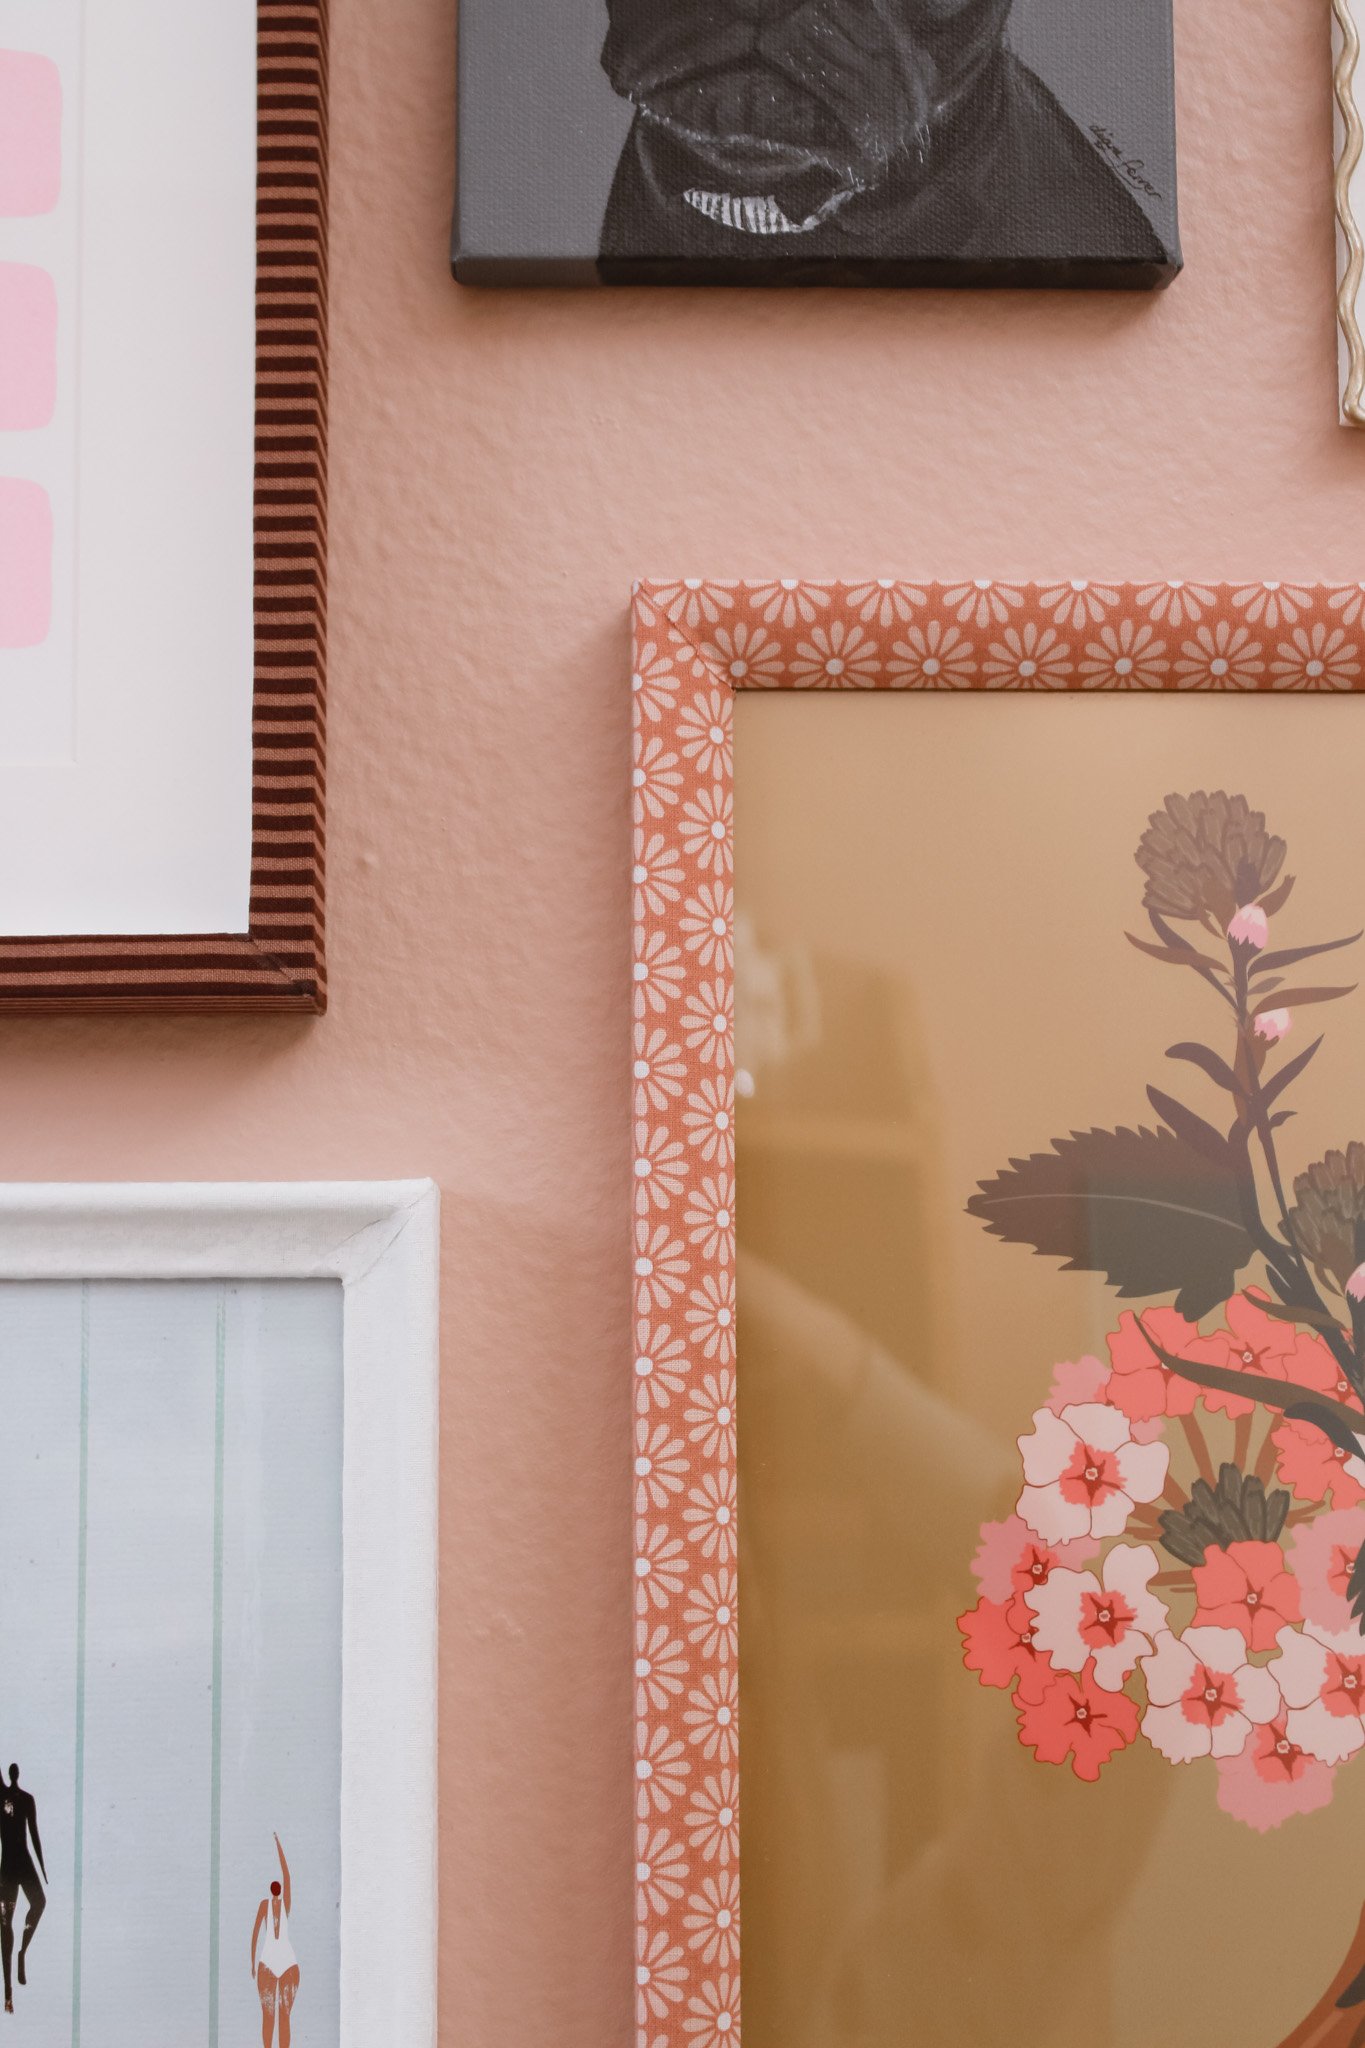
The corners are the trickiest part to deal with. But I found it best to trim your fabric as you’re going to make sure it just slightly overlaps onto the next side of the frame. You are kind of wrapping the corners like a present so just go one plane at a time and paint Mod Podge over any edges you need smoothed down. It doesn’t have to be perfect! It will look something like the image above when you are done.
Now repeat the whole process on the bottom side of your frame.

And then the process of making the left and right side of the frame are the exact same as well but you’re going to overlap the fabric edges in the corners so that there is no wood frame visible underneath. You will also want to keep the fabric pattern in mind on these steps if you want the pattern to match up correctly to the sides.
Once you have wrapped these sides, paint a layer of Mod Podge on top of the fabric just in the corners to secure down the visible seams.

And here’s what your completed frame will look like once you have wrapped all 4 sides! Allow the frame to fully dry overnight and then you’re ready to add back in your glass, art, and backing.
If the process seems daunting, I promise you will get the hang of it as you’re going. Just be sure to trim fabric as you go instead of trying to cut it to size first then glue down. And painting the Mod Podge over any visible seams is a MUST to keep everything in place and from fraying.
TIPS FOR PICKING OUT ART FOR A GALLERY WALL
Here are a few tips for picking out your art prints:
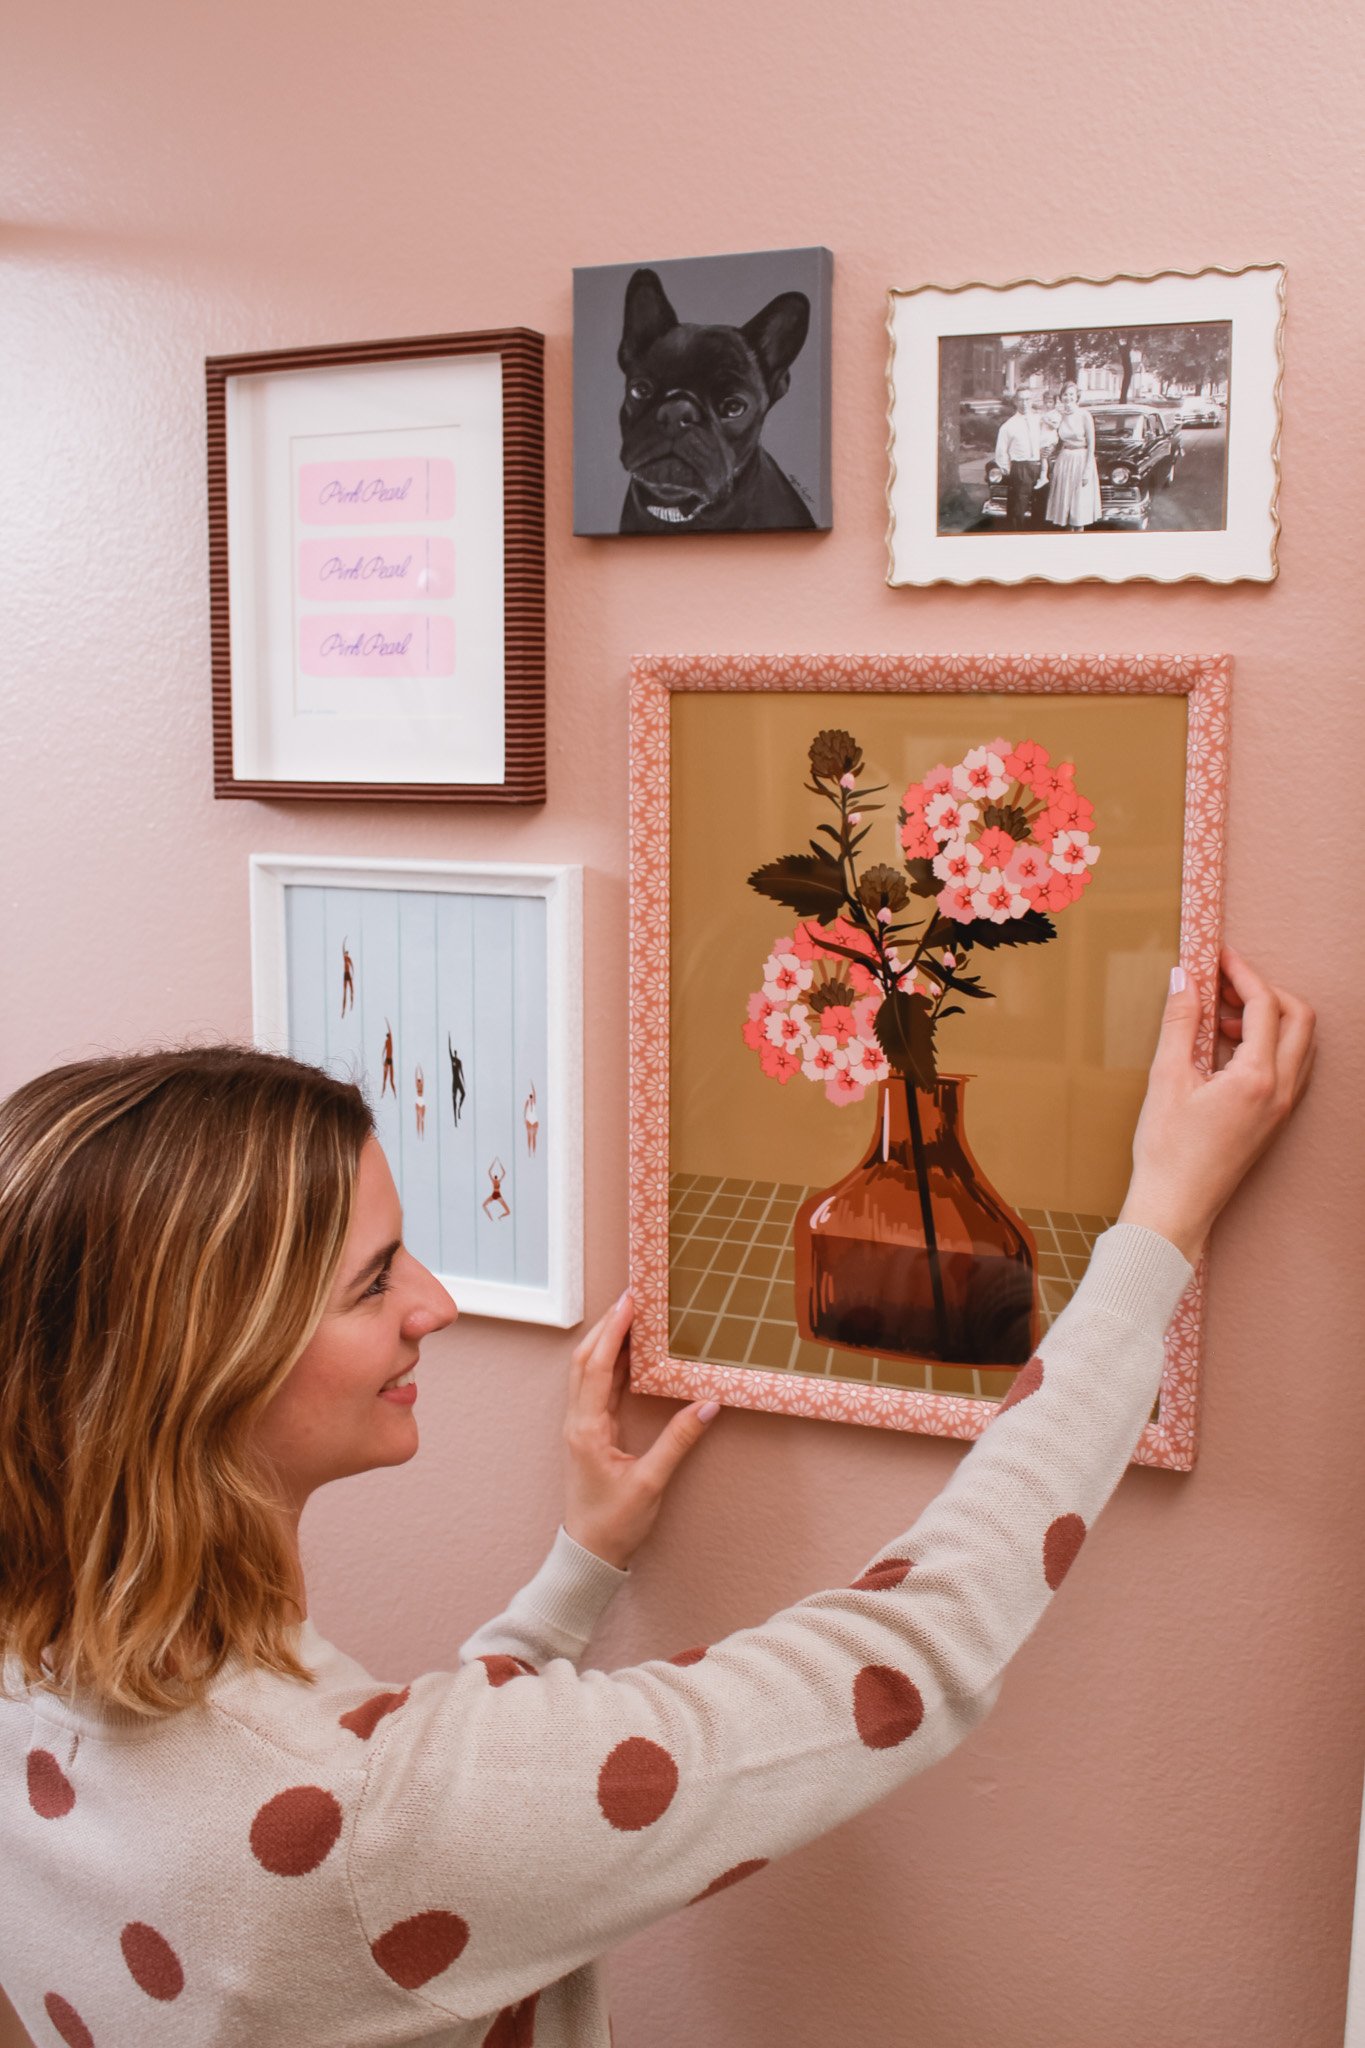
Include a mix of both graphic/illustrated art along with personal items or family photos to add a little personality and uniqueness to your gallery wall.
Use a mix of matte boards and art without matte boards. This gives a better mix of visual size and blank space. If you have a painted wall, the blank space will really pop against your wall color.
Pair a more busy picture frame (with a more elaborate pattern) with a more simple piece of art.
You can tie different pieces together by repeating colors from one to the next (for example I used a brown striped fabric on the Pink Pearl print below to tie in the brown from the vase print).
If you purchase a digital art print and are having it printed yourself, I would recommend getting it professionally printed from a printing service (either local or a place like VistaPrint) instead of a photo printing place (like CVS or Walgreens) because I got some of mine printed at CVS and the coloring turned out a lot different than they looked digitally. They do a good job with photographs but I find they have a hard time getting coloring right with illustrated artwork especially.

I love how this little bathroom gallery wall has turned out! It added a ton of personality into the space and helped me establish a color palette for the room. I’m currently loving this combo of brown and pink, what do you think?!
Here are the prints that I’ve included in my gallery wall:
Dog portrait — this is a portrait of our dog Kevynn that was randomly mailed to us by the company Chewy. They are seriously the best! And she looks so cute in this little painting!! :)
Black & white family photo — this an old family photo of my dad with his parents when he was a little kid. I just love this picture because of the amazing vintage clothes & car. This one is framed with another DIY frame that I made in a previous post. Check it out here!
Do you have any artwork you have been meaning to hang up? This is your push to get that art framed and on the wall! You will feel so accomplished once you do :)
xo Rachael

