
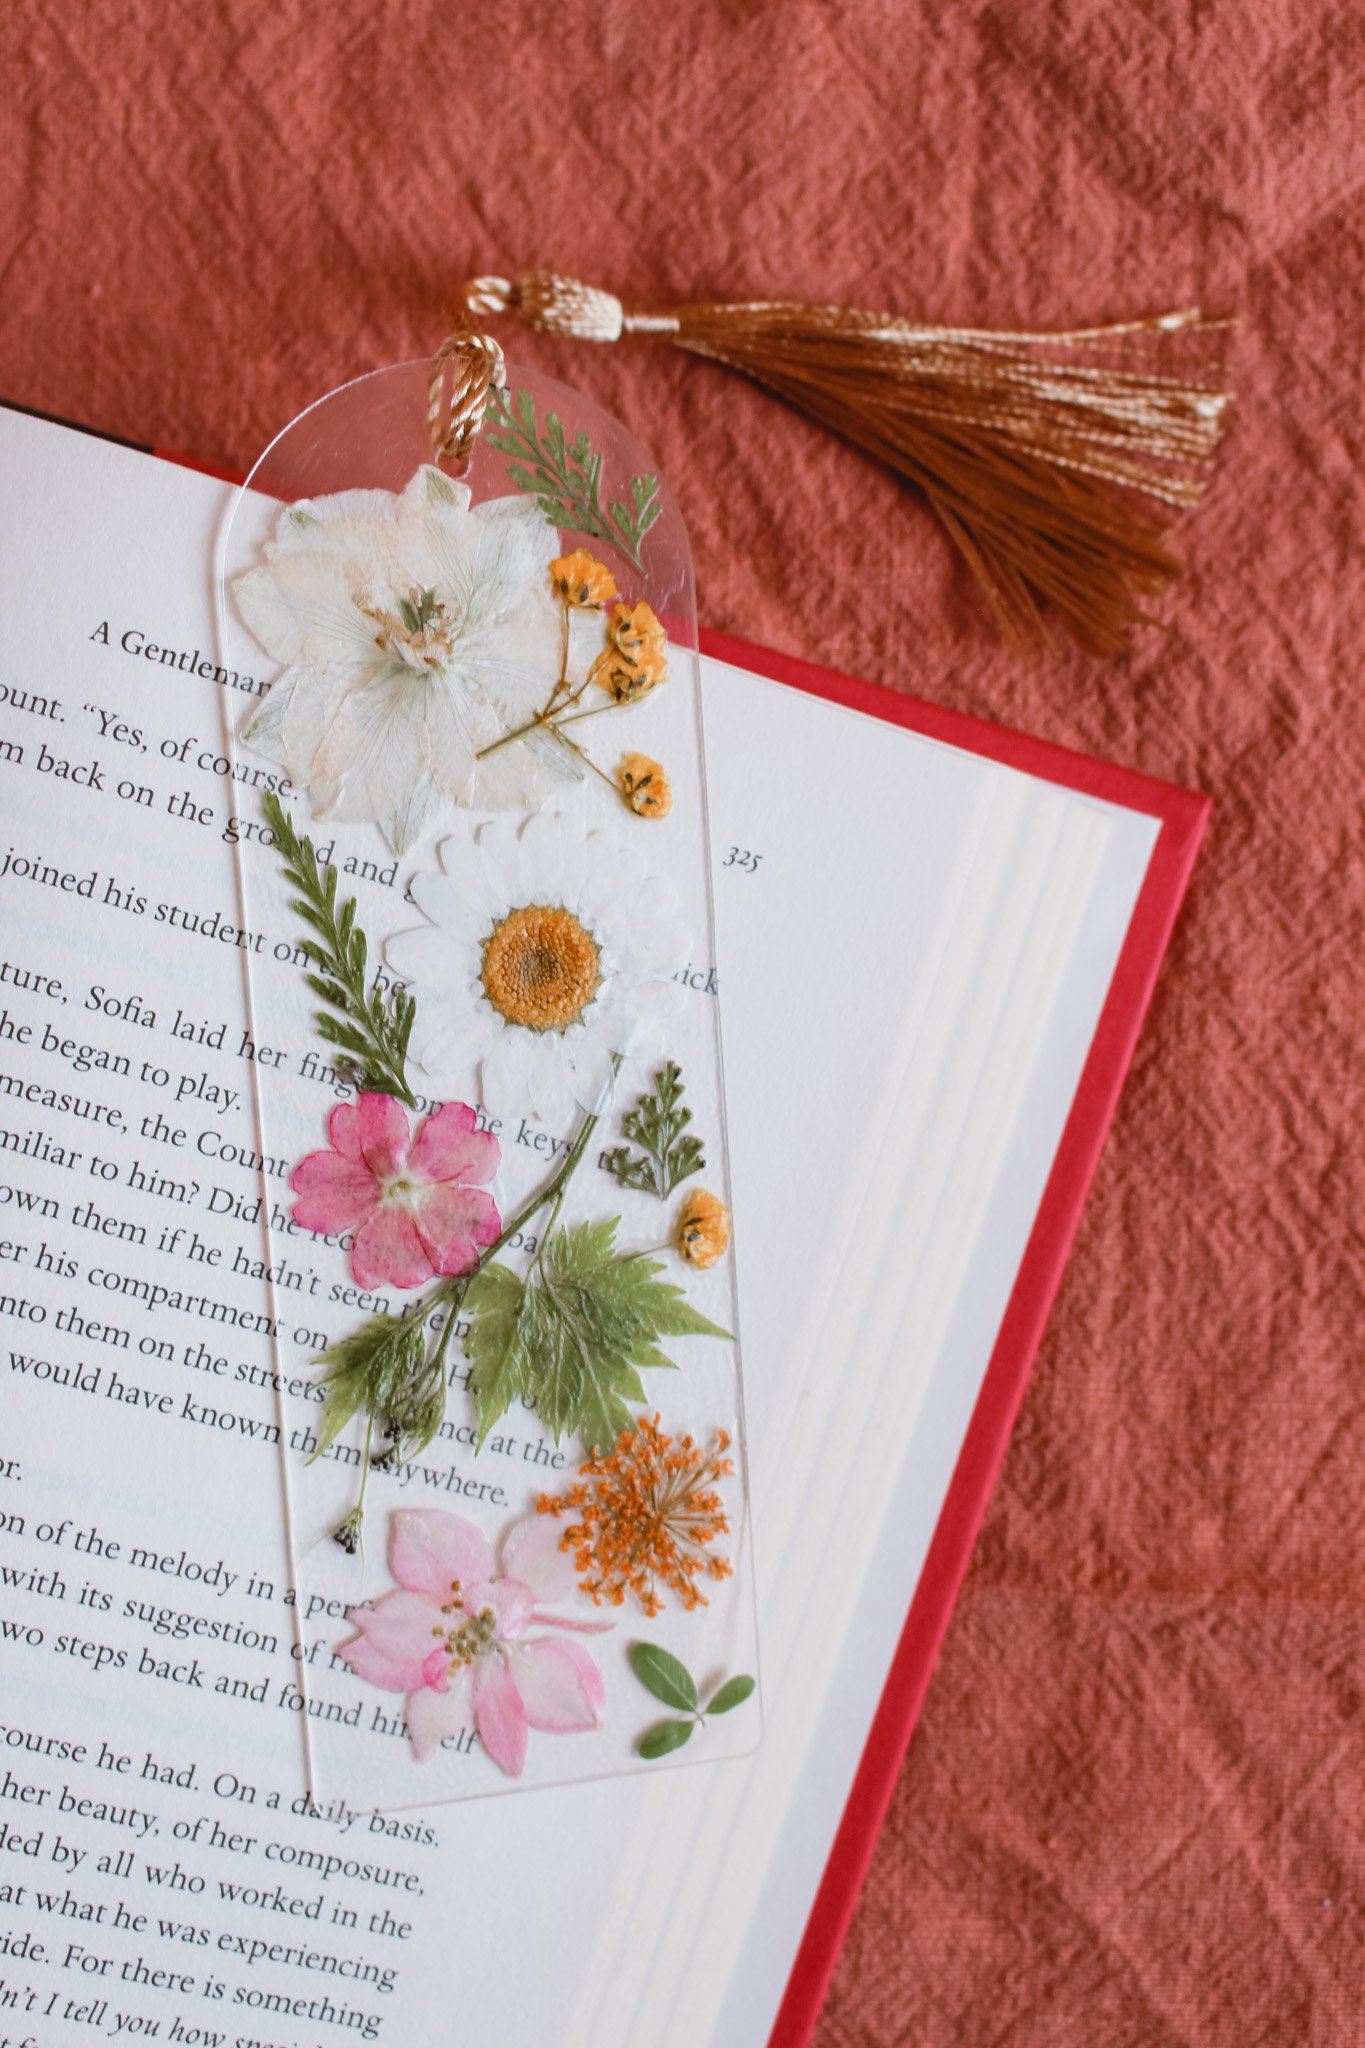
DIY Pressed Flower Bookmarks
Today’s craft project is a fun one if you’re in the midst of some cold, dreary winter weather and are looking forward to SPRING! One of my New Years Resolutions was to read more, and I have already been making quite a dent in my Goodreads 2023 Reading Challenge. And while I have to admit I do most of my reading on my Kindle, I still like to read a good old fashioned hard cover book from time to time. And for that purpose, I created these adorable botanical pressed flower bookmarks.
My inspiration for this project came from an activity that we did at my Valentine’s Day Crafternoon party where I had guests DIY their own glass candle holders with pressed flowers mod podged to the outside. They turned out super cute! And I thought this was a good way to utilize the leftover pressed flowers that I had sitting around.
I also had the extra clear acrylic bookmarks in my crafting stash from a previous blog post — DIY Faux Stained Glass Bookmarks (& Printable!) — so be sure to check out that idea as well if you have any leftover bookmarks :)
Affiliate disclosure: This post contains several affiliate links. As an Amazon Associate, I may earn commissions from qualifying purchases from Amazon.com. Thank you for your support!
HOW TO DIY PRESSED FLOWER BOOKMARKS
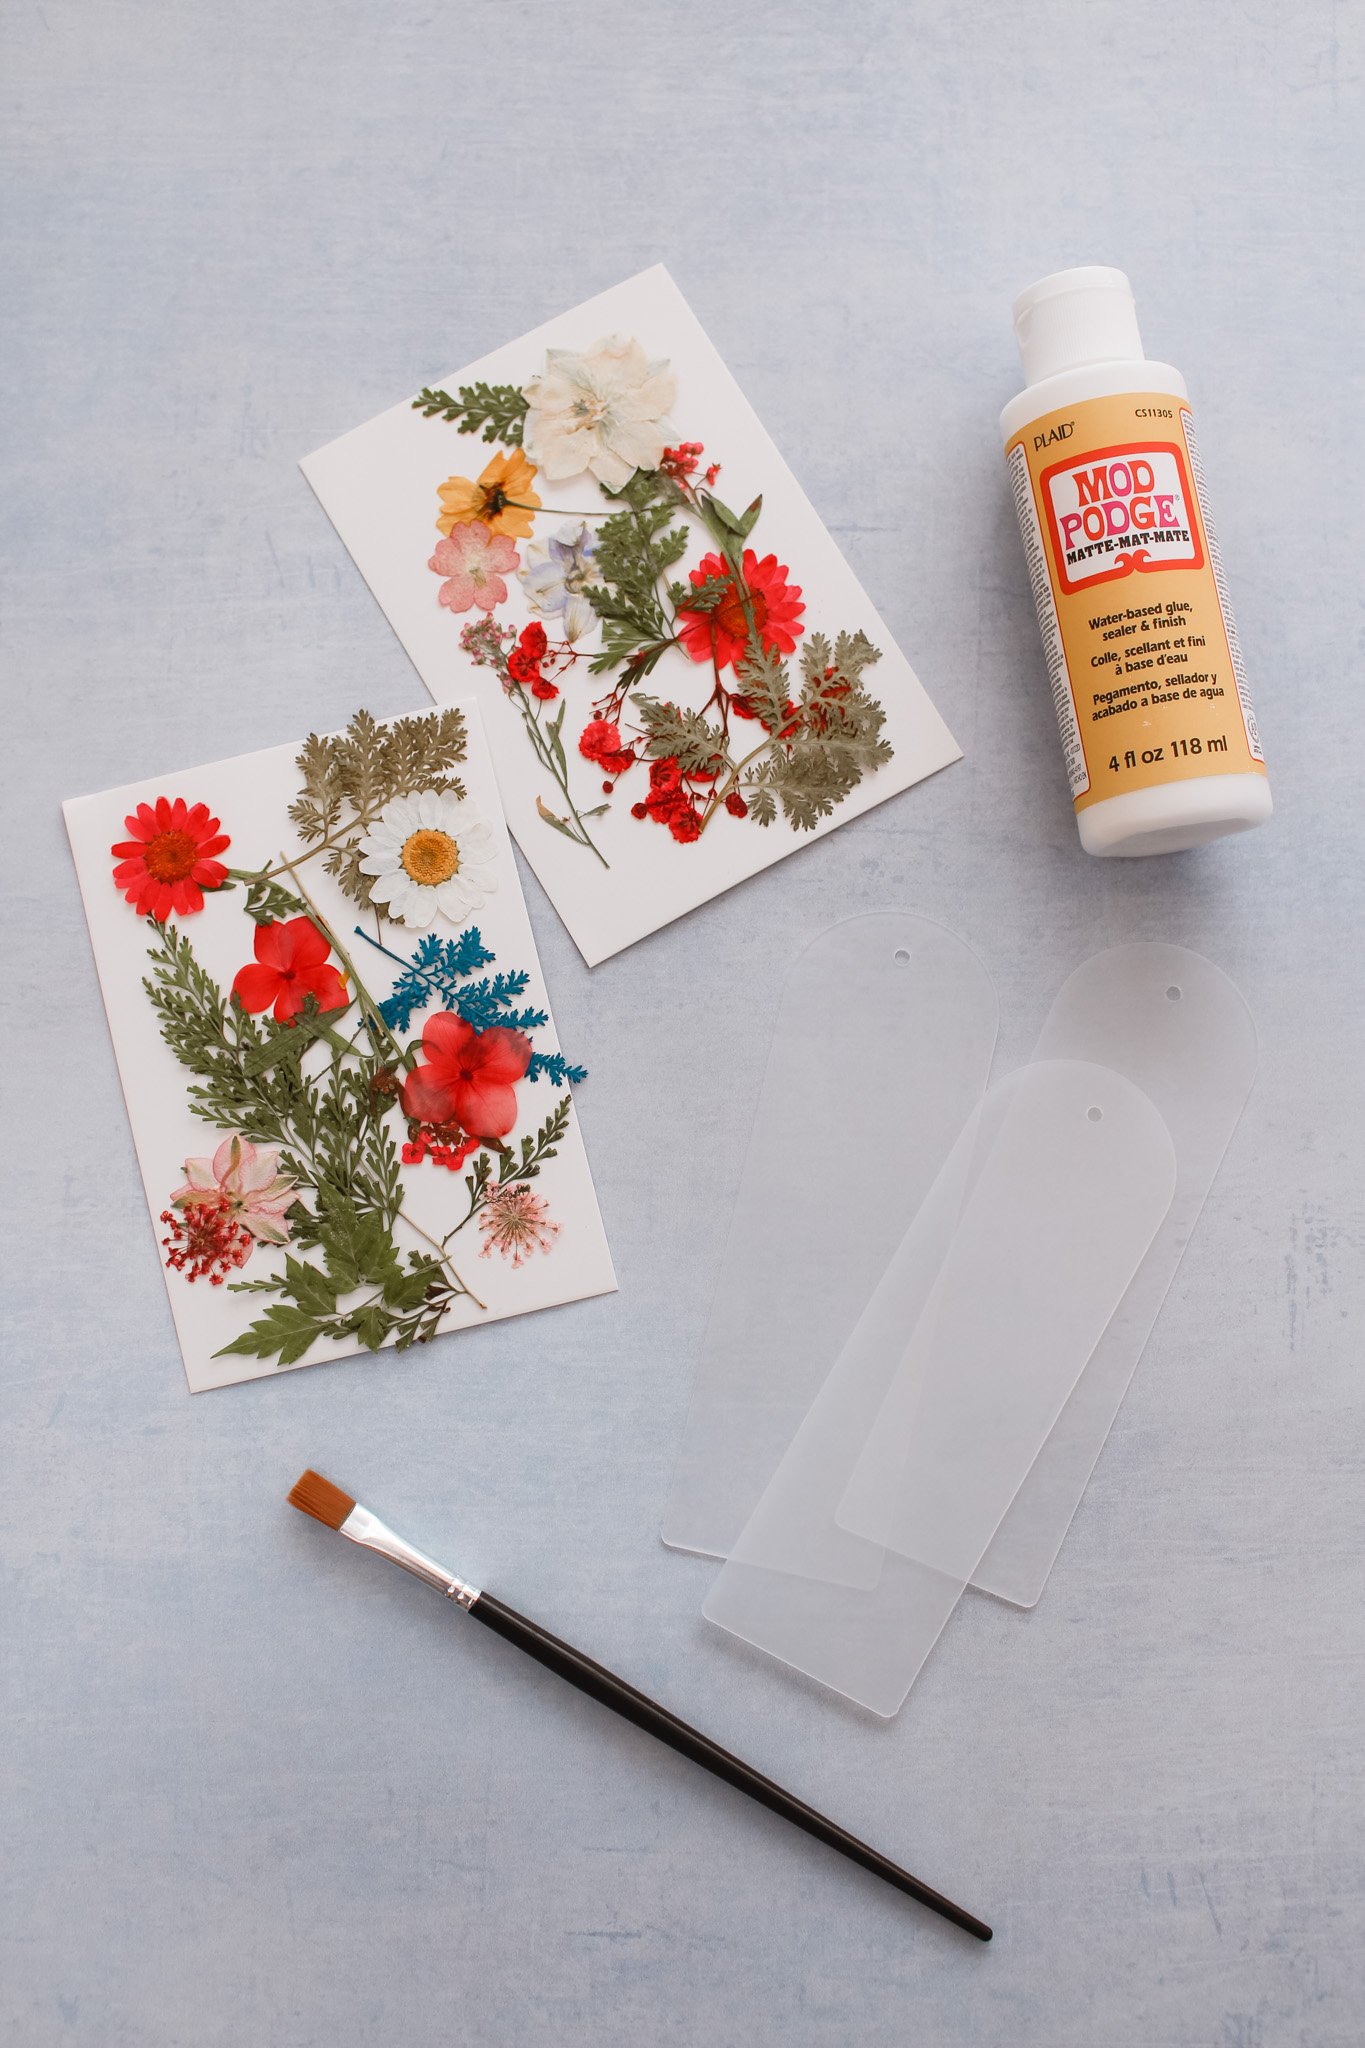
DIY Pressed Flower Bookmarks Supplies:
Clear acrylic bookmarks
Assorted dried pressed flowers (you can collect & press the flowers yourself, or I just bought this set from Amazon)
Matte Mod Podge
Paint brush
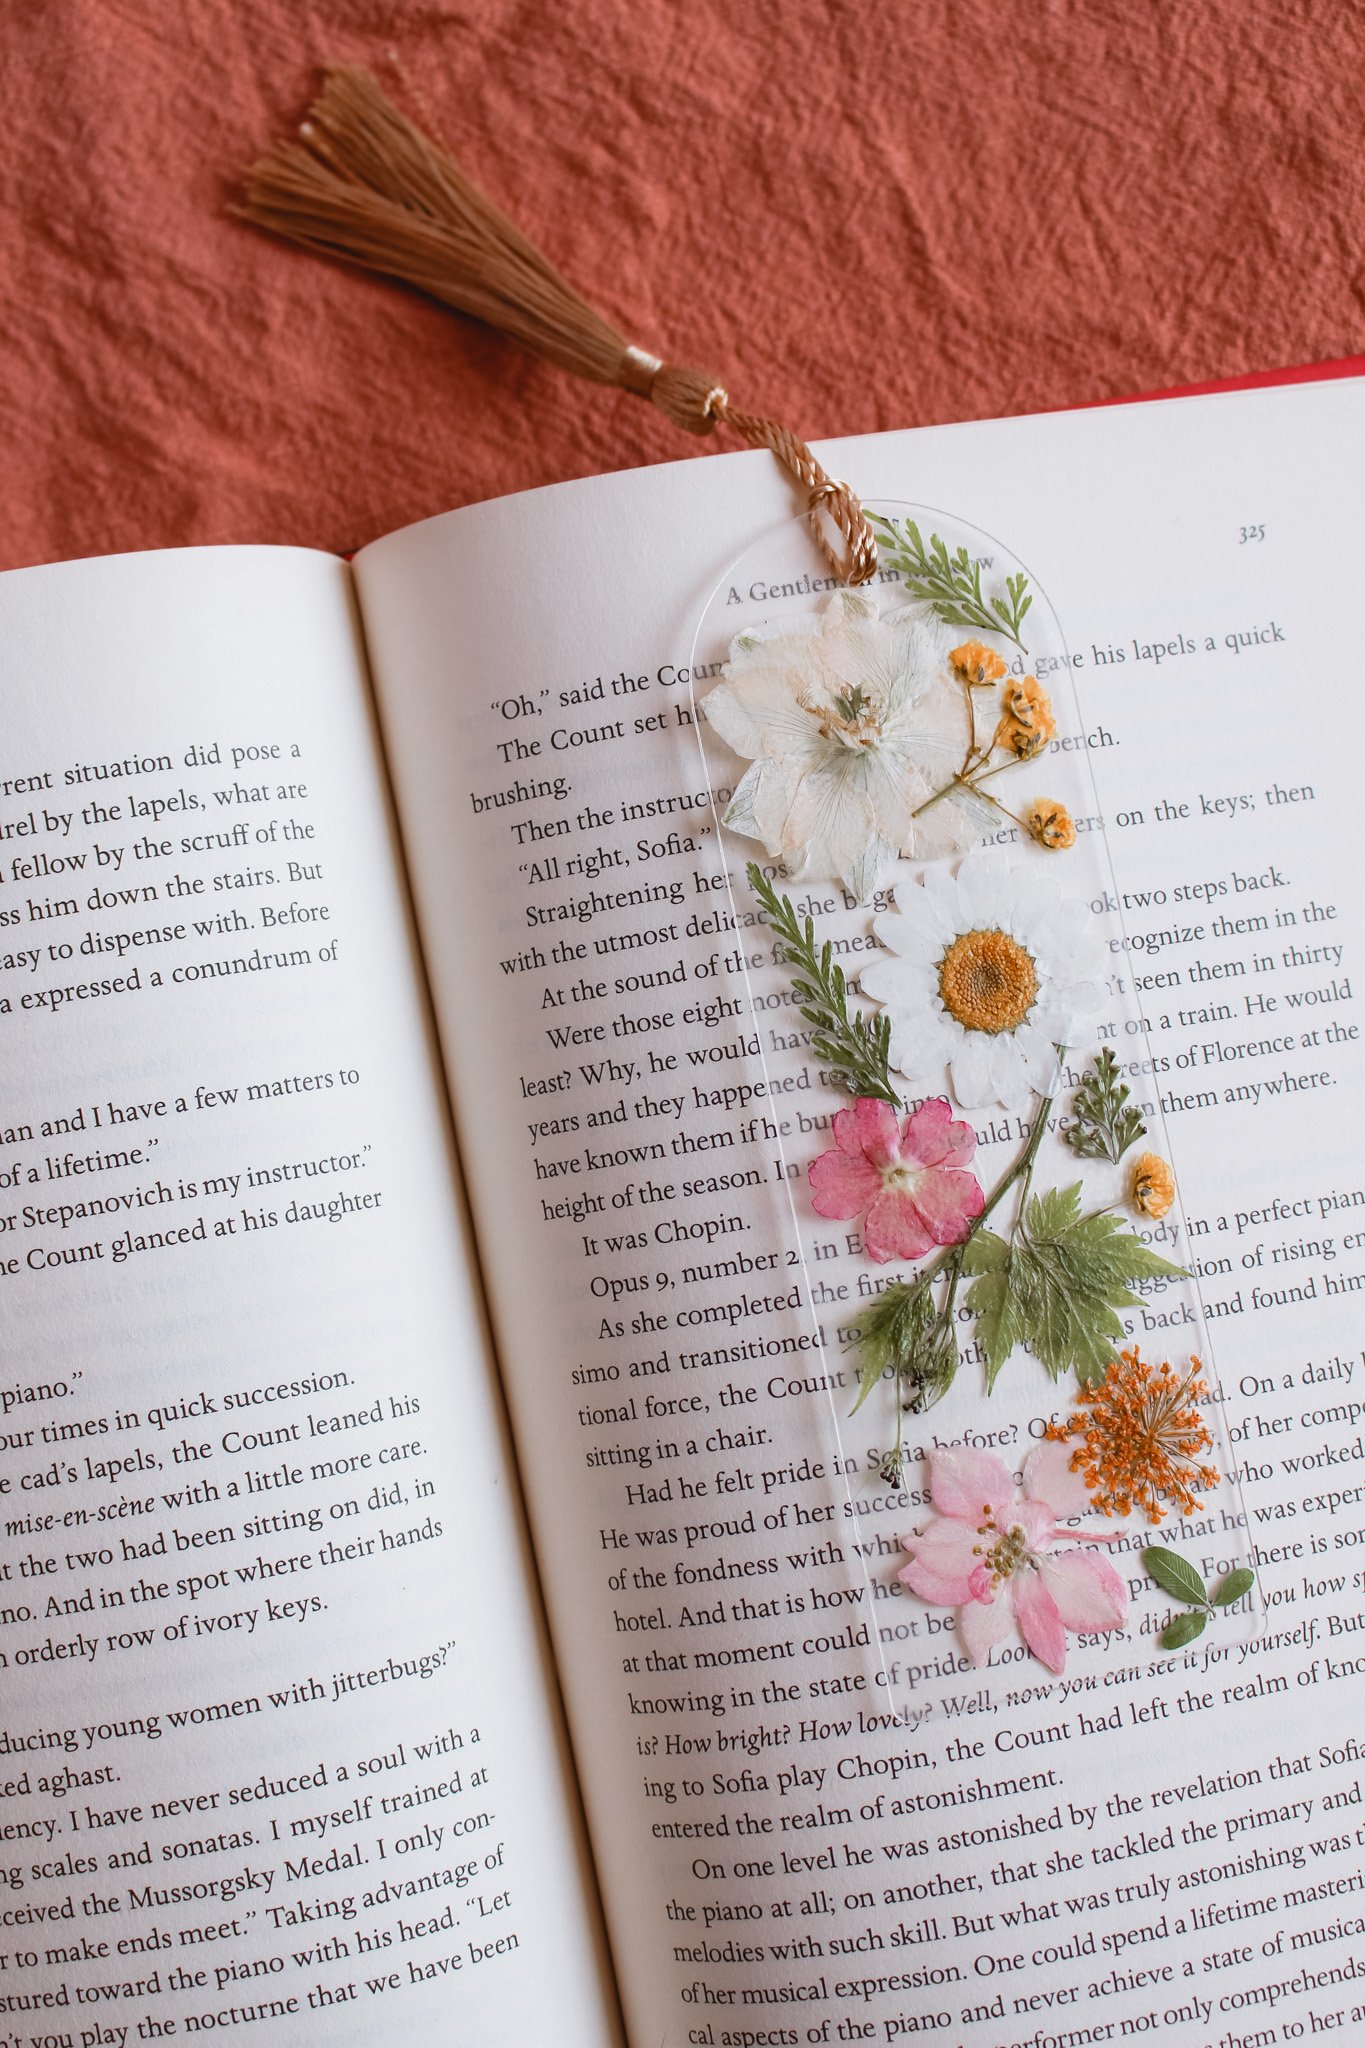
Floss tassels (optional)
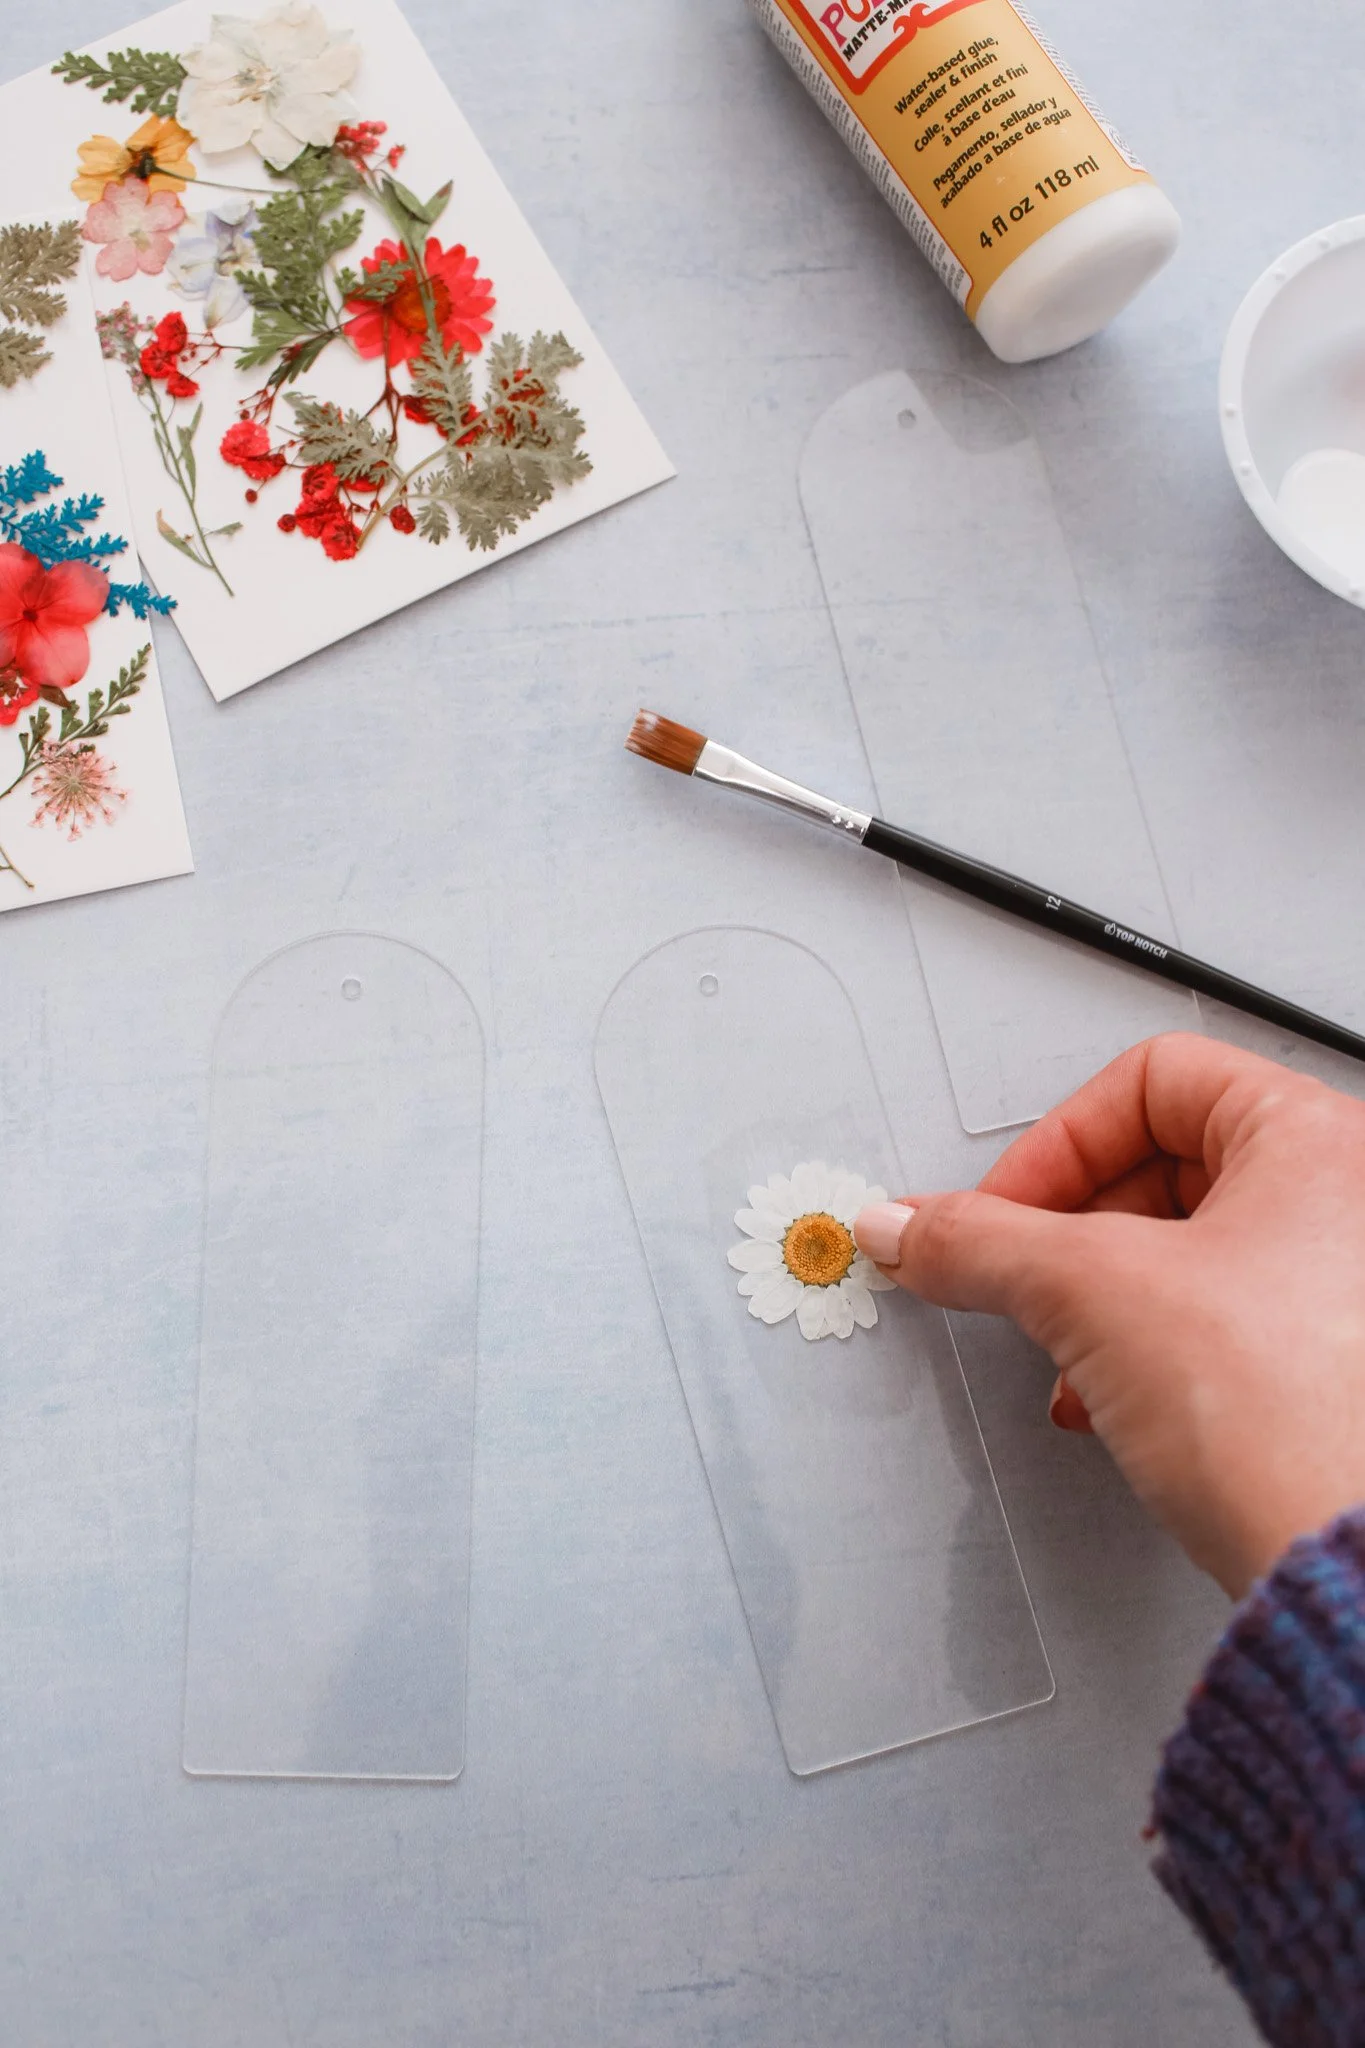
To begin, you will want to pull off the plastic protective liner on either side of your acrylic bookmarks. They should now look much more shiny and clear!
You can plan out the pattern you are going for on your work surface, or simply just wing it! I found it was fun to just start adding flowers and see where the design took me! One by one, paint on a thin layer of Mod Podge in the area where you will be placing each flower. Carefully press the flower down into the glue and move on to the next flower.
Some of the thicker-stemmed florals are a little trickier to attach. You may need to hold those down with your fingers for a few minutes while the Mod Podge hardens. I would also recommend trying to use the flattest florals since this bookmark will be placed inside of a book and you won’t want anything too bulky.
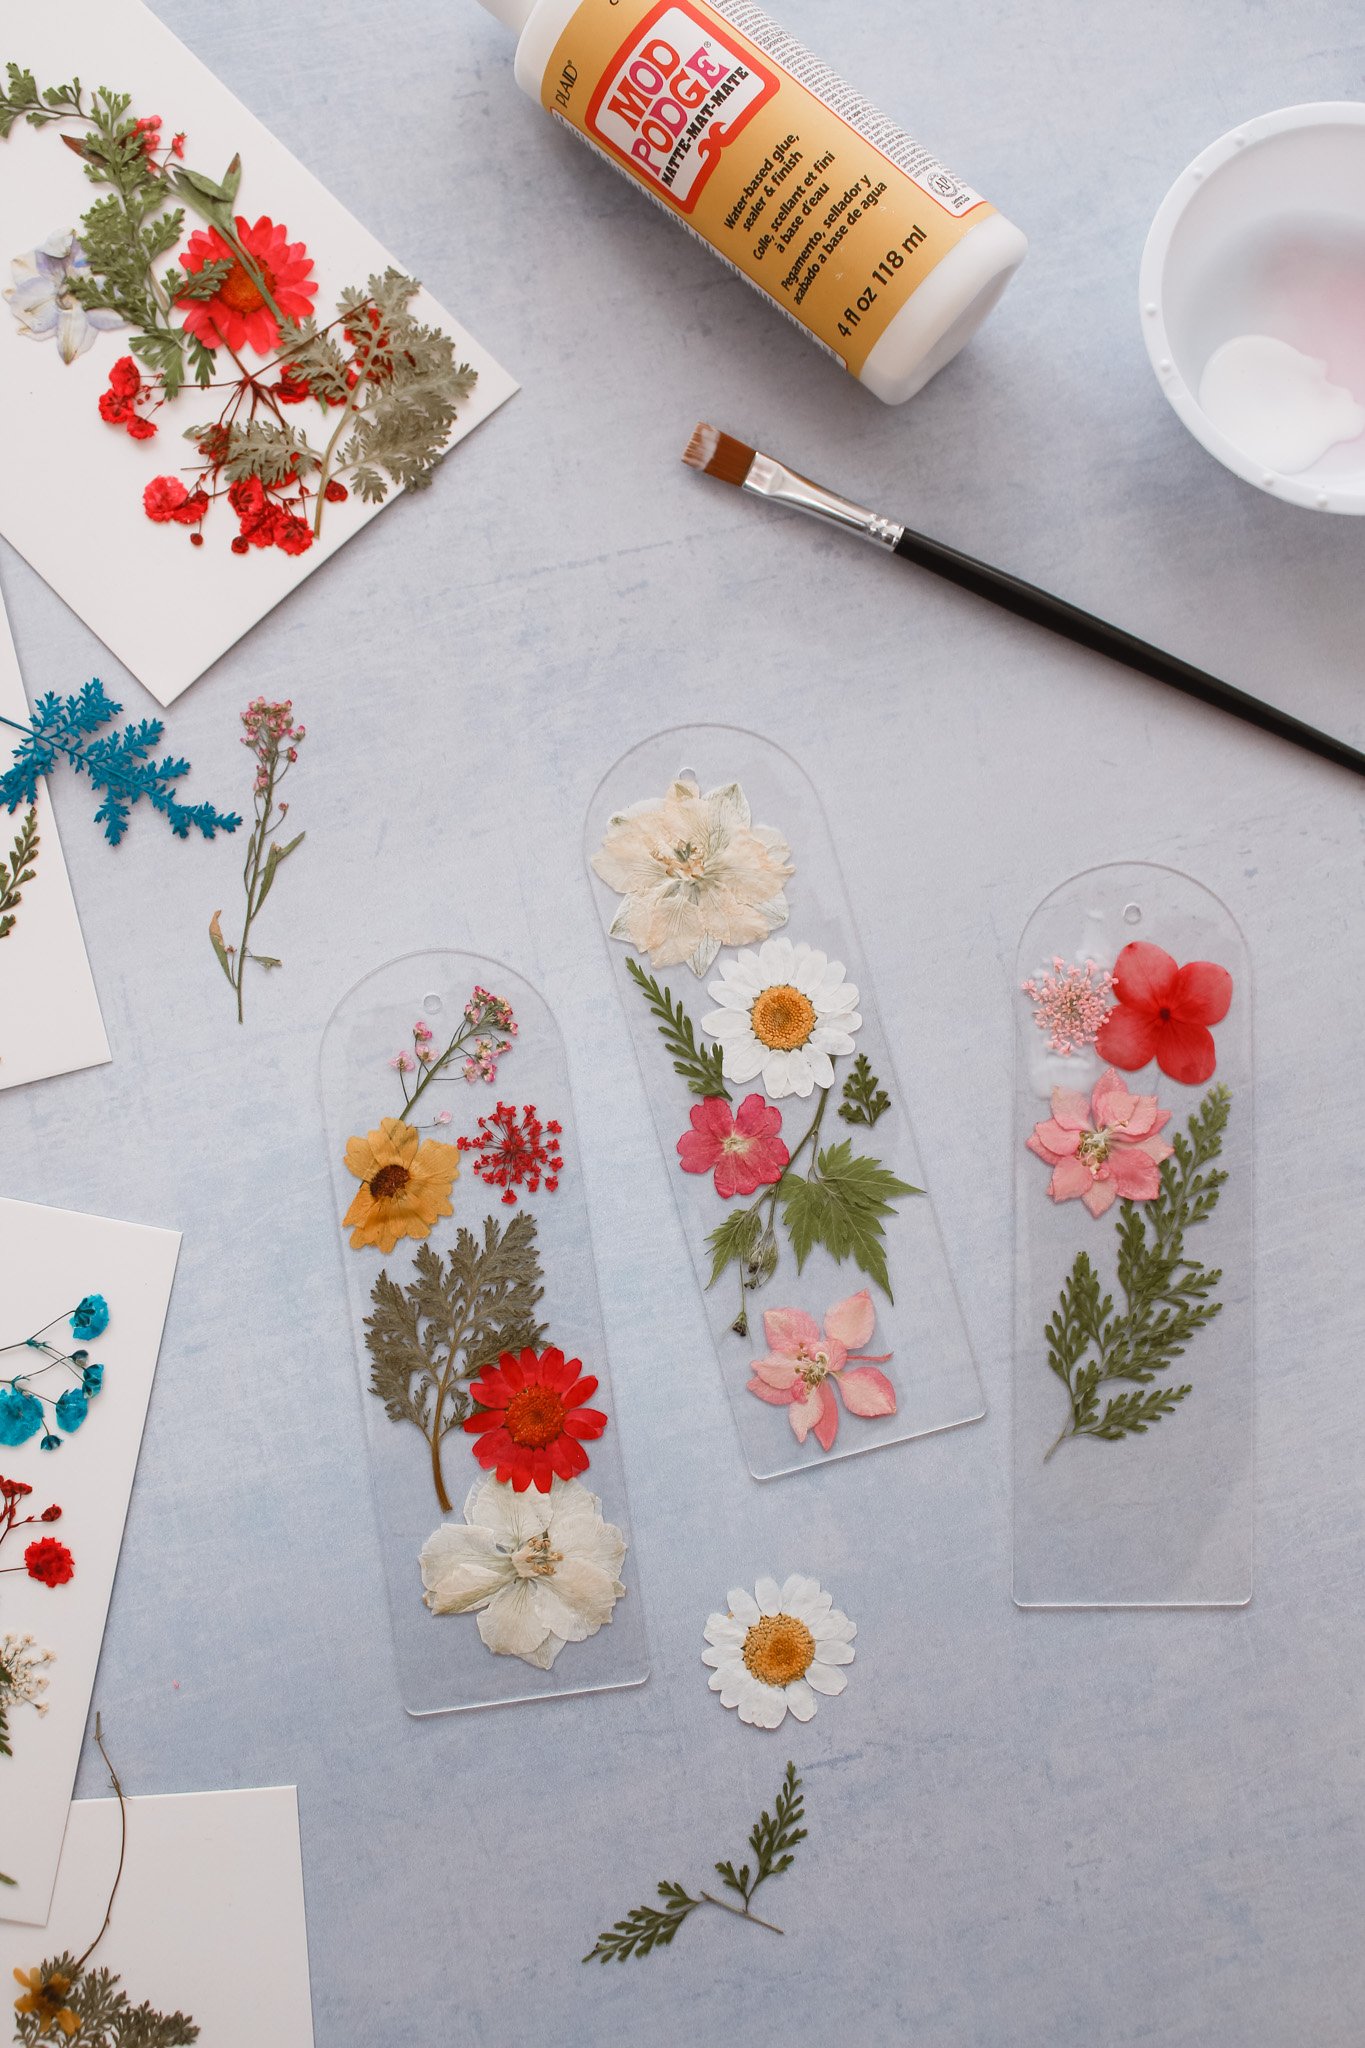
Once you have attached a few flowers, go back with your paint brush and carefully brush on a second layer of Mod Podge on top of the dried flowers. Be very gentle with this step since the dried florals are very delicate and can break easily.
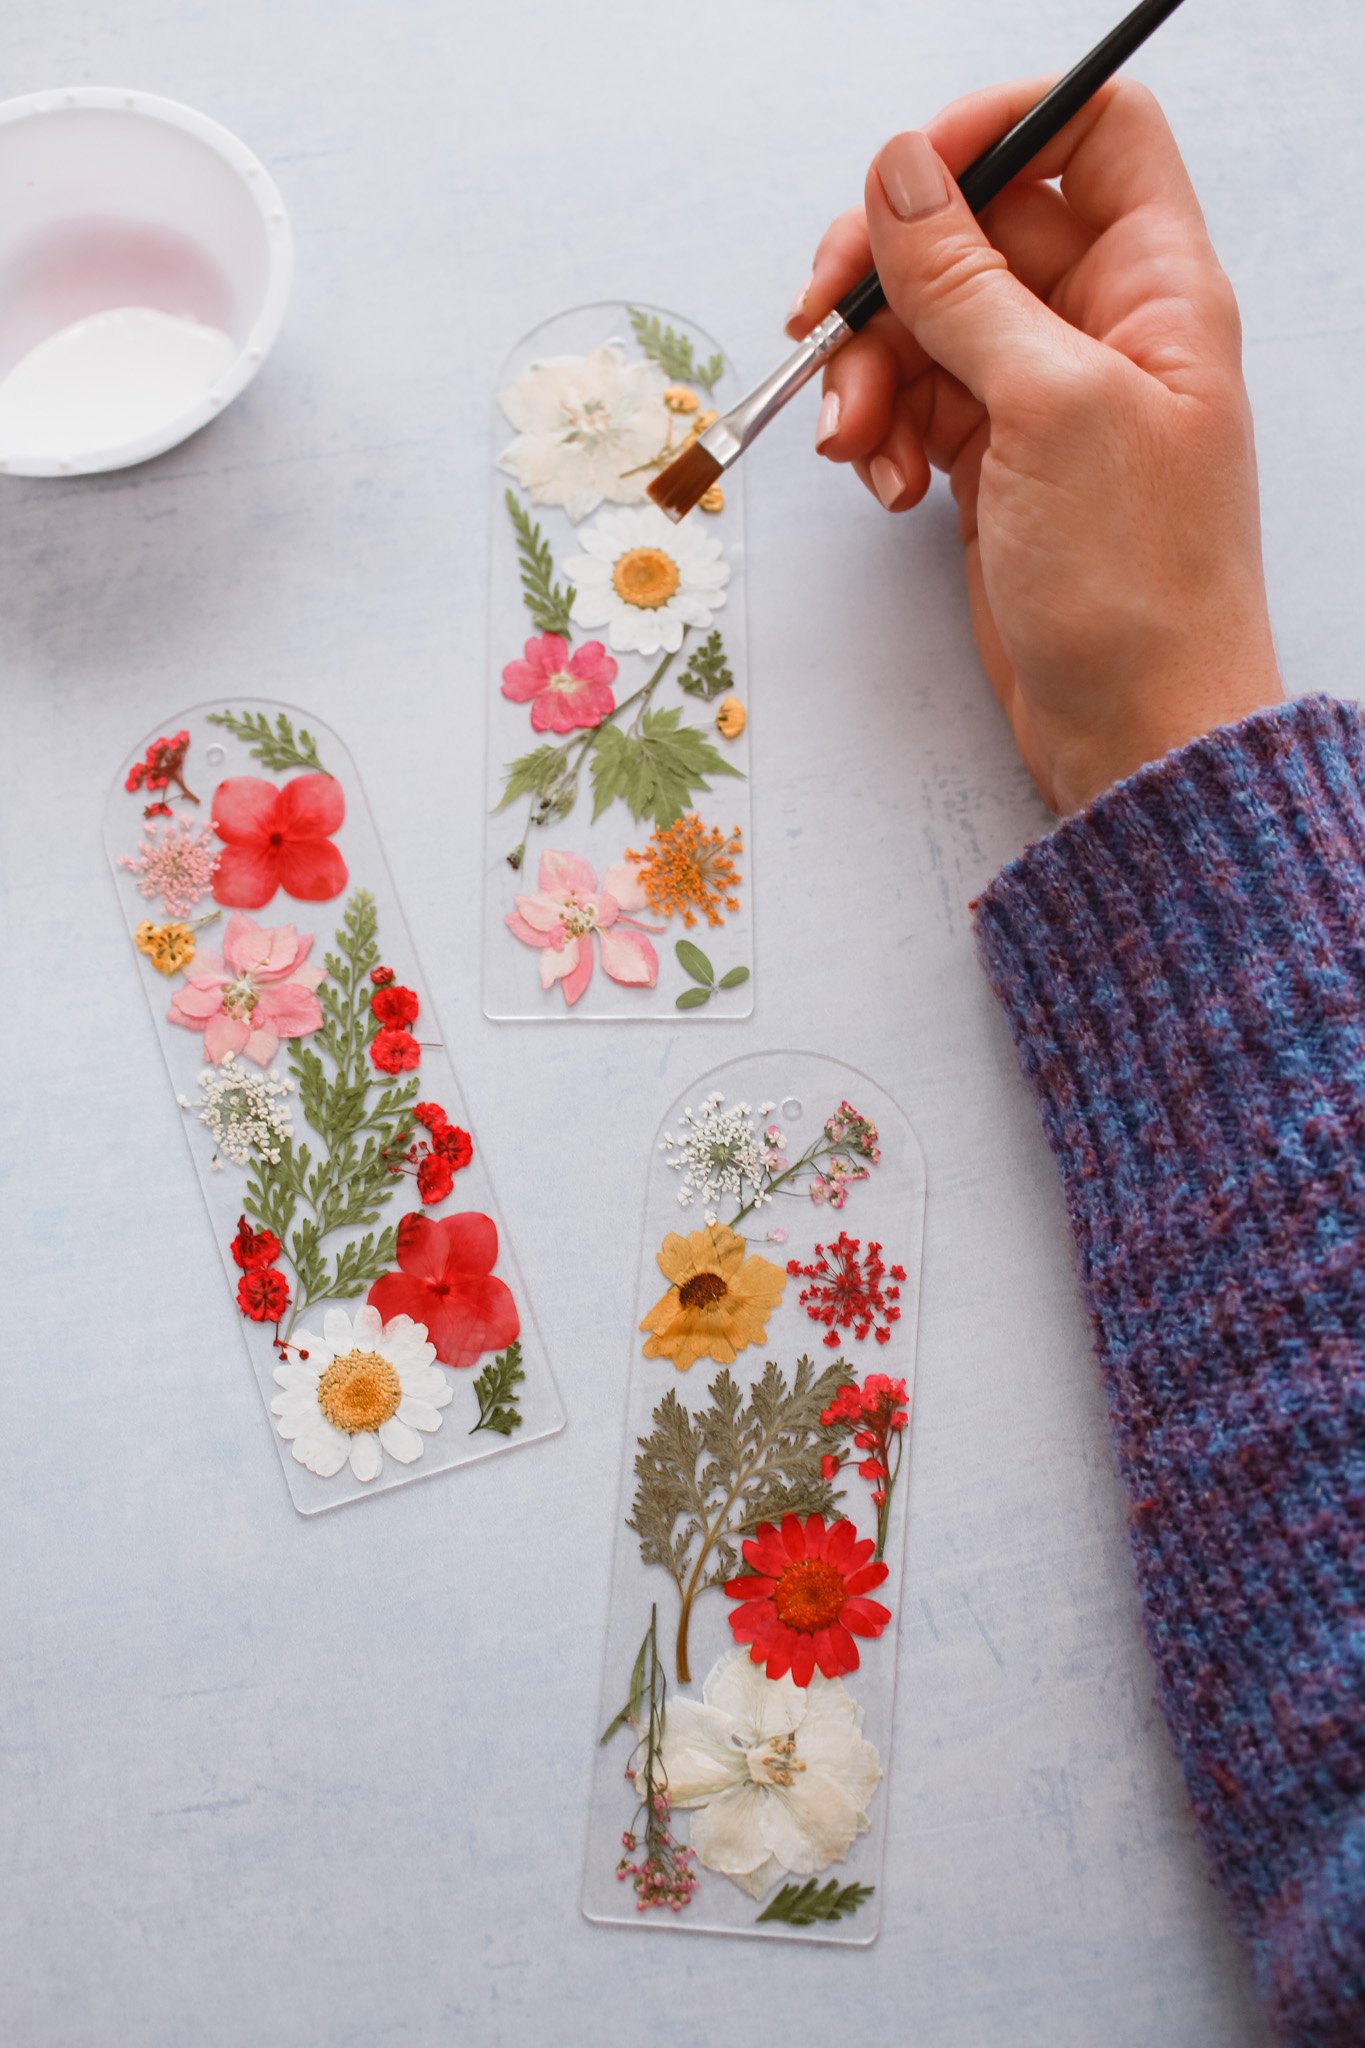
Continue this process of painting Mod Podge, pressing down your dried flowers, and then painting a layer of Mod Podge on top until the whole bookmark is filled to your liking. Let the glue dry for about 15 minutes and then I would recommend adding one more layer of Mod Podge over the whole surface just to make sure you didn’t miss any spots.
Allow the bookmarks to fully dry, and then you can add on a cute floss tassel if you would like. And the bookmarks are now ready for your next read!
Are you reading anything good this winter? My favorite of the year so far was probably The Paris Apartment by Lucy Foley. I love a good murder mystery!
xo Rachael

