
DIY Faux Stained Glass Bookmarks (& Printable!)
Despite the fact that it is now September, the weather here in LA has decided to grace us with a late-summer heat wave. The temperatures are suppose to be in the 100s all weekend, so needless to say I will be looking for some indoor air-conditioned activities to attend to while avoiding the heat. So today we have a fun craft to share if you’re looking for a creative, indoor long weekend project!
I love the look of stained glass in home decor. It is such a beautiful way to add color and light into a space. And while installing real stained glass into a rental apartment is not an option, I thought this craft was a fun way to bring the stained glass look into my home with very minimal supplies. Follow our tutorial below to see how to make these DIY faux stained glass bookmarks to use as a bookmark or sun catcher!
Affiliate disclosure: This post contains several affiliate links. As an Amazon Associate, I may earn commissions from qualifying purchases from Amazon.com. Thank you for your support!

How to Paint Faux Stained Glass

You will need:
Clear Elmer’s glue
Acrylic paint in various colors
Paint brushes
Gallery Glass black liquid leading (you can also make this by mixing black acrylic paint into a bottle of white Elmer’s glue — but I found the Gallery Glass version to be easier to use)
Clear acrylic bookmarks (these are the ones I used and is the exact bookmark that fits the ETI printable template)
Masking tape
Tassels (optional — mine came with my bookmarks!)
ETI Faux Stained Glass Bookmarks Printable Template (download below!)
STEP 1: Print out our Faux Stained Glass Bookmarks printable template PDF. There are four different designs for you to choose from. Or make them all and share with friends!
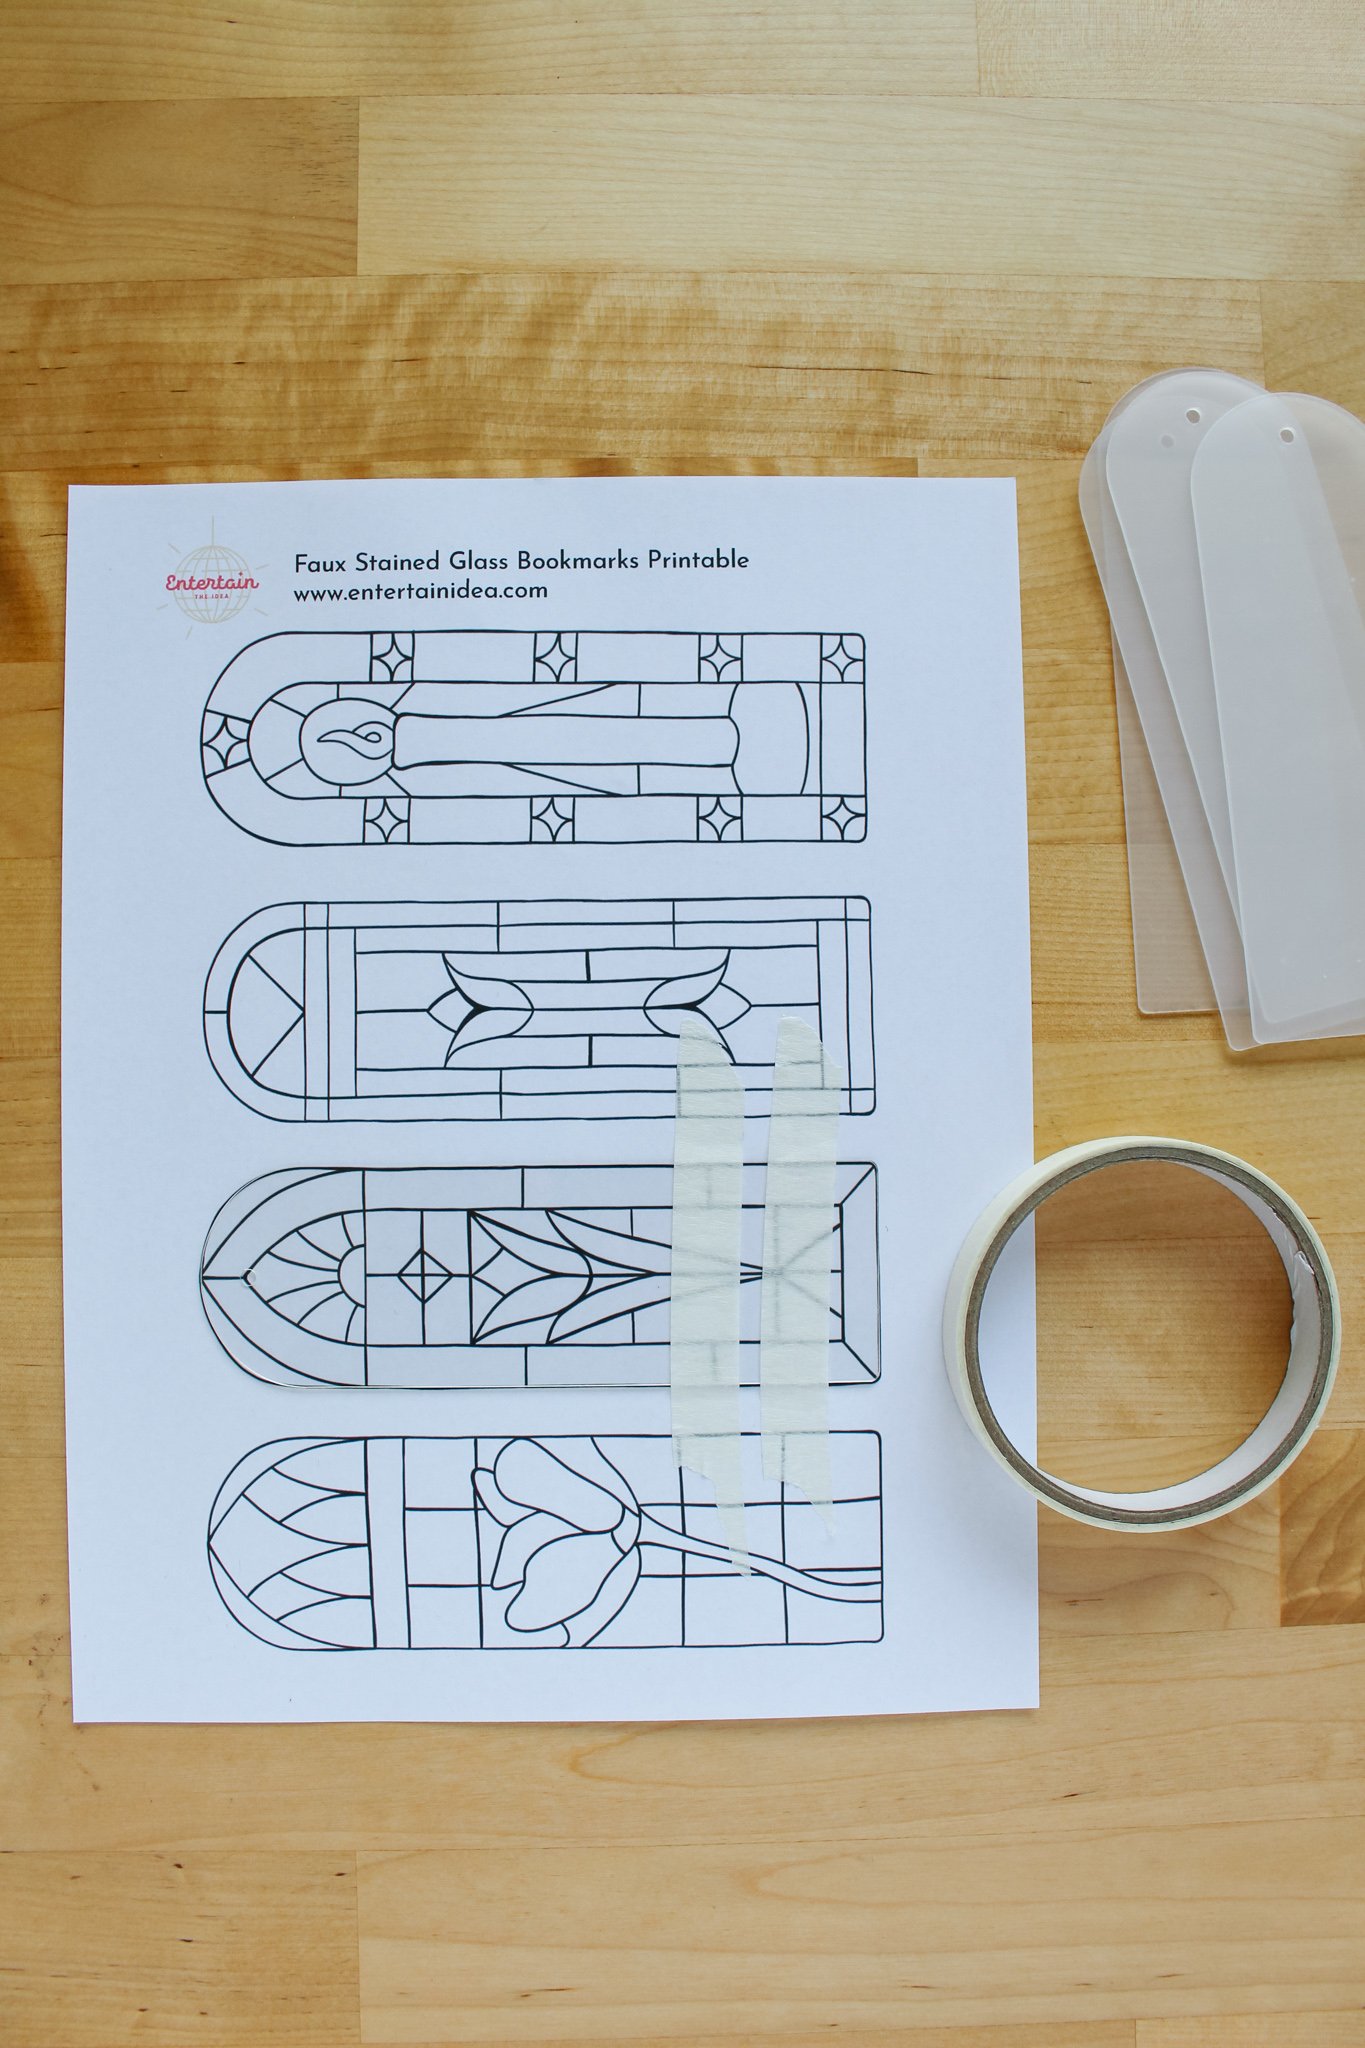

STEP 2: Pull off the protective plastic on both sides of your acrylic bookmarks. Place your acrylic bookmark on top of whatever design you would like to make, matching up the edge as close as possible.
Place a piece of masking tape on the bottom half of the bookmark to secure the acrylic in place while you trace your design.
STEP 3: Give your black liquid leading paint a shake before starting. I would also recommend trying out the paint on a scrap piece of paper or paper towel to get used to the pressure/flow of creating an even line.
Very carefully, trace the lines of your printable design onto the acrylic bookmark with the black leading paint. Just trace the top half of the design for now (above your masking tape). The slower you go, the easier it is to get an even line. Try to do full lines before lifting up your paint to get a steady looking line.
If you make a mistake or need to adjust a line, you can use a toothpick to push the black paint into place or to remove unwanted paint.
**TIP: Whenever you intersect another line during this process, I would recommend wiping the end of your black leading paint off on a piece of paper towel before starting again. That way you don’t track more paint across your surface.

STEP 4: Allow the black leading paint to dry overnight before moving onto the lower section. Now that the top half of the design is complete, you can remove the masking tape and roll your tape under the top design to secure it in place while you complete the bottom half.
Repeat step 3 on the bottom half of your design & allow your bookmark to dry overnight.
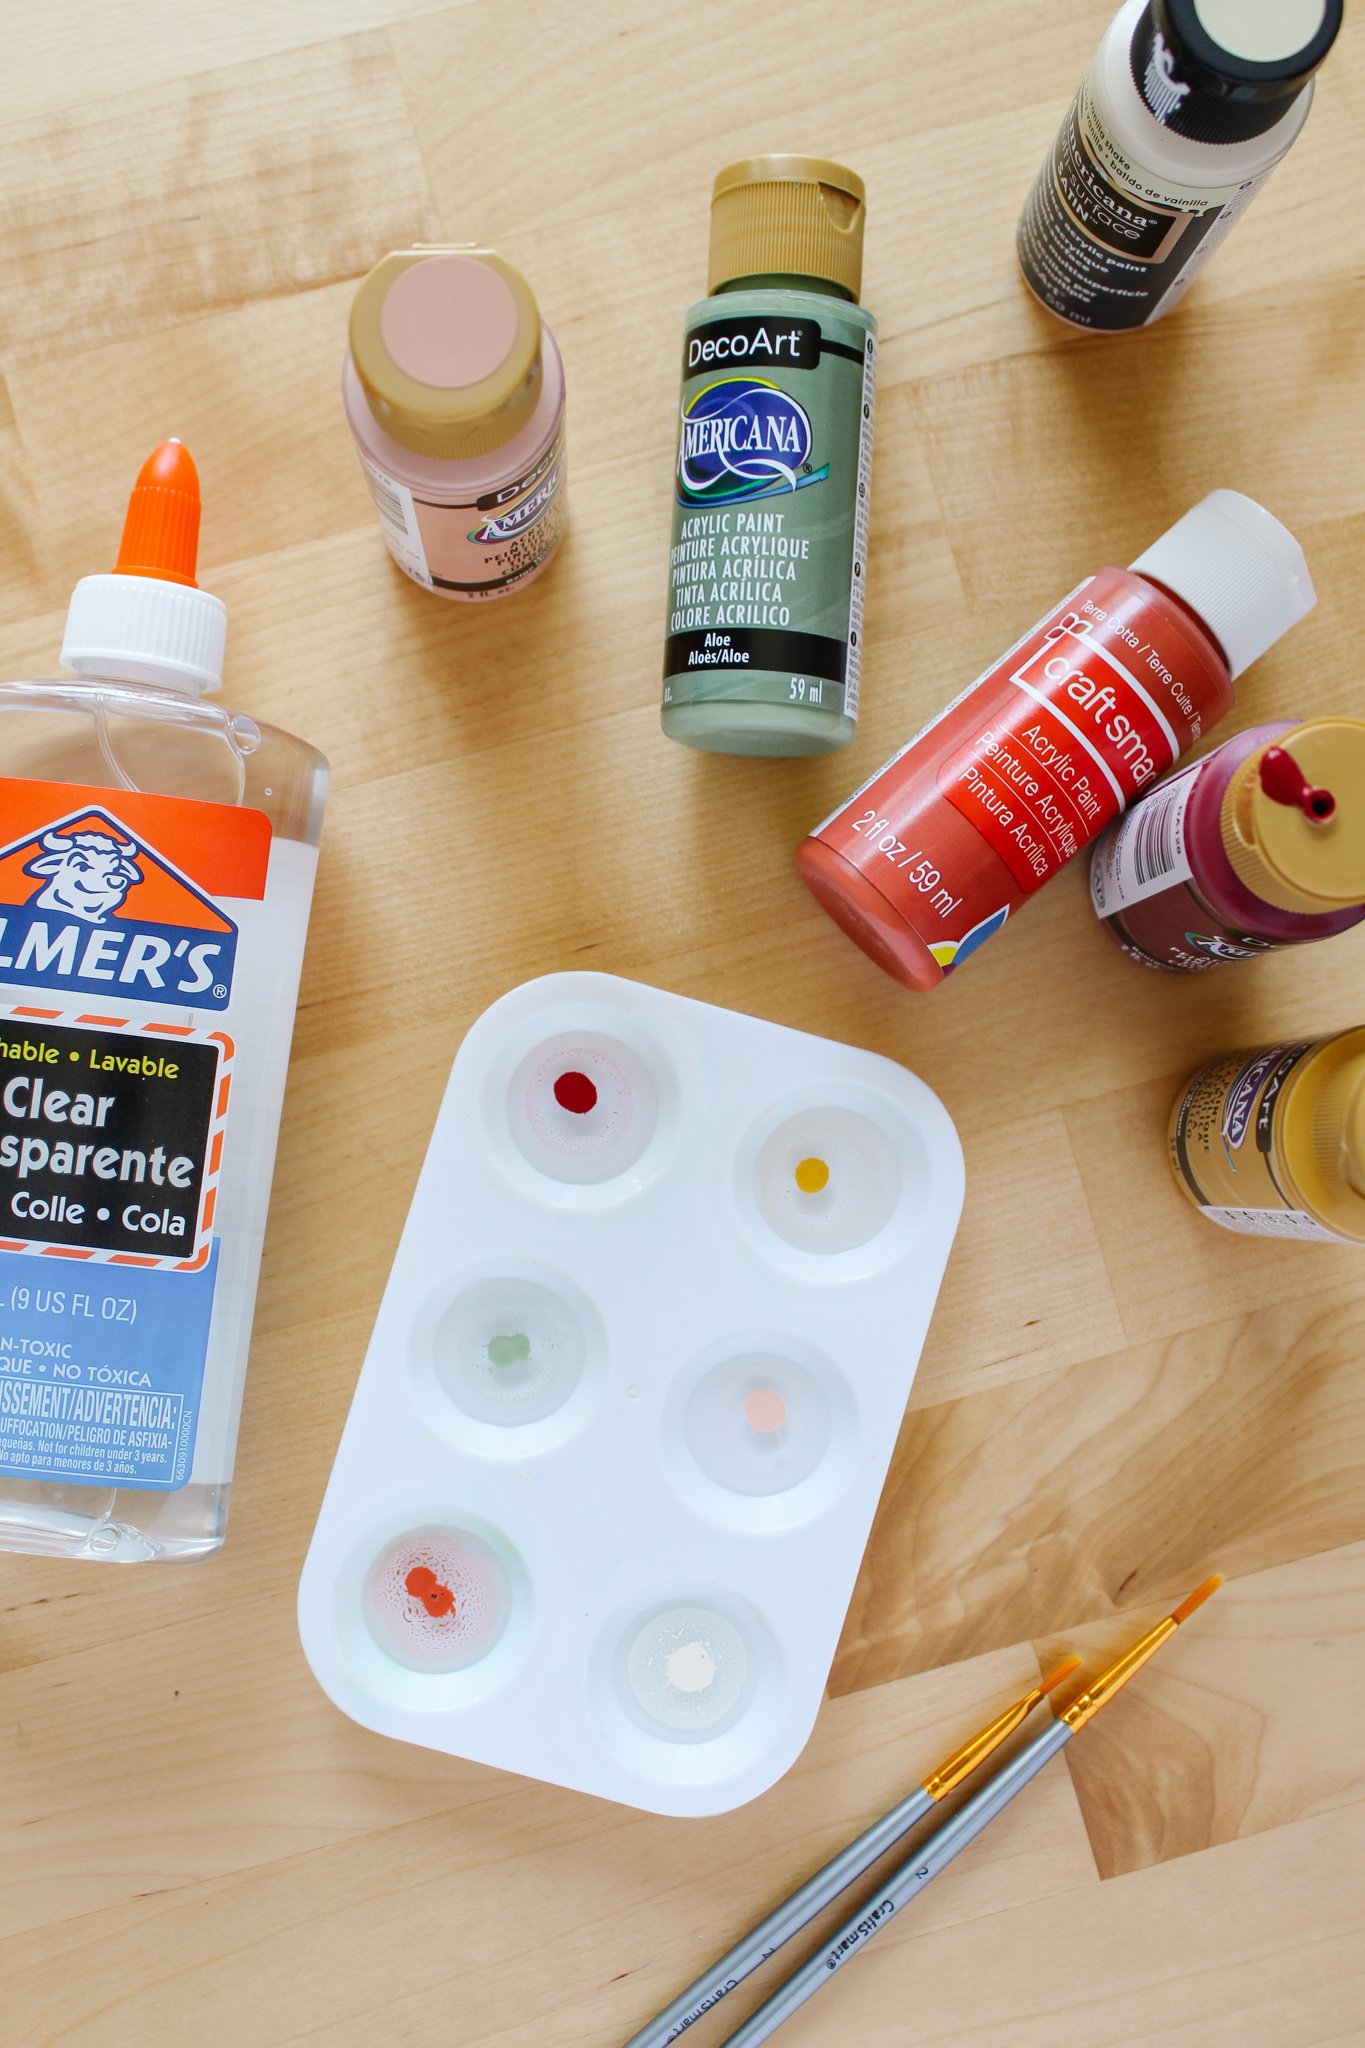
STEP 5: Now it is time to create your stained glass paint. For this process you will want to mix a dollop of clear Elmer’s glue with about 2 drops of acrylic paint. You may want to adjust this ratio to your preference.
The more paint you add, the more opaque the paint will show. If it feels too opaque, go ahead and mix in more glue to make it more transparent. It just depends on the look you’re going for! I used about 2-3 drops of acrylic paint and maybe about 1 teaspoon worth of Elmer’s glue per color.
**TIP: I would recommend having a spare piece of acrylic or an extra acrylic bookmark nearby to test the transparency of your paint before painting on your actual stained glass project.
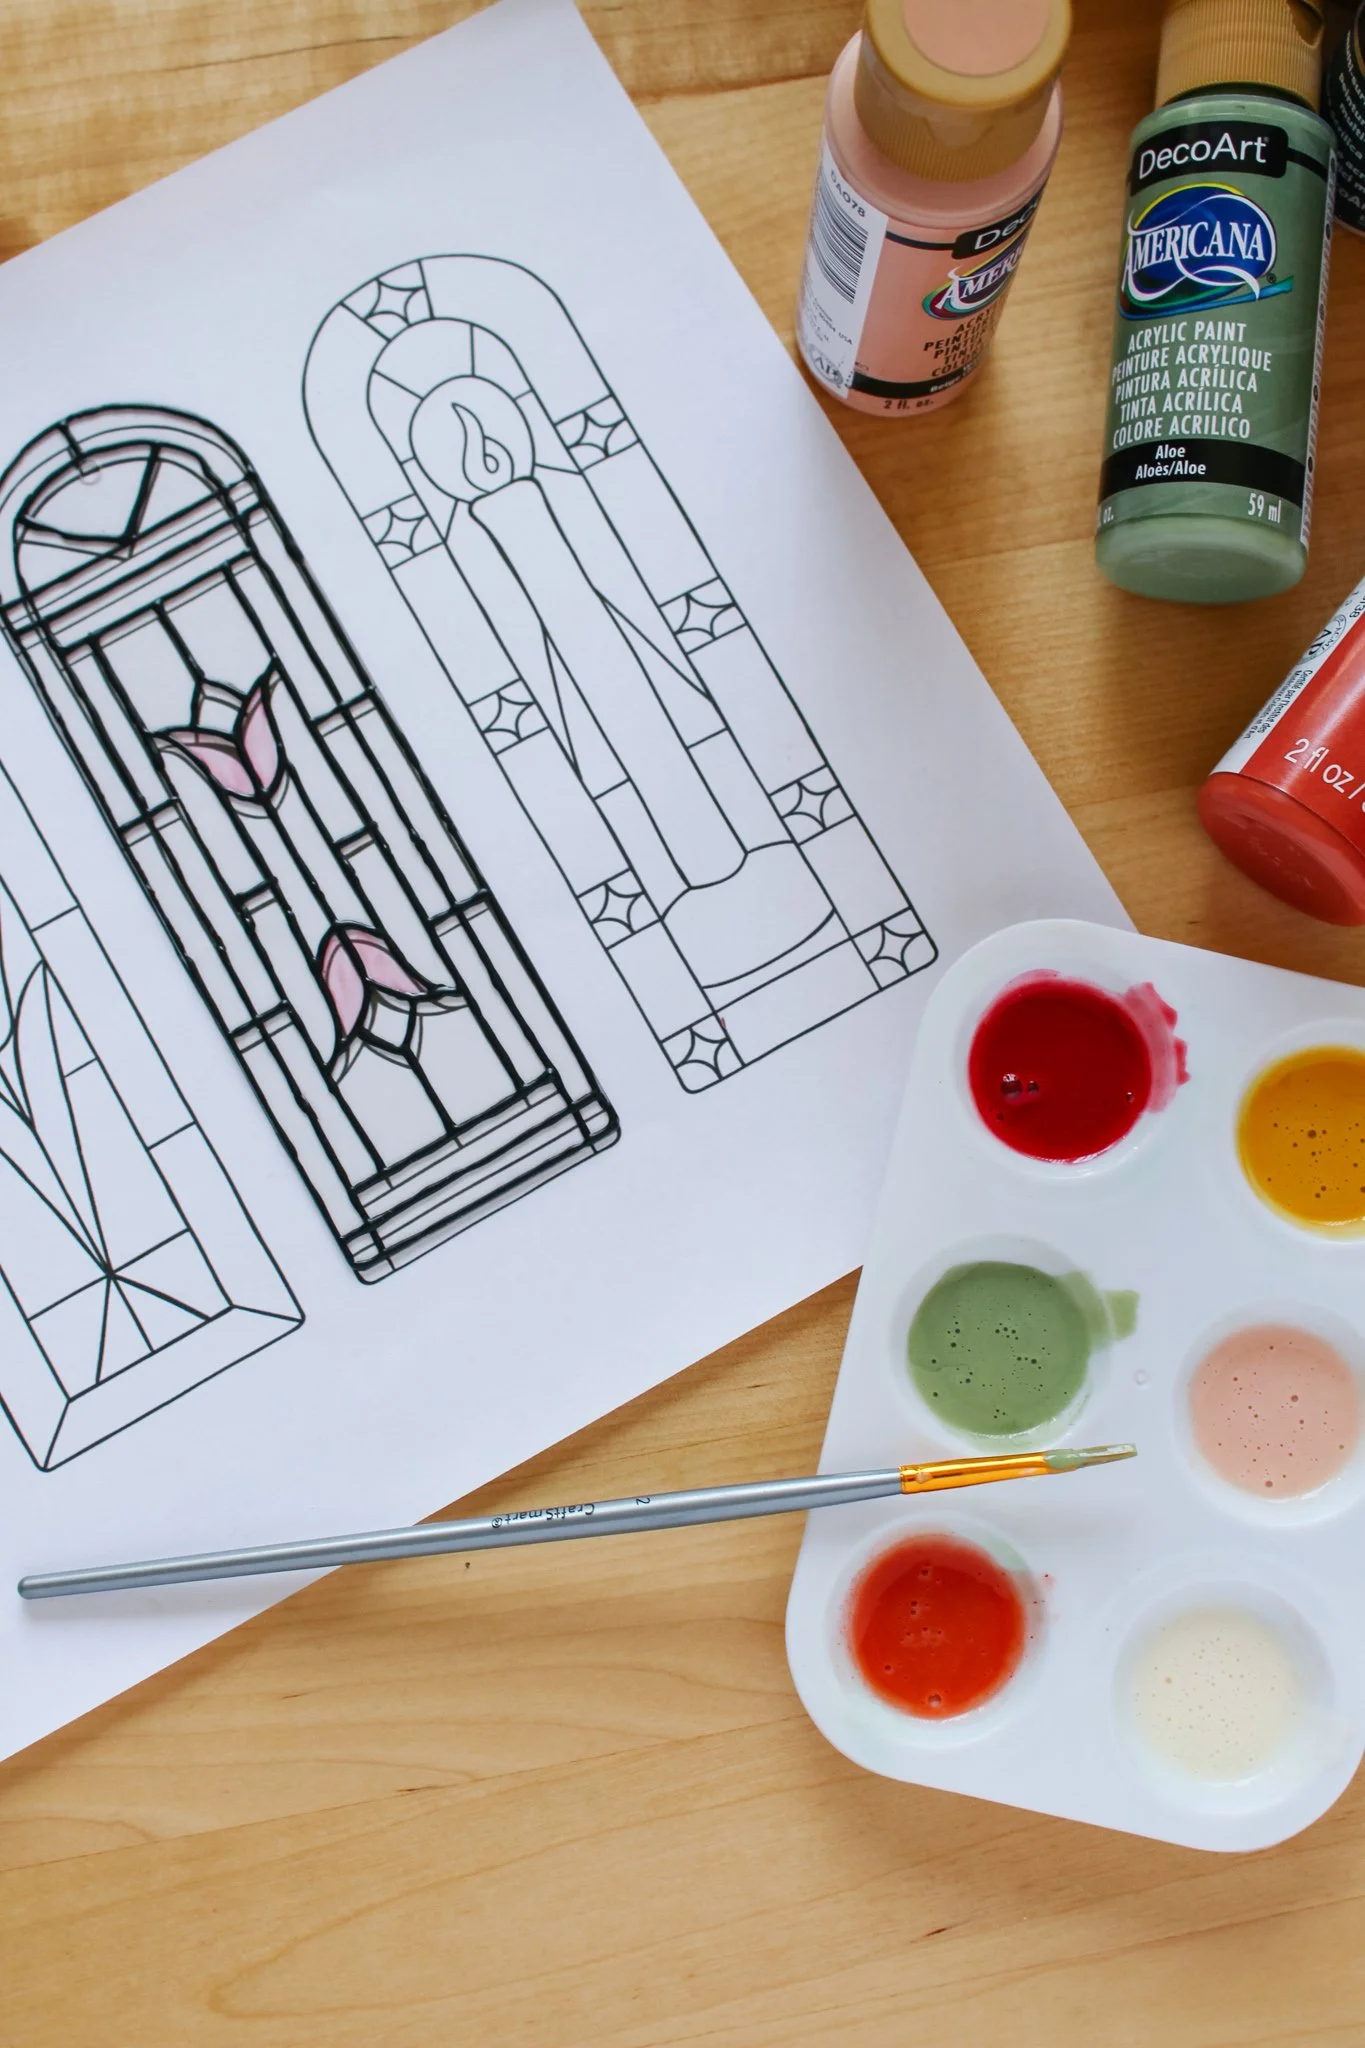
STEP 6: Now is the fun part! Pretend you’re back in kindergarten learning to color, and do your very best to paint within the lines. Carefully fill the different shapes with paint as evenly as possible. You may want to go back and do a second coat of paint once the first coat dries if you want a more opaque & even looking design.

The whole process of faux stained glass is a bit trial and error. So I would recommend making a few of these bookmarks as practice pieces first to get the hang of the steady black leading and the right combination of paint/glue for your liking!
Mine definitely did not come out perfect by any means, but I like the imprecise, handmade look of this fun project! It is also a very therapeutic craft to slow down and enjoy the process.
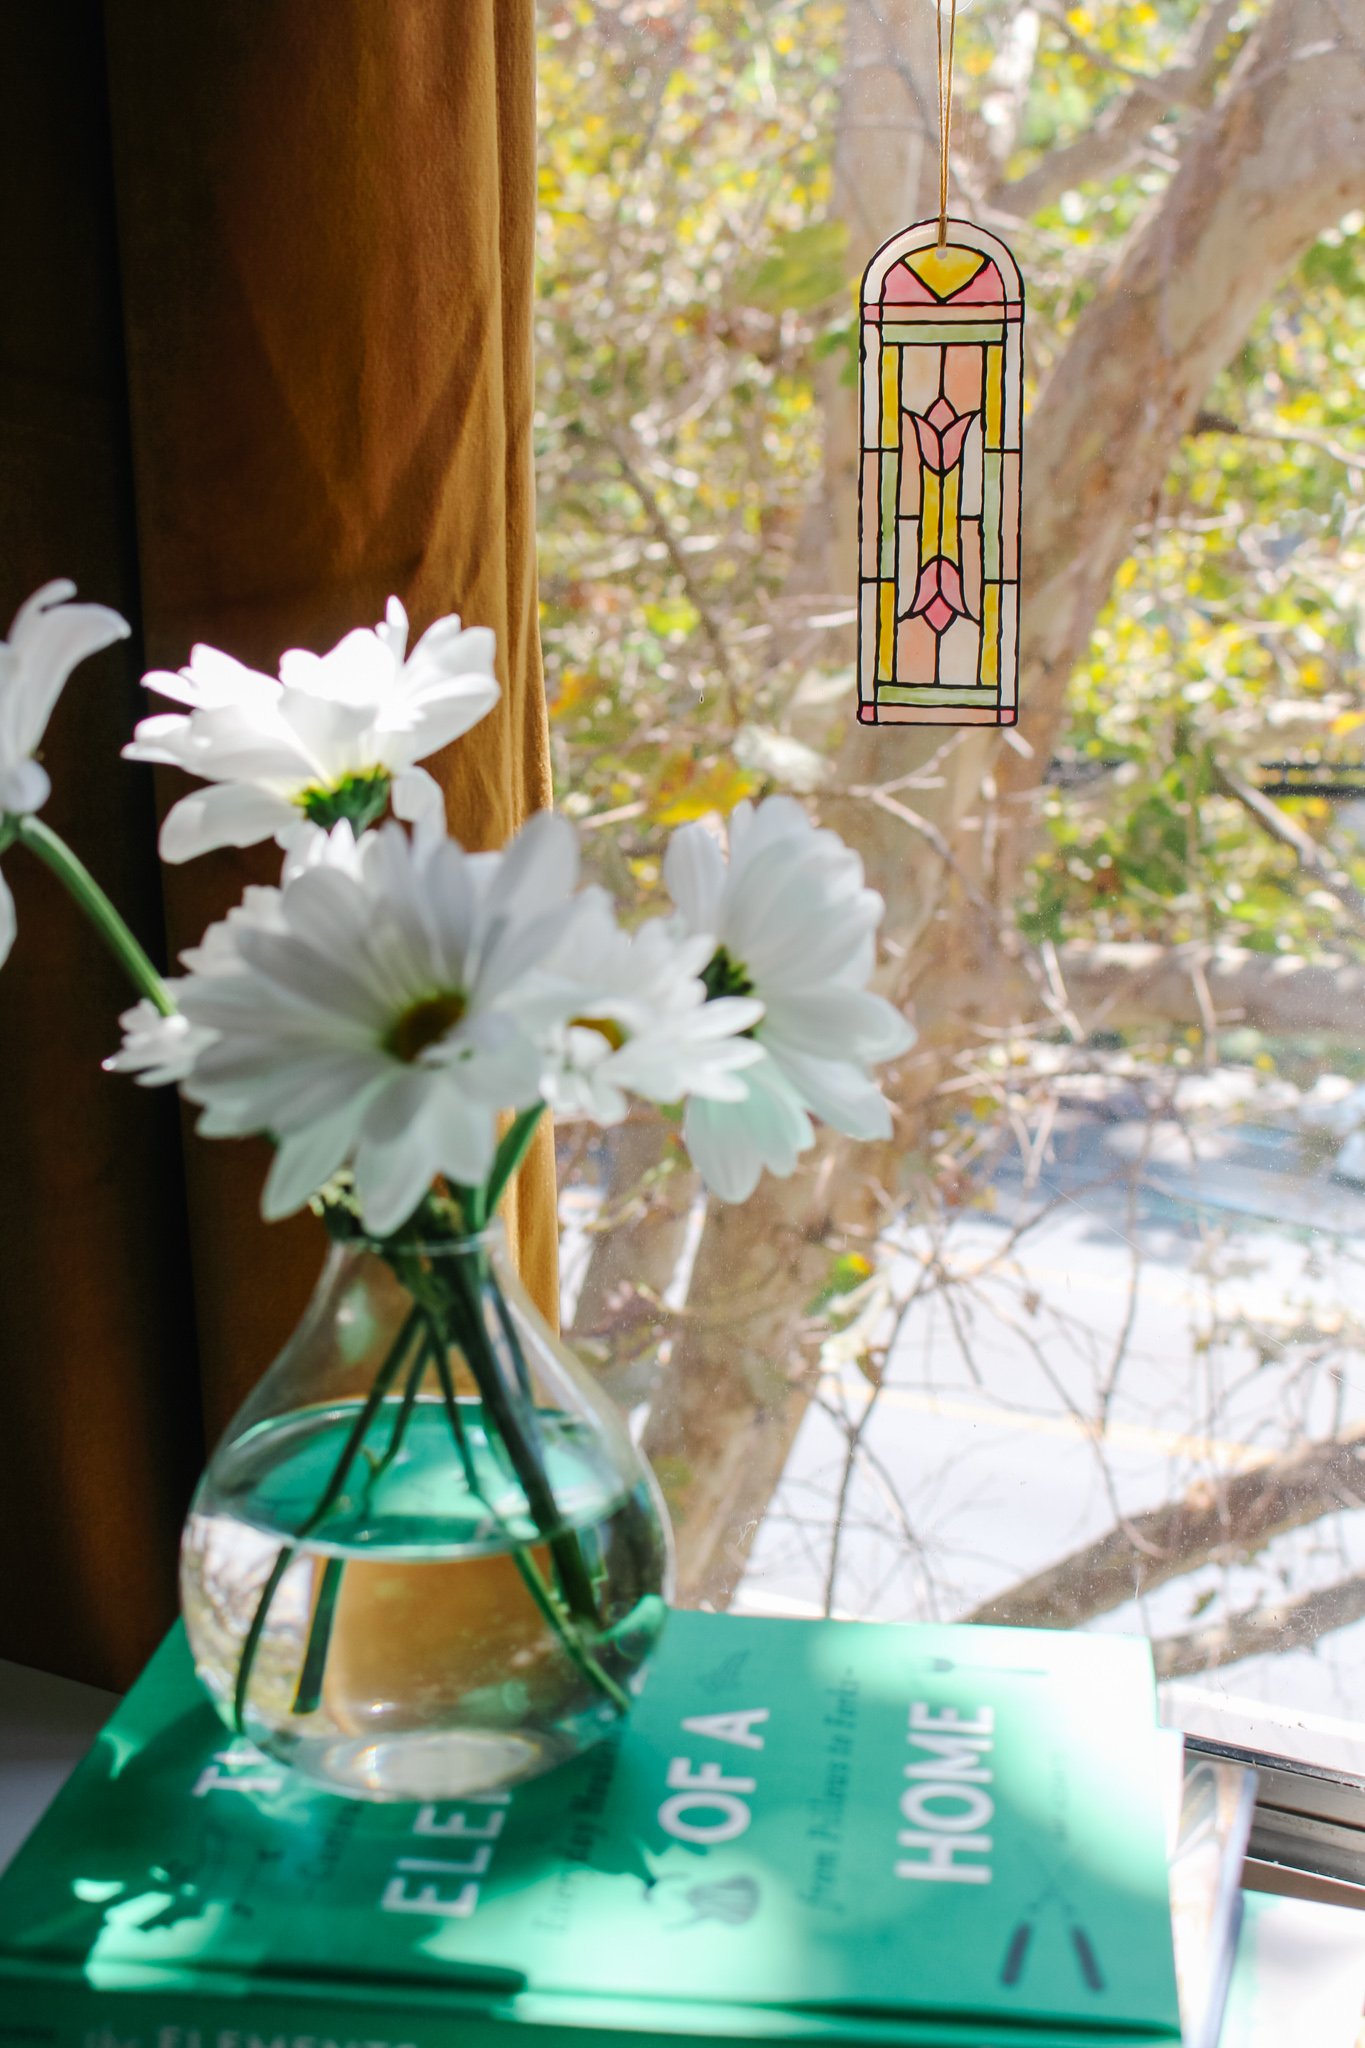
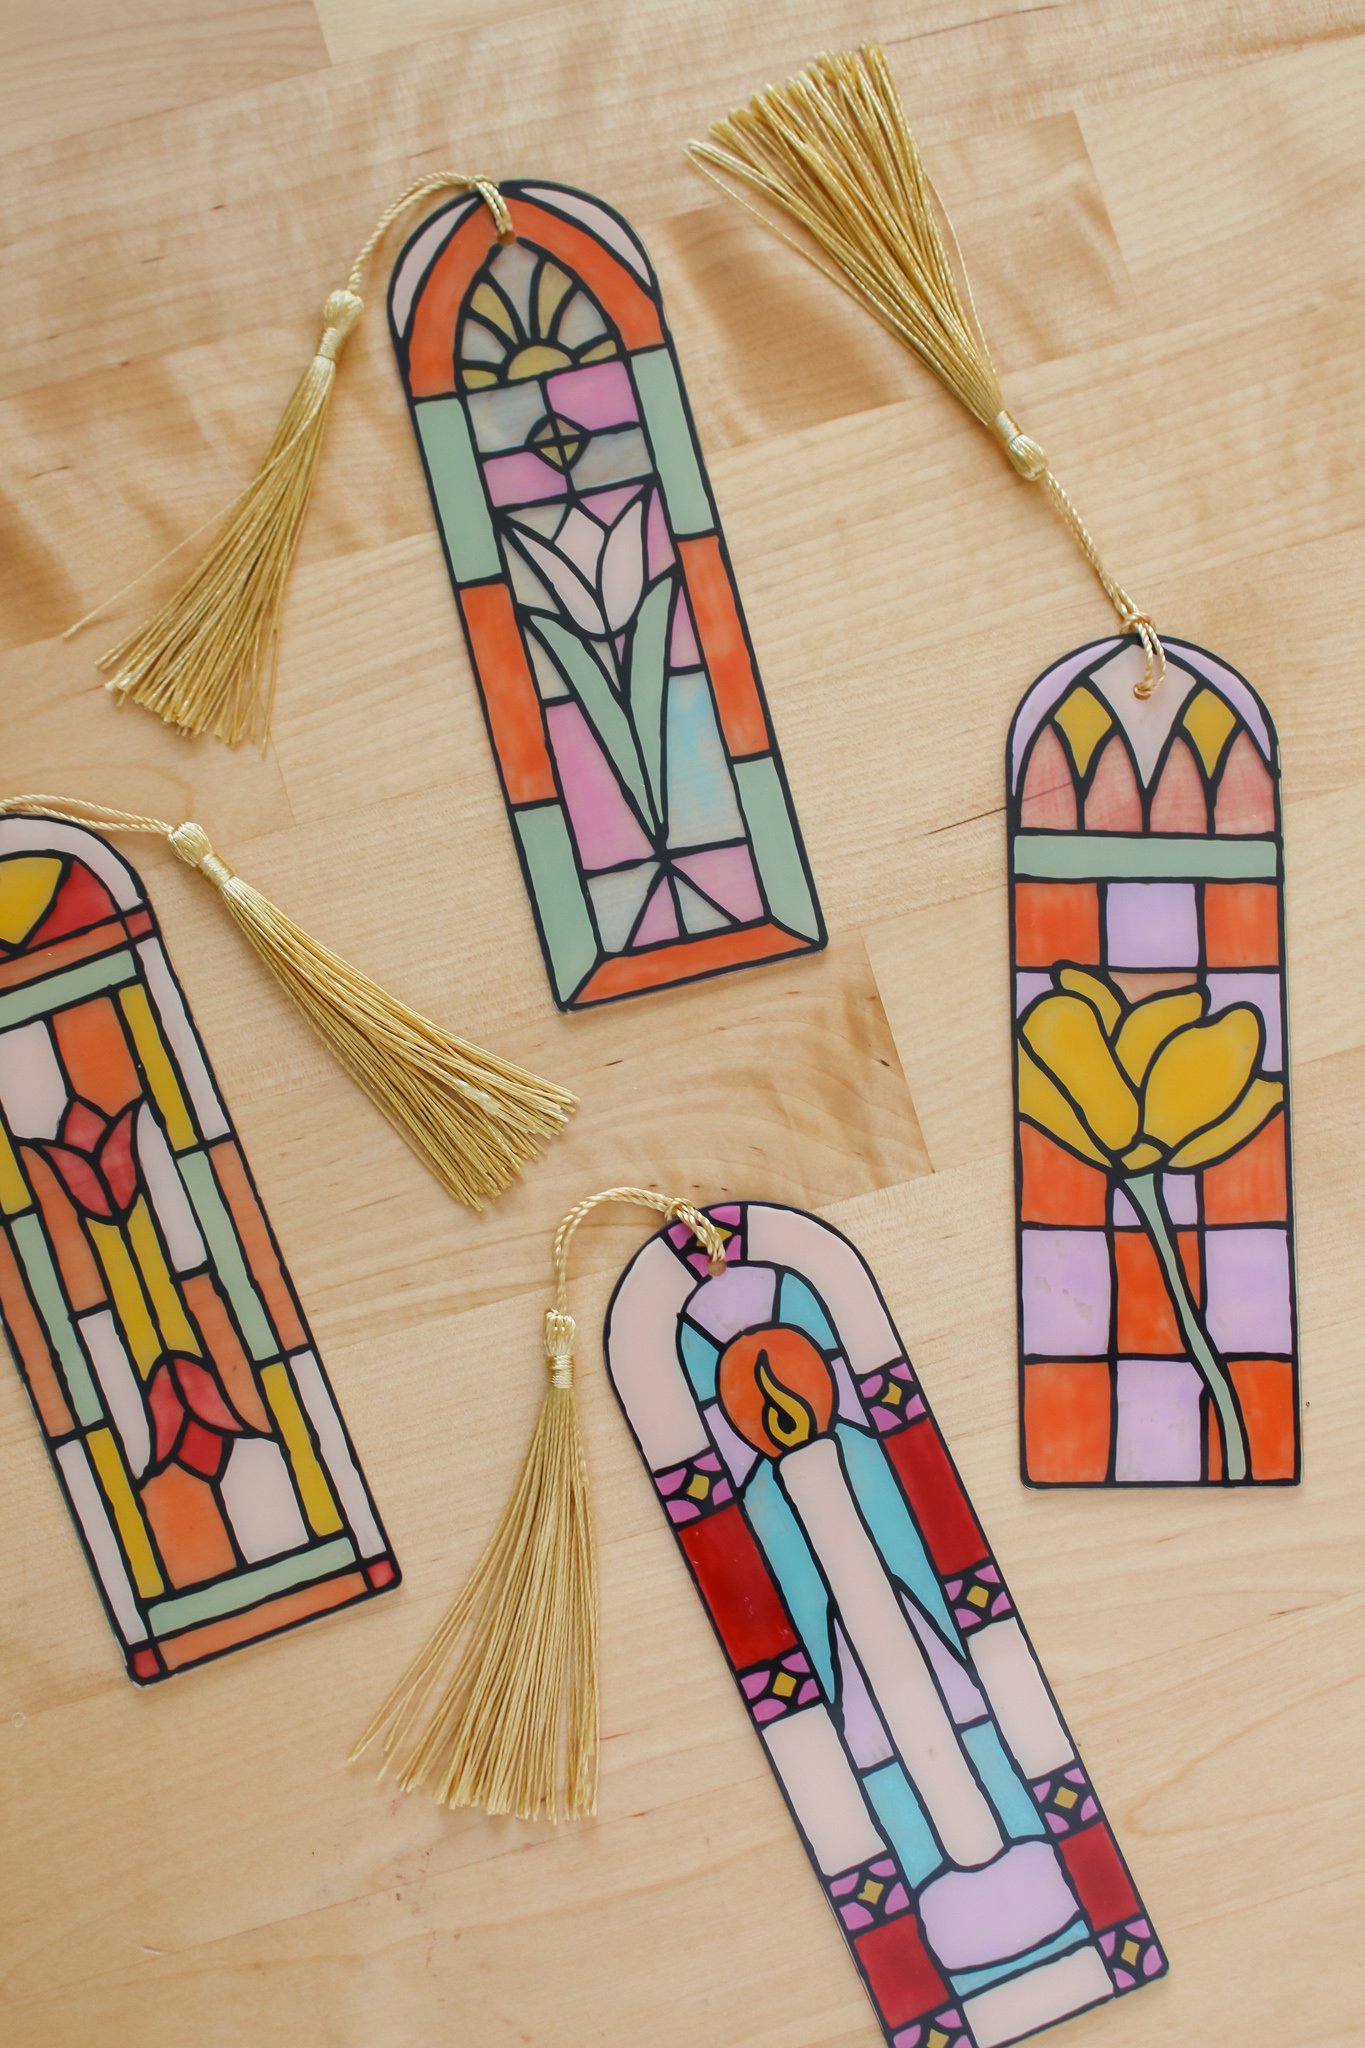
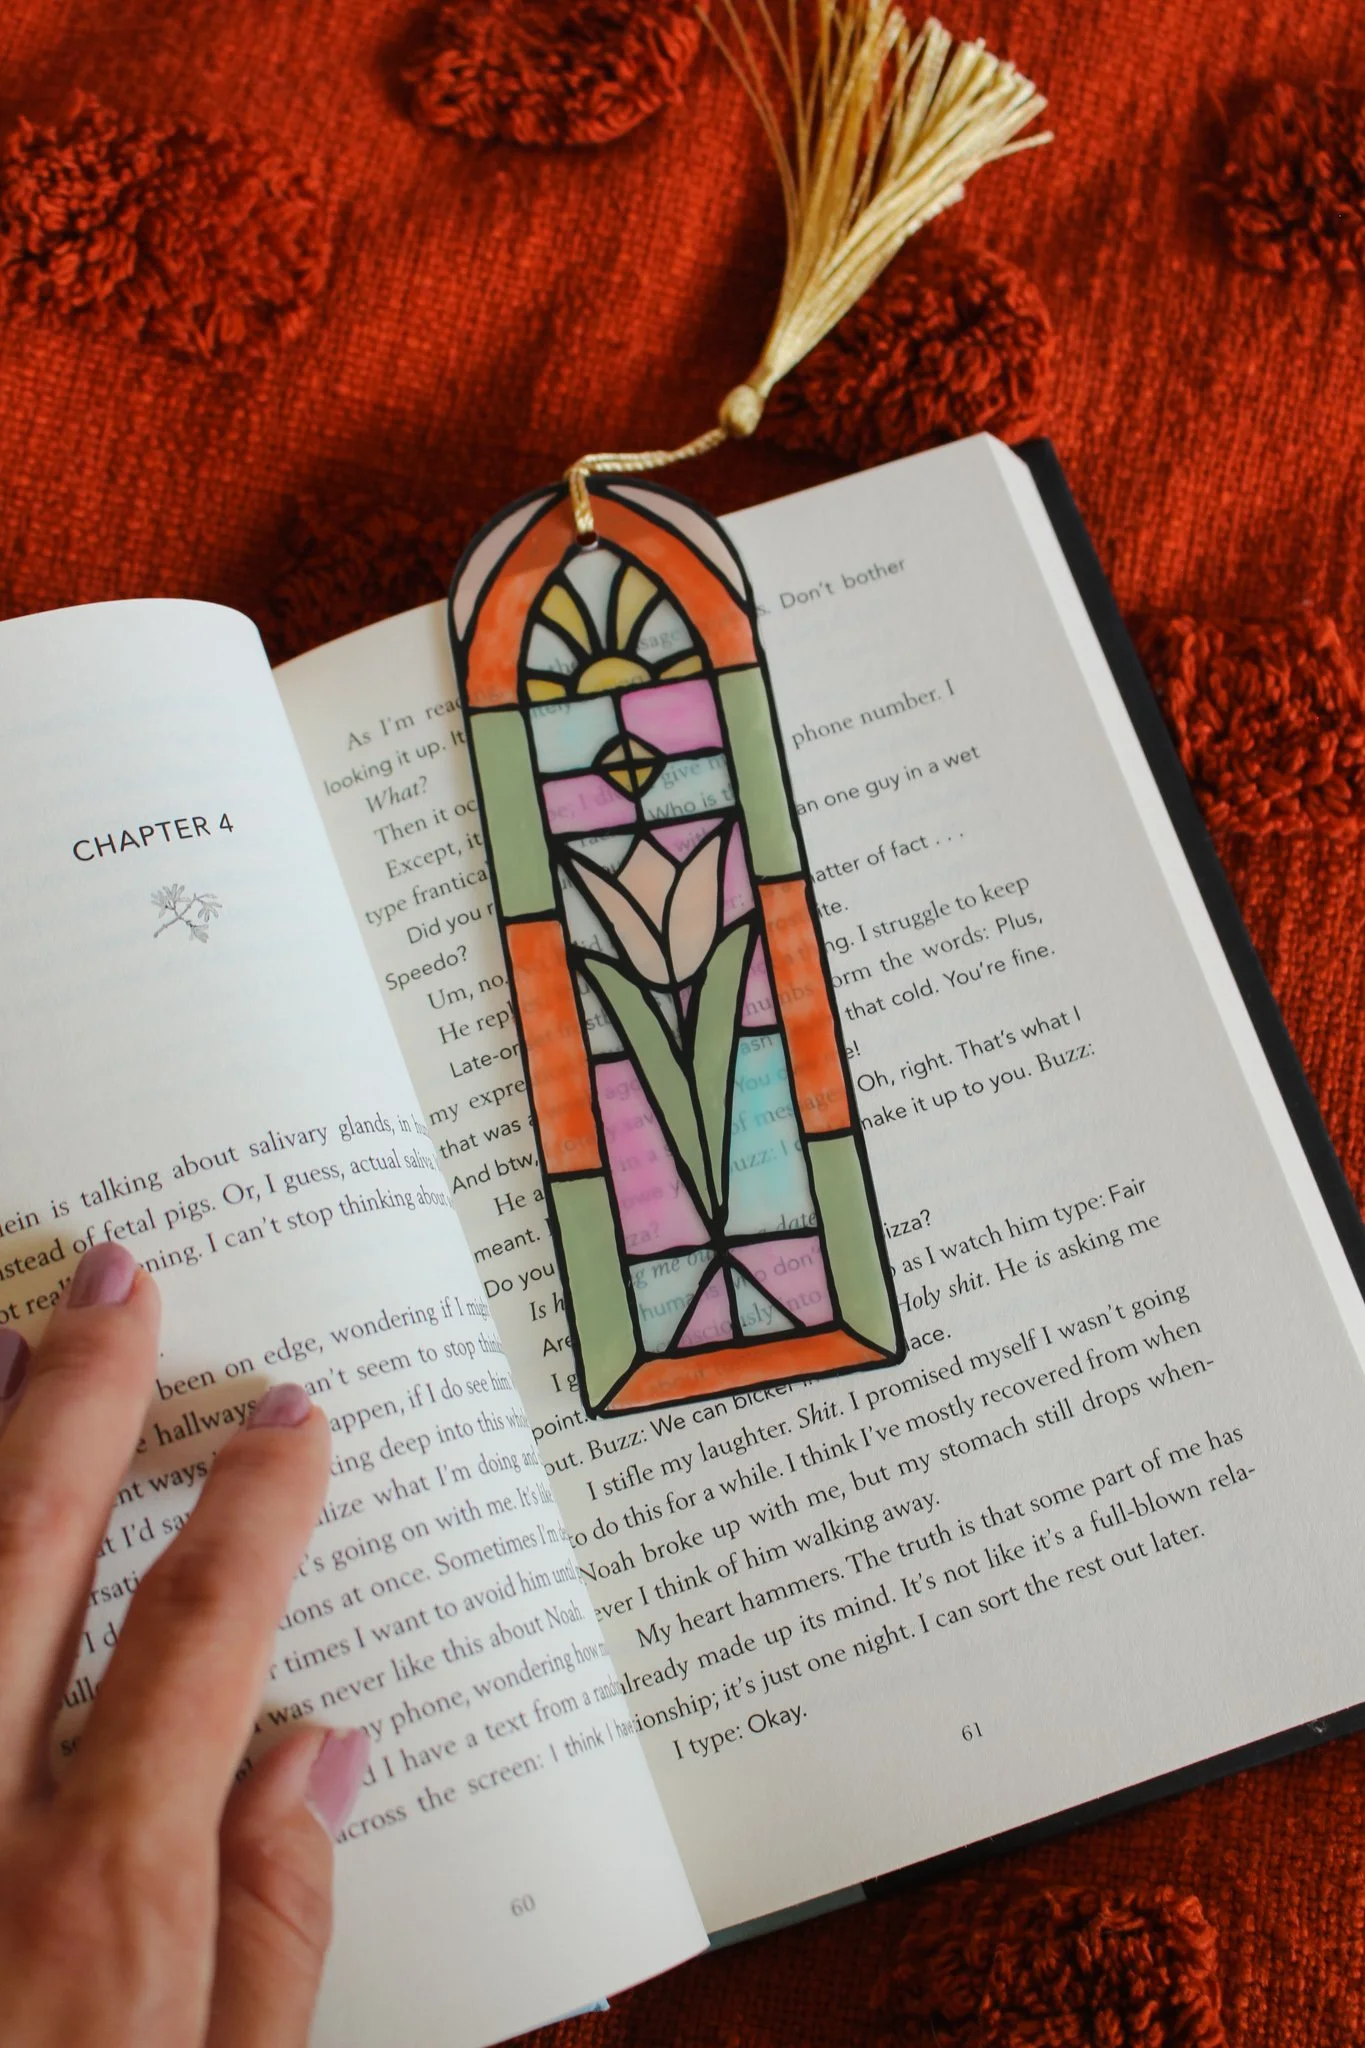
These stained glass bookmarks can certainly be used as an actual bookmark for whatever book you are currently reading — I added on the cute gold tassels that came with my acrylic bookmarks to complete the look.
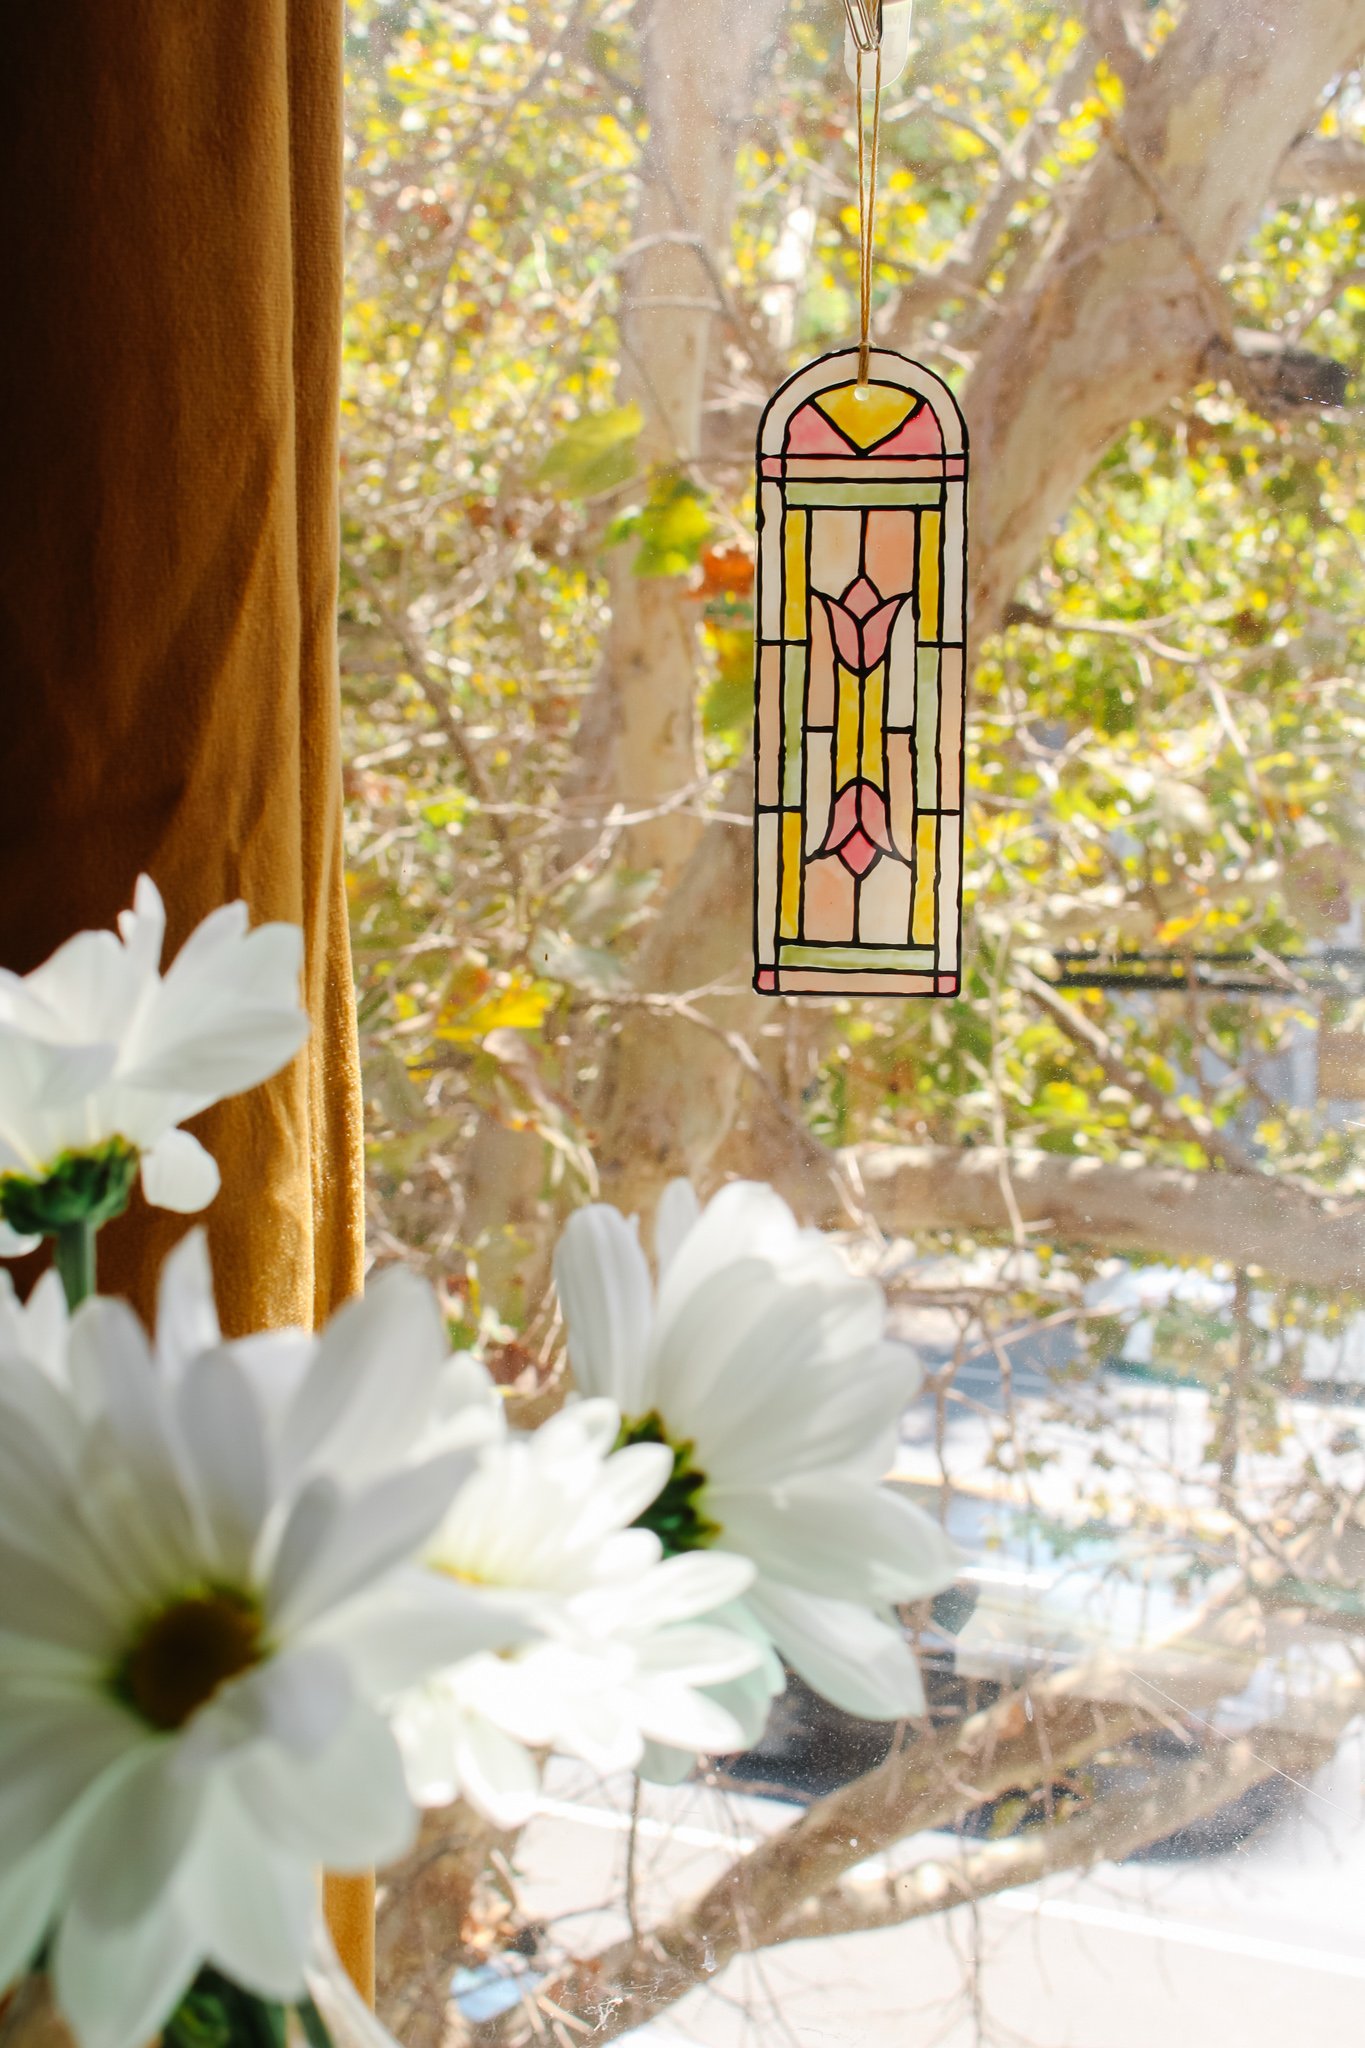
But I think they also look cute as a sun catcher in your window with the light shining through the transparent paint! For this, I just strung a piece of yarn through the hole in the top of the bookmark and attached a command hook to my window (you could also use a suction cup hook). You could even hang up a few in a row to create more of a statement piece.

Speaking of bookmarks… if you’re interested in some book recommendations, here are a few books on my TBR shelf this autumn! Bring on all the cozy fall vibes with witches, ghosts, magic, and quaint small towns :)
The Ex Hex by Erin Sterling
The Dead Romantics by Ashley Poston
Love in the Time of Serial Killers by Alicia Thompson
A Far Wilder Magic by Allison Saft
The Southern Book Clubs Guide to Slaying Vampires by Grady Hendrix
The Hunting Party by Lucy Foley
Cackle by Rachel Harrison
If you’ve already read any of these, I’d love to know how you liked them. xo Rachael

