
Woven Velvet Storage Box
This post is sponsored by Michaels.
Happy New Year! Hope you are all enjoying a slow and restful start to 2026. In case you haven’t noticed, it has been a while since I’ve posted on the blog — where did the last year go?! — I’ve been a bit busy around here with a new season of life. We welcomed our new baby girl, Della, into the world last spring, and we’ve been soaking up all the sweet moments since then. So needless to say the blog moved to the back burner for a bit. But I’m back and more inspired than ever, so bring on the new projects this year!
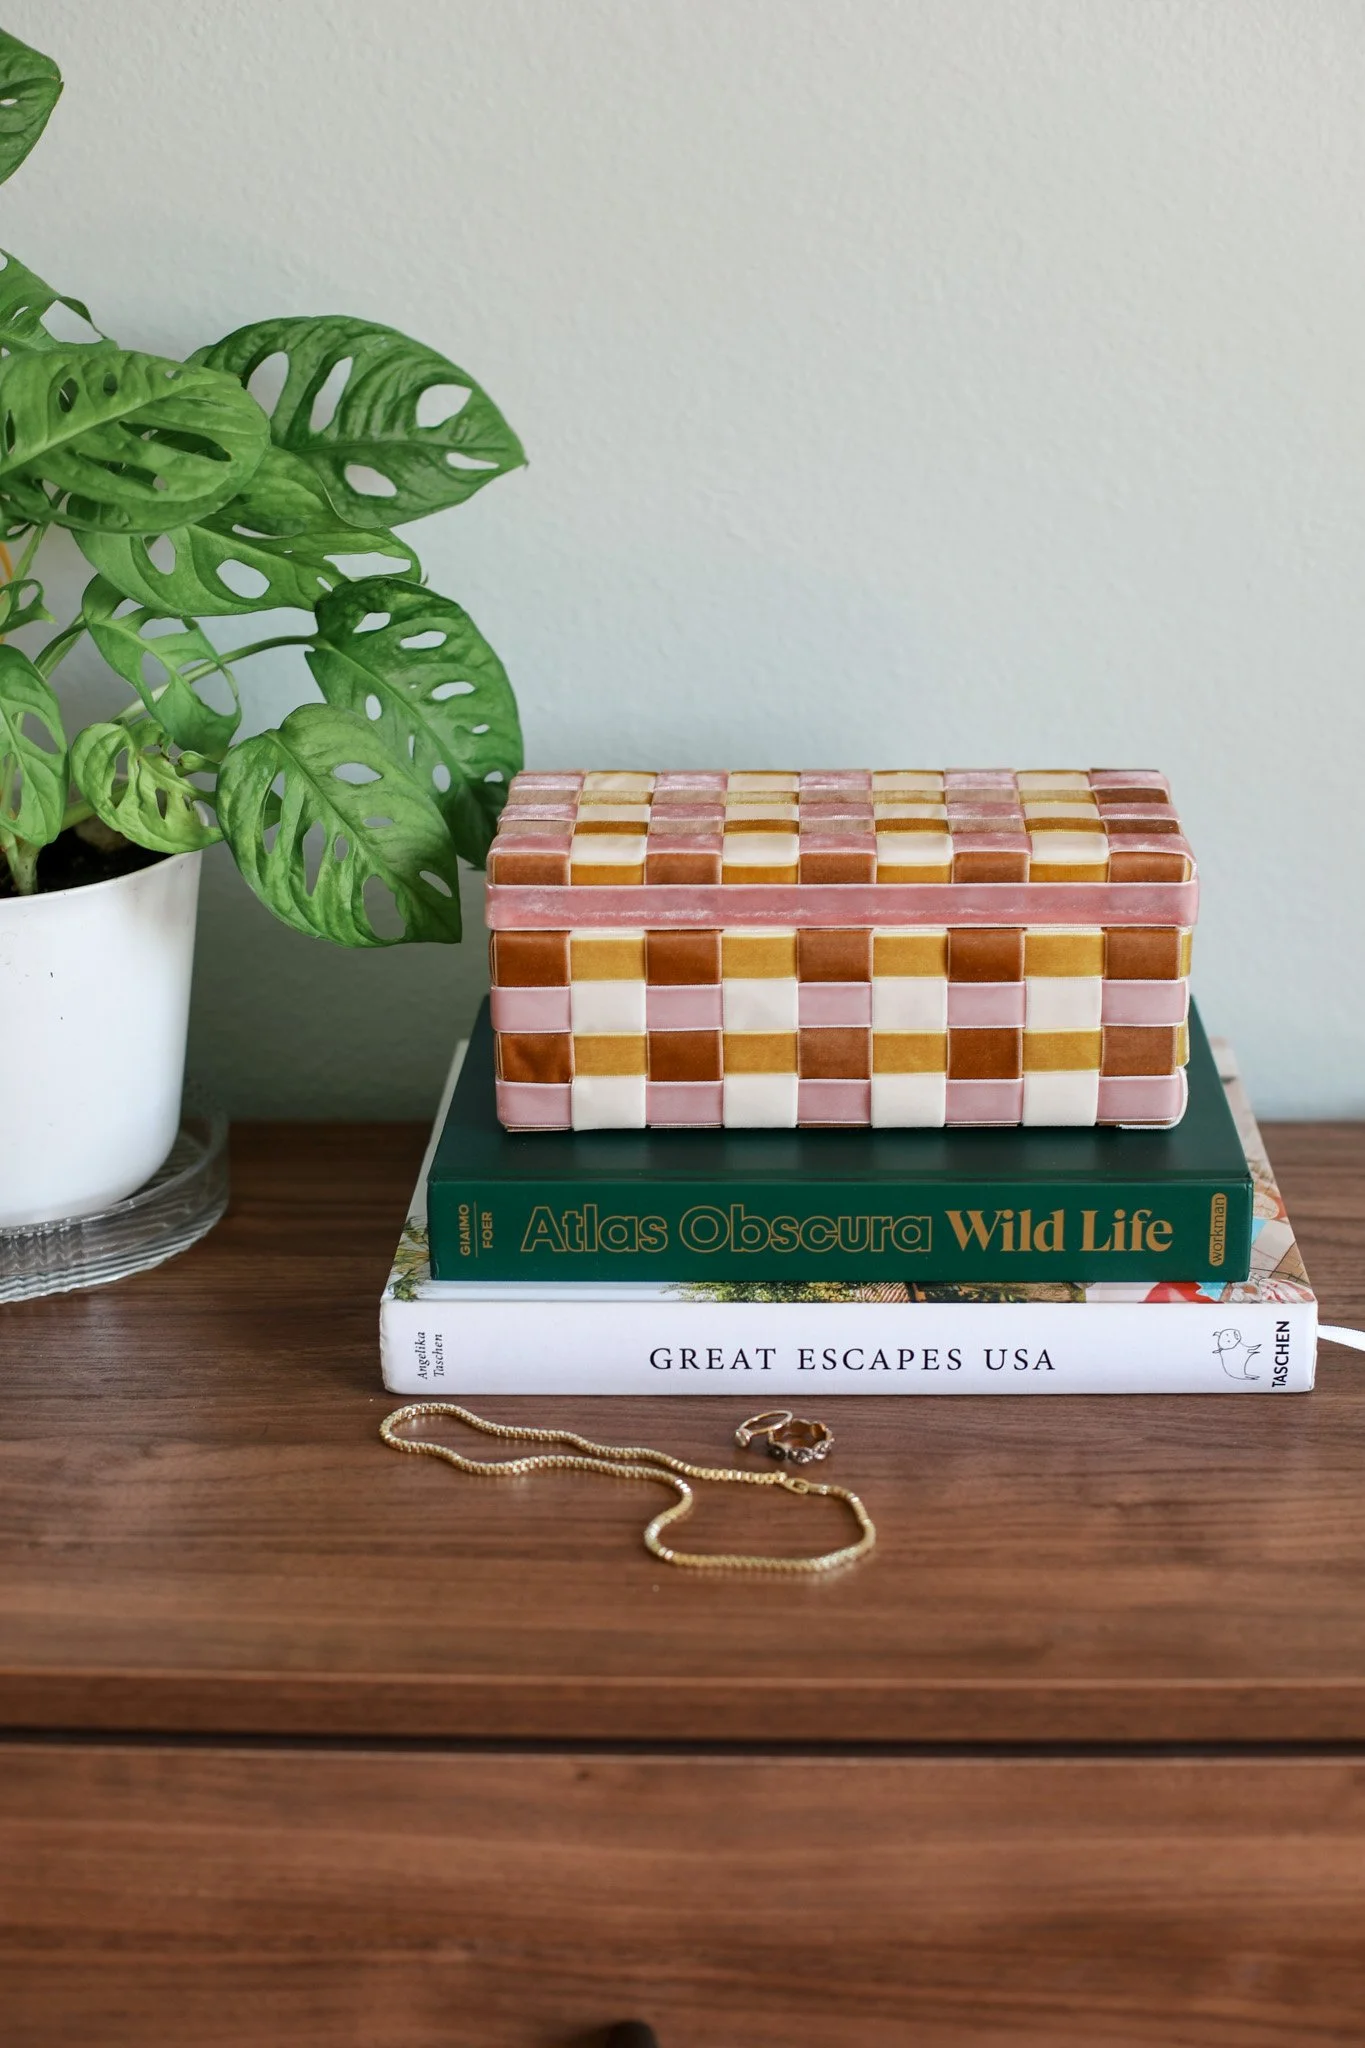
And one new project I’m super excited about is this woven velvet storage box! I’m so grateful to be partnering with Michaels for today’s project. I was able to get all the supplies I needed to create this fun and functional piece of home decor from Michaels. And they had a great selection of velvet ribbons to choose from if you are looking to make this craft in a different color scheme or style.
For this project, I was hugely inspired by a project that I saw Geneva from Collective Gen do with the frame of a mirror on her Instagram last year and I thought this woven look would be so cute on a little jewelry or trinket box. I was hoping to share this project before the holiday season because I think this cute storage box would make such a fun DIY gift, but alas time escaped me. So I figured I would share it now in case you are looking for a cozy winter craft to pass the time this January.
It ended up being a bit more complicated than I thought it would be to use a mix of different sized ribbon so if you are able to find the exact box that I used, you can follow along with my exact method & measurements below. But if you want to cover a different sized box or use different sized ribbon, you will have to adjust measurements and play around with your ribbon sizes. Let’s get started!
Affiliate disclosure: This post may contain affiliate links. When you buy from these links, I may earn a small commission, at no additional cost to you. Thank you for your support!
WOVEN VELVET STORAGE BOX

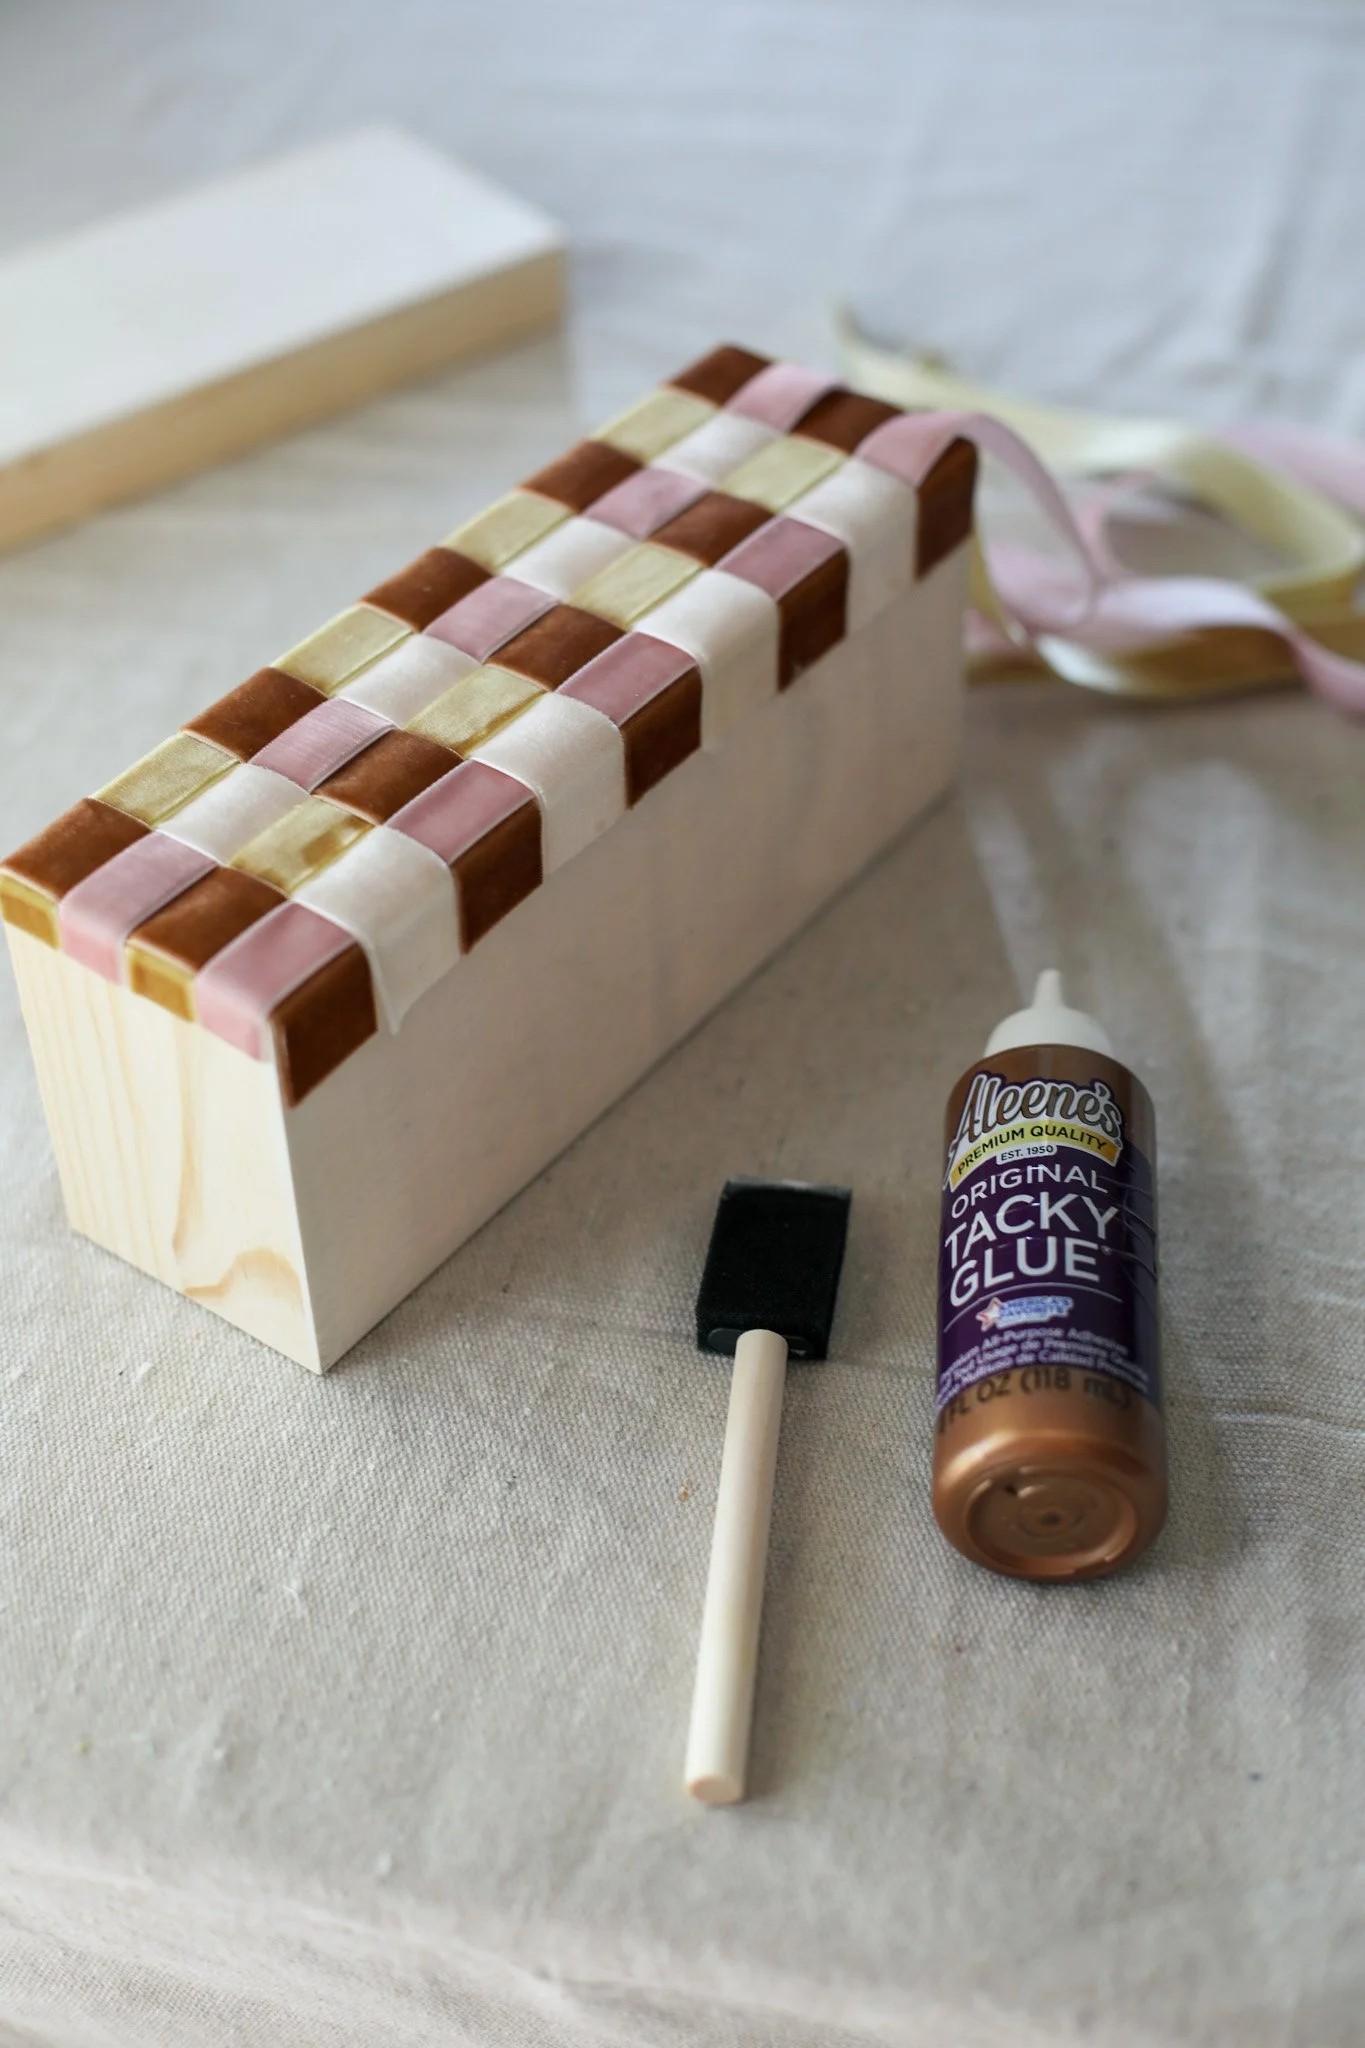
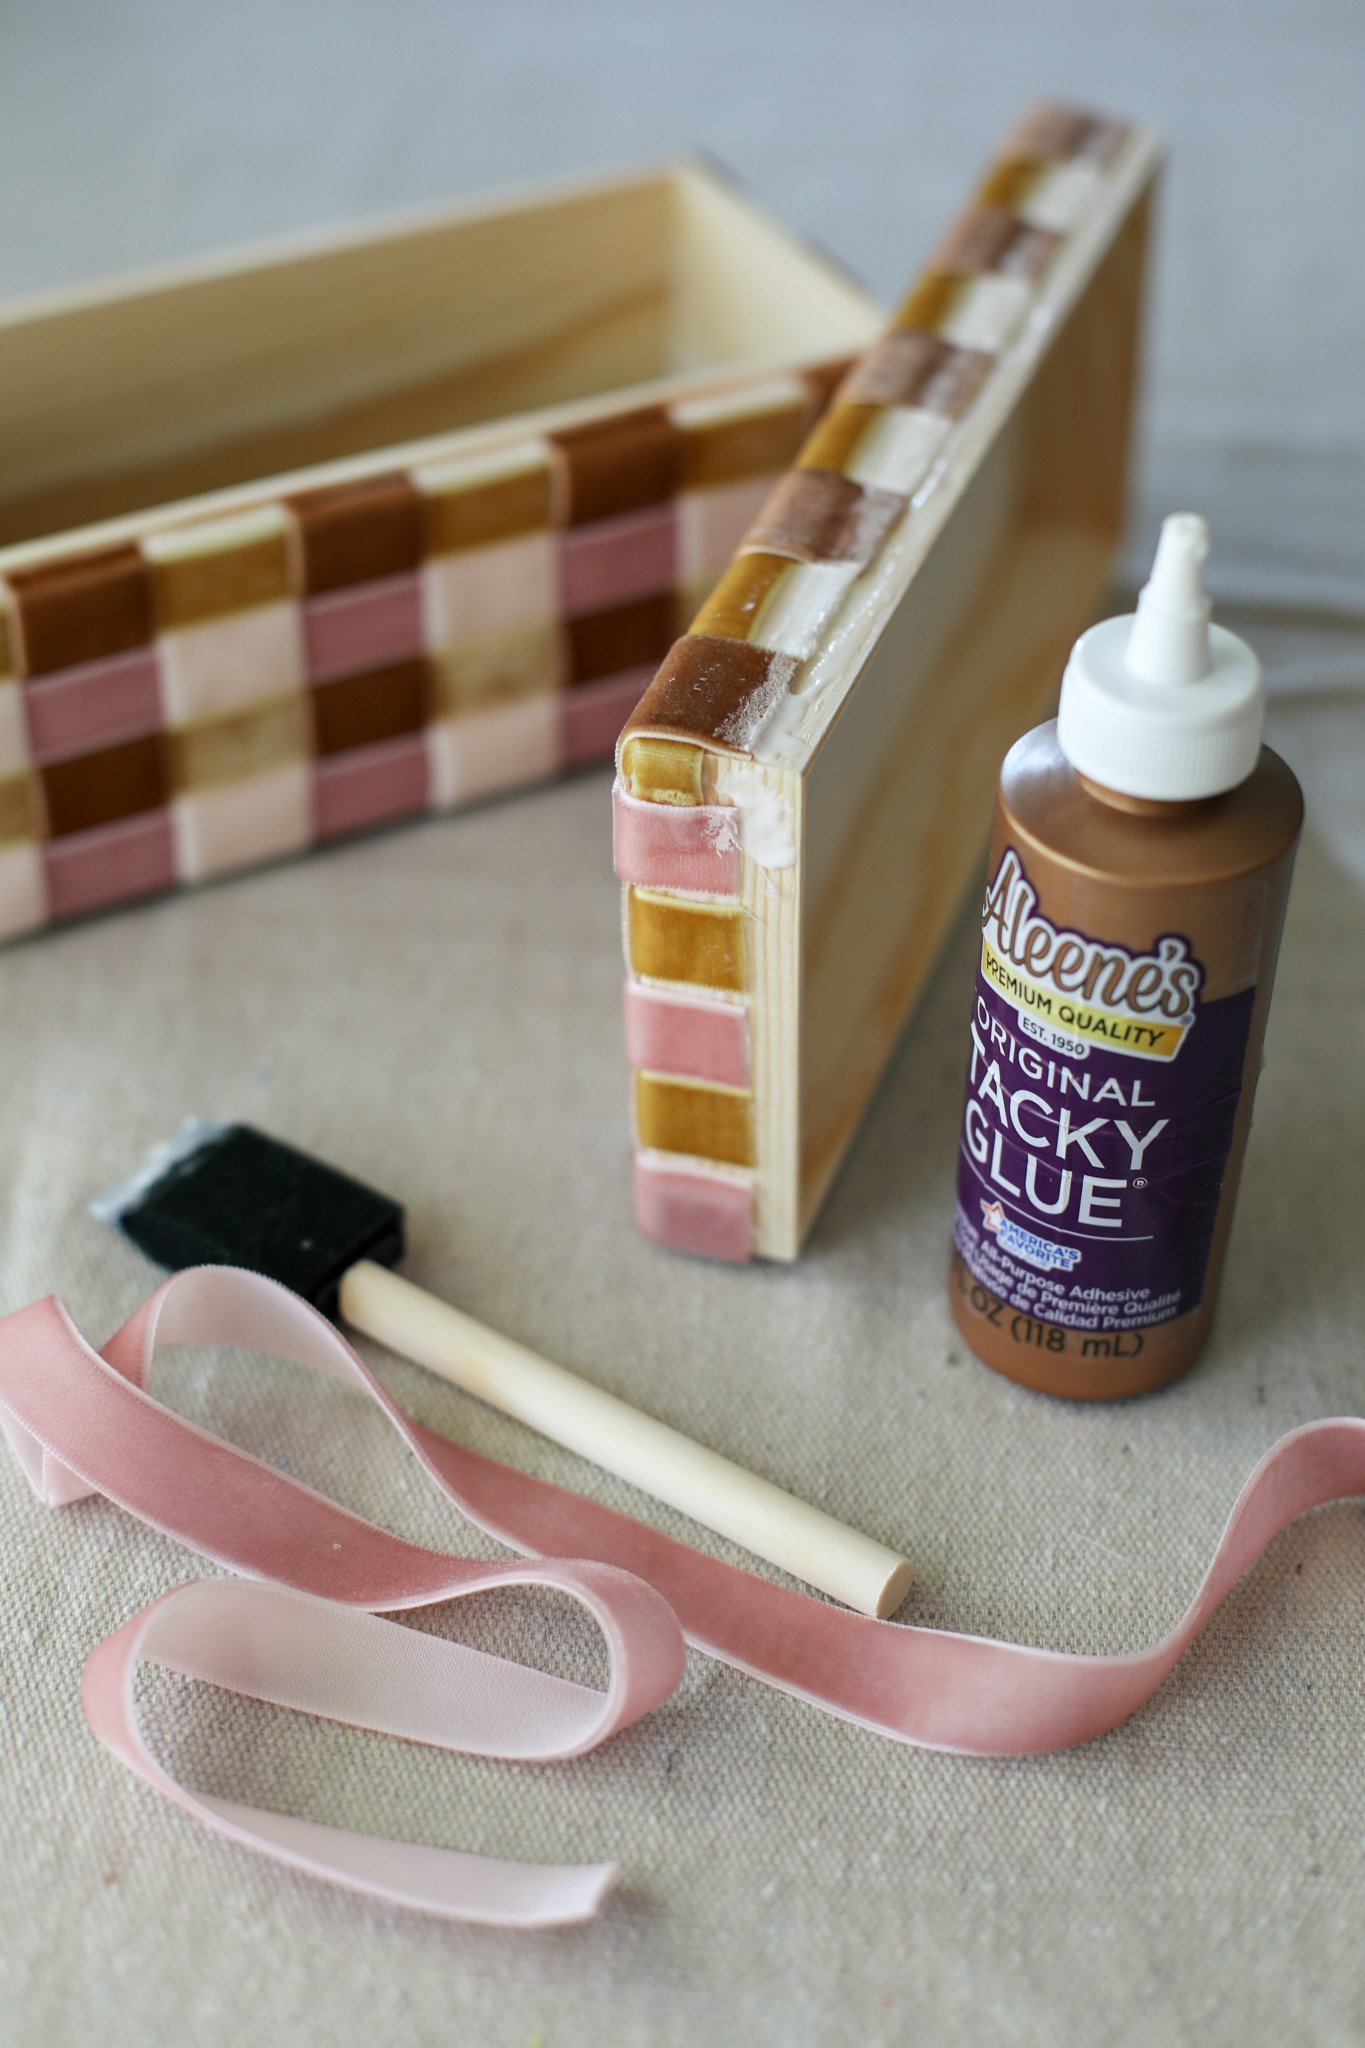
Supplies:
Cap Top Box (3.75” x 3.75” x 9”)
4 Rolls of Velvet Ribbon (two colors 1in x 3yd and two colors 5/8in x 3yd)
Foam brush or paint brush
Sharp scissors (or fabric scissors)
Ruler
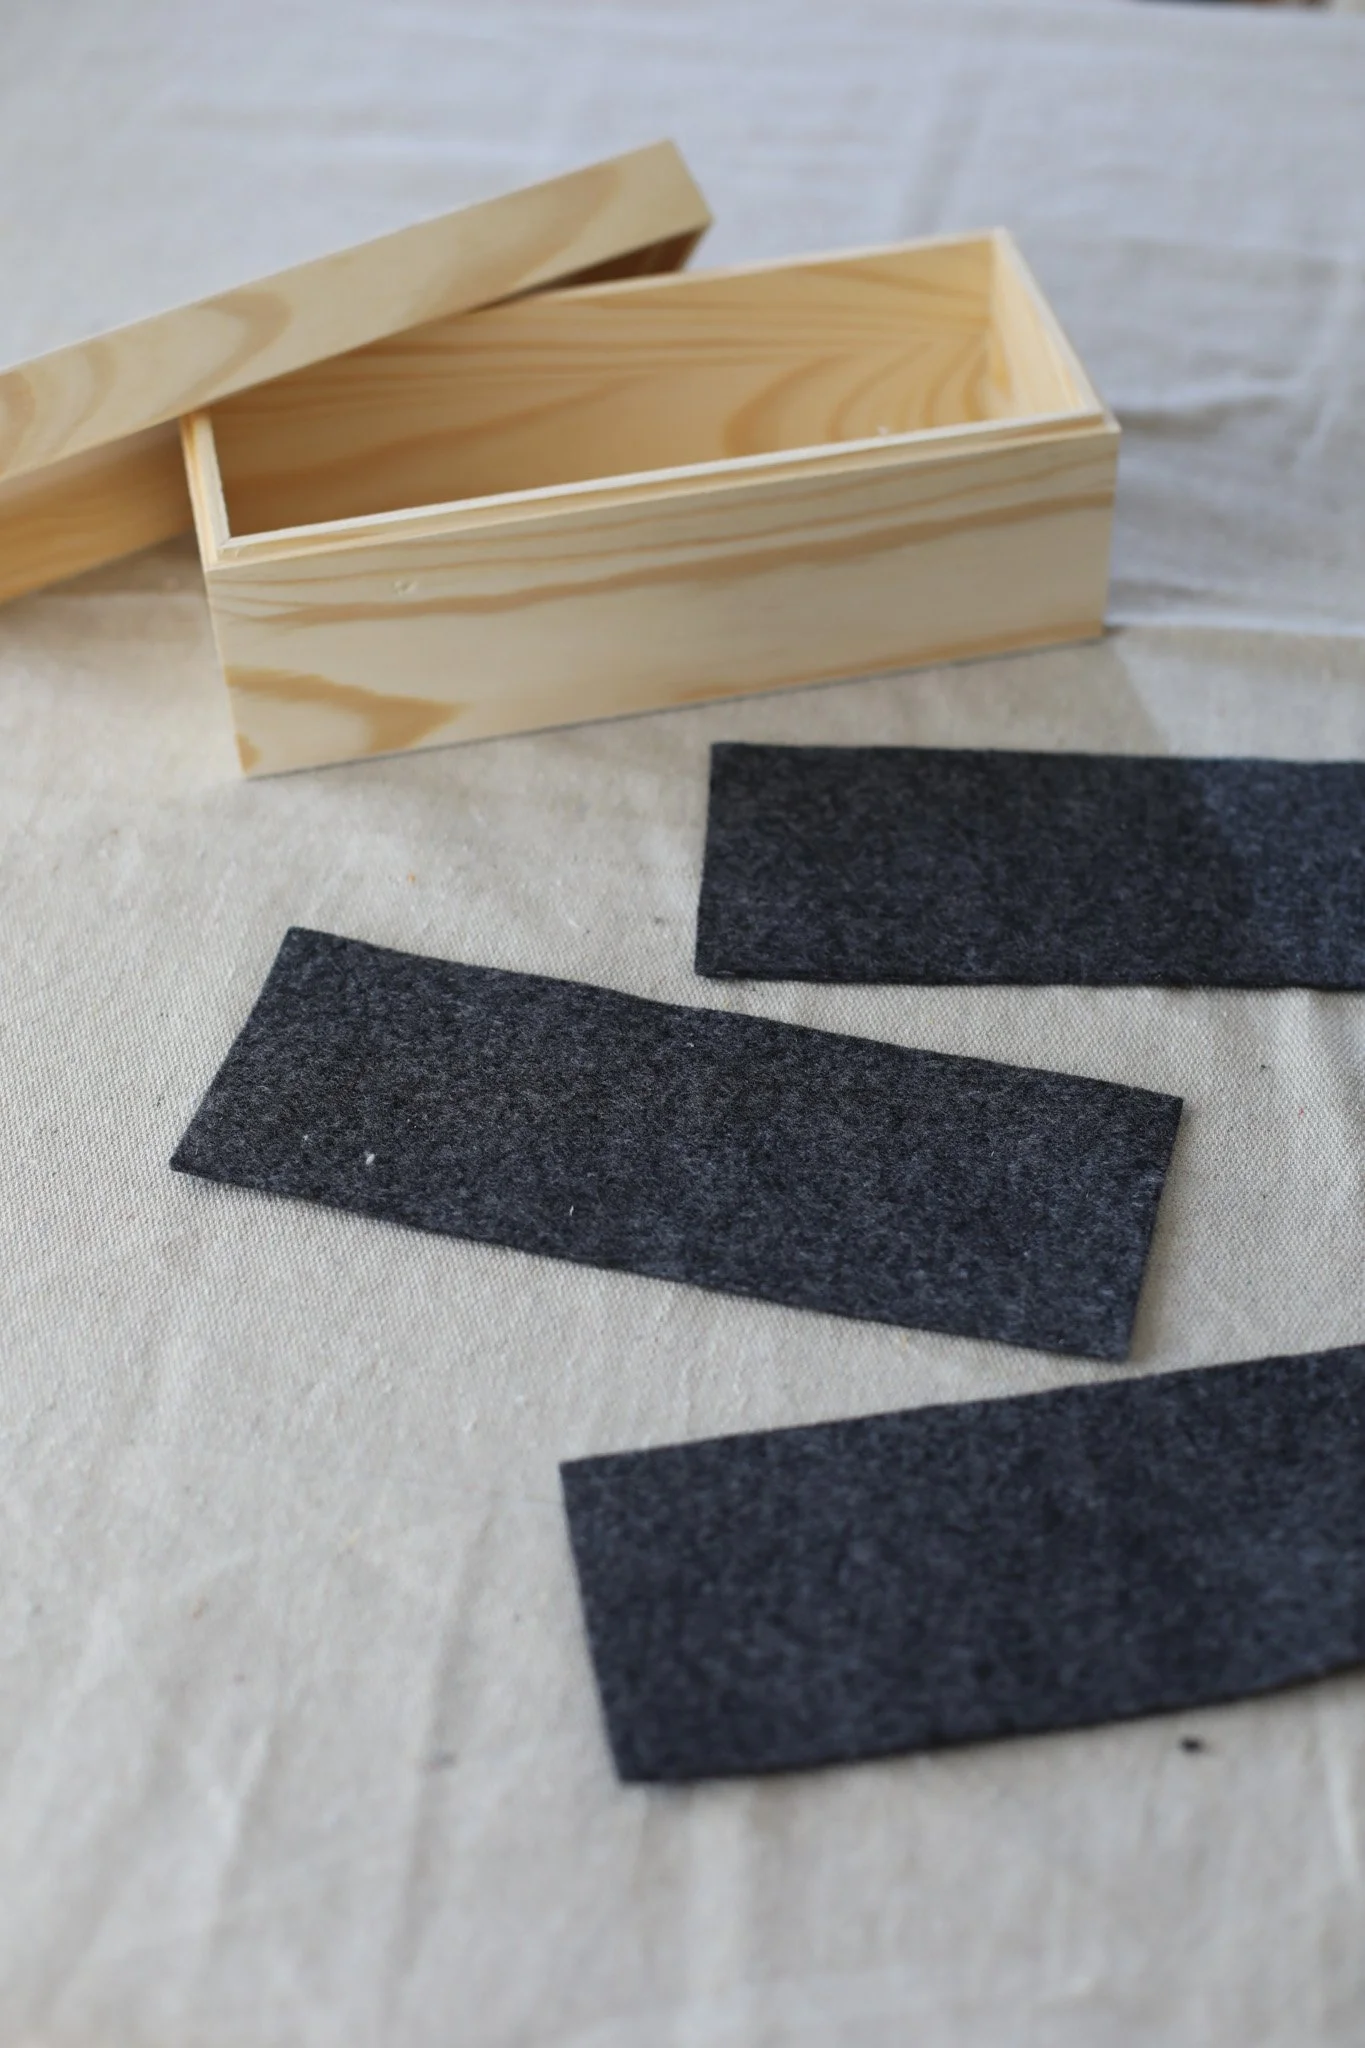

STEP 1: First, I measured out the interior dimensions of the bottom of the box and I cut out three pieces of felt to those measurements. For my box it was 8.5” x 3-1/8”. I set these aside to use later — these will finish off the bottom, inside bottom, and inside top of the box at the end.
STEP 2: Then I measured out and cut my velvet ribbon pieces to size, careful to get a clean cut edge on the ribbon because otherwise it can fray a bit. Here are the exact quantities and lengths that I cut:
For the box lid:
Cream 1” ribbon — cut 5 pieces at 5.5” length
Brown 1” ribbon — cut 4 pieces at 5.5” length
Gold 5/8” ribbon — cut 4 pieces at 10.75” length
Pink 5/8” ribbon — cut 3 pieces at 10.75” length & 1 piece at 27” length
For the box base:
Cream 1” ribbon - cut 14 pieces at 3.75” length
Brown 1” ribbon - cut 12 pieces at 3.75” length
Gold 5/8” ribbon — cut 2 pieces at 28” length
Pink 5/8” ribbon — cut 2 pieces at 28” length
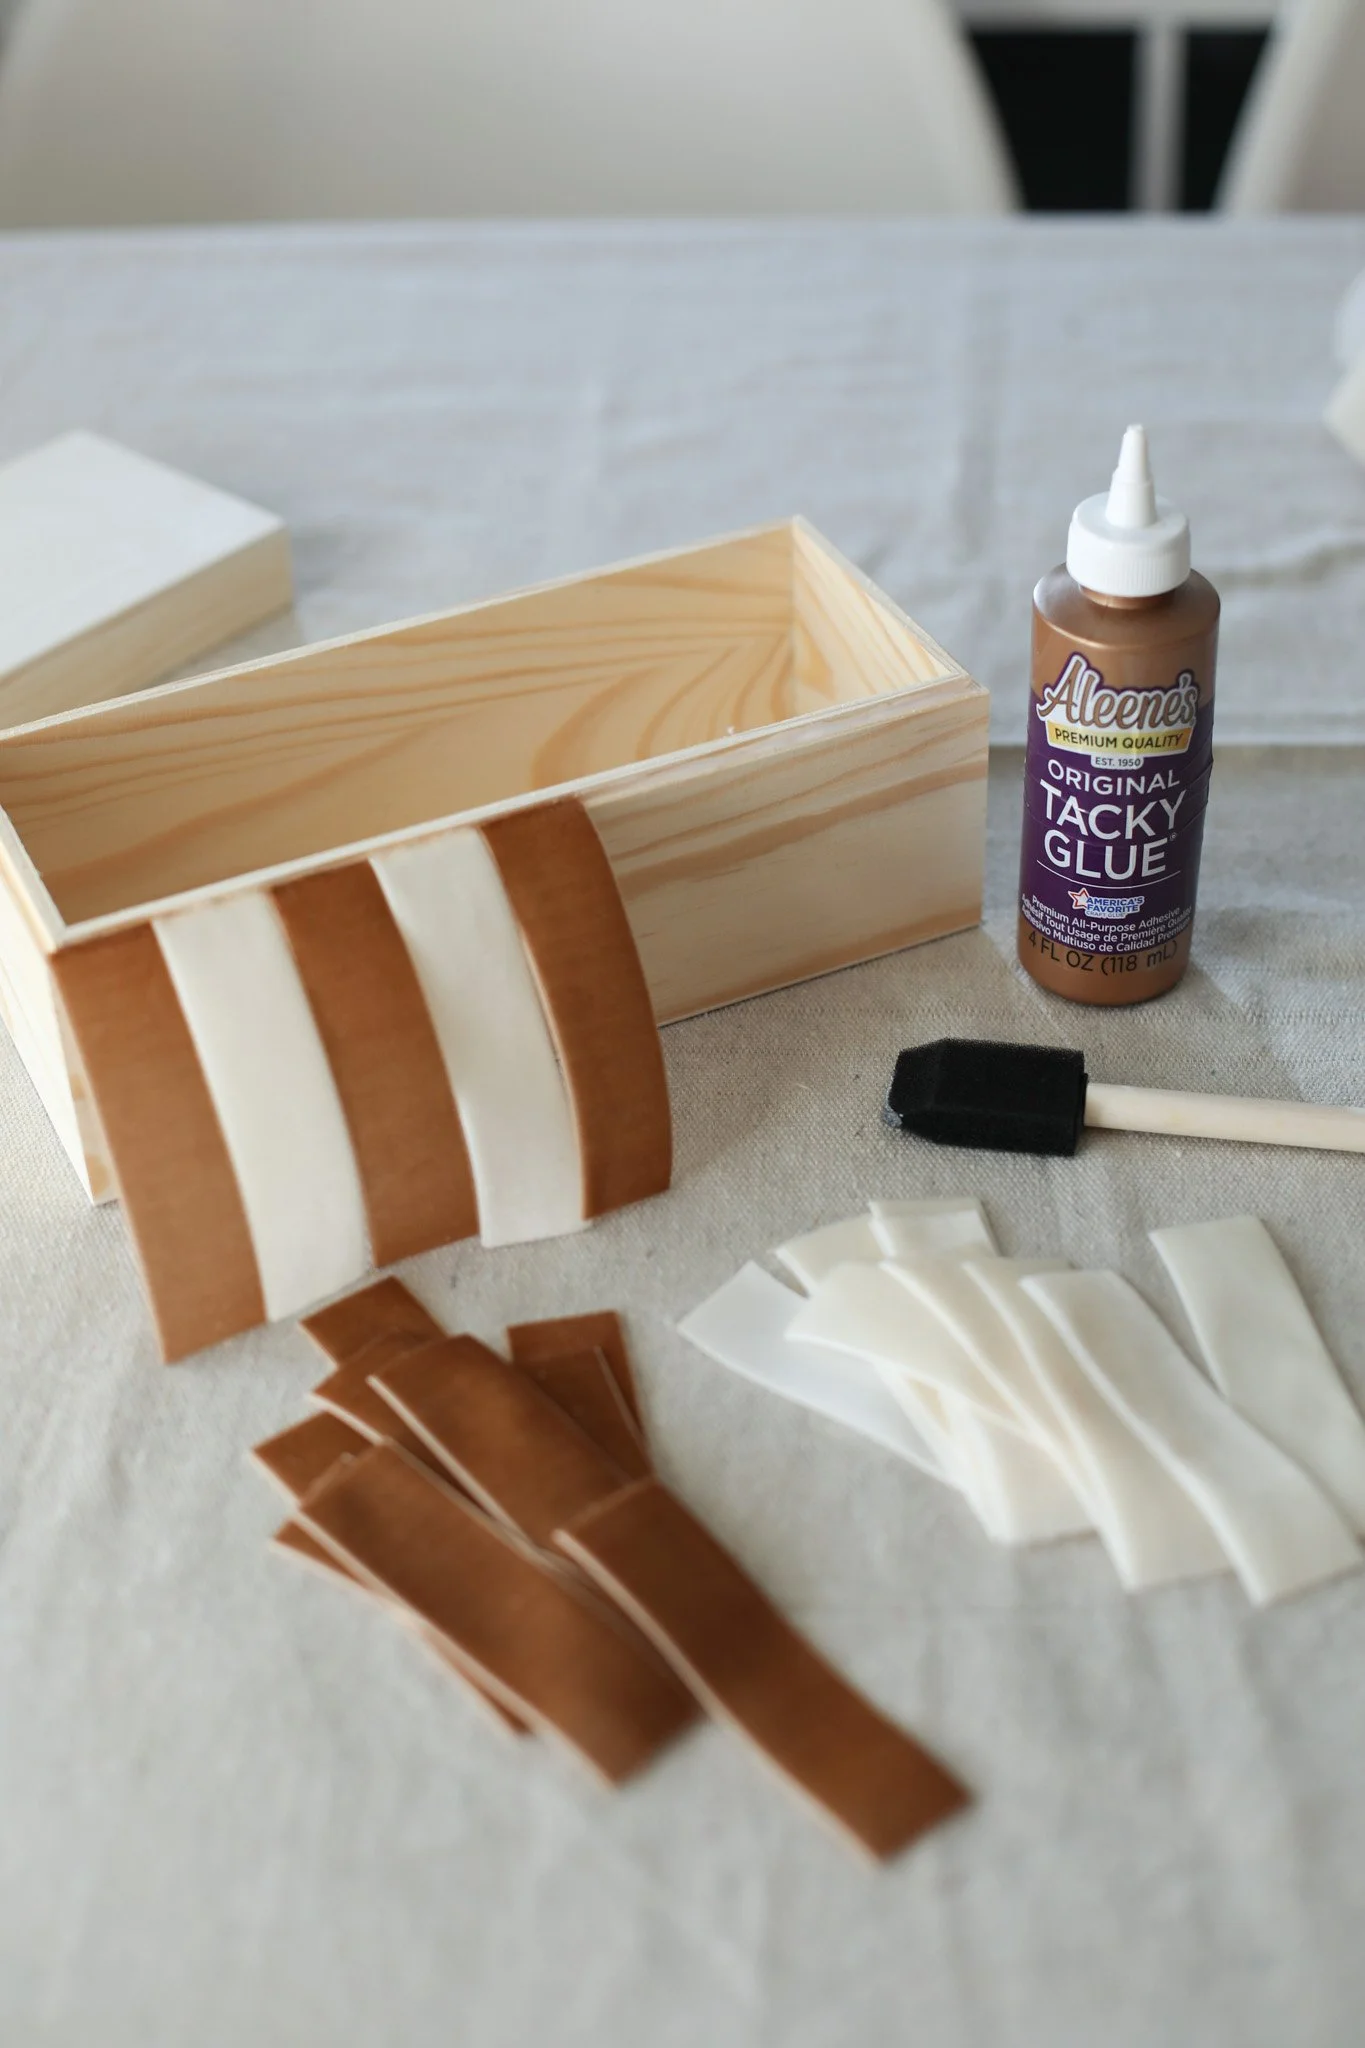
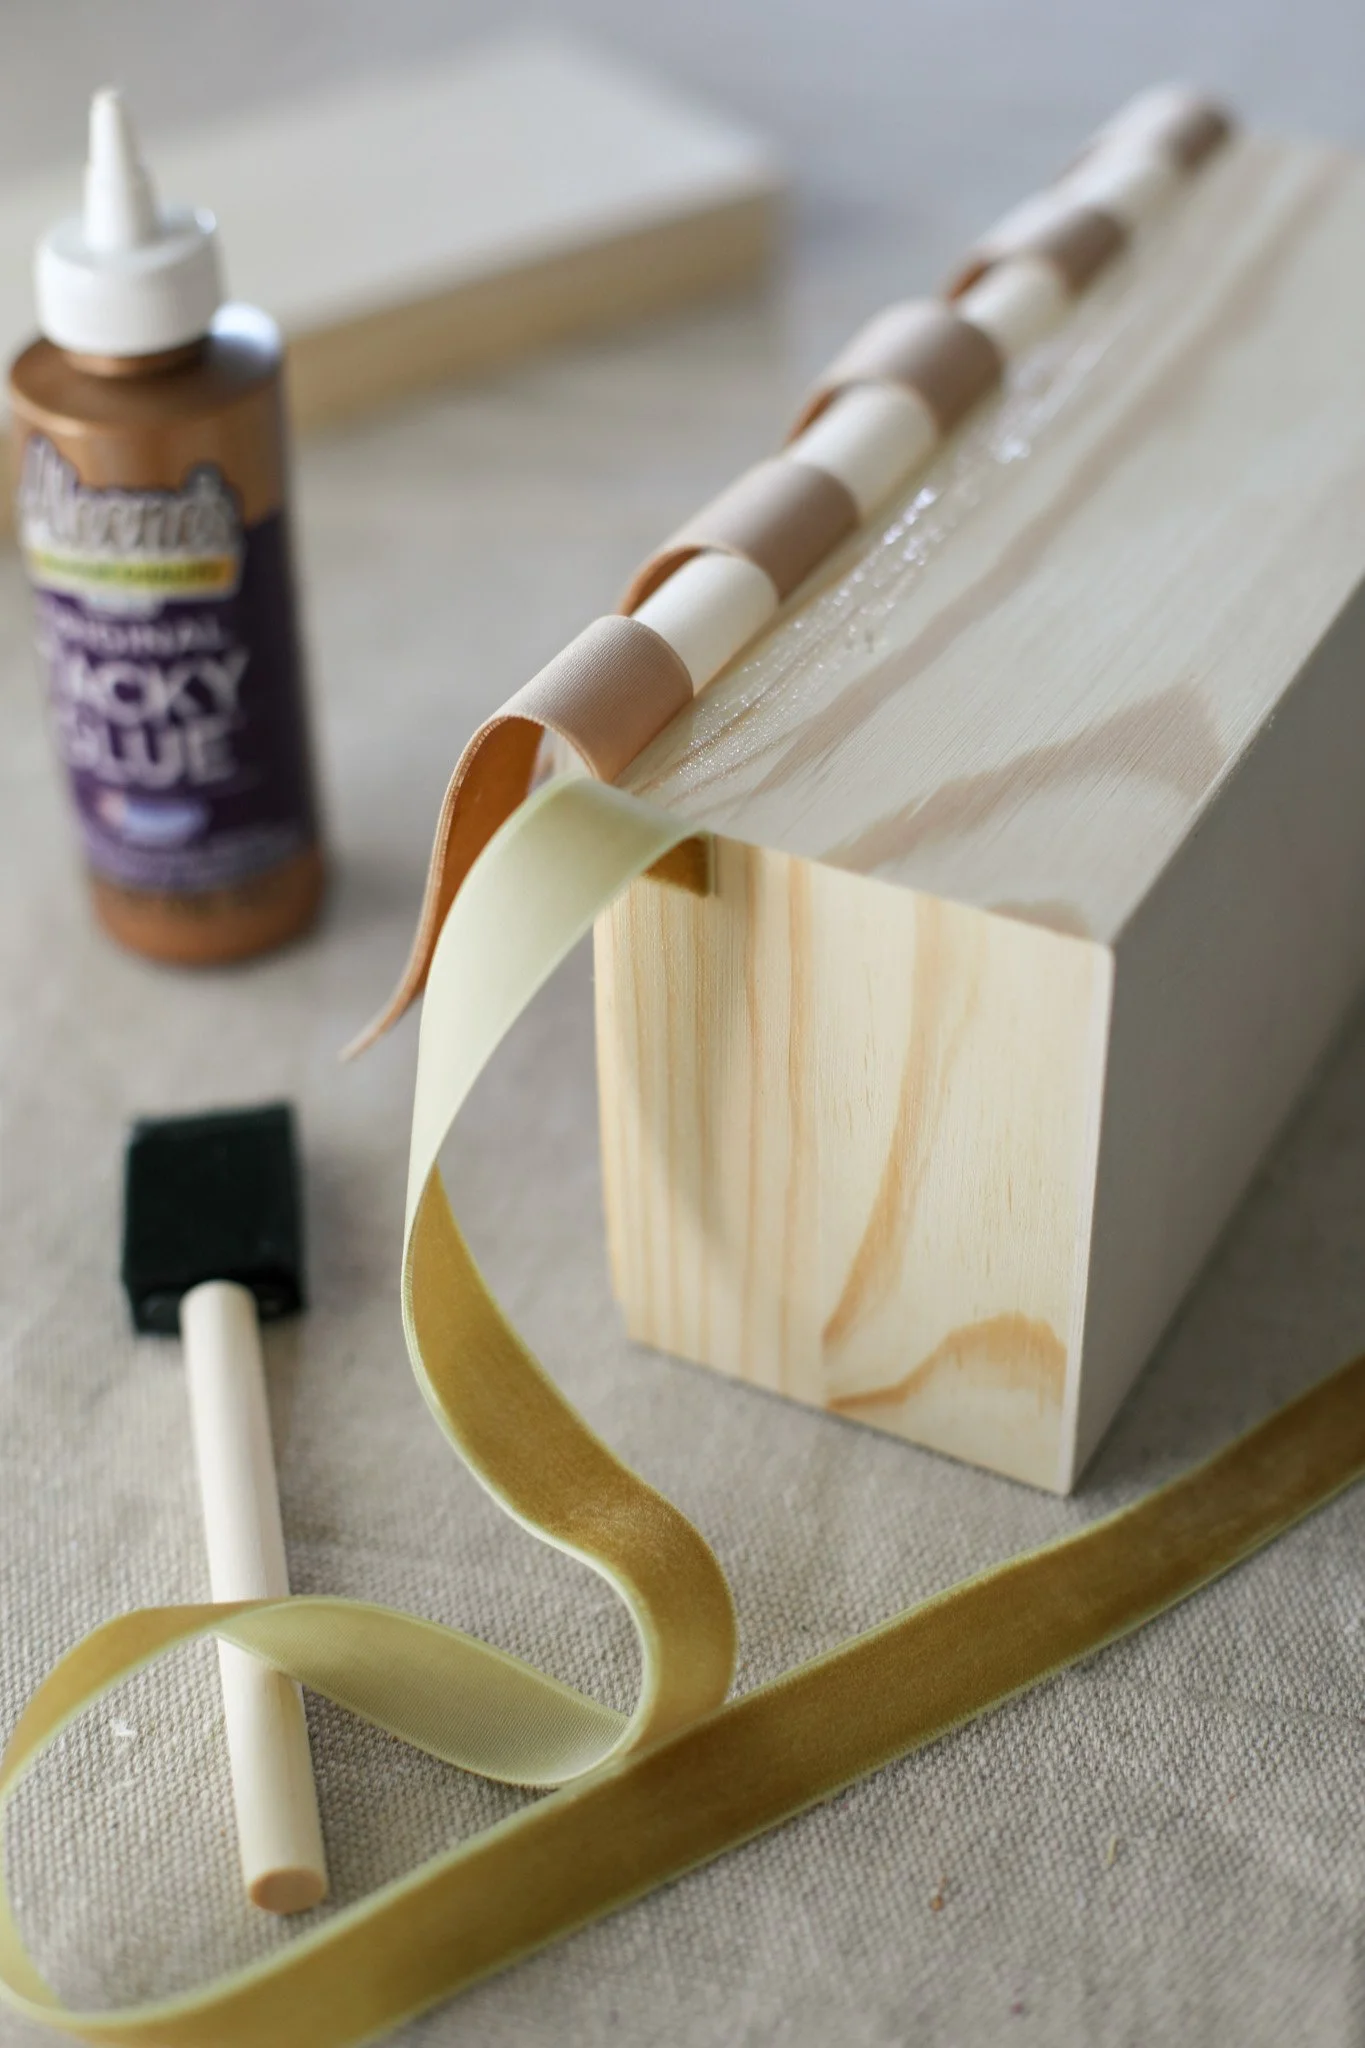
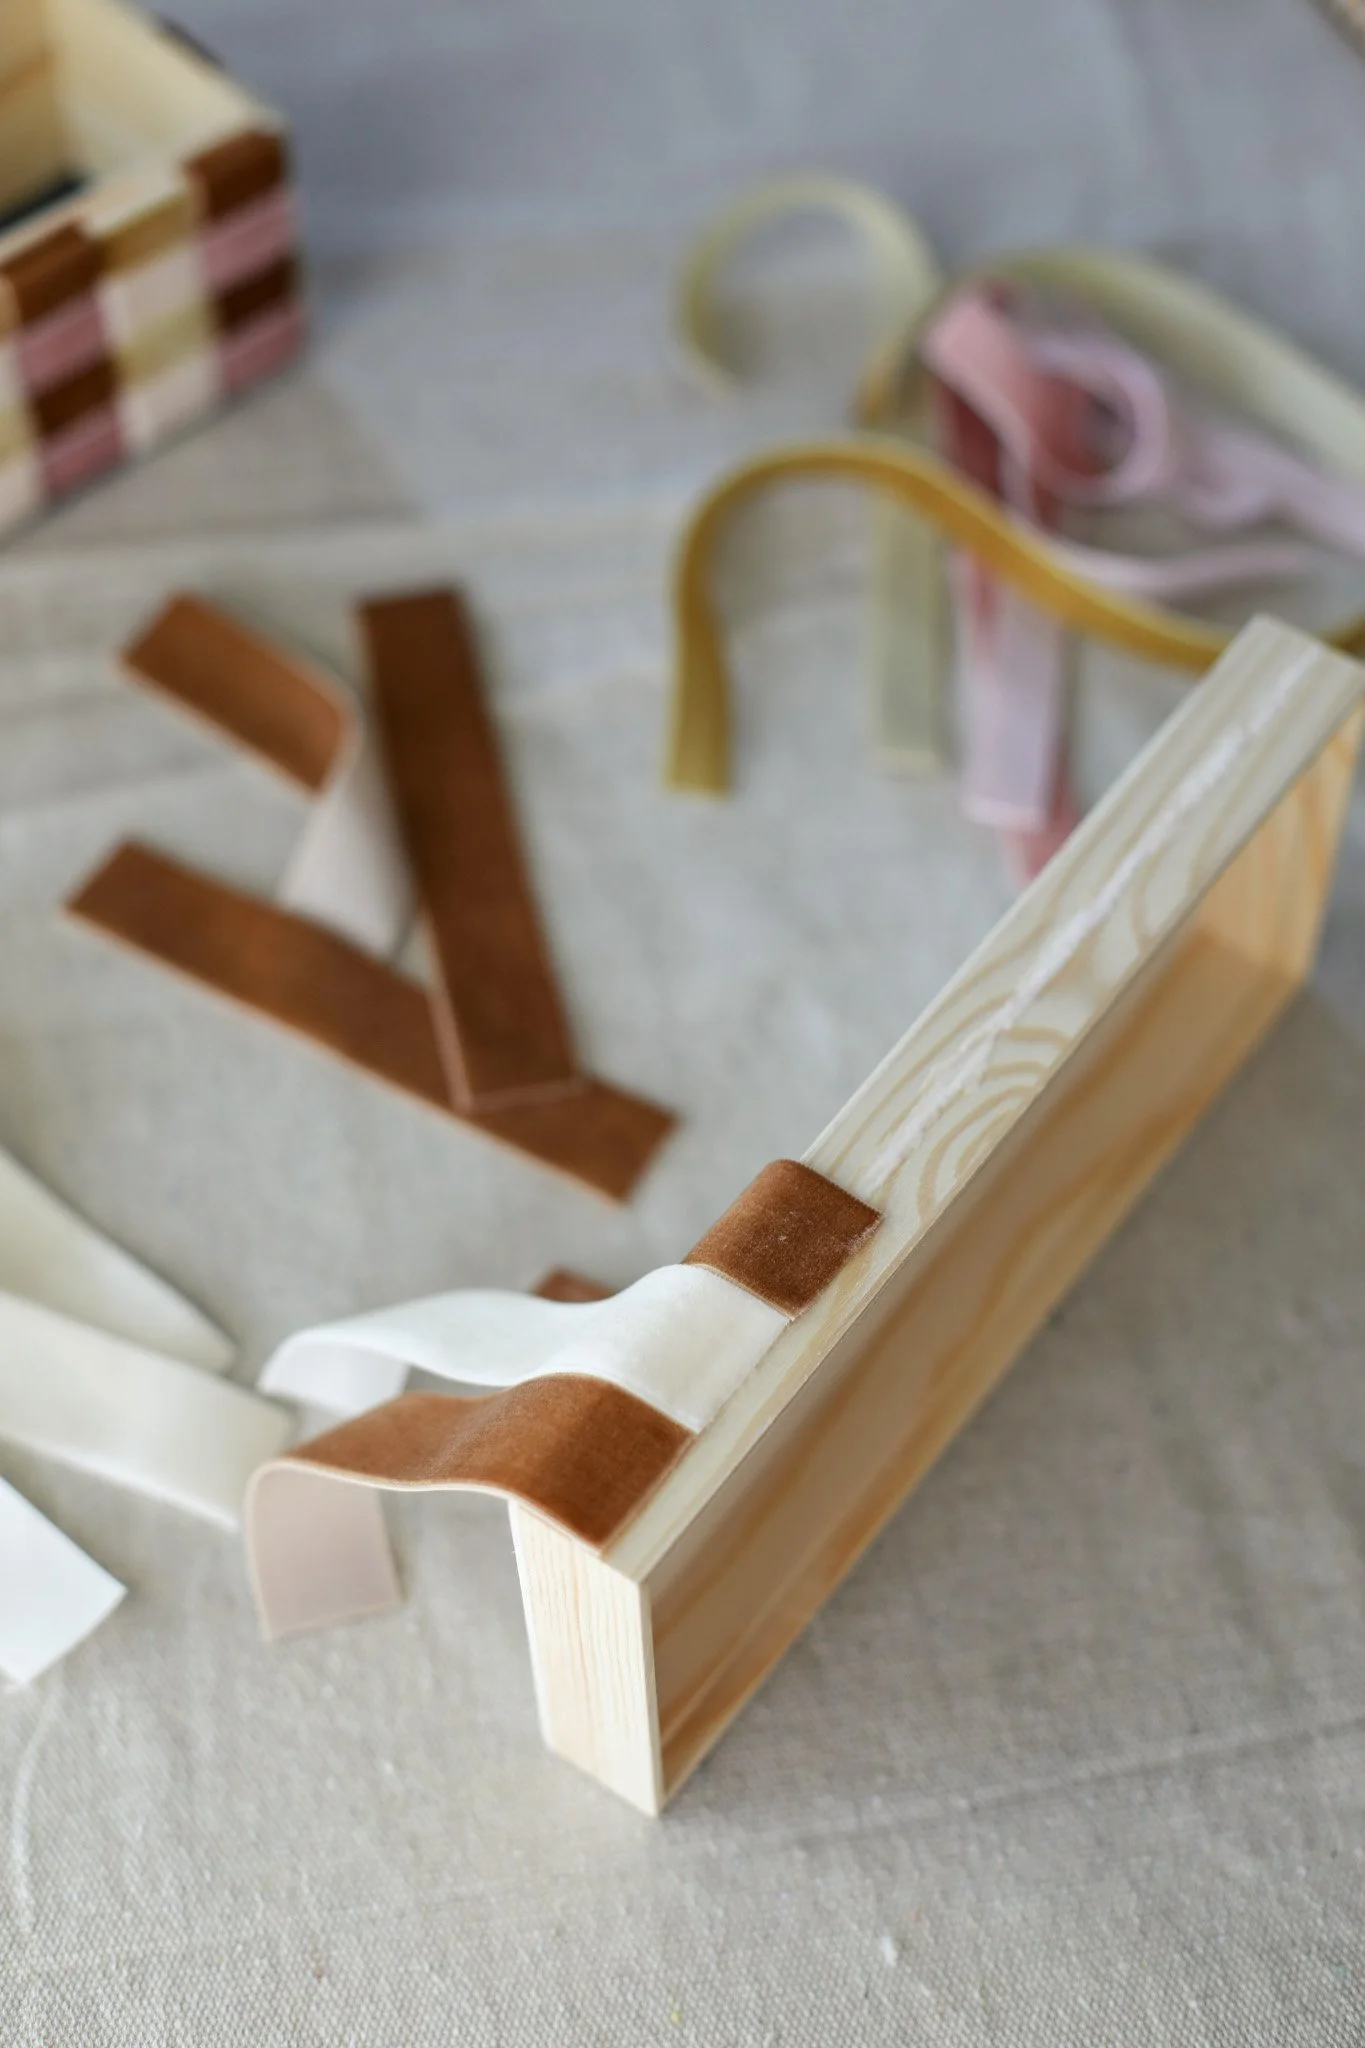
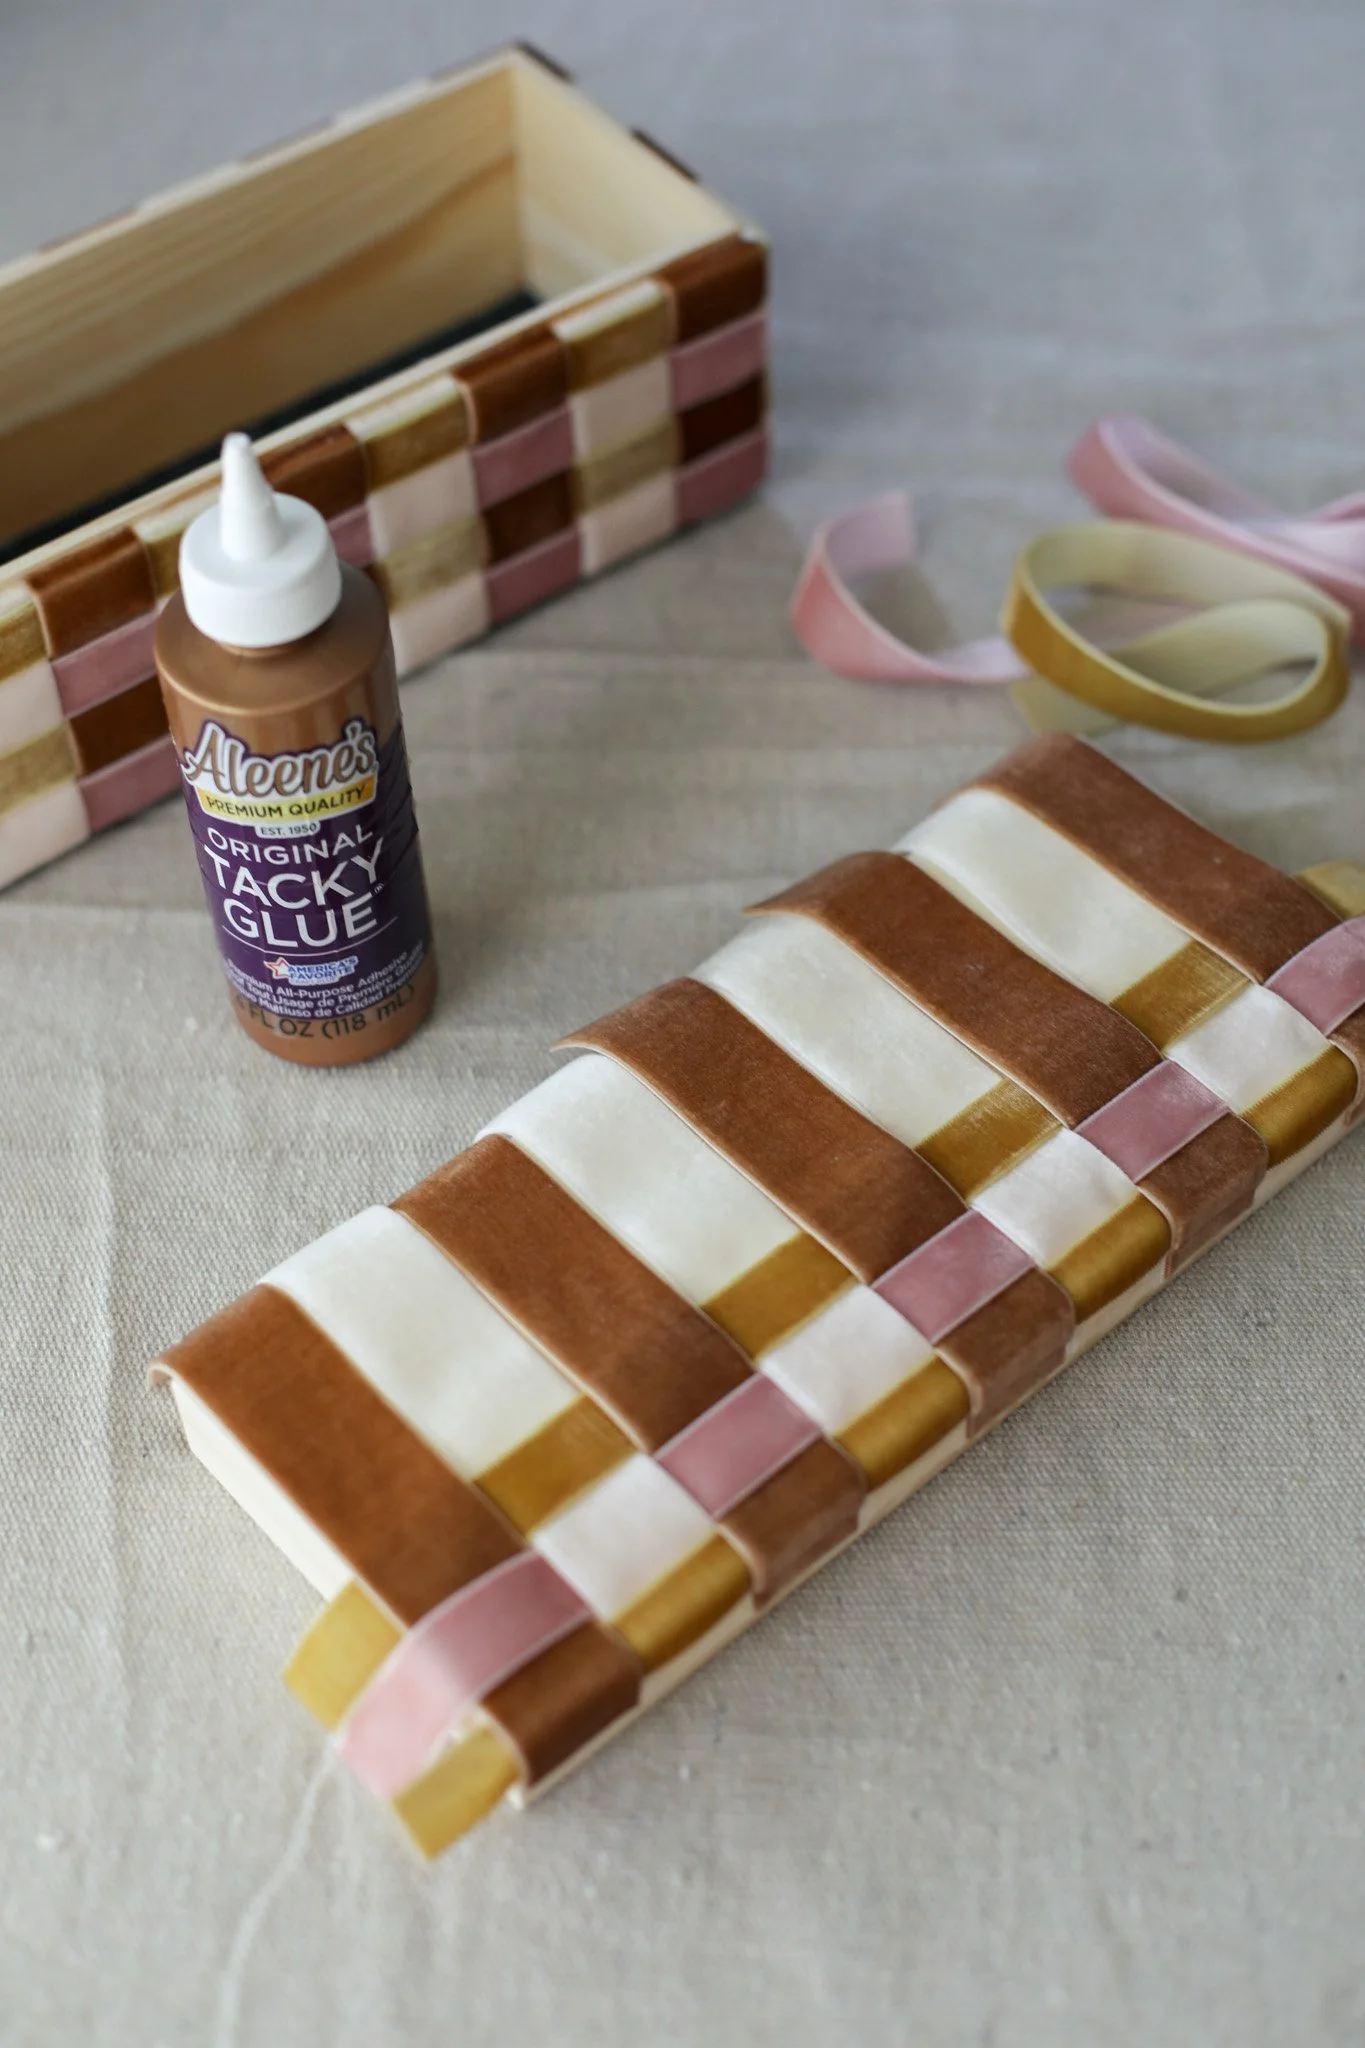
STEP 3: Next, it was time to start attaching the ribbon to the base of the box. Starting on a long side of my box I used a sponge brush to brush on a bit of tacky glue to the rim. I didn’t want to obstruct the top edge of the box because I still wanted the wooden top to fit, so you’ll see in the picture above that I adhered the top edge of the ribbon just below the lip of the box.
I glued on a piece of ribbon in every other color — brown & cream.
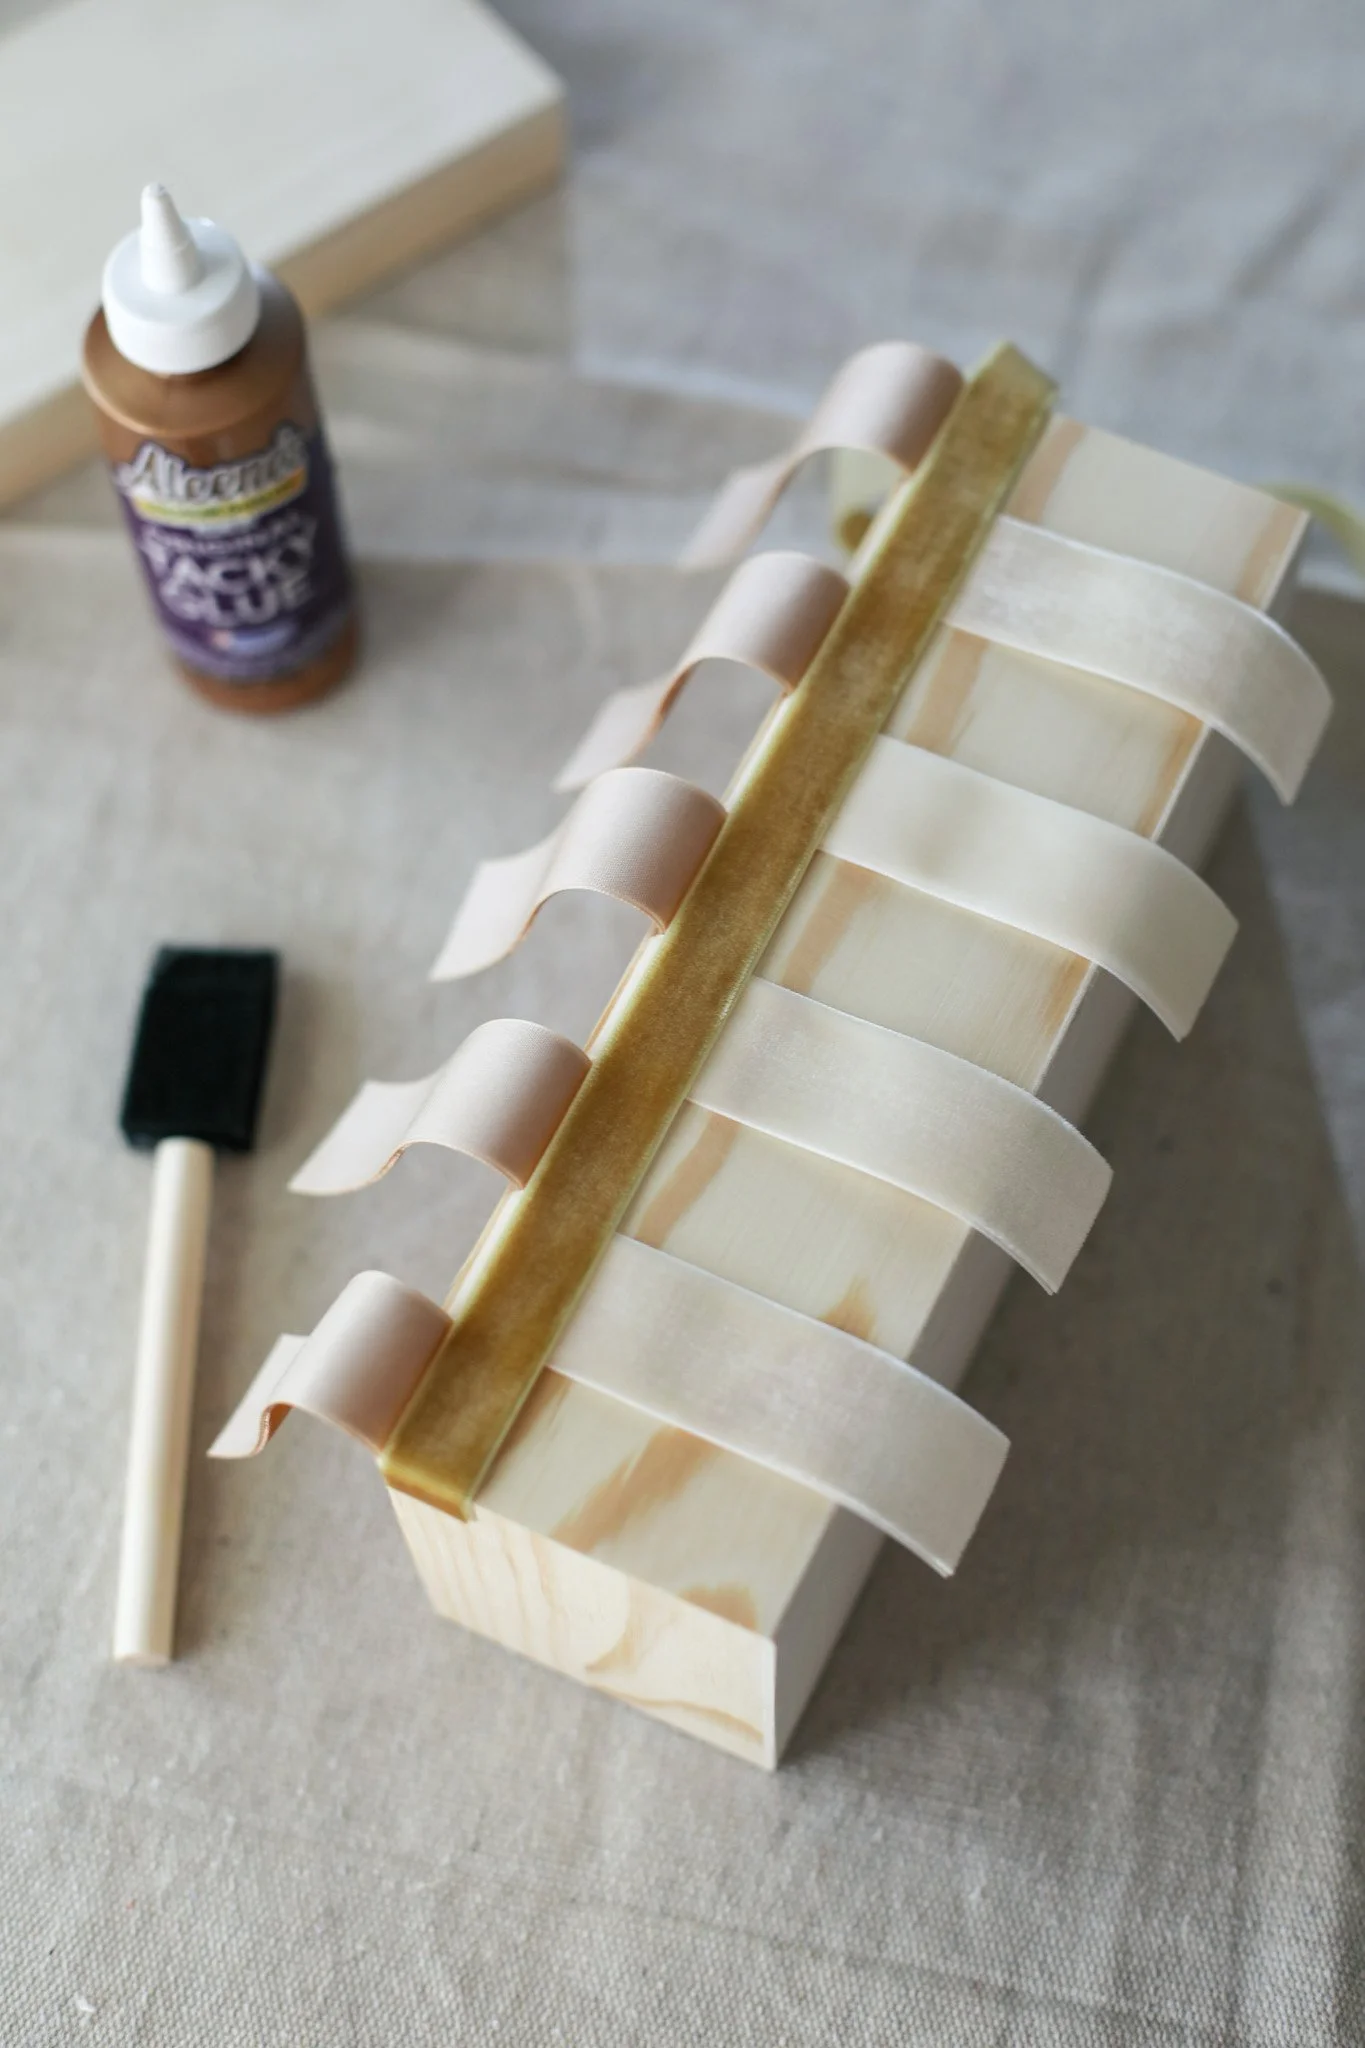
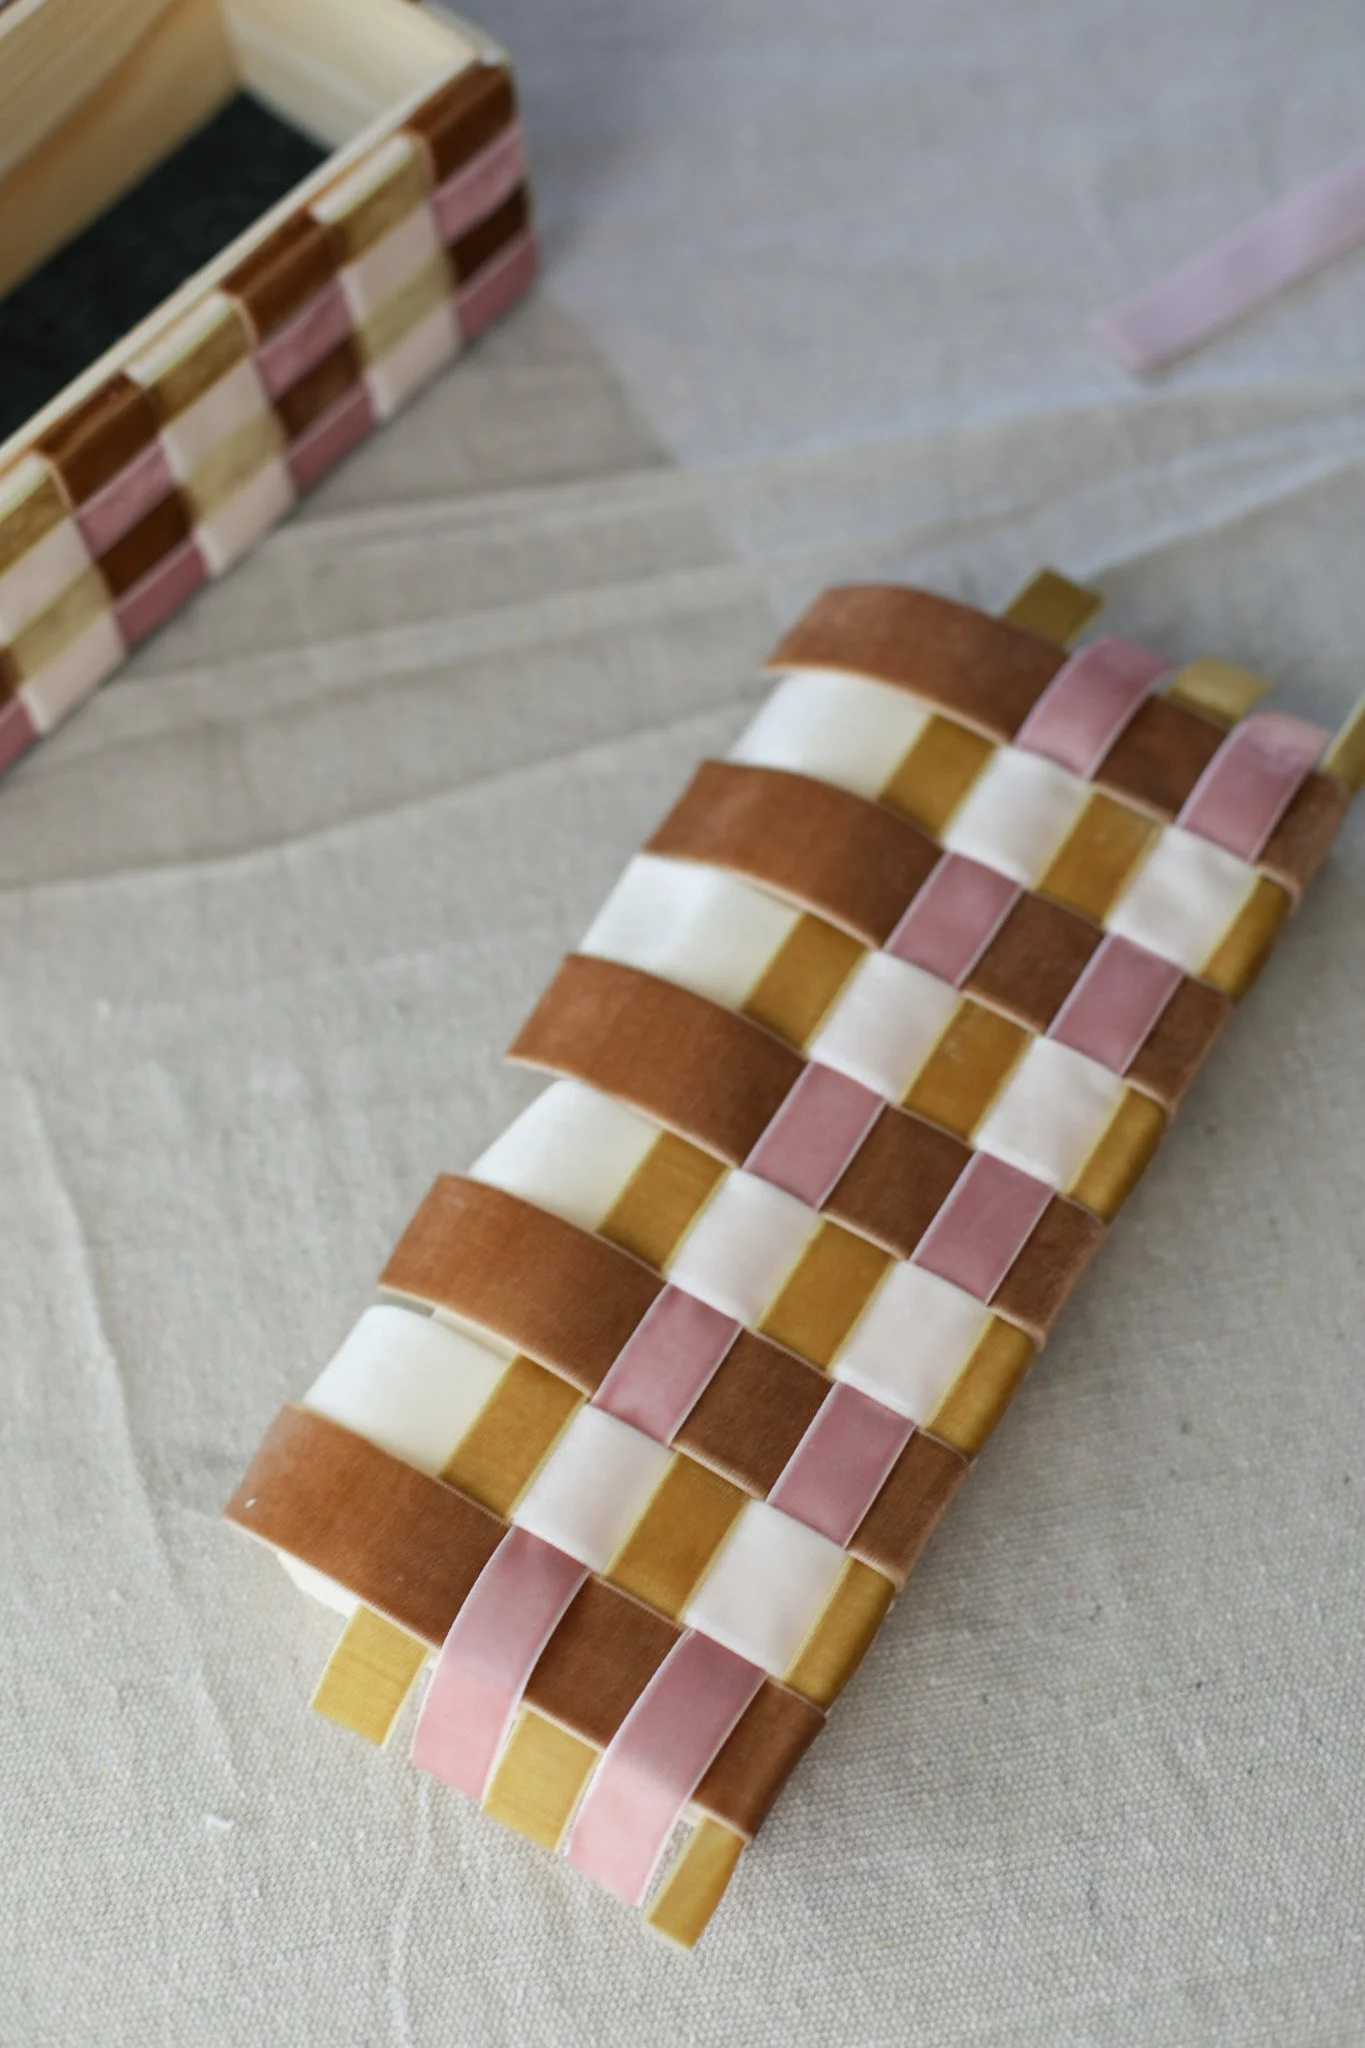
STEP 4: Once the vertical ribbons were all attached at the top on the long side of the box, it was time to weave in the horizontal ribbon. I folded all my vertical ribbons up and brushed on a line of glue to the surface of the box. Then I folded back down all of my cream ribbon only. I glued the end of the thin gold ribbon to the short side of the box and then laid it horizontally across the cream vertical pieces.
STEP 5: Once the gold ribbon was stuck down well, I folded the cream vertical ribbons back up and out of the way and squeezed on another line of glue. Then I folded back down the brown vertical ribbons only and pressed them into the glue.
And then I laid the thinner pink ribbon down horizontally, going over the brown vertical ribbons.
NOTE: For this entire project, I found it best to squeeze on the tacky glue from the bottle and then use the sponge brush to brush it around for a light even coat so that the velvet ribbon adhered well but the glue was not so thick that it seeped through the velvet material.
I repeated this process again, alternating with the gold ribbon and pink ribbon so that the gold ribbon always went over the cream and under the brown. And the pink ribbon always went over the brown and under the cream.
NOTE: I tried to keep my horizontal ribbons as tight to each other as possible and I also occasionally pulled all of my vertical ribbons taut. It’s important to secure everything well as you go for a clean final look.
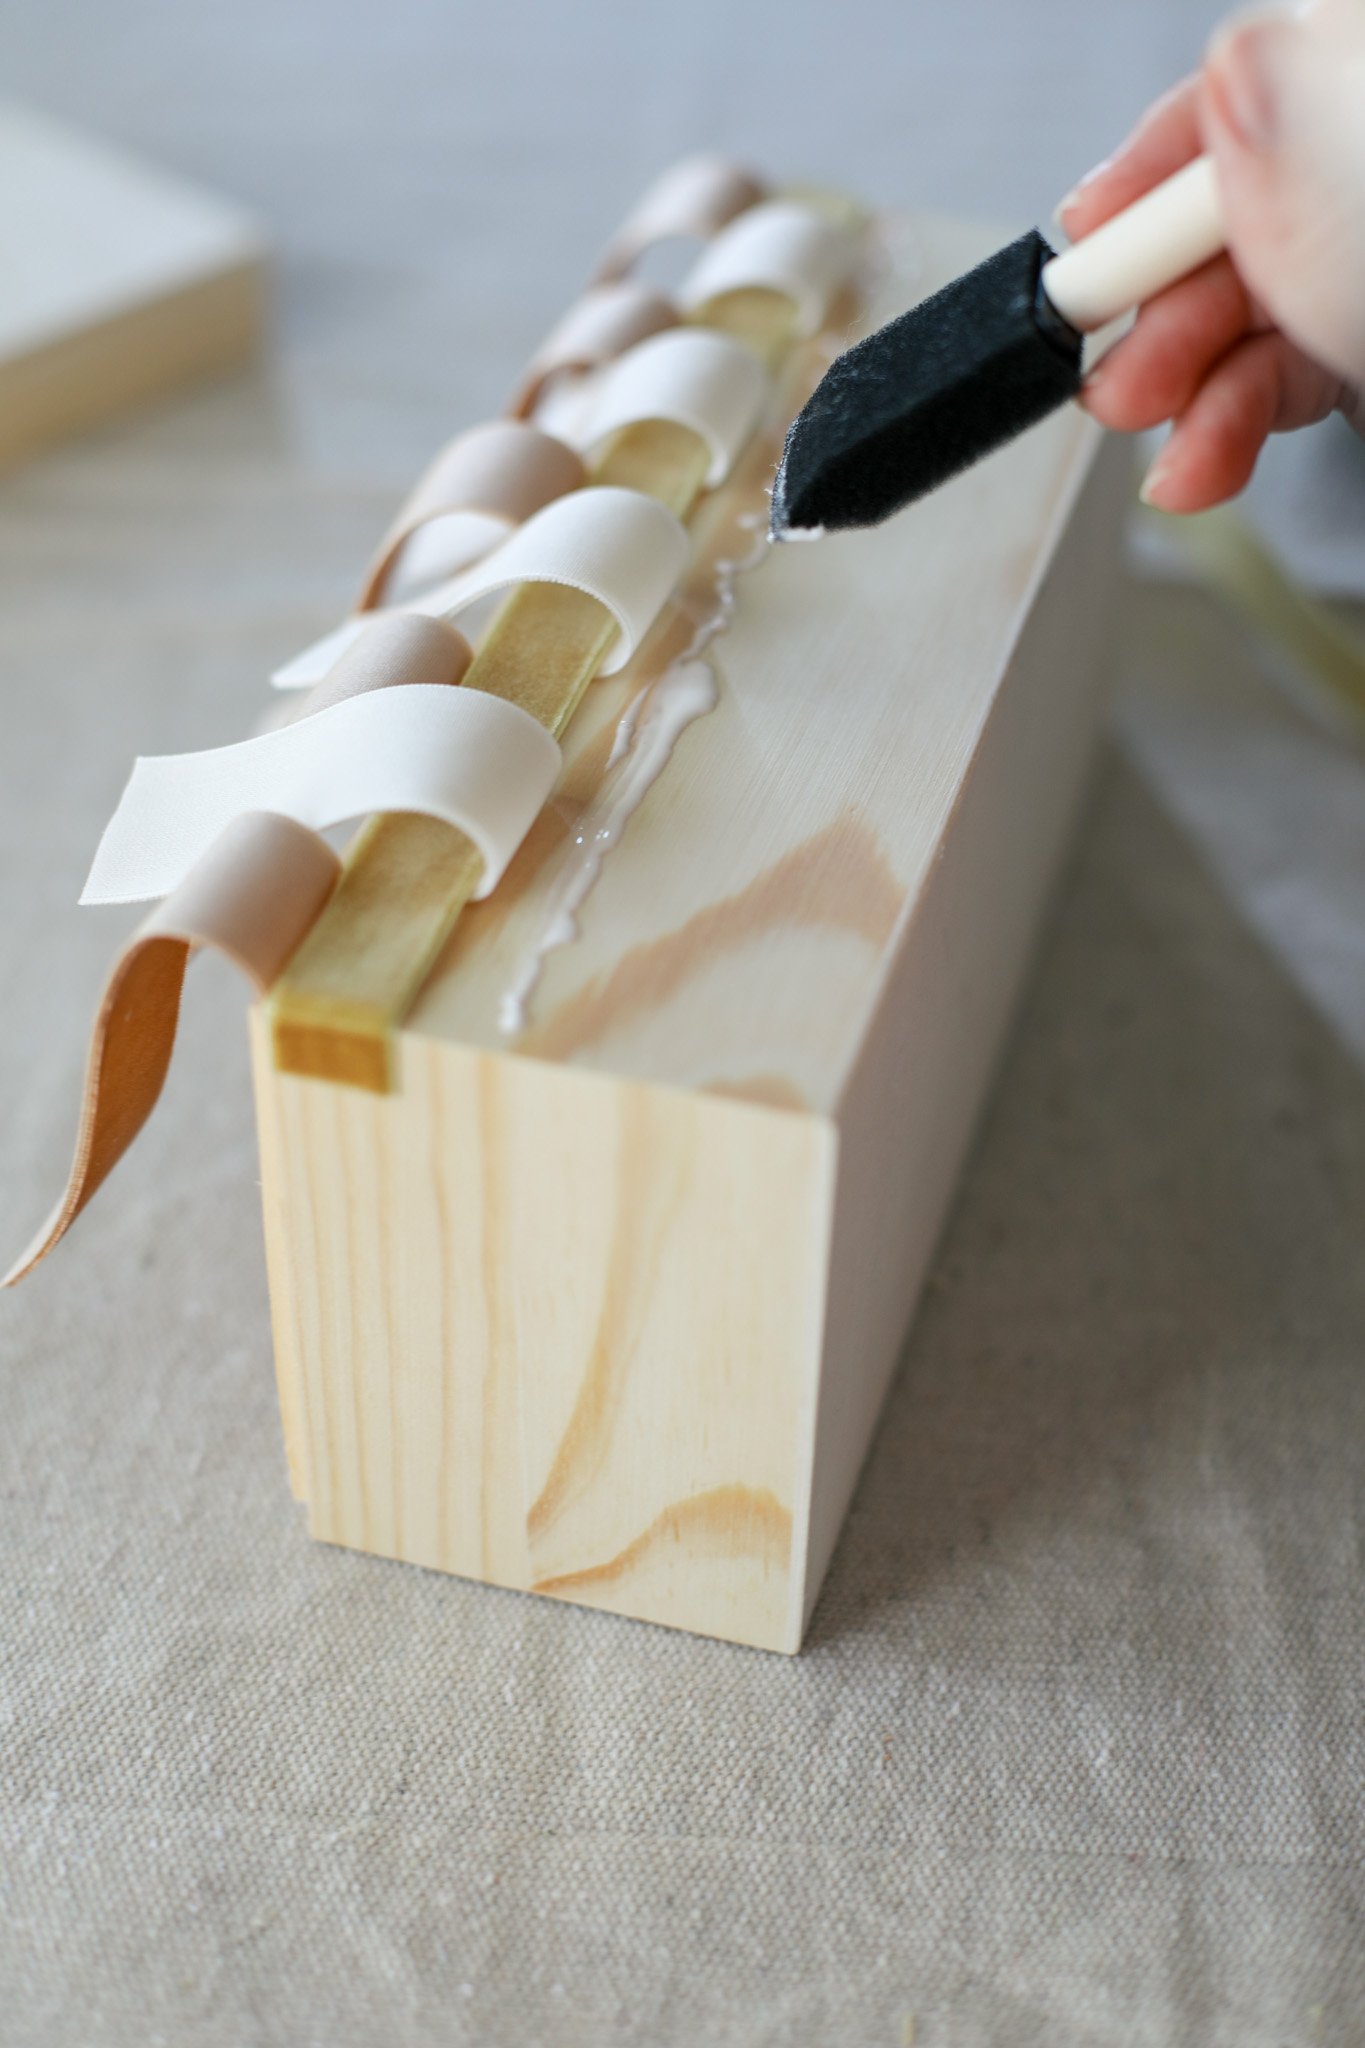
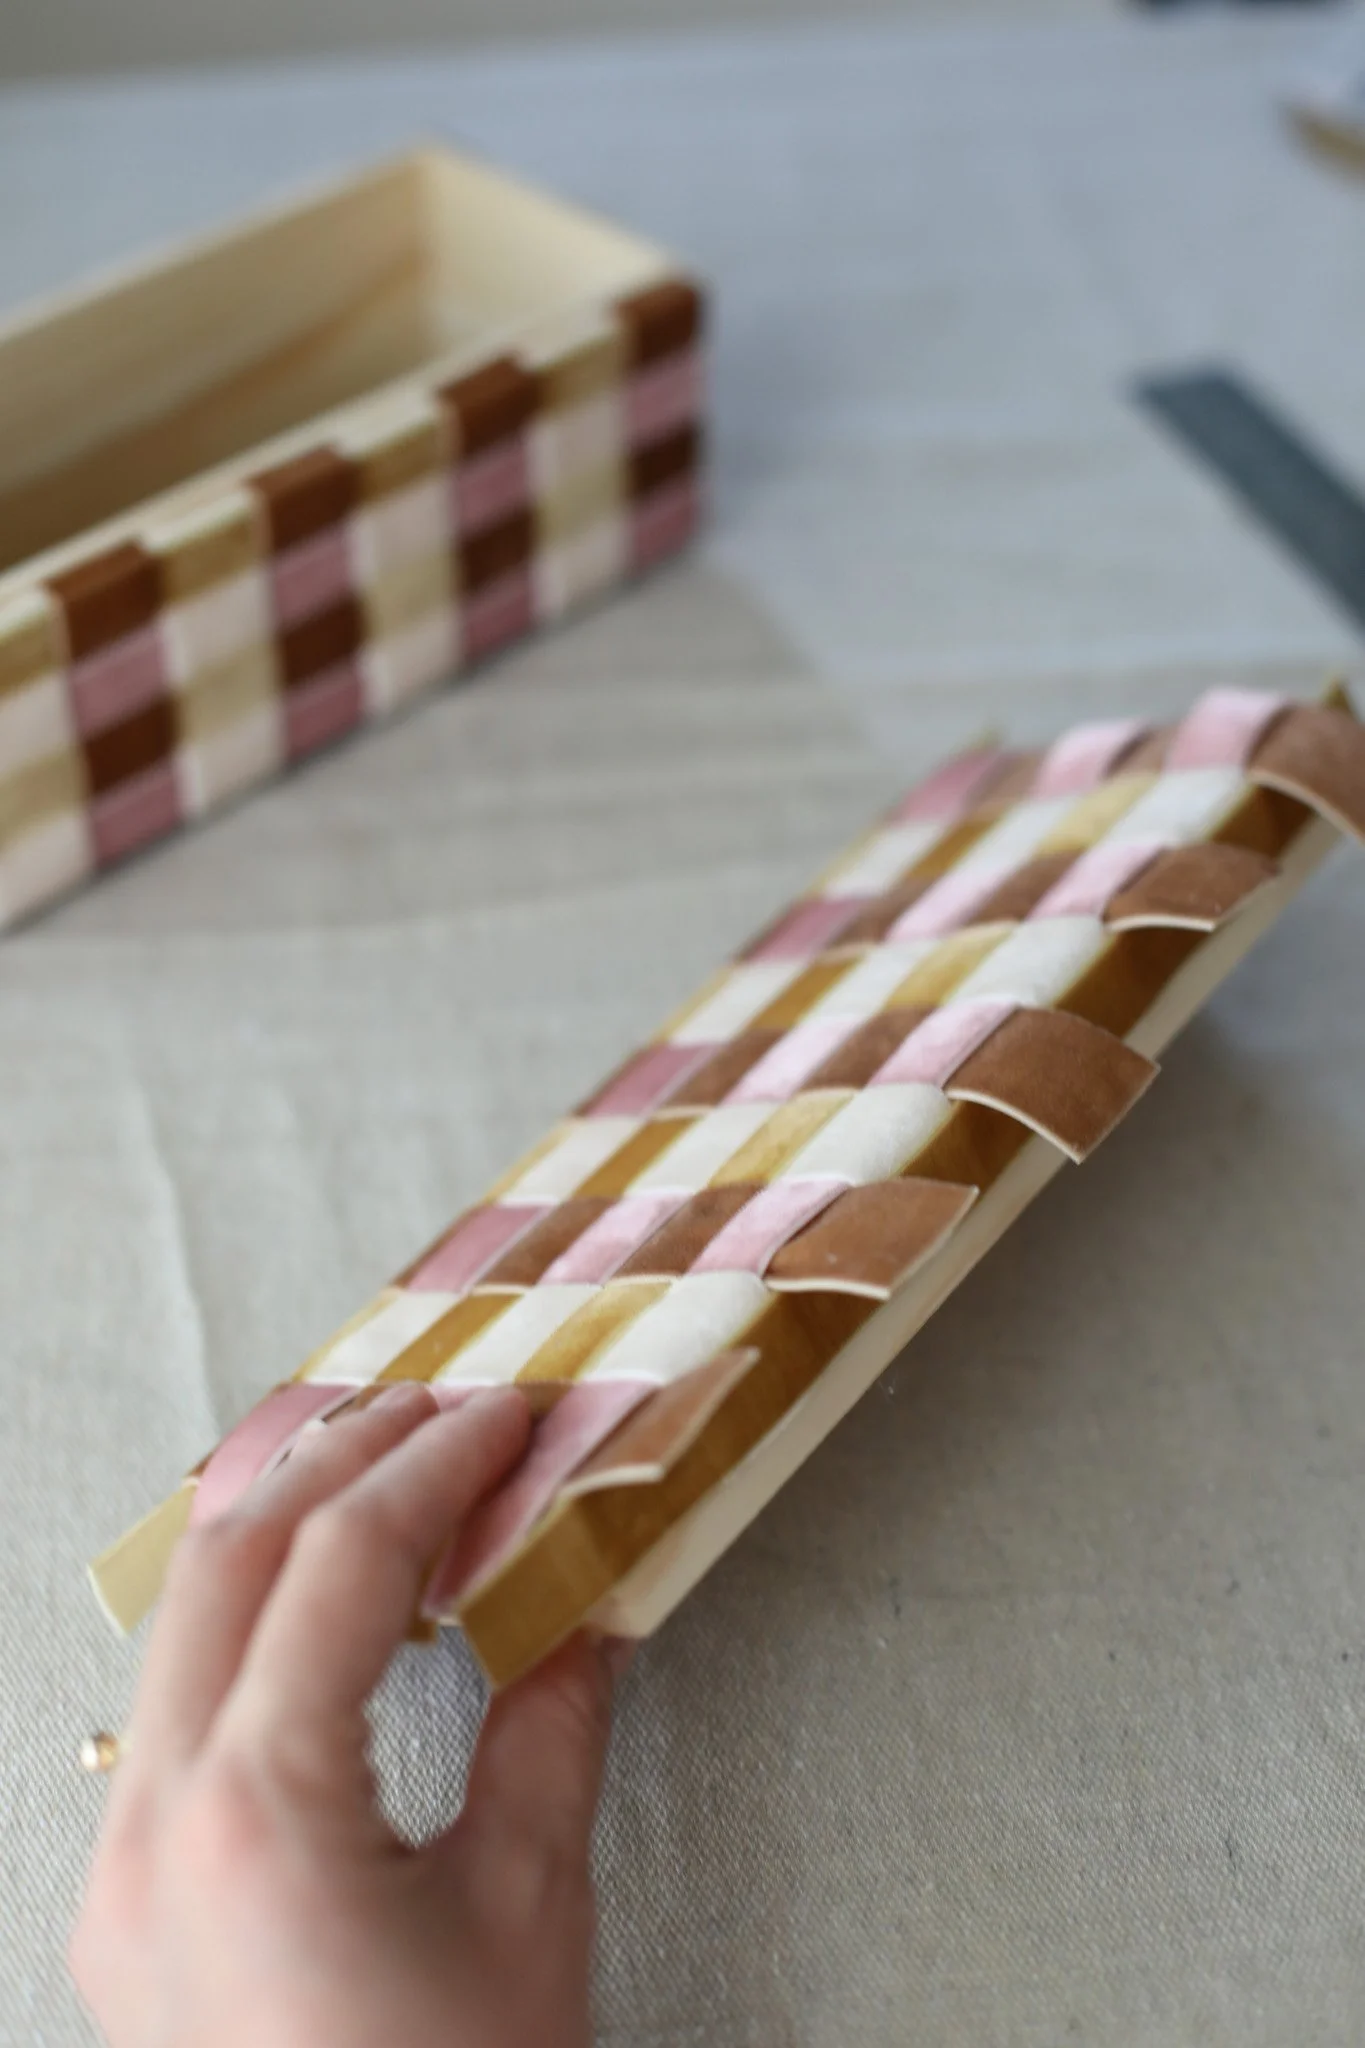
STEP 6: Once I got to the bottom edge of the box, I folded the cream and brown vertical pieces over the edge to the bottom surface of the box and pulled them taut and glued them down. The completed side looked like the image above — the full side of the box was covered in the woven ribbon and my long horizontal gold & pink ribbons were hanging off the short end.
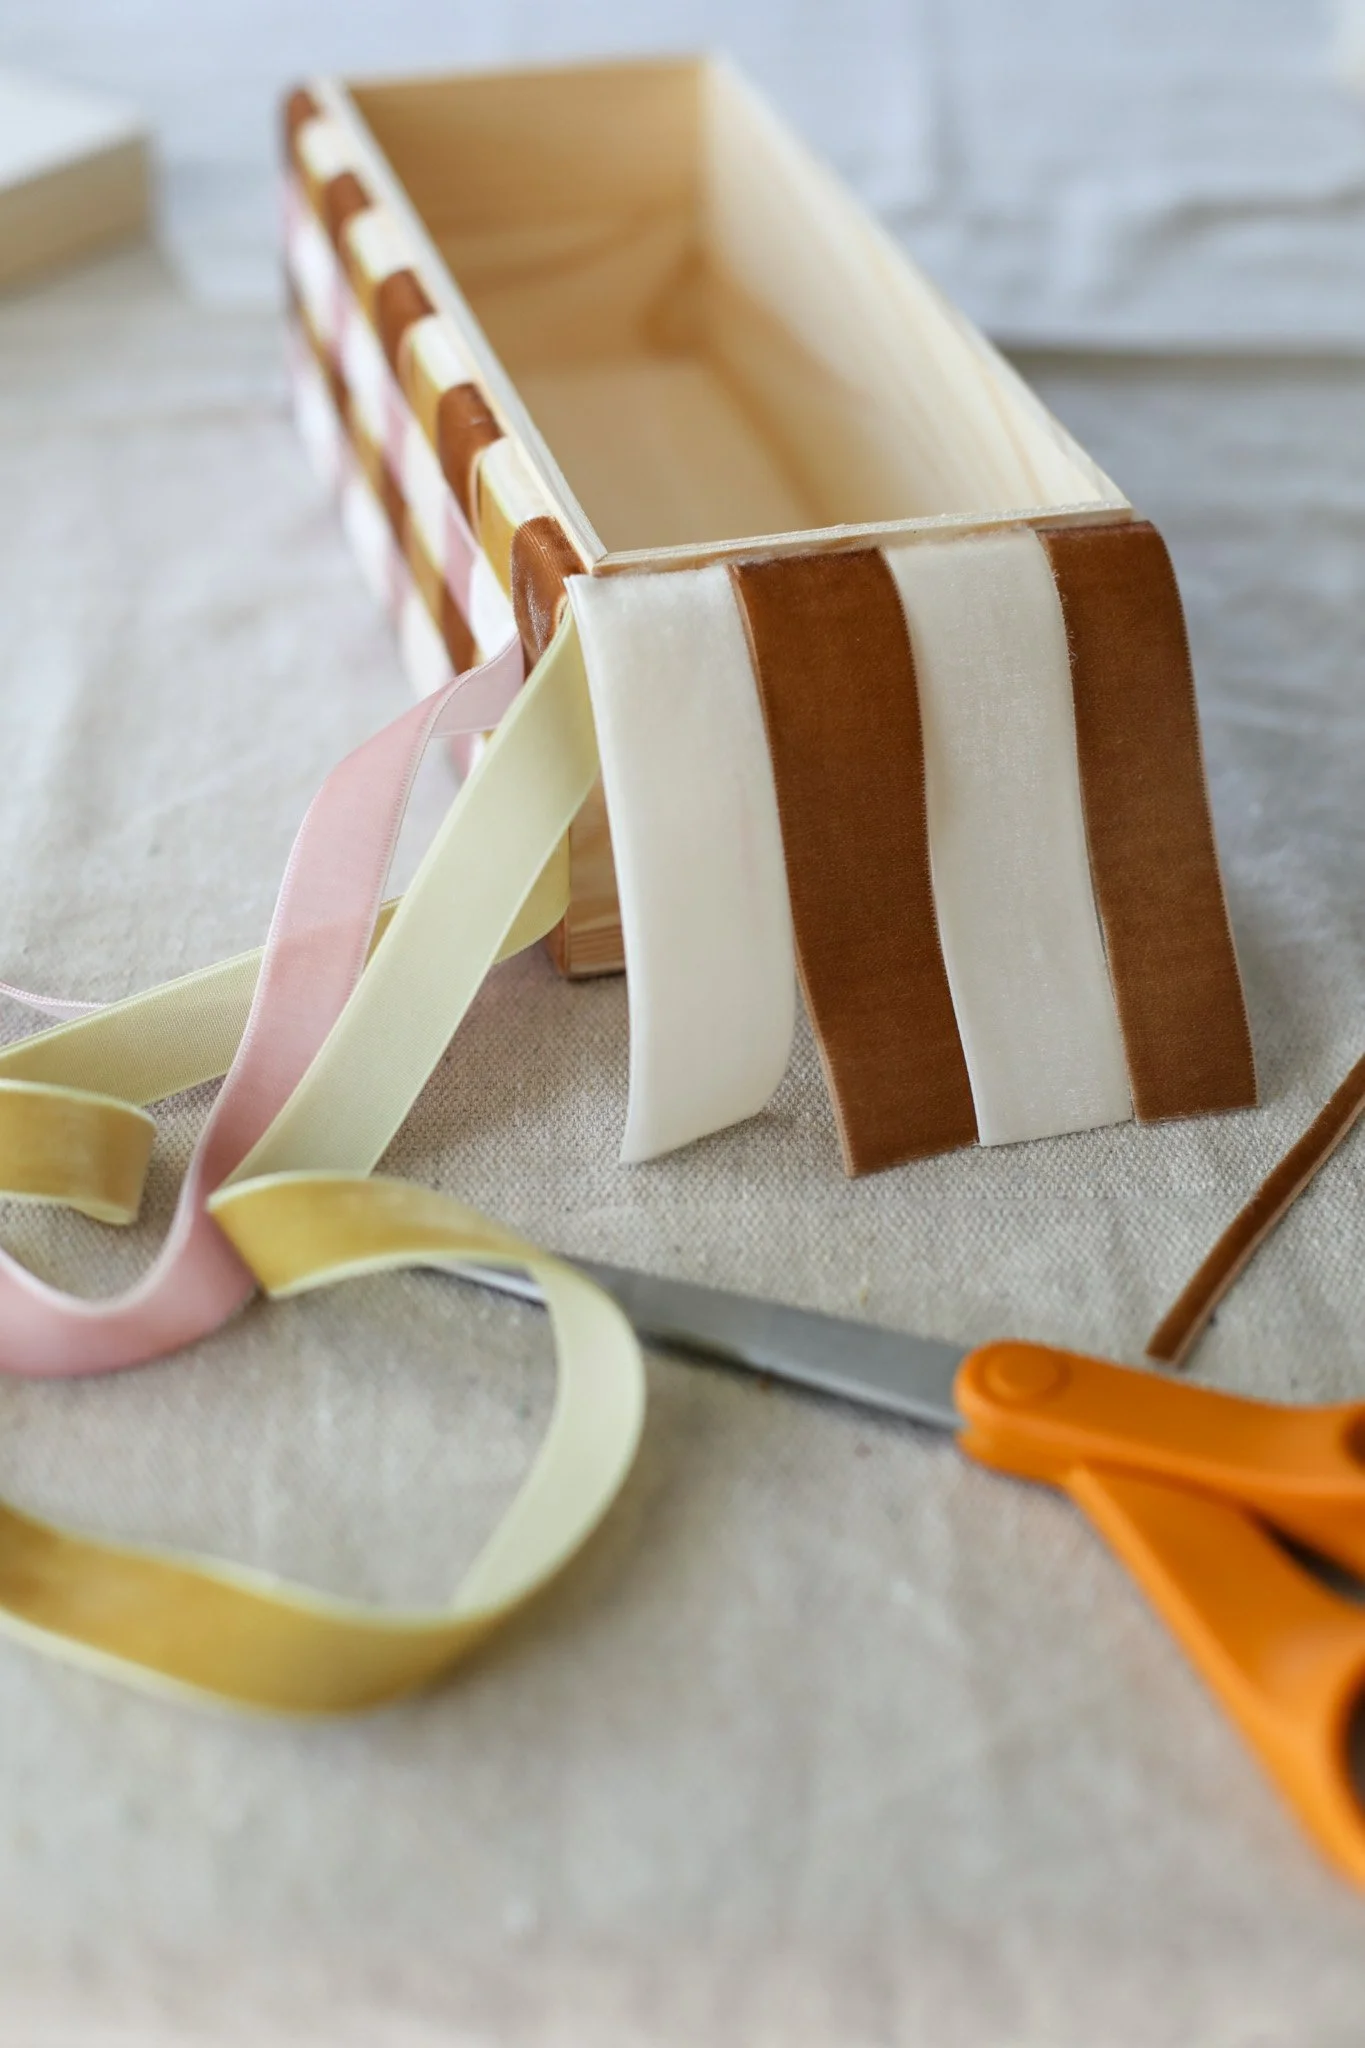
STEP 7: Next, I continued this same process on the next short side of the box. Continuing to glue down my long pink and gold ribbons alternating the gold ribbon over the cream and under the brown. And the pink ribbon over the brown and under the cream.
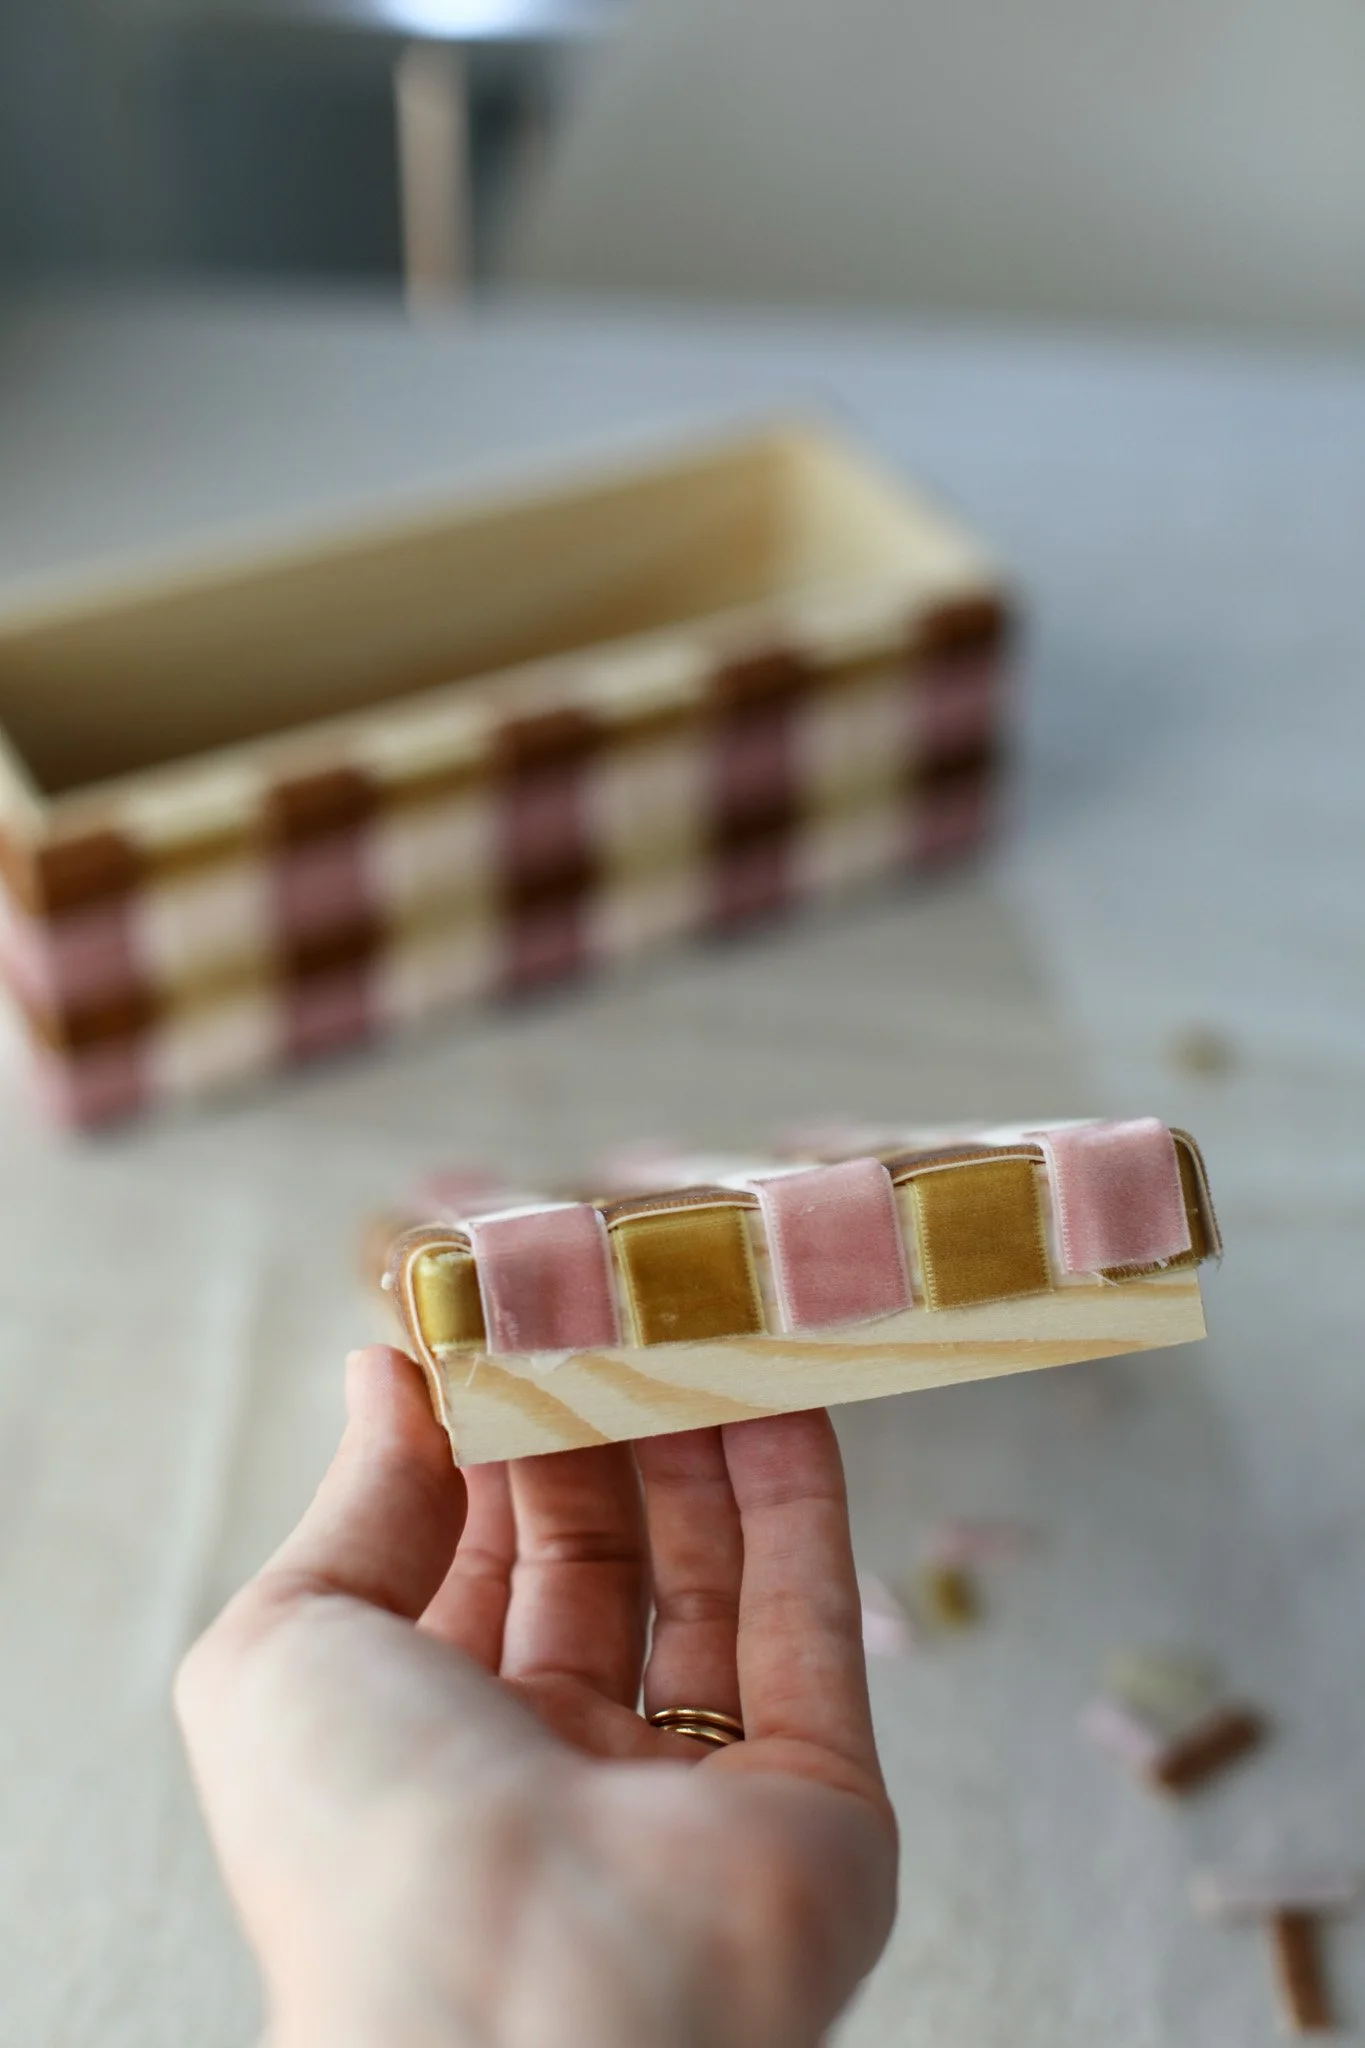
NOTE: For the short side of the boxes, I had to trim the width of the last piece of brown vertical ribbon so that it fit without bending over the side. I positioned that piece of ribbon so that the trimmed length was on the inside so that the clean edge was right on the corner edge of the box to avoid fraying.

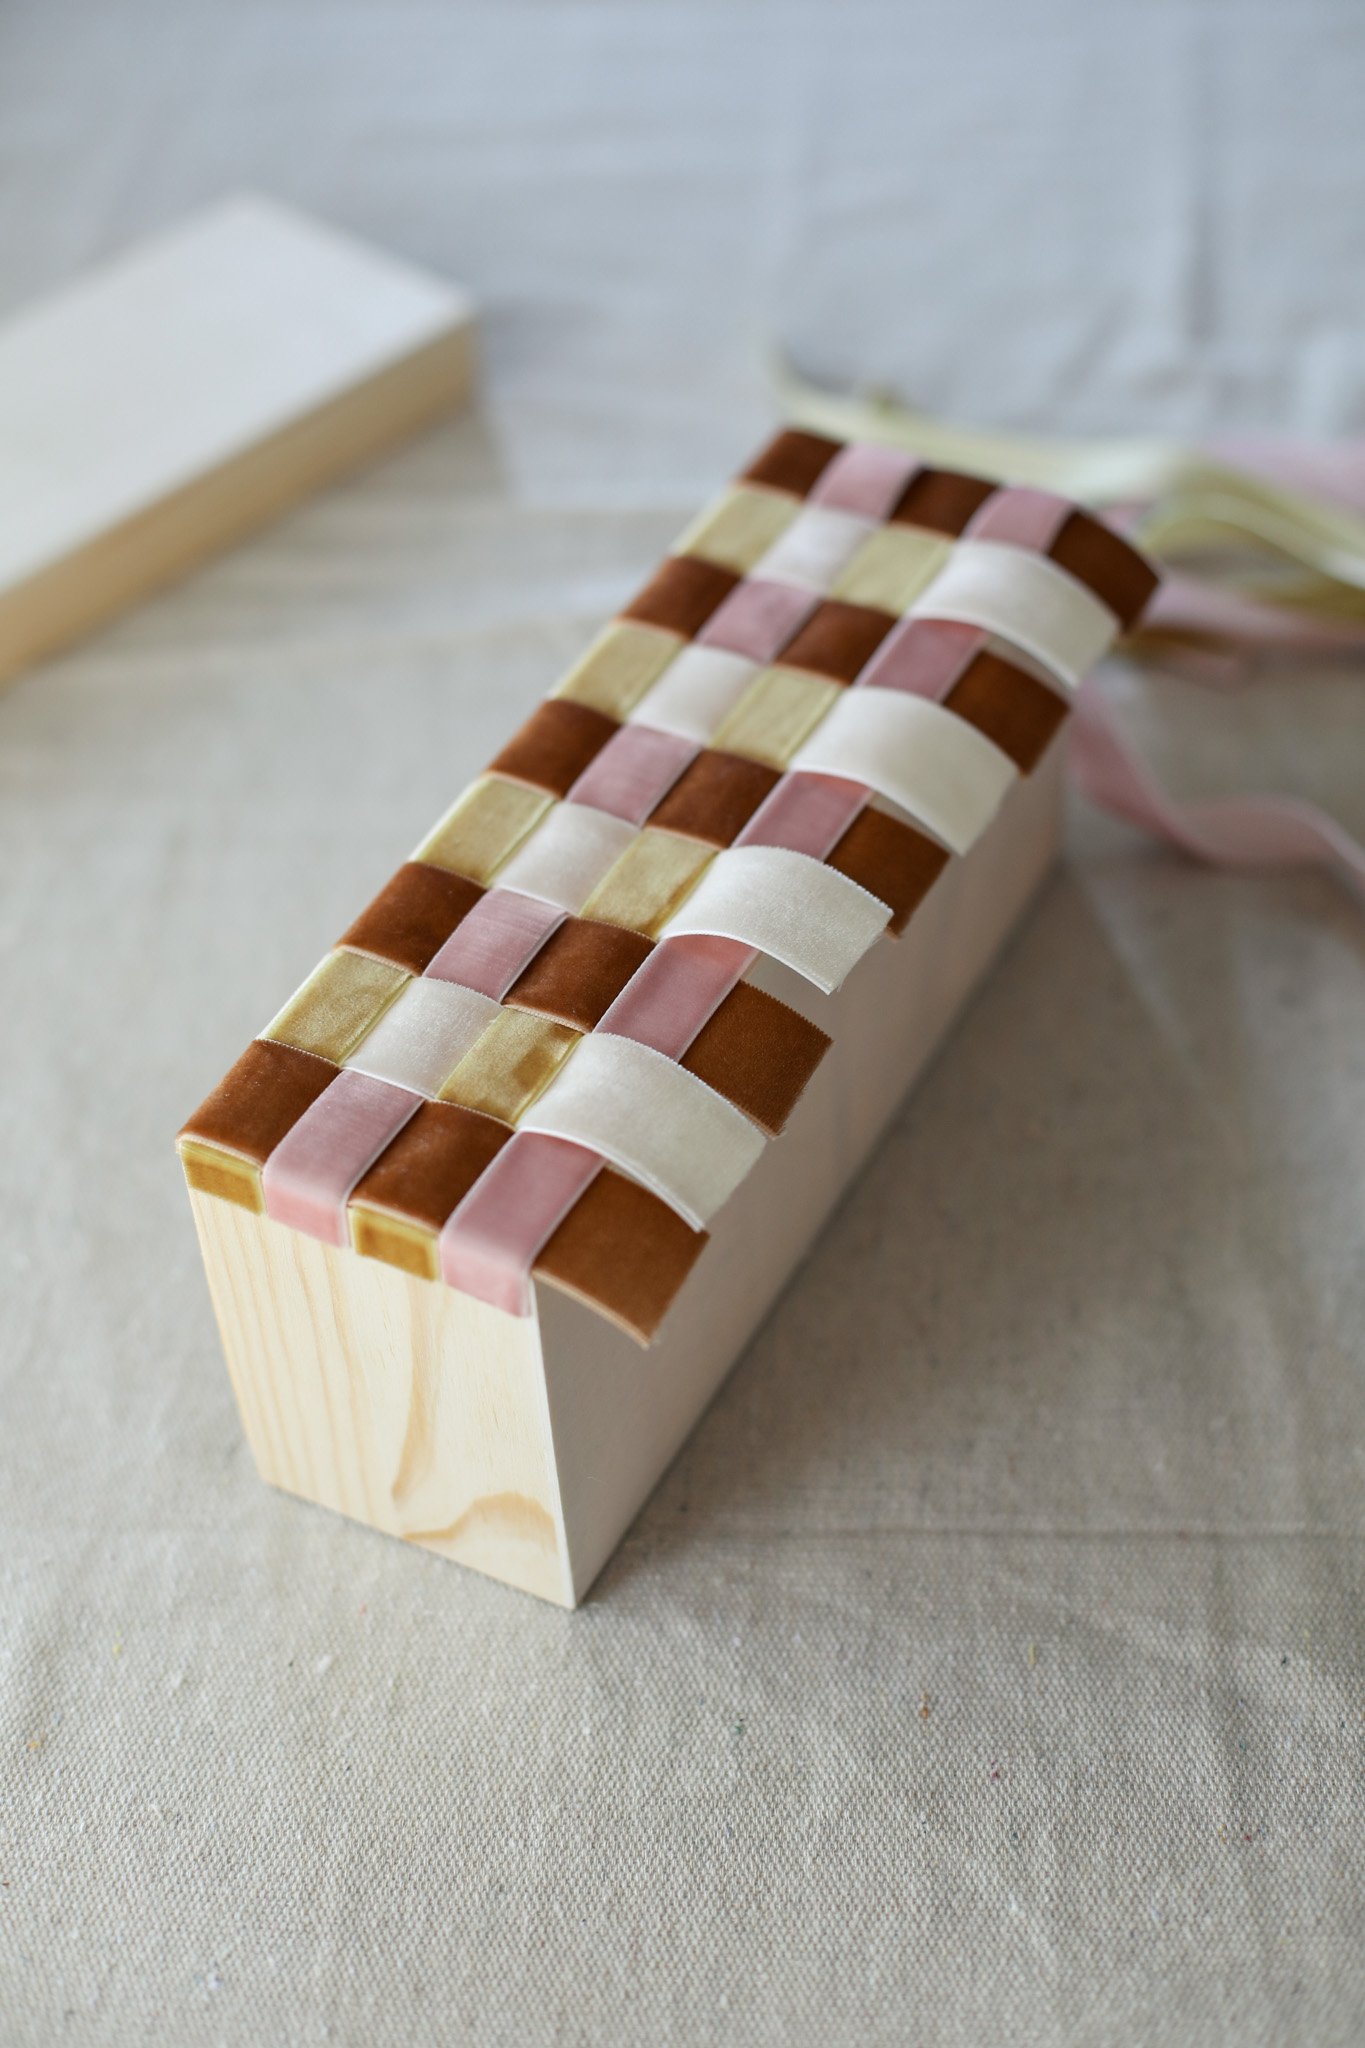
The completed short side looked like this!
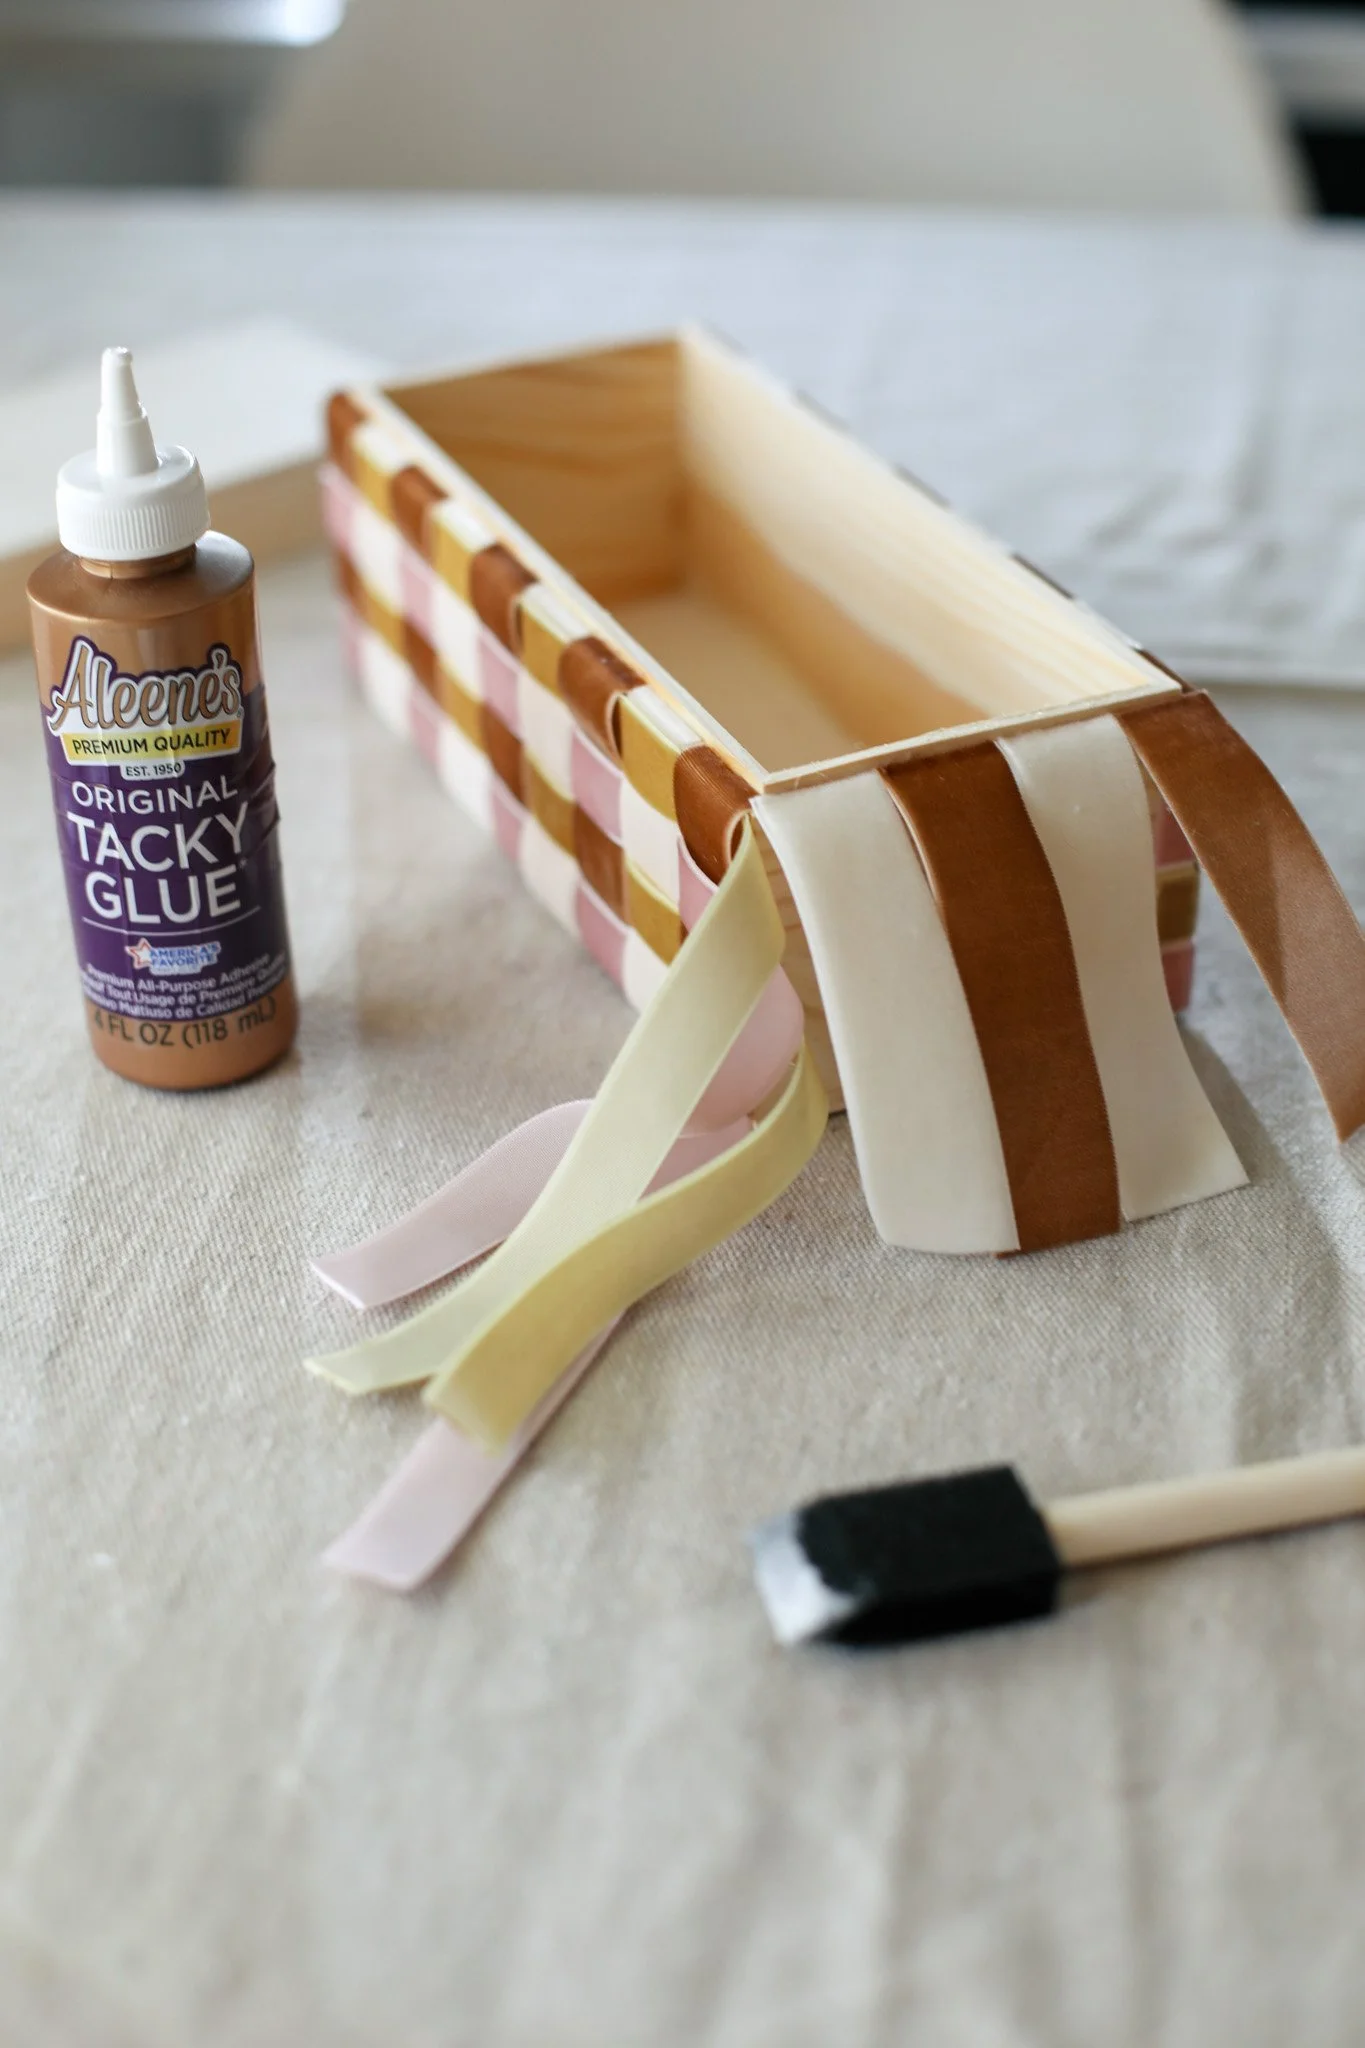
And then I repeated the process again on the other long side and the final short side.
STEP 8: After weaving the final short side, I was left with a small tail of the gold and pink horizontal ribbons. Since the gold was going under the brown vertical ribbon, I just trimmed it before gluing it down under the brown. But since the pink was going on top of the brown vertical ribbon, I pulled it over the corner edge and glued it on top of the first pink sections. This helped the ends to just blend in with the woven pattern and kind of disappear so you can’t really tell where I started and ended.
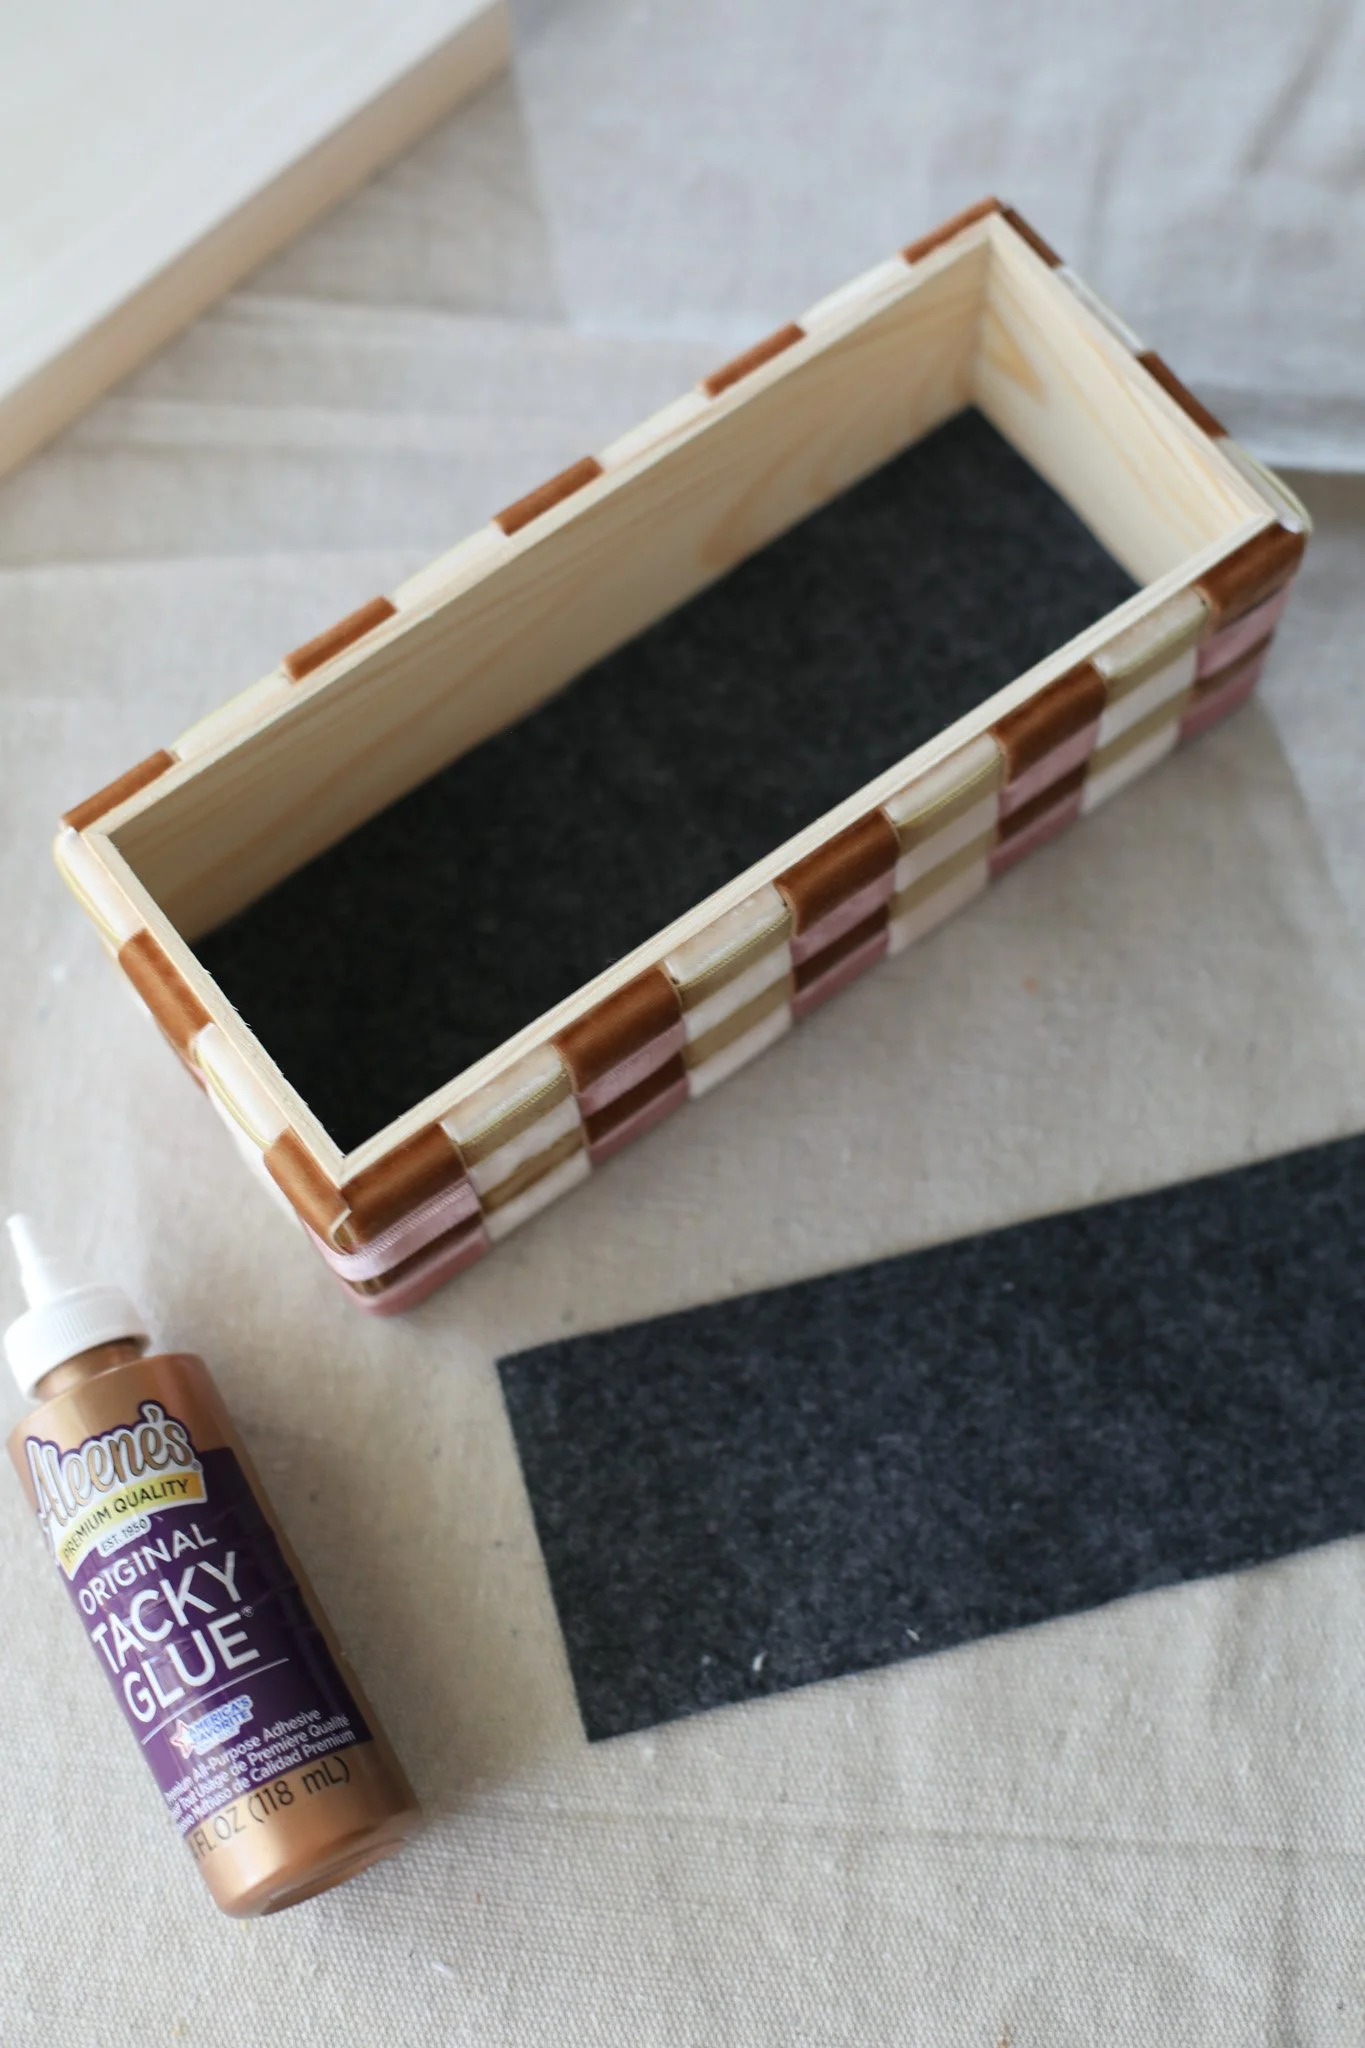
STEP 9: To complete the base of the box, I brushed on a layer of glue to the bottom of the inside of the box and pressed down my piece of felt. Then I brushed on a layer of glue to the bottom of the box and pressed down another piece of felt to cover and clear up my ribbon ends.
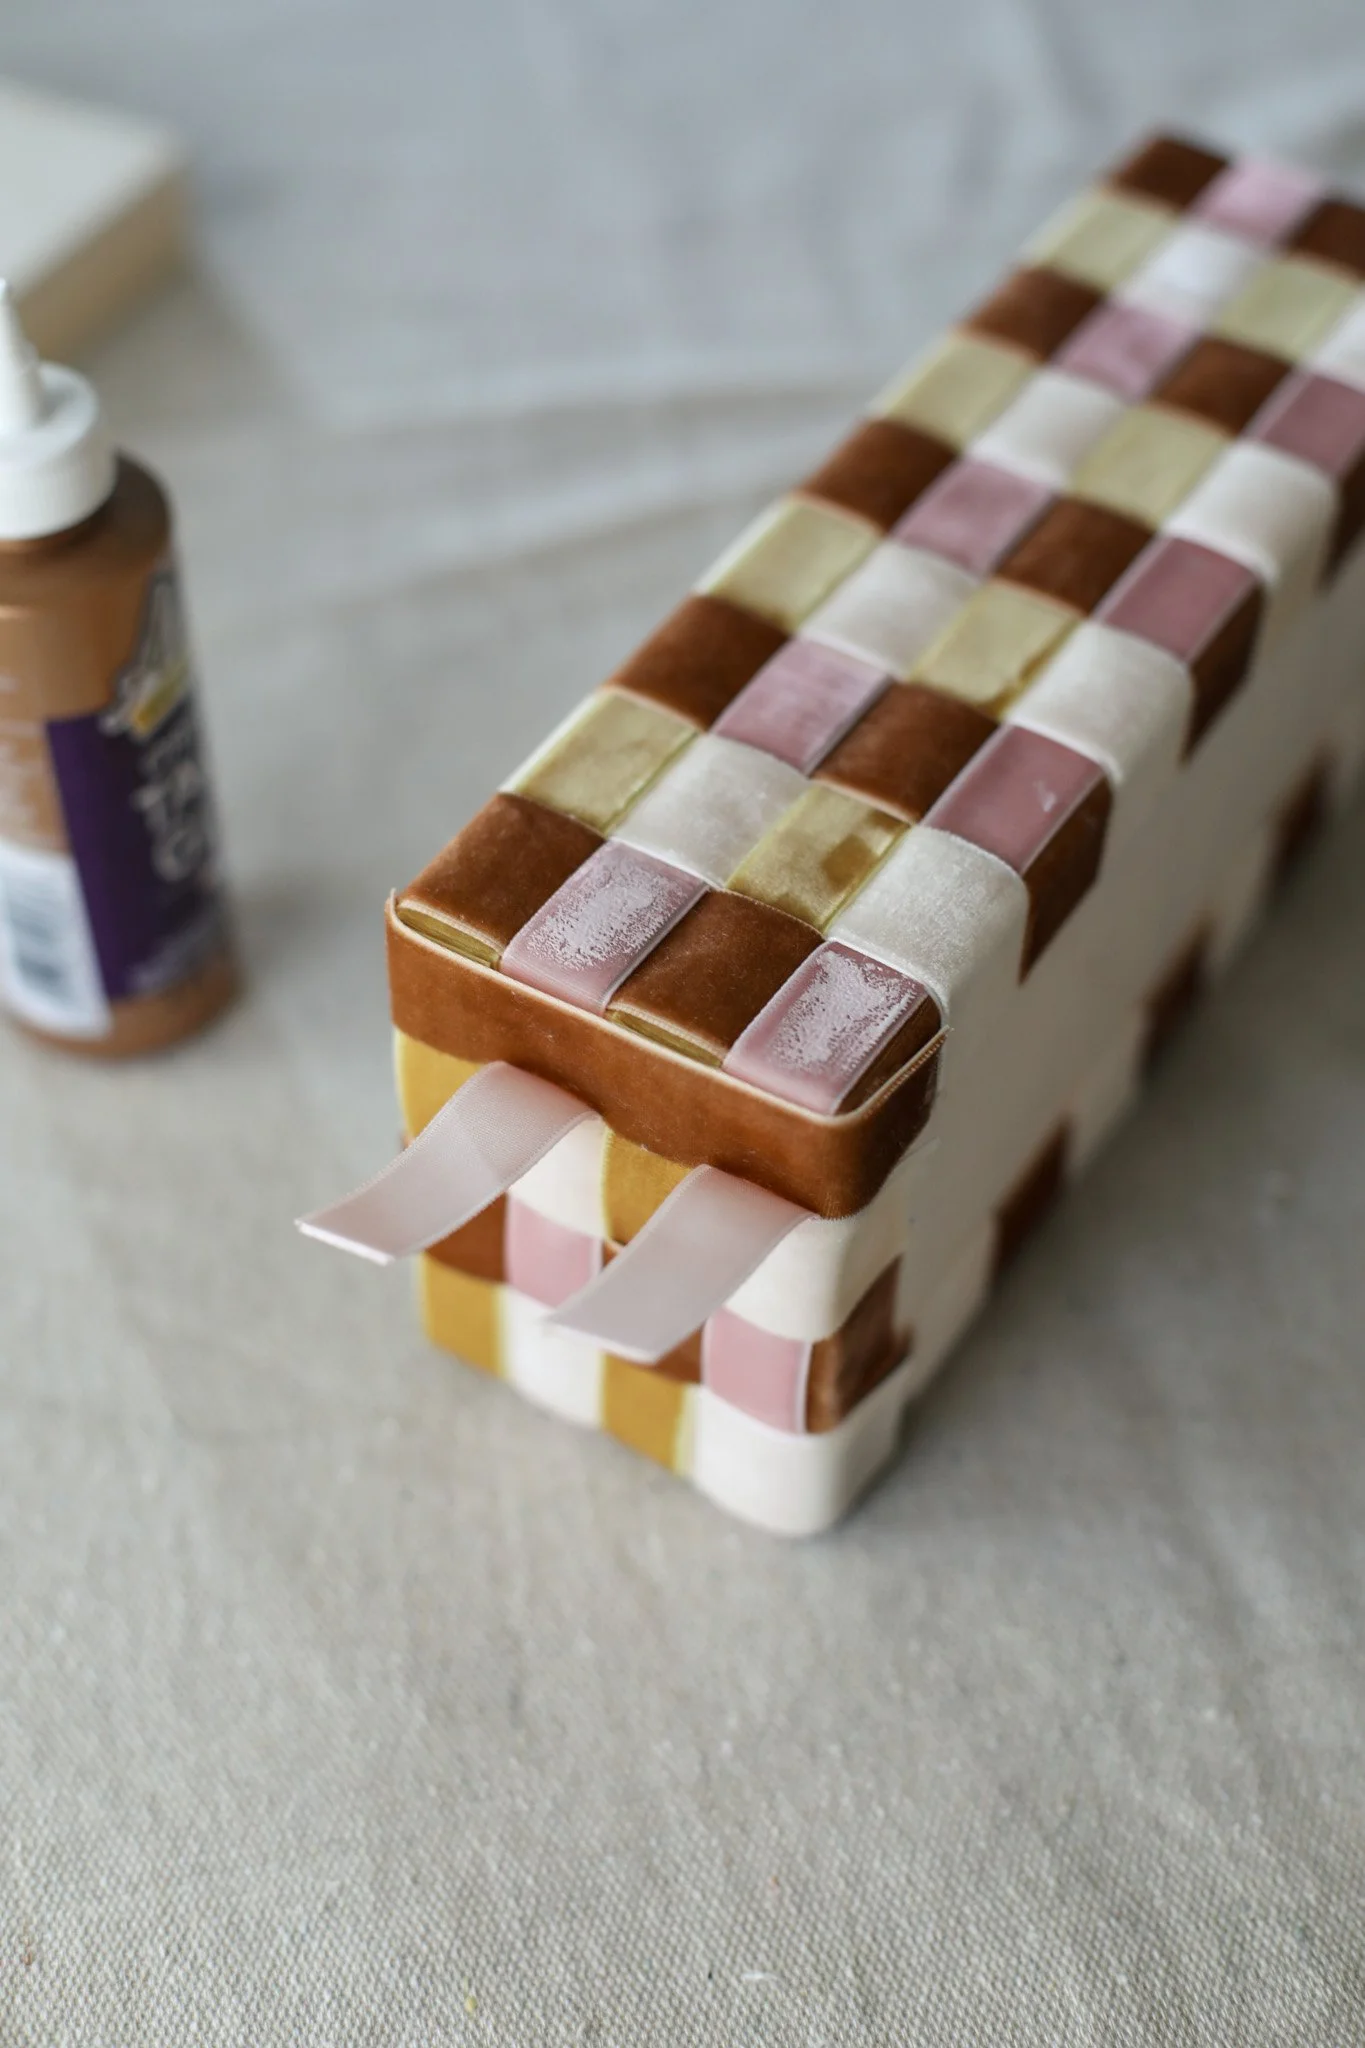
STEP 10: And then it was time to cover the lid of the box! I basically used the same process but started by gluing the ends of my cream and brown vertical ribbons about 2/3 of the way down the side of the lid.
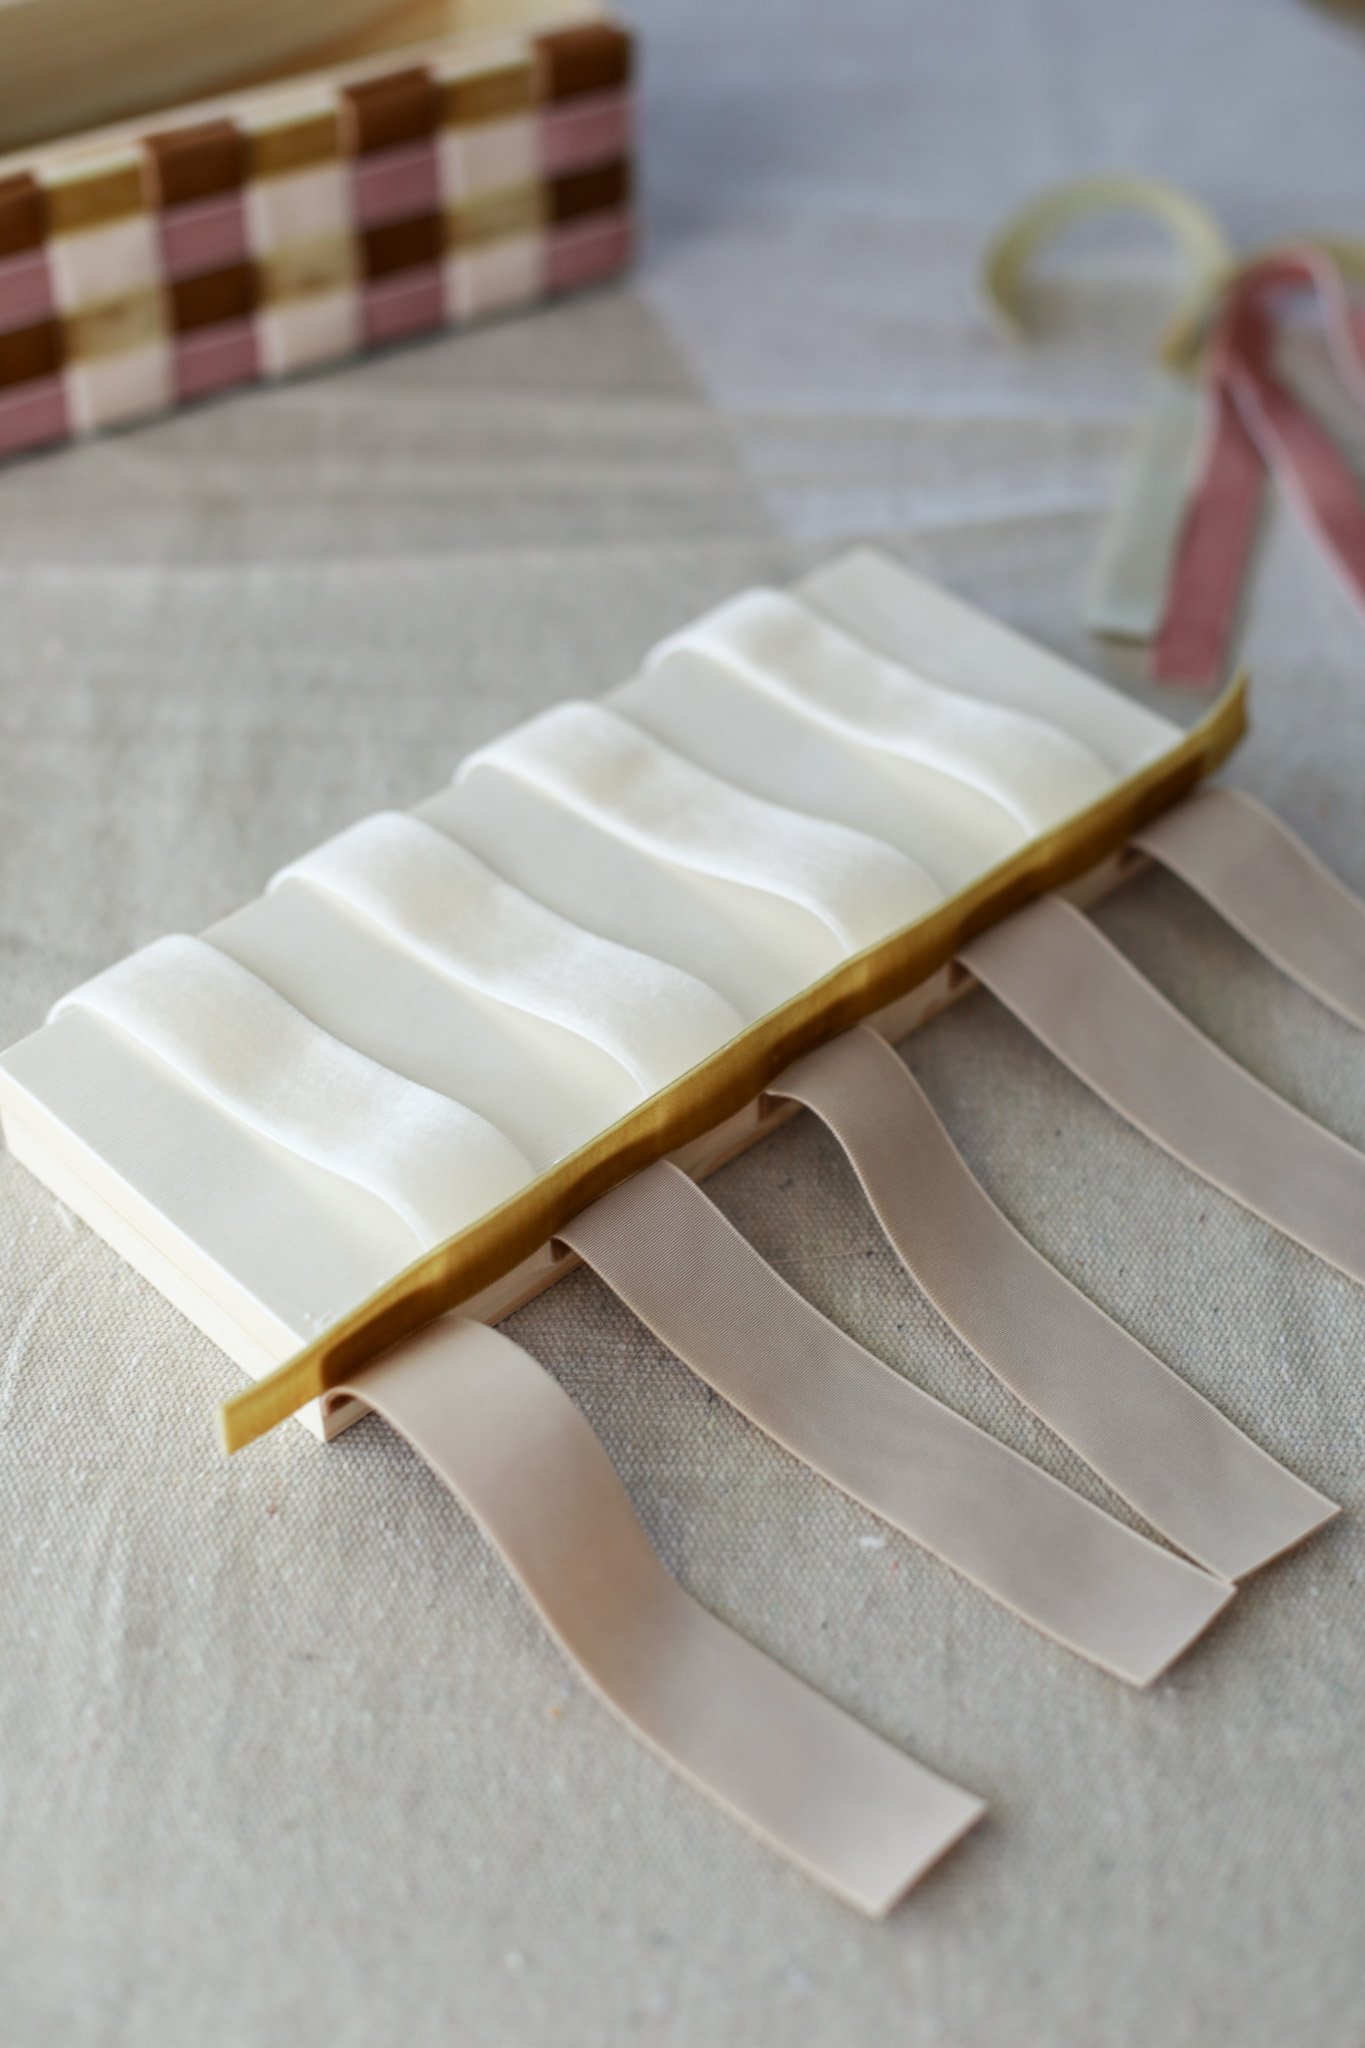
Then I weaved in the thinner gold and pink ribbons the same way — gold ribbon over the cream and under the brown. And the pink ribbon over the brown and under the cream.

Just like the base of the box, I glued row by row as I weaved the ribbons together.
Every time I added a thin horizontal ribbon, I tried to pull it as close to the previous ribbon as possible to keep the pattern tight.
STEP 11: I continued this pattern all the way until the other long side of the lid. Then I trimmed the vertical cream and brown ribbons and glued them down about 2/3 of the way down the side.
For the short sides of the lid, I simply trimmed the thinner gold and pink ribbons and glued them down to the wood about 2/3 of the way down too.
STEP 12: To finish off the edge of the lid, I added a row of glue to the bottom and pressed on a thin pink ribbon around all four sides.
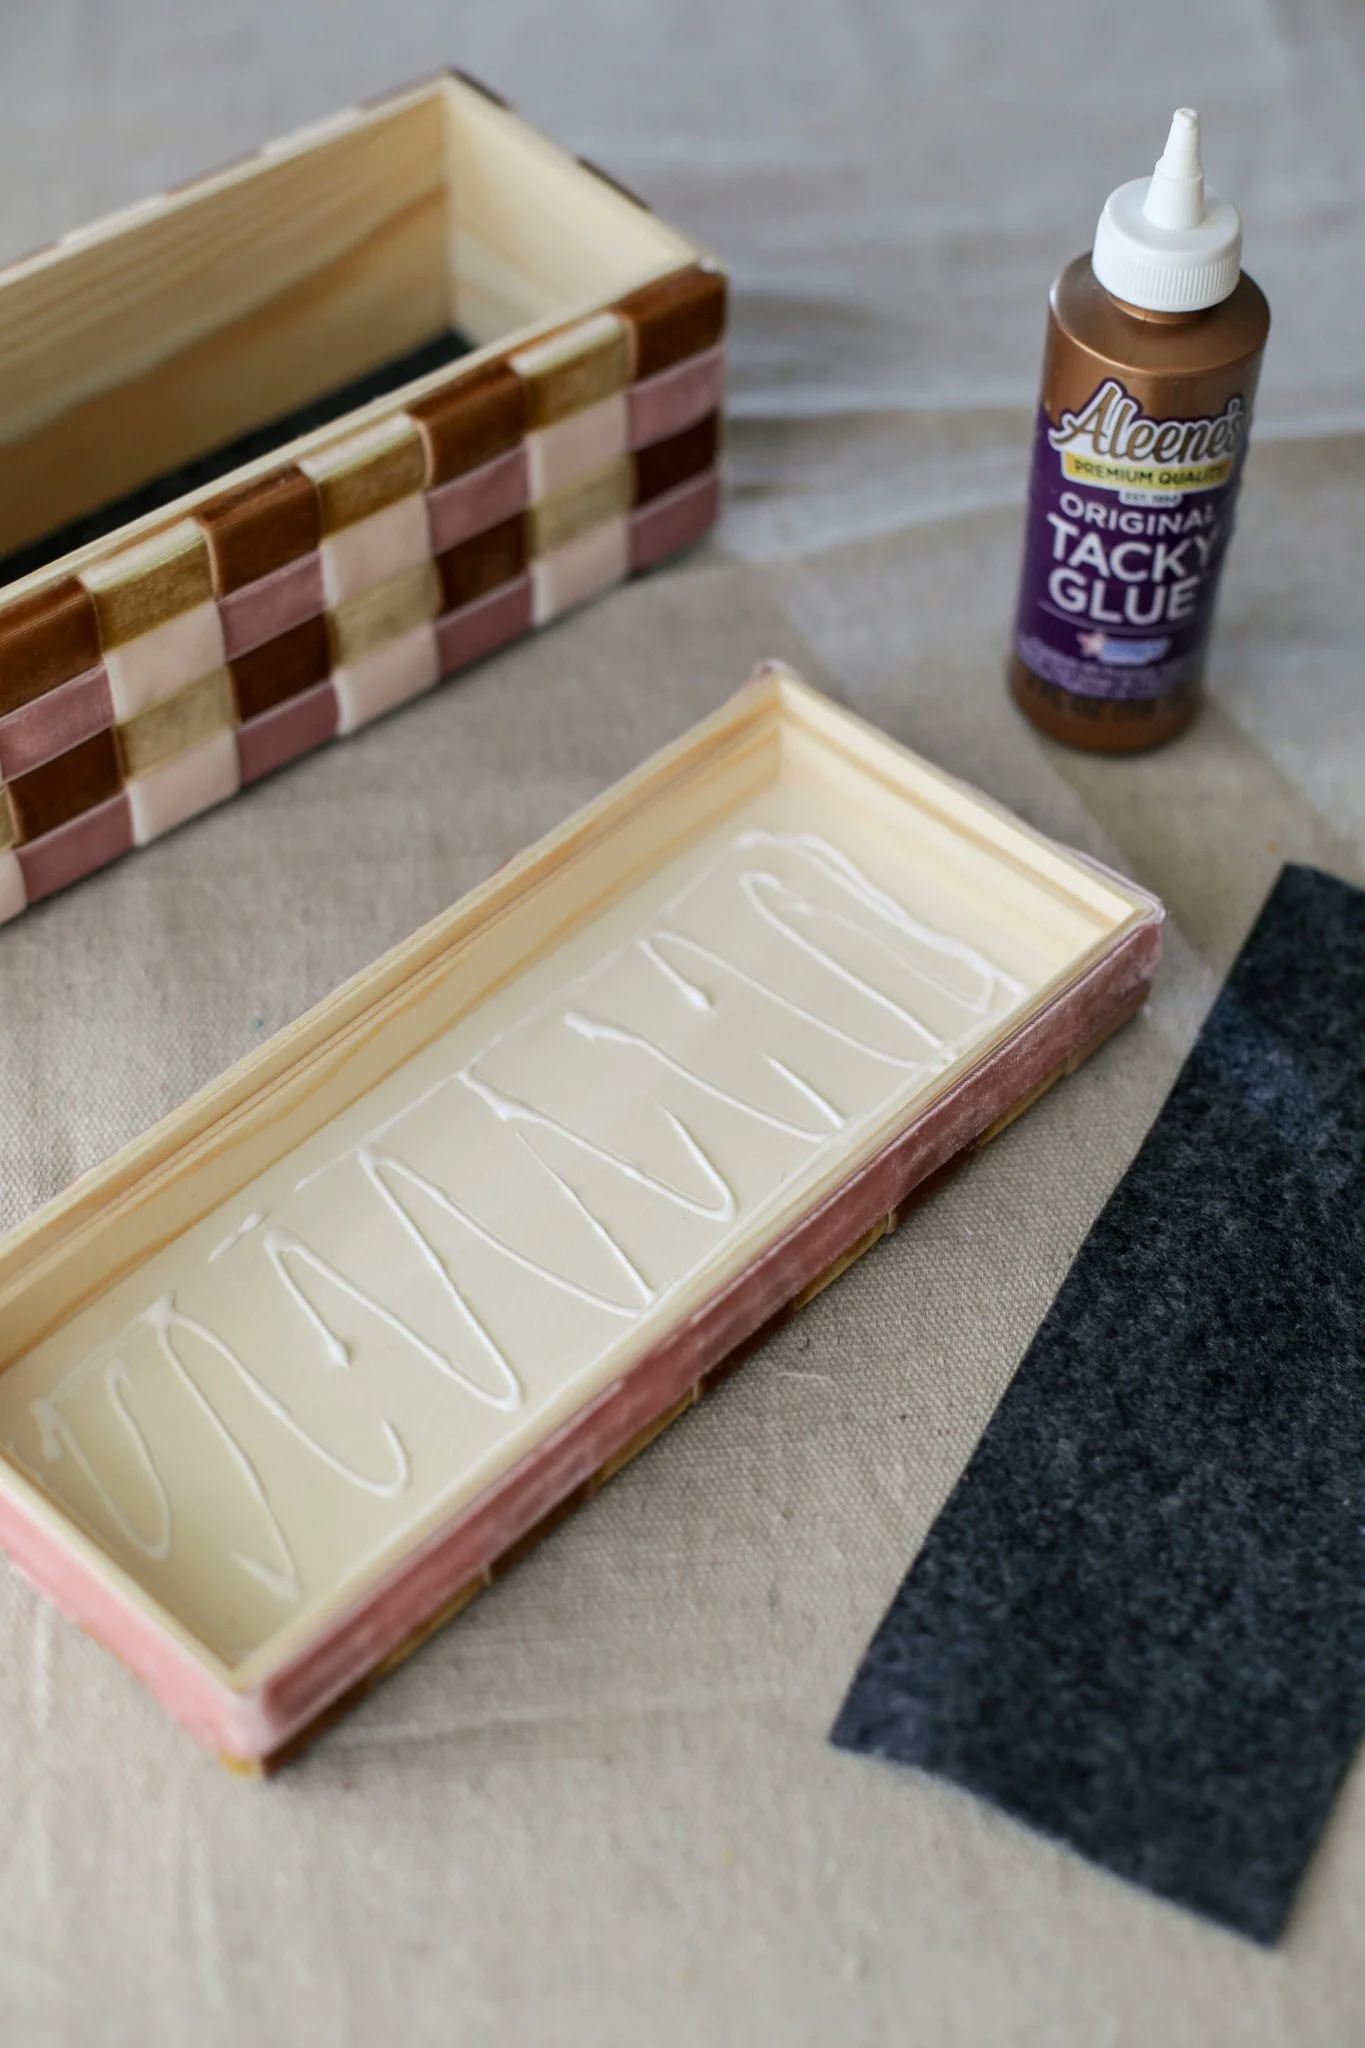
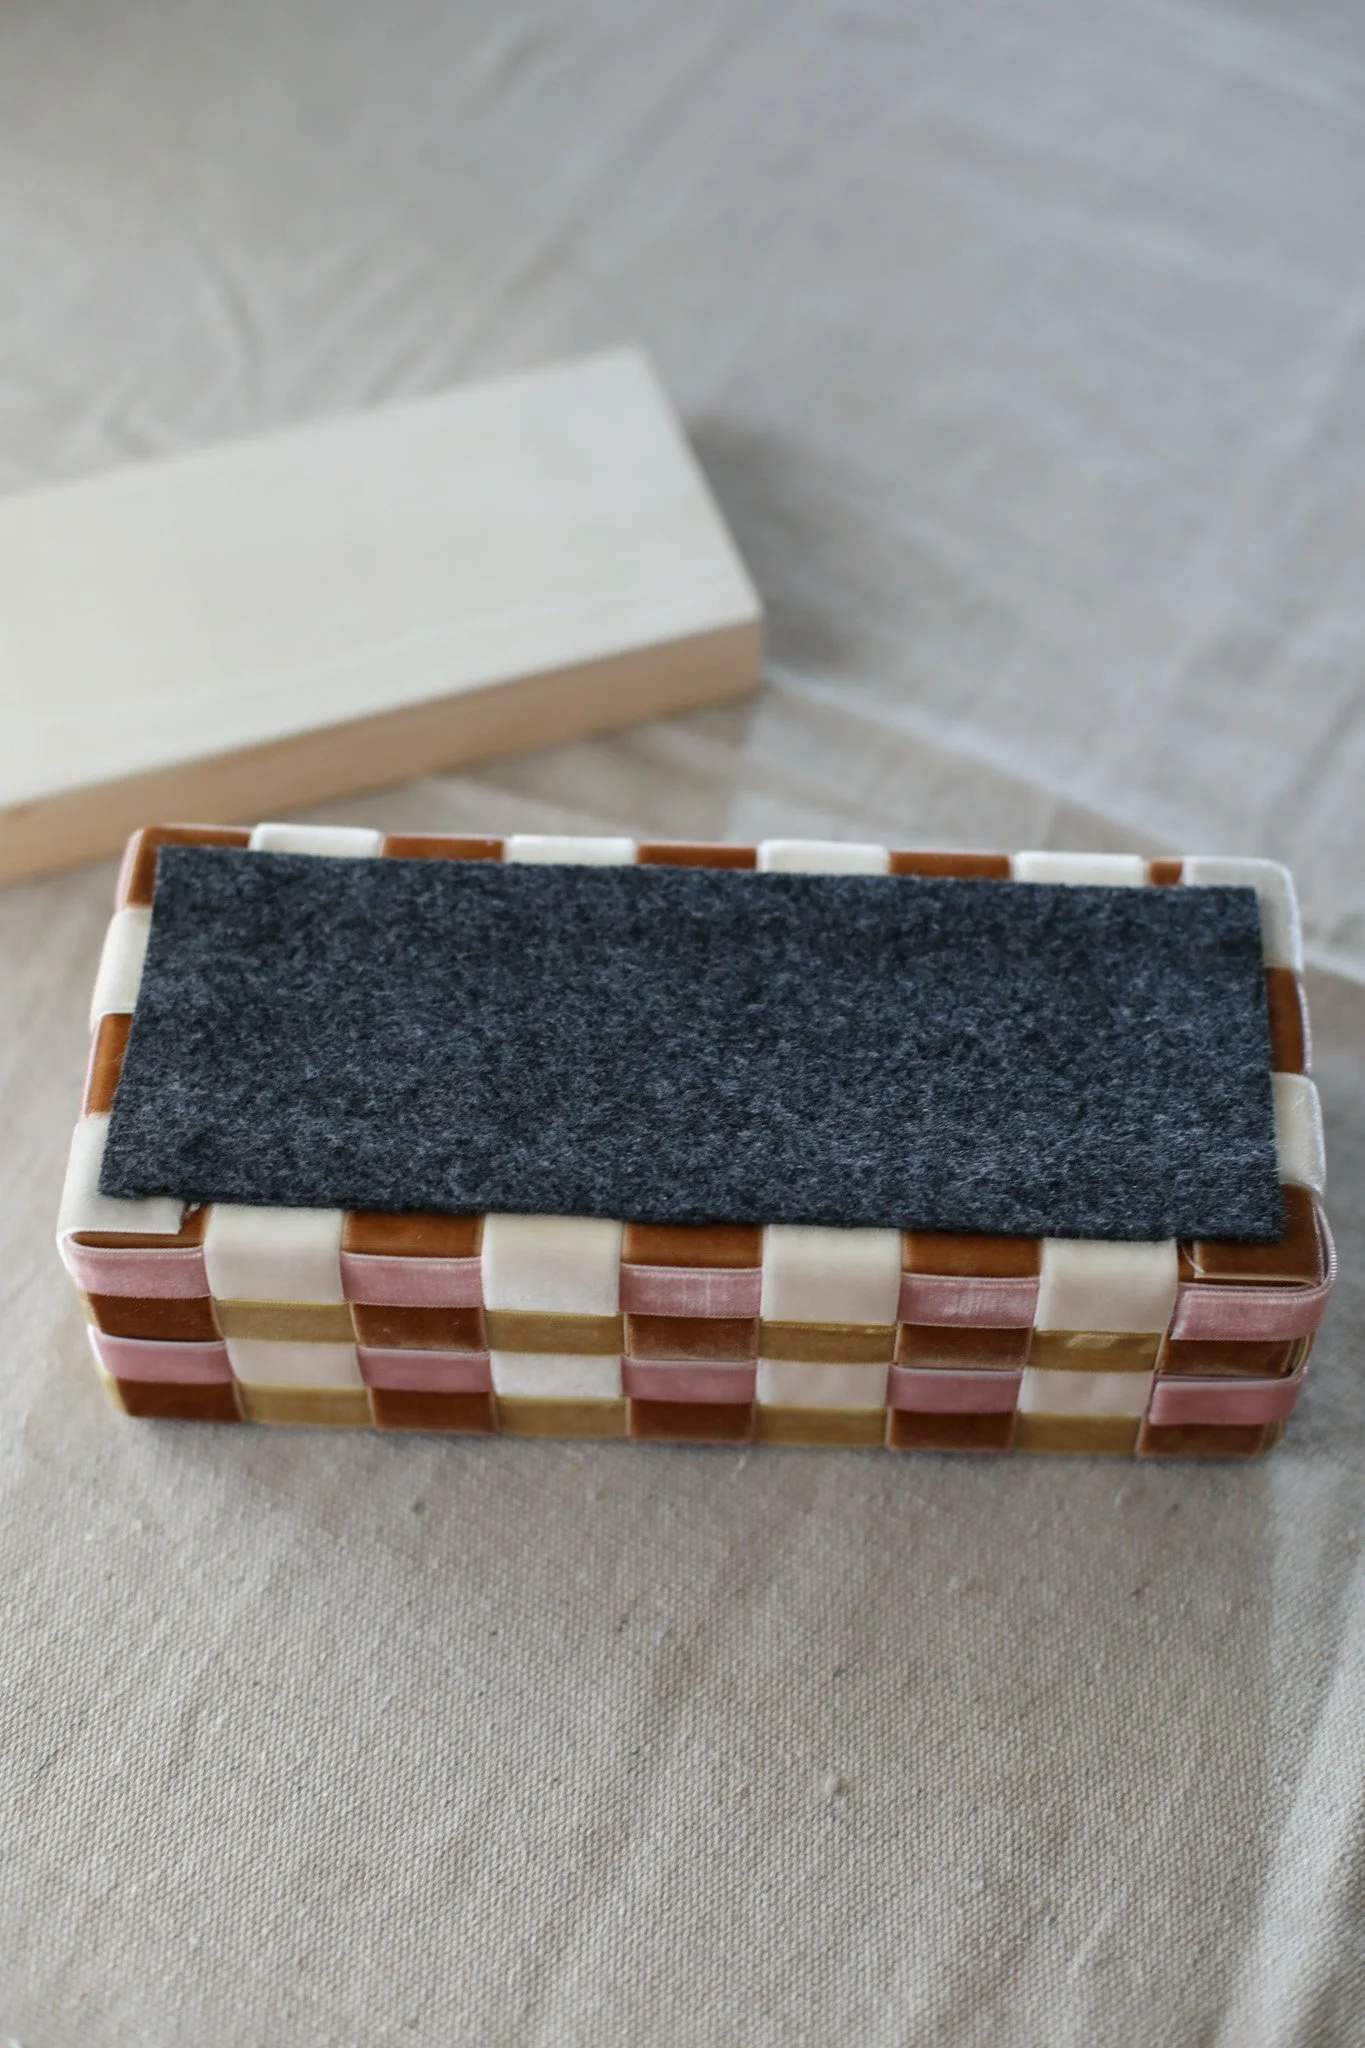
STEP 13: Then I glued the last remaining piece of felt to the inside of the lid. This step is optional and not necessary but I felt like it finished off the project :)
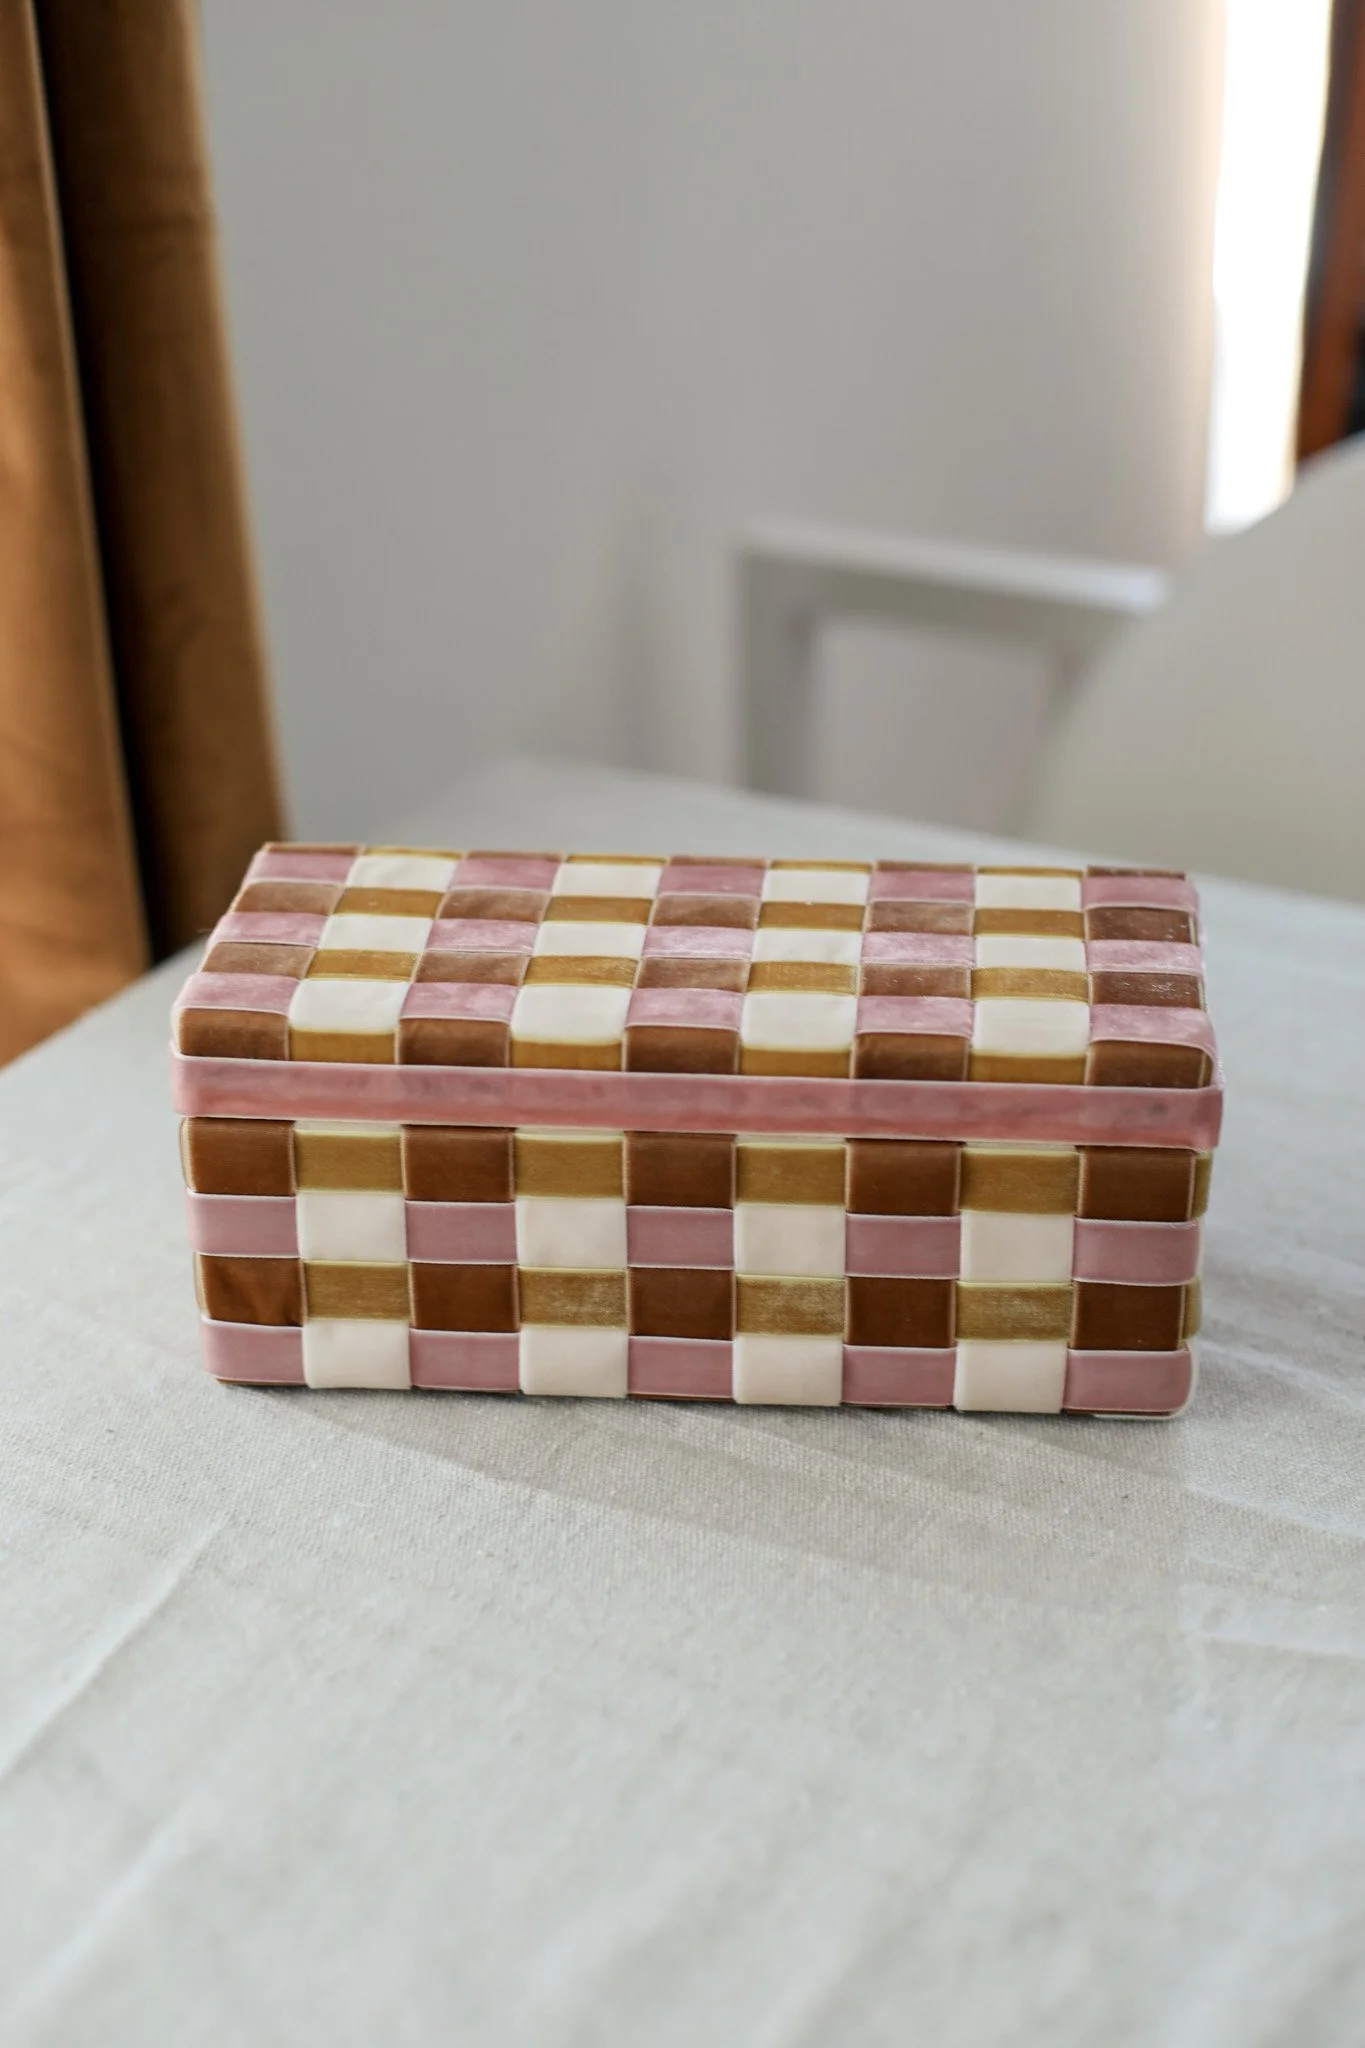
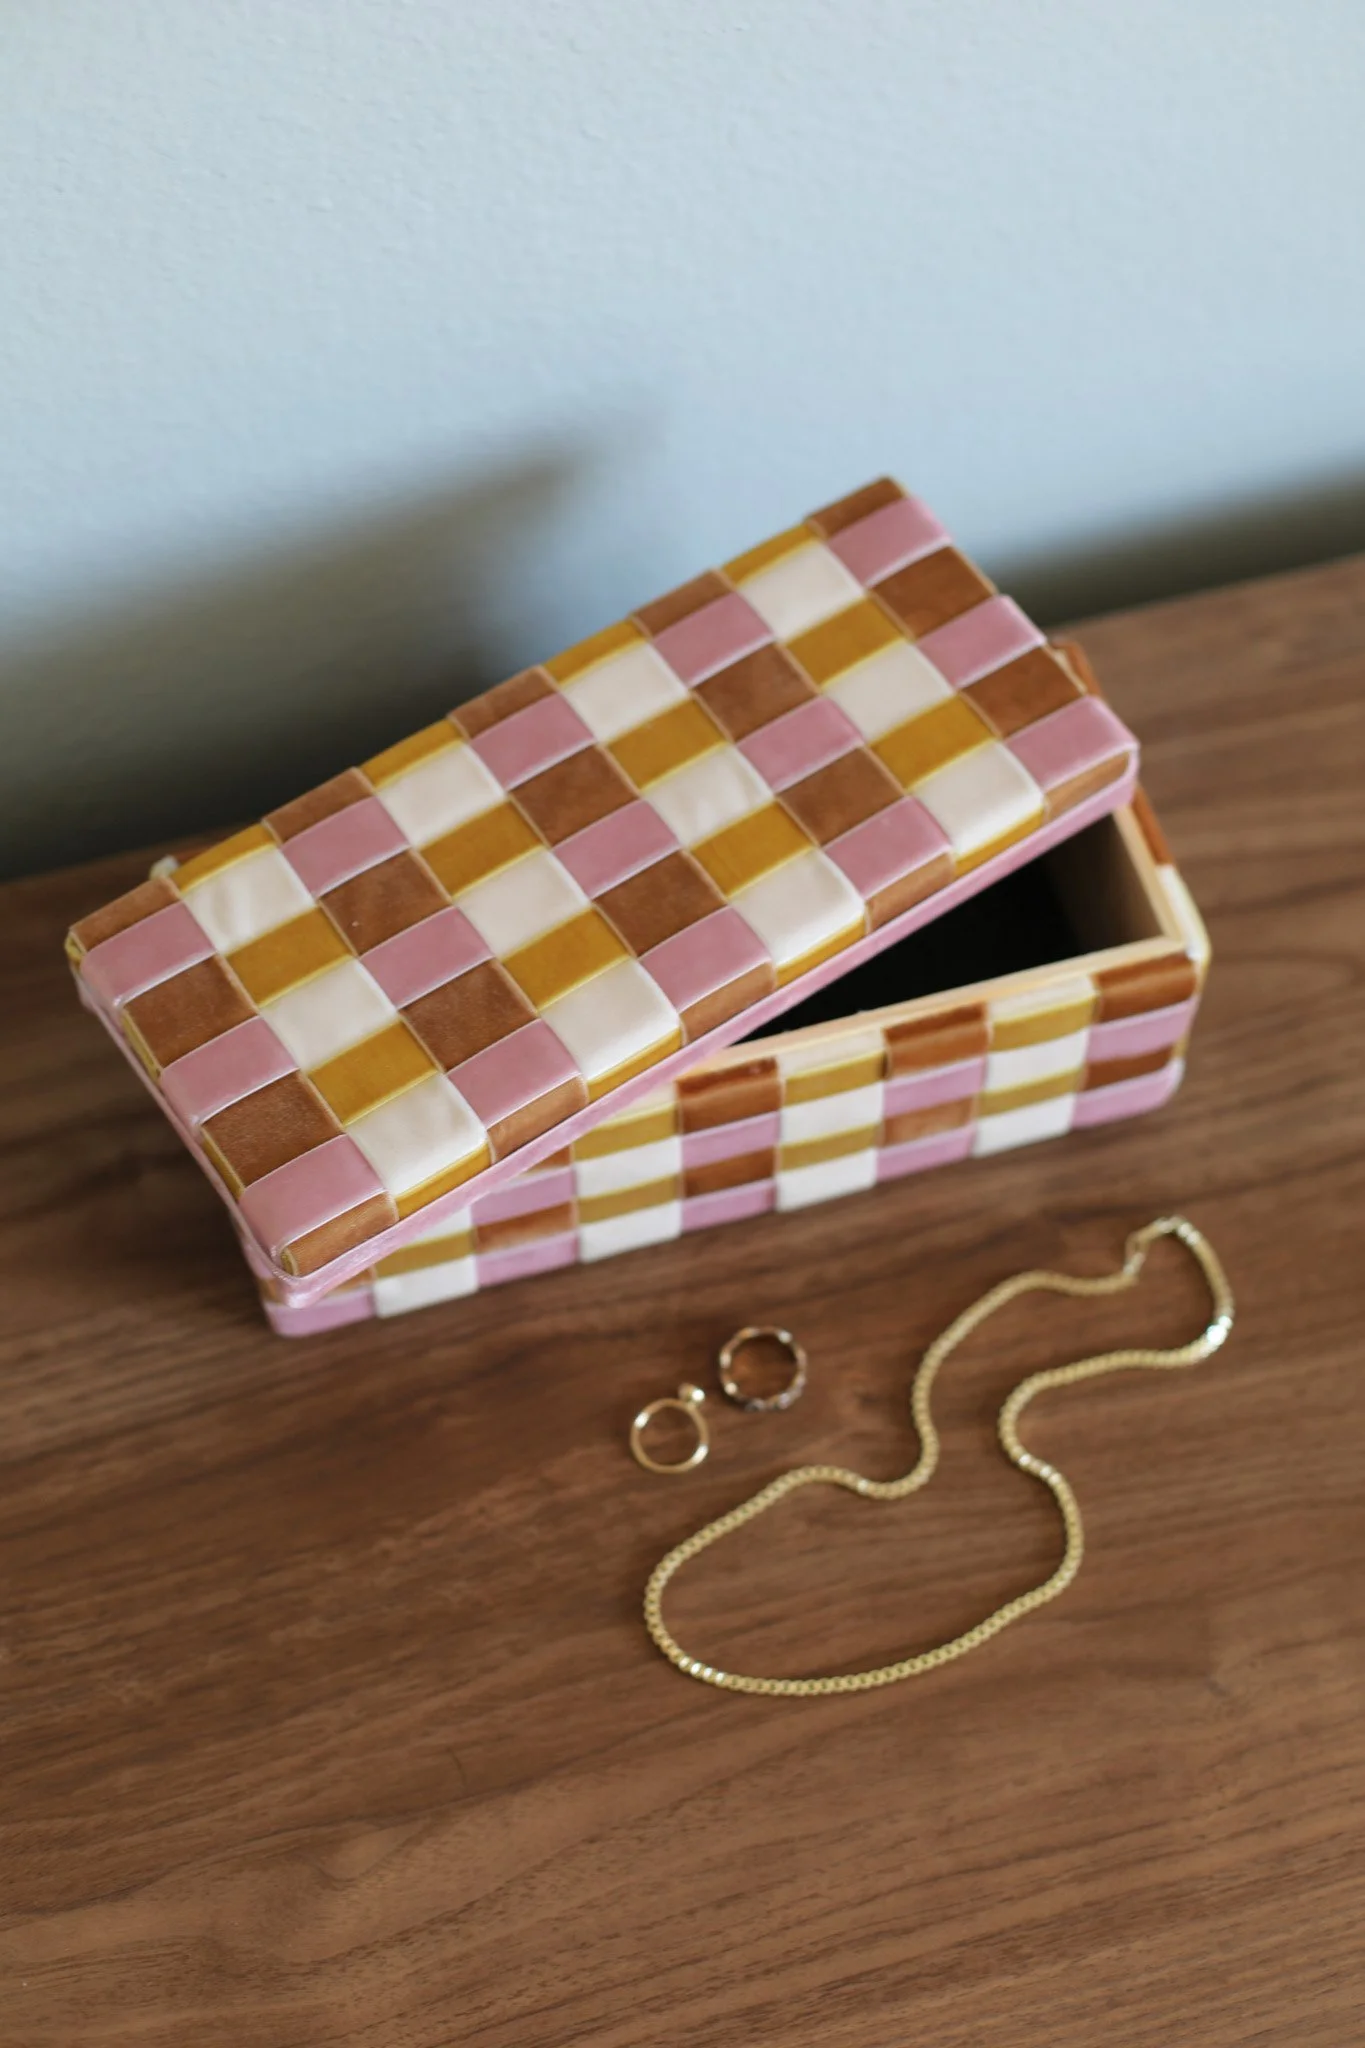
And there you have it! After a good amount of trial and error, I successfully covered the box! This project was a lot more challenging than I originally thought because I wanted clean edges but wanted to make sure the box was still functional and the lid still fit. I also misjudged how difficult covering a three-dimensional surface is with a woven pattern, especially with different sized ribbons.
But what I’ve come to find out through several tedious projects on the blog — the longer a craft takes to figure out, usually the more satisfying the results will be! And that certainly was the case for this little trinket box. I LOVE how it turned out. It feels like a unique piece of decor you might buy from somewhere like Anthropologie but you get the pride & joy of making it yourself!

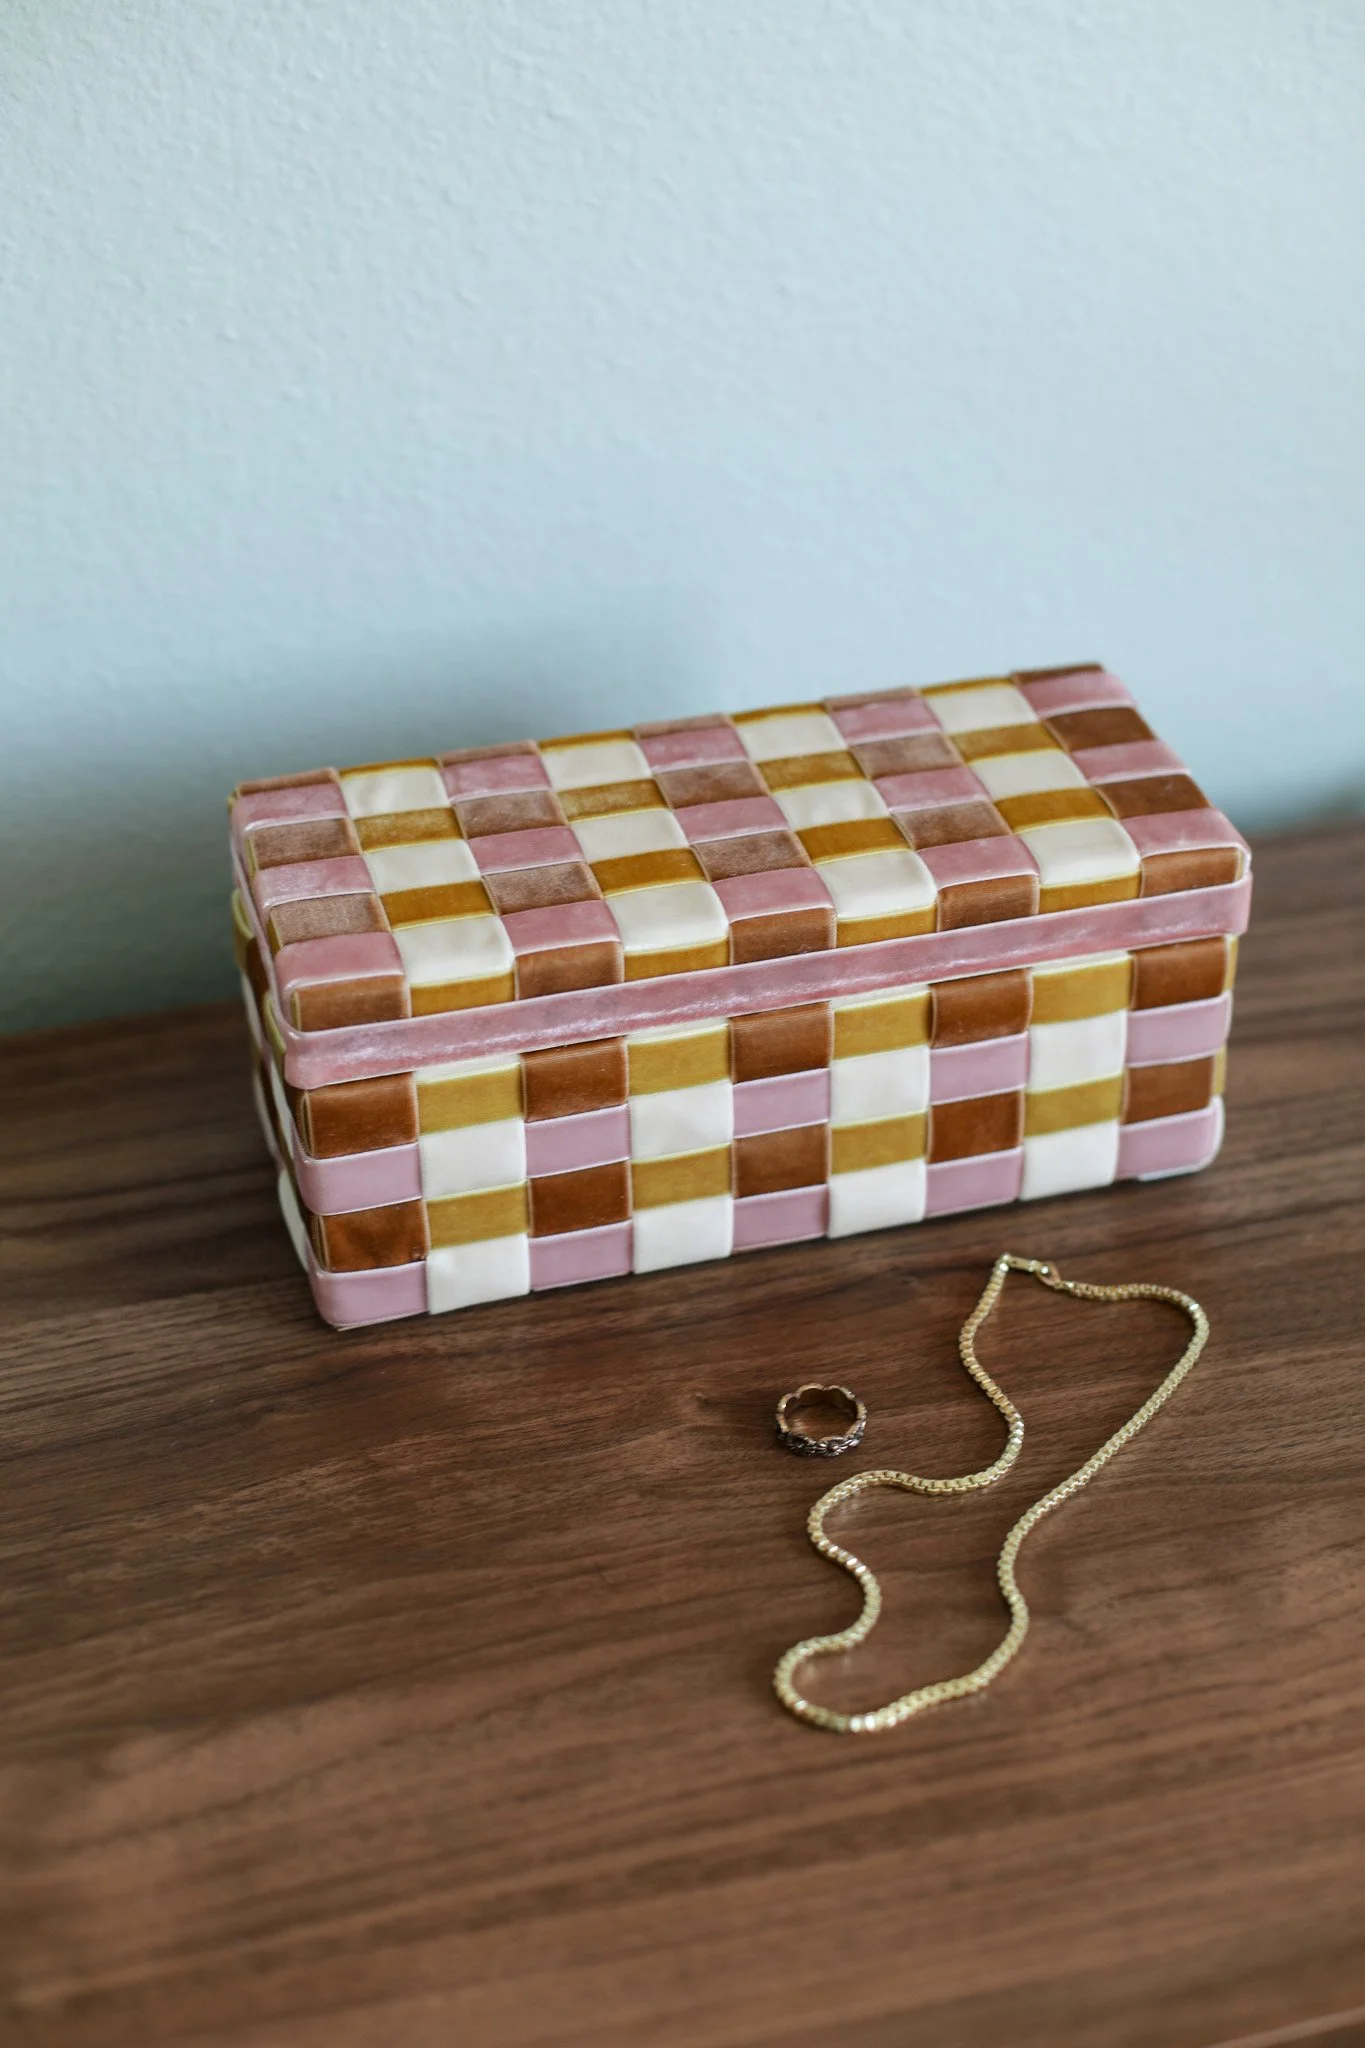
Thank you to Michaels for supplying me with everything I needed to put together this unique piece! I’m going to use it as a jewelry box but it can totally be used to store anything or simply as a piece of decor on a shelf. It would make such a lovely gift as well for the home decor lover in your life.
I love this woven ribbon technique and am looking forward to brainstorming what else I can decorate with velvet ribbon. Hope your year is off to a crafty start!
xo Rachael

