
DIY Gift Idea! Polymer Clay Wine Charms
To celebrate the official first day of winter today, I wanted to share a fun DIY project that would make a perfect DIY gift idea if you’re still up for a last minute project! And if you don’t have the time (or aren’t able to gather the supplies quick enough) to gift this for the holidays, you can totally save this project for a winter birthday or for the holidays next year. It would also make a great (and fitting) indoor craft activity if you’re snowed in this upcoming season :P
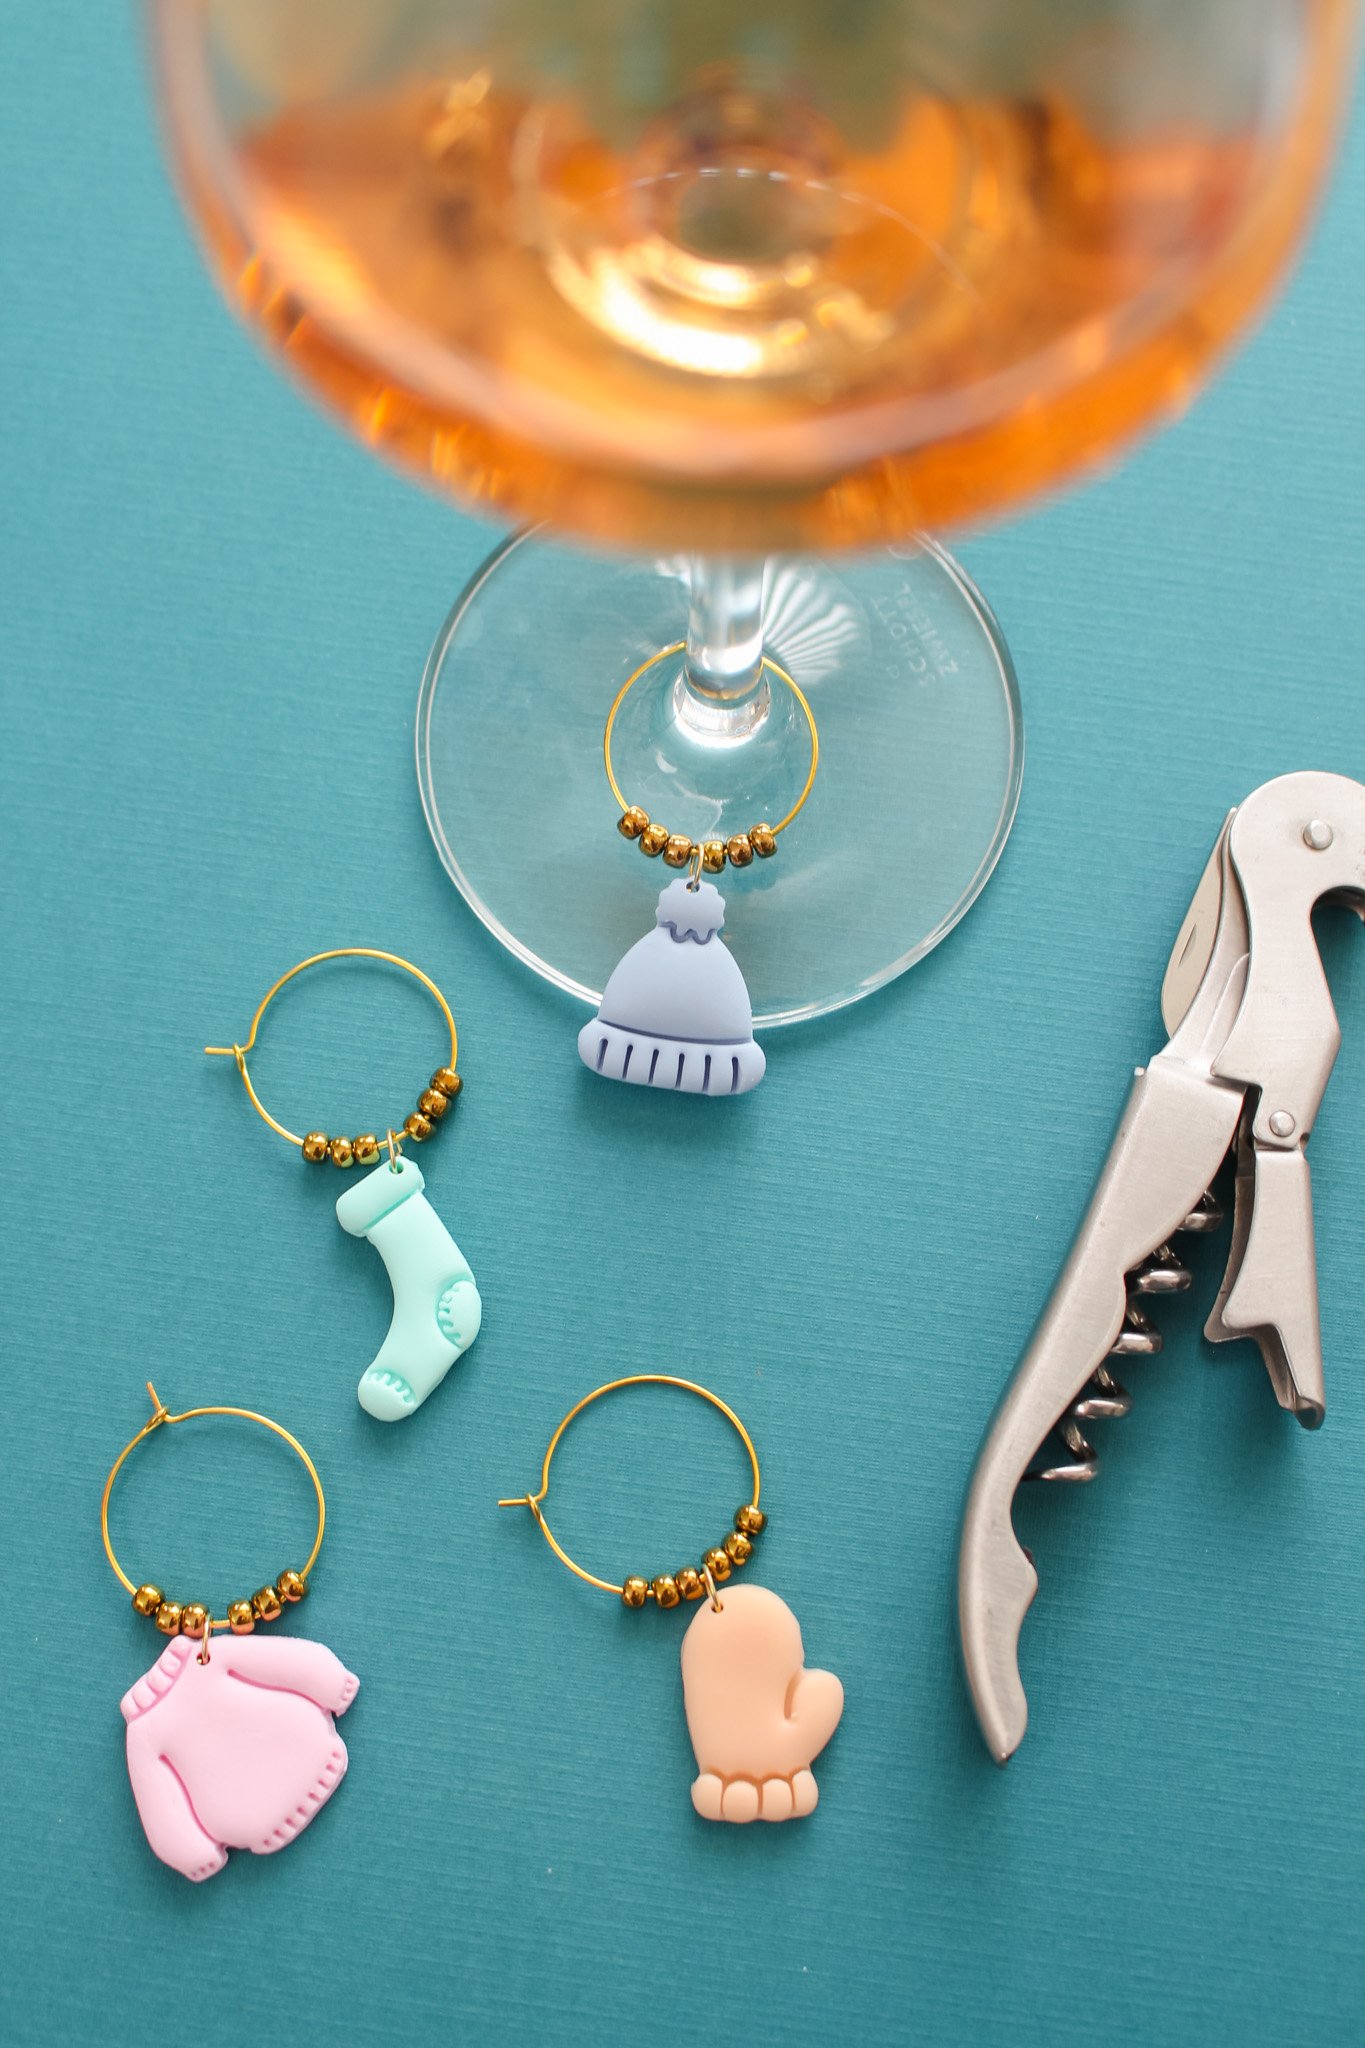
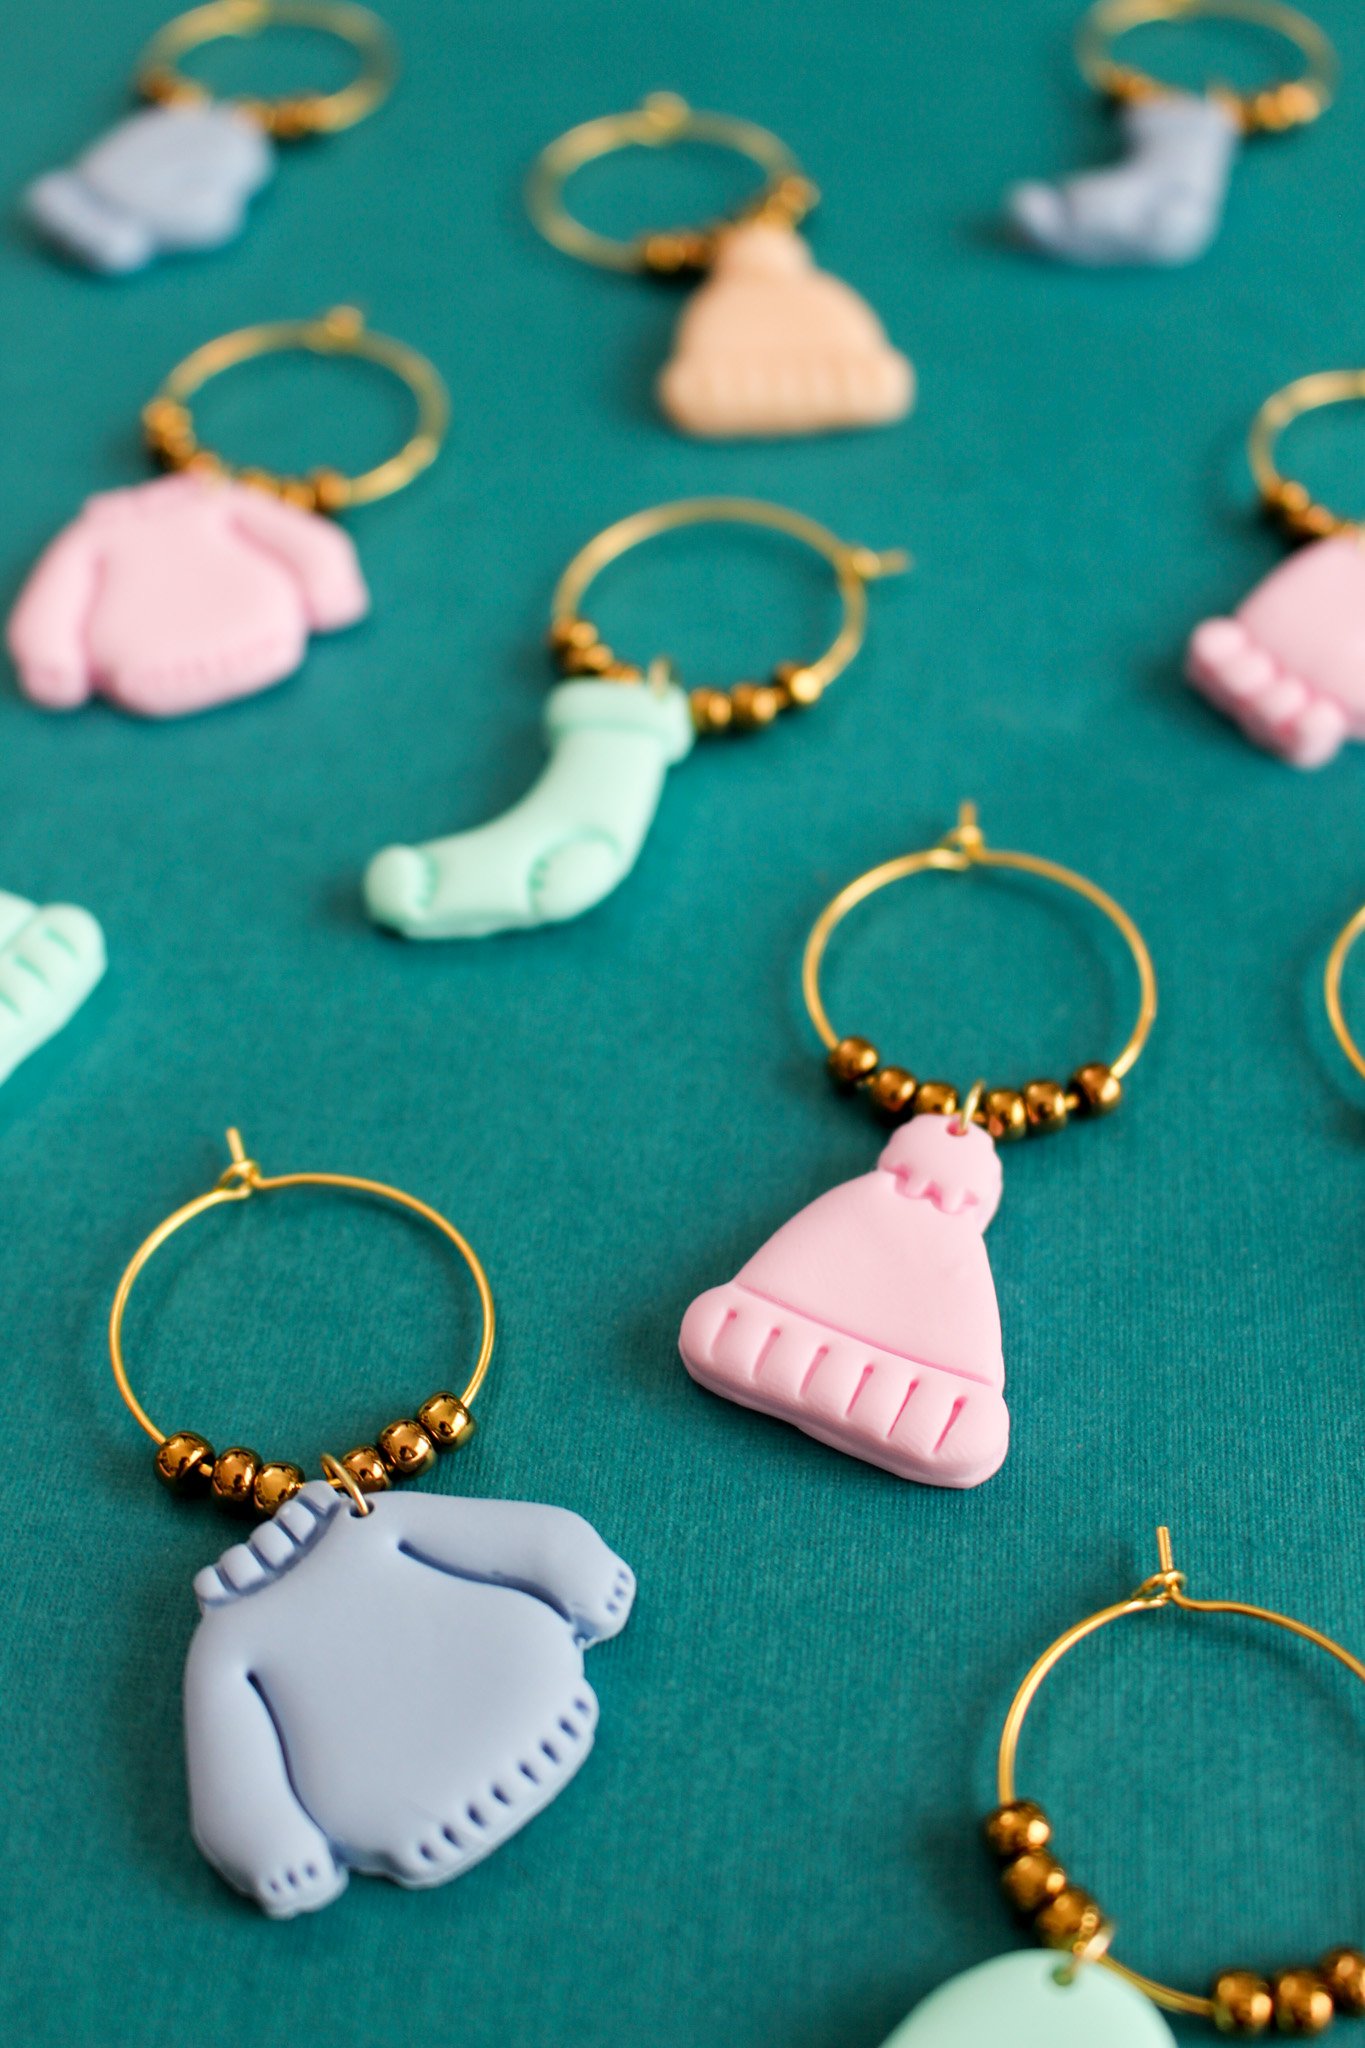
Nothing quite says a holiday or celebration like toasting with a glass of wine or champagne! And when you’re celebrating with a bunch of people, it can be hard to remember which glass belongs to who. To avoid drinking from the wrong glass (especially during these crazy covid times), a wine charm can be a fun solution to the problem and also add a bit of decorative jewelry to your wine glass! Each guest can have a unique wine charm to attach to the stem of their wine glass to easily tell them apart.
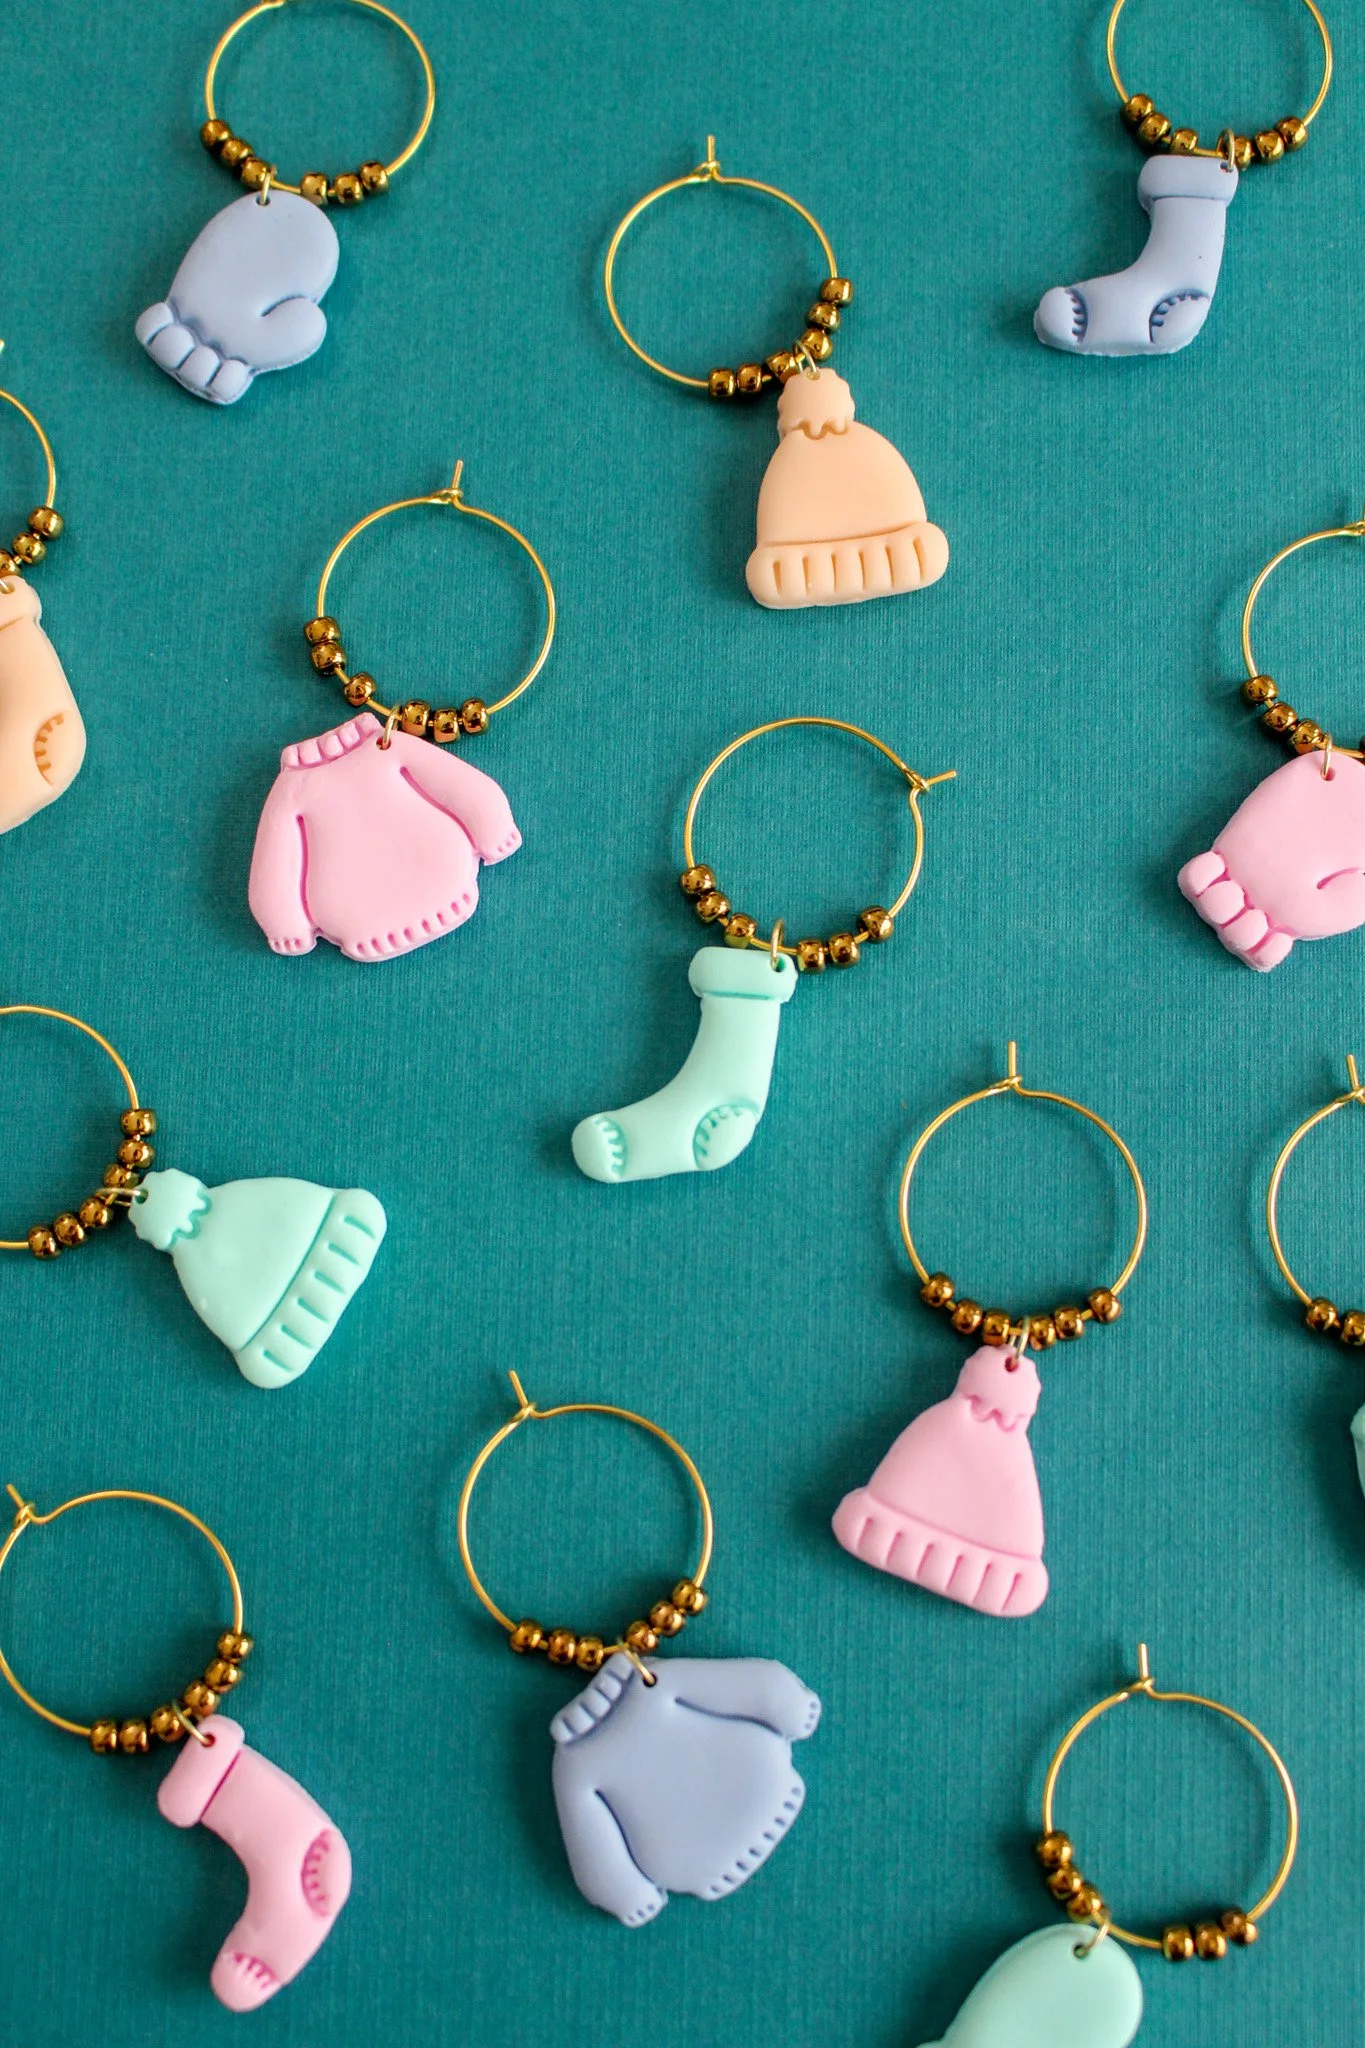
There are so many cute ways to make your own wine charms, but for this project I used a mix of beads and polymer clay. I love how they turned out!! Check out the tutorial below.
Affiliate disclosure: This post contains several affiliate links. As an Amazon Associate, I may earn commissions from qualifying purchases from Amazon.com. Thank you for your support!
HOW TO MAKE YOUR OWN POLYMER CLAY WINE CHARMS

Polymer Clay Wine Charms Supplies:
Polymer clay in assorted colors (I used this set)
Acrylic clay roller
6mm gold jump rings
Pliers
Parchment paper or aluminum foil
Oven
Drill & small drill bit or Dremel tool
Beads (optional) - I used 6/0 seed beads to fit on the wine charms

STEP 1: Preheat your oven to 230 degrees F (or 110 degrees C). Pull off a piece of polymer clay and work it in your hands, pulling it apart and balling it together until it has a smoother and more pliable consistency.
STEP 2: Roll the ball of clay out on a flat surface (I like to use a glass surface) using a clay roller or small rolling pin to create an even flat surface roughly 1/4” thick.
**Tip: To create an even surface of clay, I like to use two stacks of post it notes, one on each side, under the roller. Make sure these two stacks are 1/4” in height on both sides.


STEP 3: Firmly press your clay cutter into your clay, making sure to apply pressure evenly. Lift the cutter to reveal your stamped clay design.
**Tip: If you have trouble with the clay sticking to the cutter, try lightly dipping the cutter in water first and pat off any extra water drops. Then press the cutter into the clay.
STEP 4: Pull off any of the excess clay around the perimeter of the design and gently lift the clay object off your glass surface. For this you can use a small spatula or knife. Or I found it helped to lift the entire piece of clay off the glass surface before stamping, so it wasn’t as stuck to the glass. Then I could lift it with my fingers easier.
Use your fingers to gently round any sharp edges of your shape or clean up any misshapen issues.
STEP 5: Place your piece onto a baking sheet lined with parchment paper or aluminum foil. Make sure your clay object is laying completely flat on your baking sheet.
Repeat these steps to make as many clay objects as you would like!
STEP 6: Place your baking sheet in the preheated oven and bake for 30 minutes. After 30 minutes, pull the baking sheet out of the oven and allow the pieces to cool.

STEP 7: Once the clay objects have cooled, they should be hardened into their shape. Use a small drill bit or a Dremel tool to drill a tiny hole in the top of your clay.
STEP 8: Use your pliers to open up your jump rings. Thread the end of the jump ring into the hole in your clay, then use your pliers again to close back up the jump ring so it is a completed circle.

STEP 9: Lastly, open the end of your wine charm ring and thread on any beads you want to use along with the jump ring of your clay object. And your wine charms are complete! You can now easily open and close back up the end of your wine charm to attach and remove from the stem of your wine glass. Ta da!
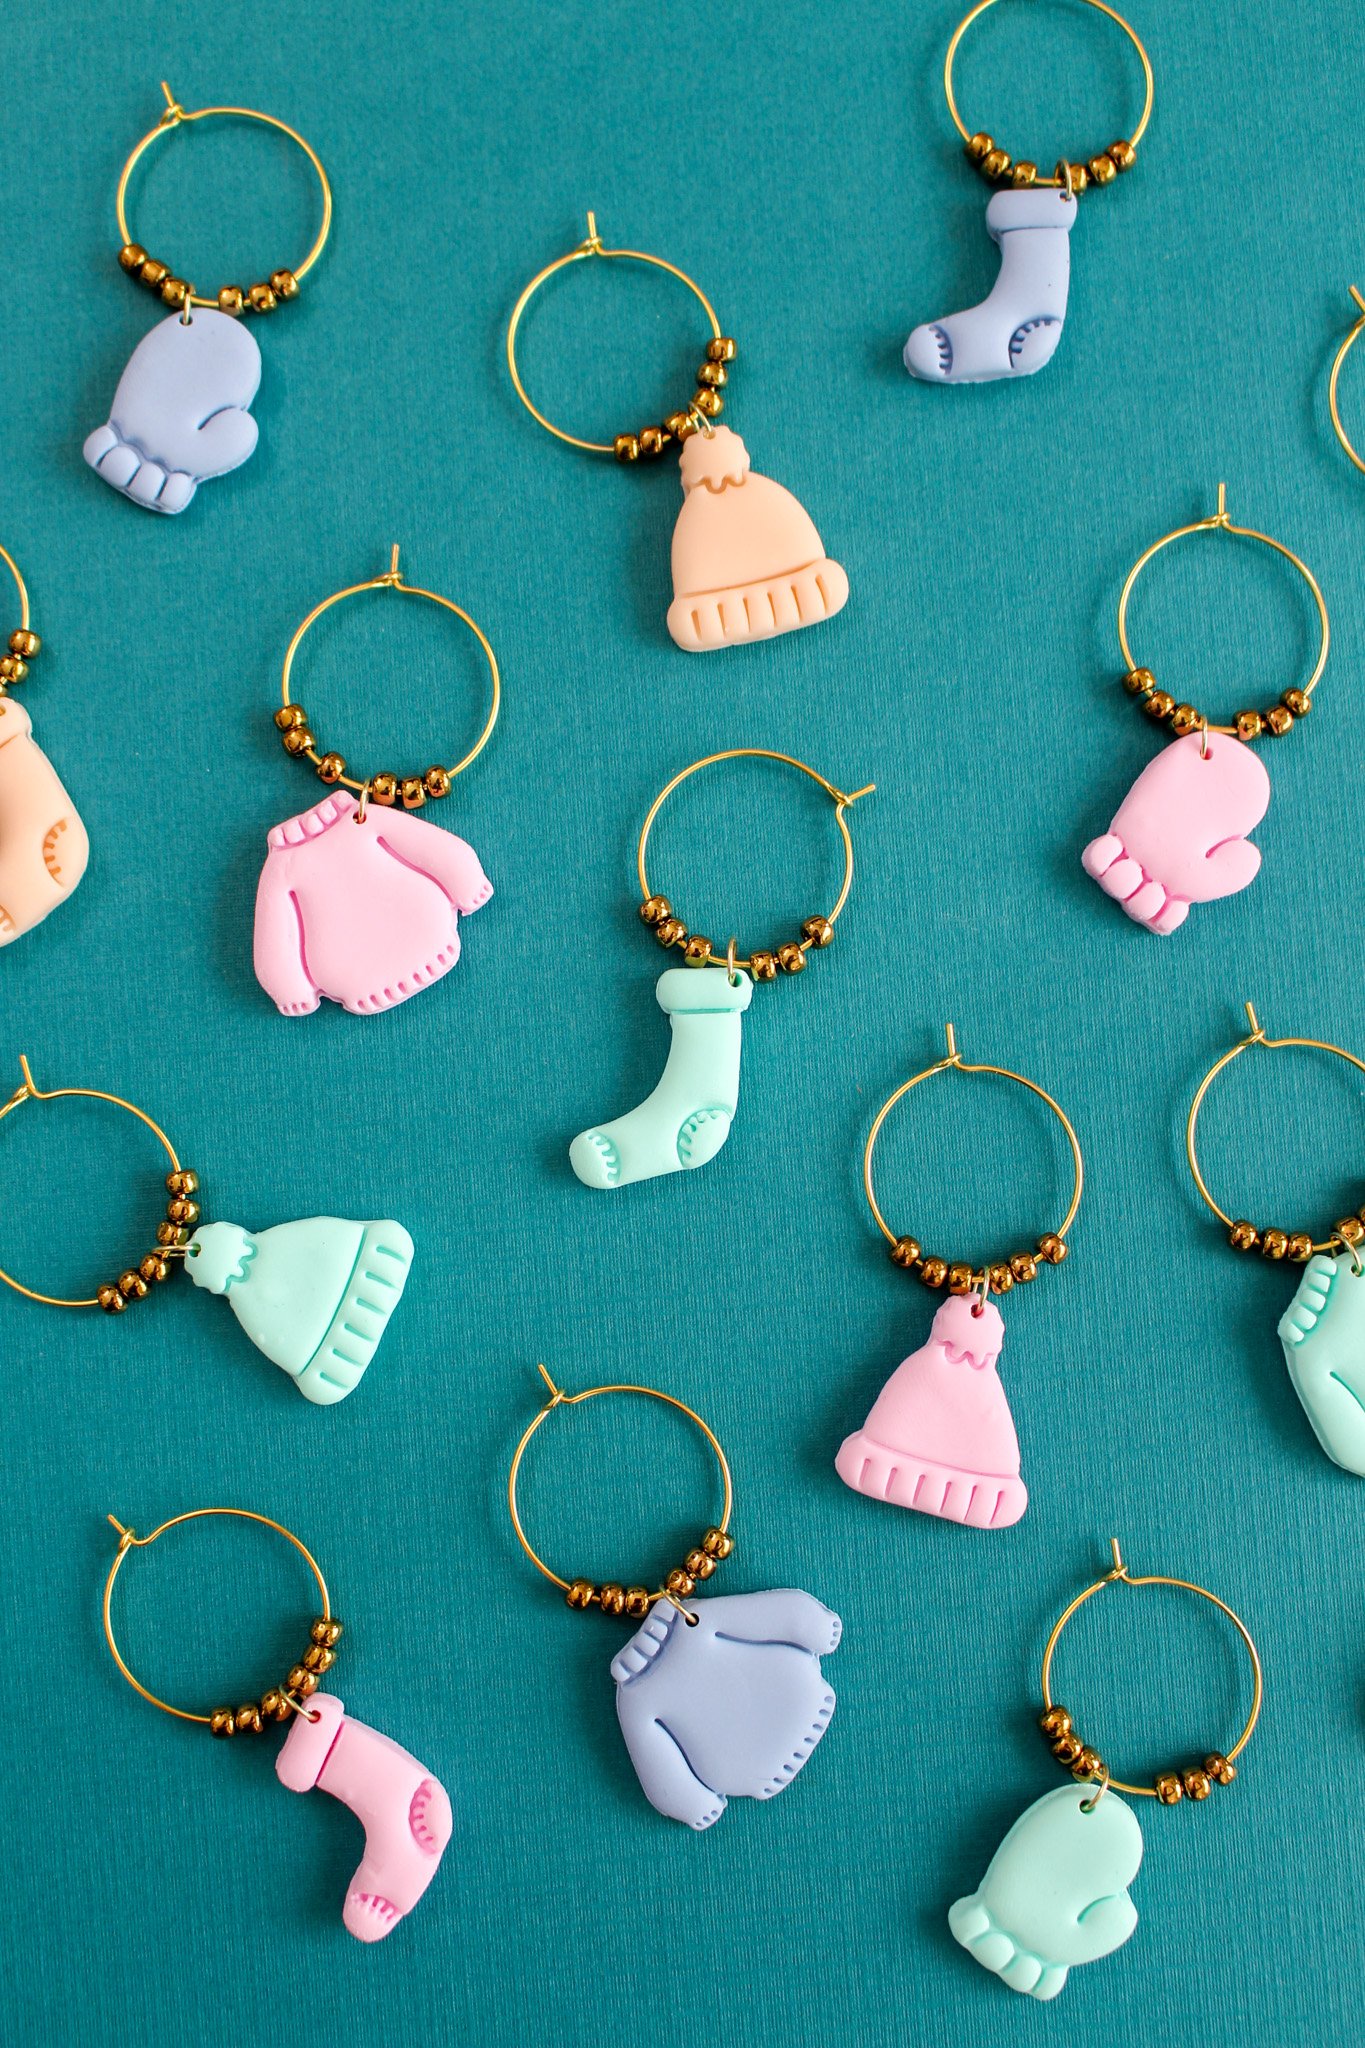
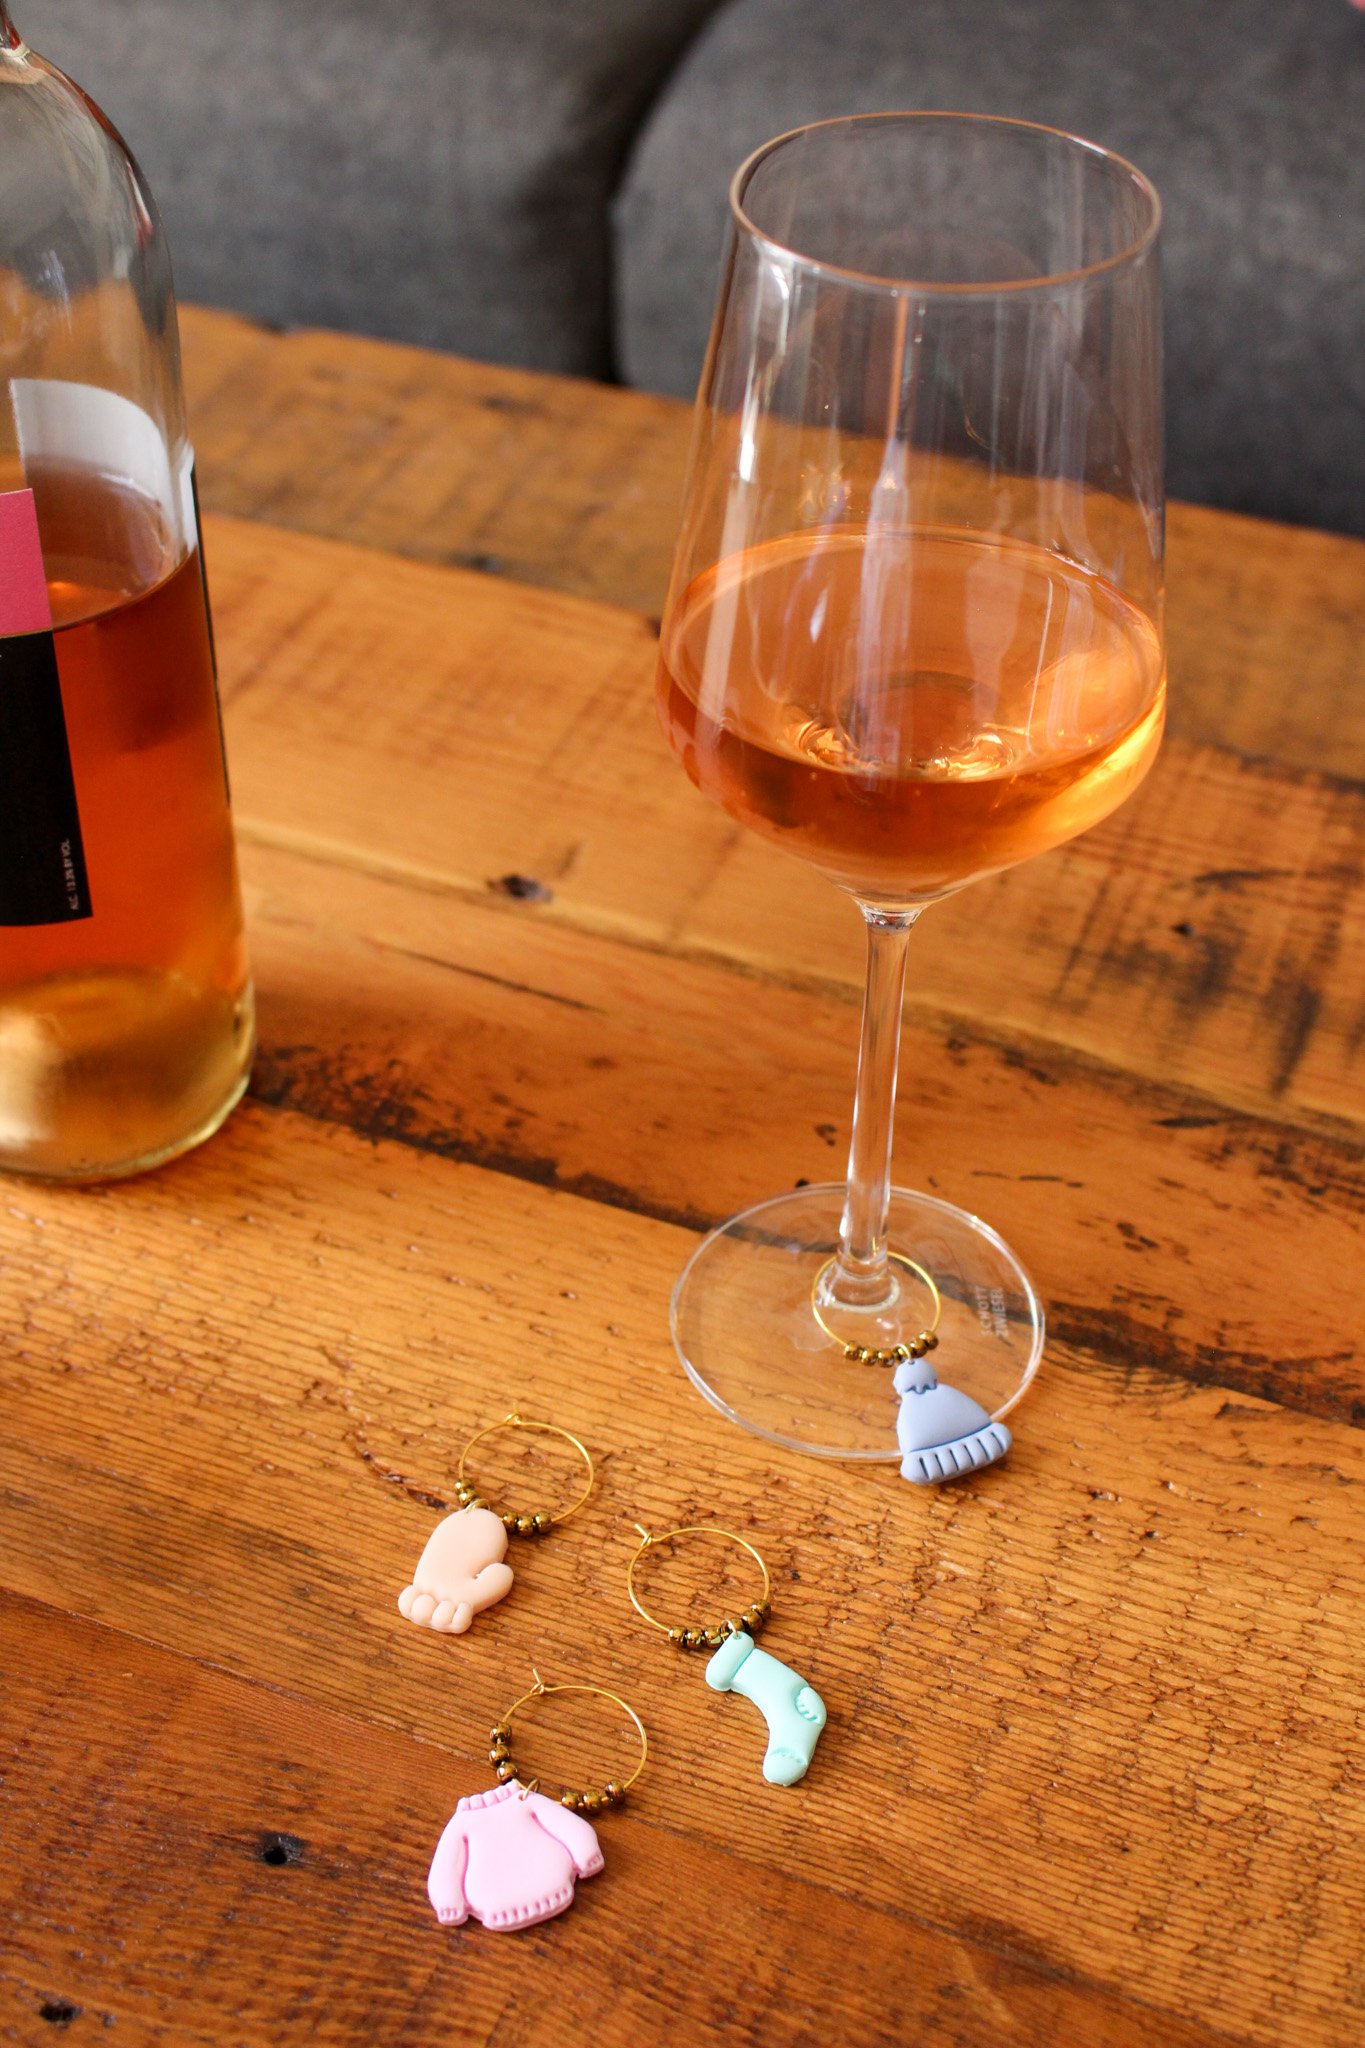
These wine charms would make a great hostess gift during the winter time. Create a group of unique color combinations and gift it as a set to your favorite wine lover! (Or keep them for yourself, of course!)
There are so many great polymer clay cutters and stamps out there, so you can always personalize these wine charms with any fun theme or shape. But those little cozy socks are too cute, I couldn’t resist.
Happy winter!! Xo Rachael

