
DIY Etched Glass Dog Treat Canister
Today’s post is for all you dog moms and dads out there! My dog Kevynn is a very important part of our family and it is no secret that I like to splurge on buying her a ton of toys, beds, sweaters, accessories, etc. — we do not have kids yet so she is our only child and it shows! So to further spoil my furry best friend, I thought it would be fun to DIY a project just for her today! :)
I have teamed up with my friend Emelie Claxton for today’s blog post! Emelie is a talented filmmaker who is currently in the process of crowd funding for a new comedy short film that she has written and will be directing, called “Doggone.” Here’s a look into the story…
An aimless artist takes a dogsitting gig to pay rent, but all hell breaks loose when the dog in her care is DOGNAPPED! To get him back, she must face art world jerks, murderous dog moms, and the rift that’s been forming between her and her best friend...

If you are interested in supporting this film and the talented group of filmmakers that are producing the short, check out the kickstarter here. There are a ton of really fun rewards available, like an official film poster, tickets to the friends & family screening, and a dog tag necklace. You can even get a custom illustration done of your dog (or a dog of your choice). I was lucky enough to read the script for this project and I’m SO excited to see the story come to life! So any support would be greatly appreciated — even just sharing the kickstarter link to your social media.
So without further ado, let’s get into the project!
Affiliate disclosure: This post may contain affiliate links. When you buy from these links, I may earn a small commission, at no additional cost to you. As an Amazon Associate, I may earn commissions from qualifying purchases from Amazon.com. Thank you for your support!

DIY ETCHED GLASS DOG TREAT CANISTER (& HOW TO CREATE A STENCIL WITH THE SILHOUETTE MACHINE)
Supplies:
Silhouette Cameo Machine (or other die cut machine like a Cricut)
Silhouette sticky cutting mat
Silhouette Studio software
ETI’s dog bone stencil shape (download jpeg below!)
Removable matte vinyl (I used this type)
Scissors
Weeder tool (optional)
Scraper tool (optional)
Protective gloves
Paint brush
Glass jar or canister (there are a ton of these available at thrift stores!)
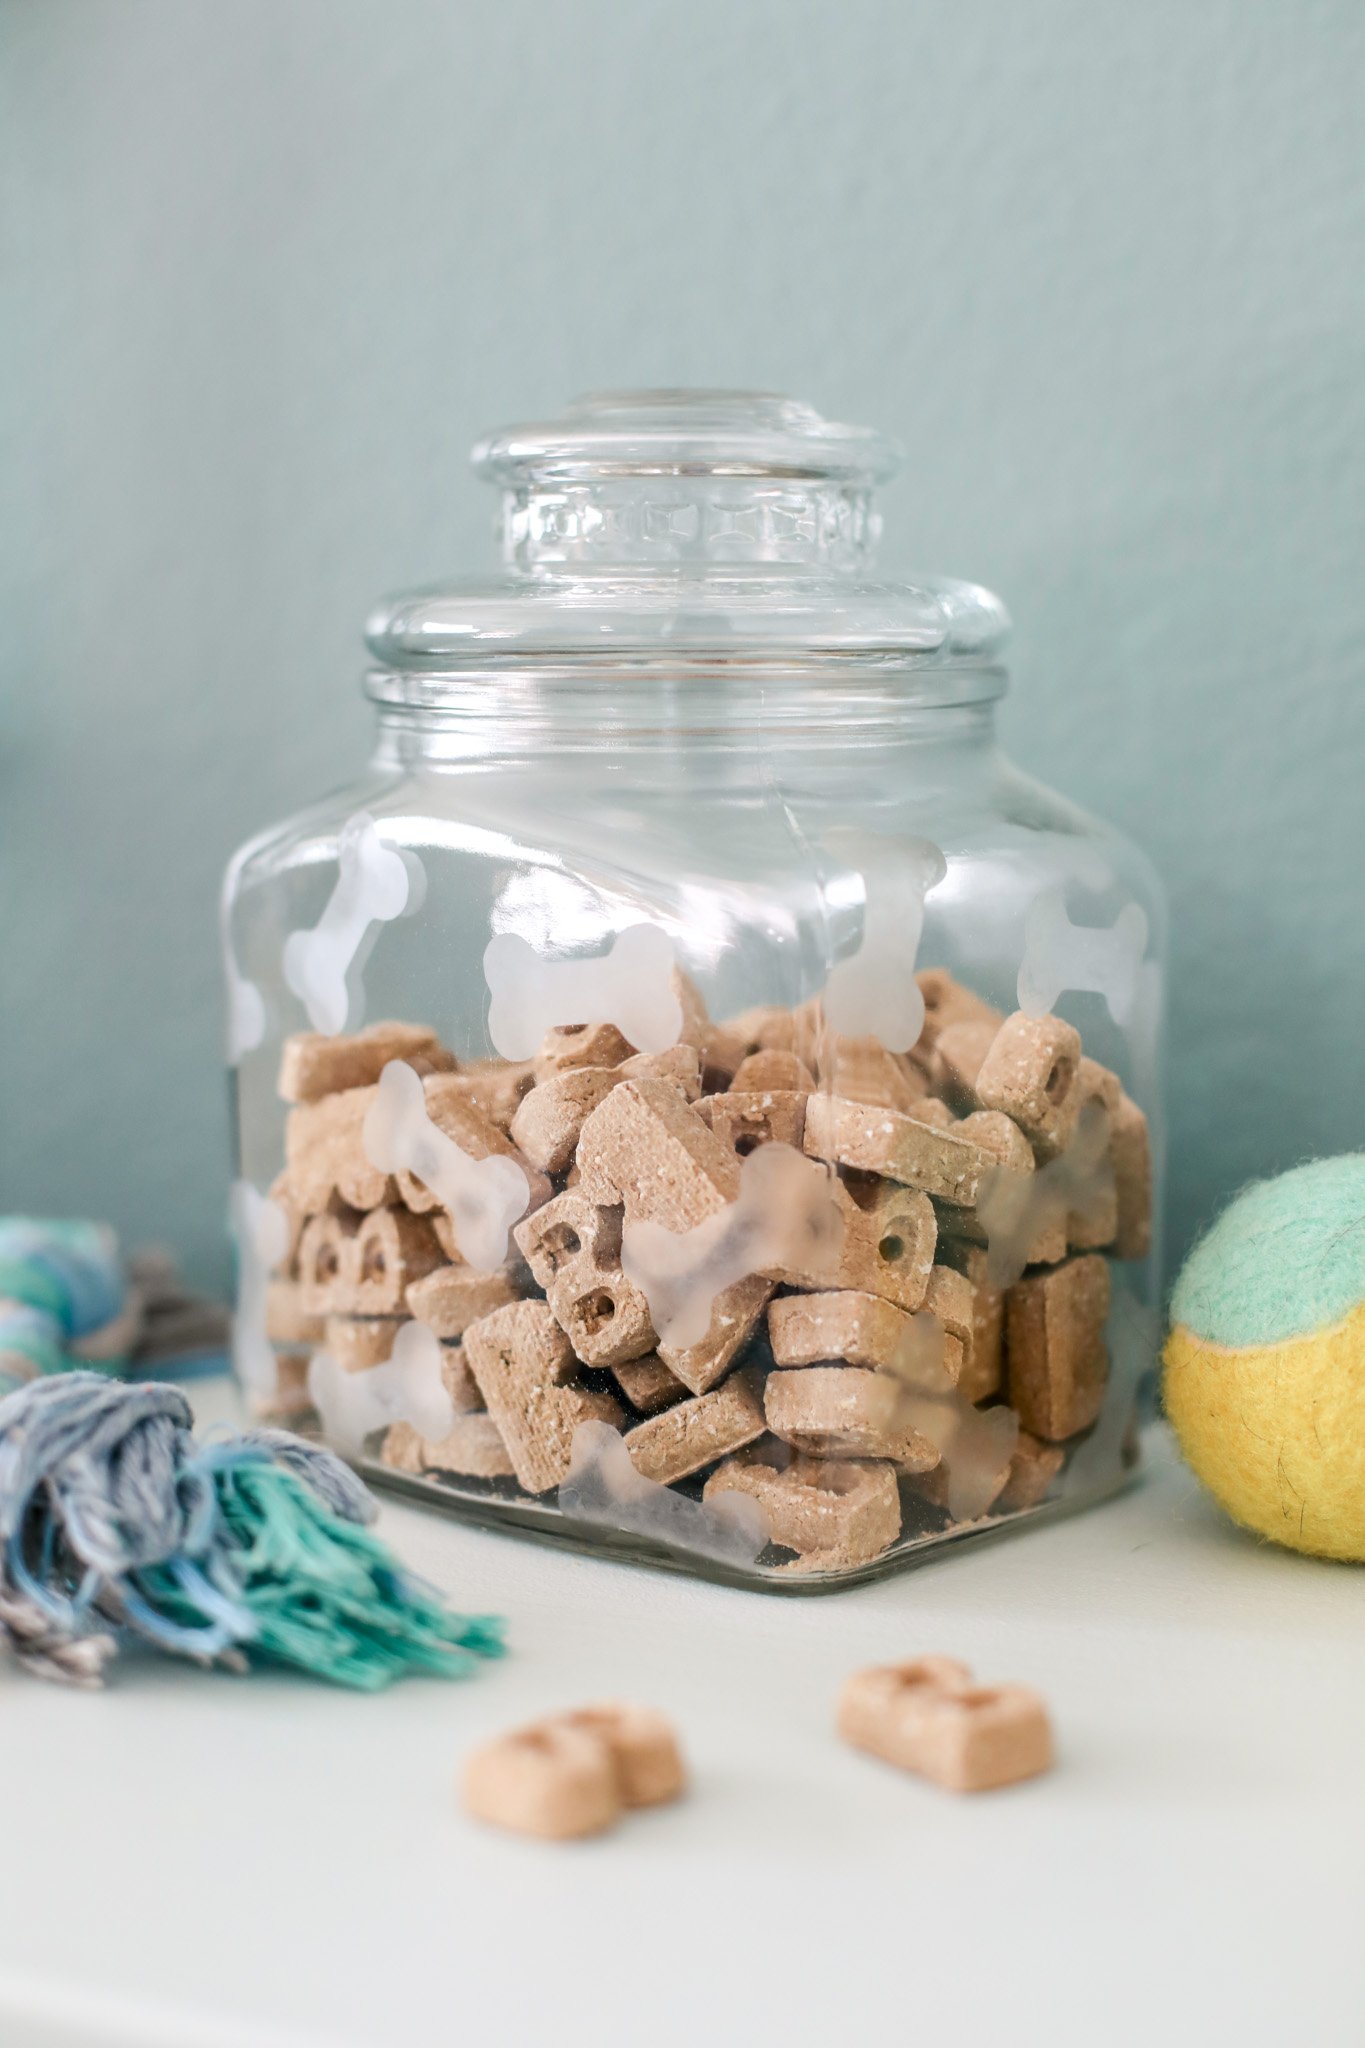
STEP 1: Find your dog treat jar! You can use an old jar that you have around the house, or you can find a ton of old jars and glass canisters at your local thrift shop. Make sure to give your jar a really good clean, inside and out, before beginning this project.

STEP 2: Download the ETI dog bone shape above to make your glass etching stencil. You are now going to follow the exact same directions that I outlined in steps 3-7 on my previous post Etched Glass Perfume Bottles (& How To Create a Vinyl Stencil).
But to summarize, you are going to import the dog bone shape into your Silhouette Studio software. Resize the shape so that the dog bone is about 1.5” long. Position your shape correctly on the grid and copy & paste as many dog bones as you want. Attach a piece of removable matte vinyl to your gridded sticky mat. Load the cutting mat into the machine. Select the trace area of the dog bone images and then click “SEND” for your machine to begin cutting. I go into more specifics on the blog post linked above if you need more details for this process!
I used about 27 dog bones total for my glass canister (which was about 5.5” wide x 5” tall in size).

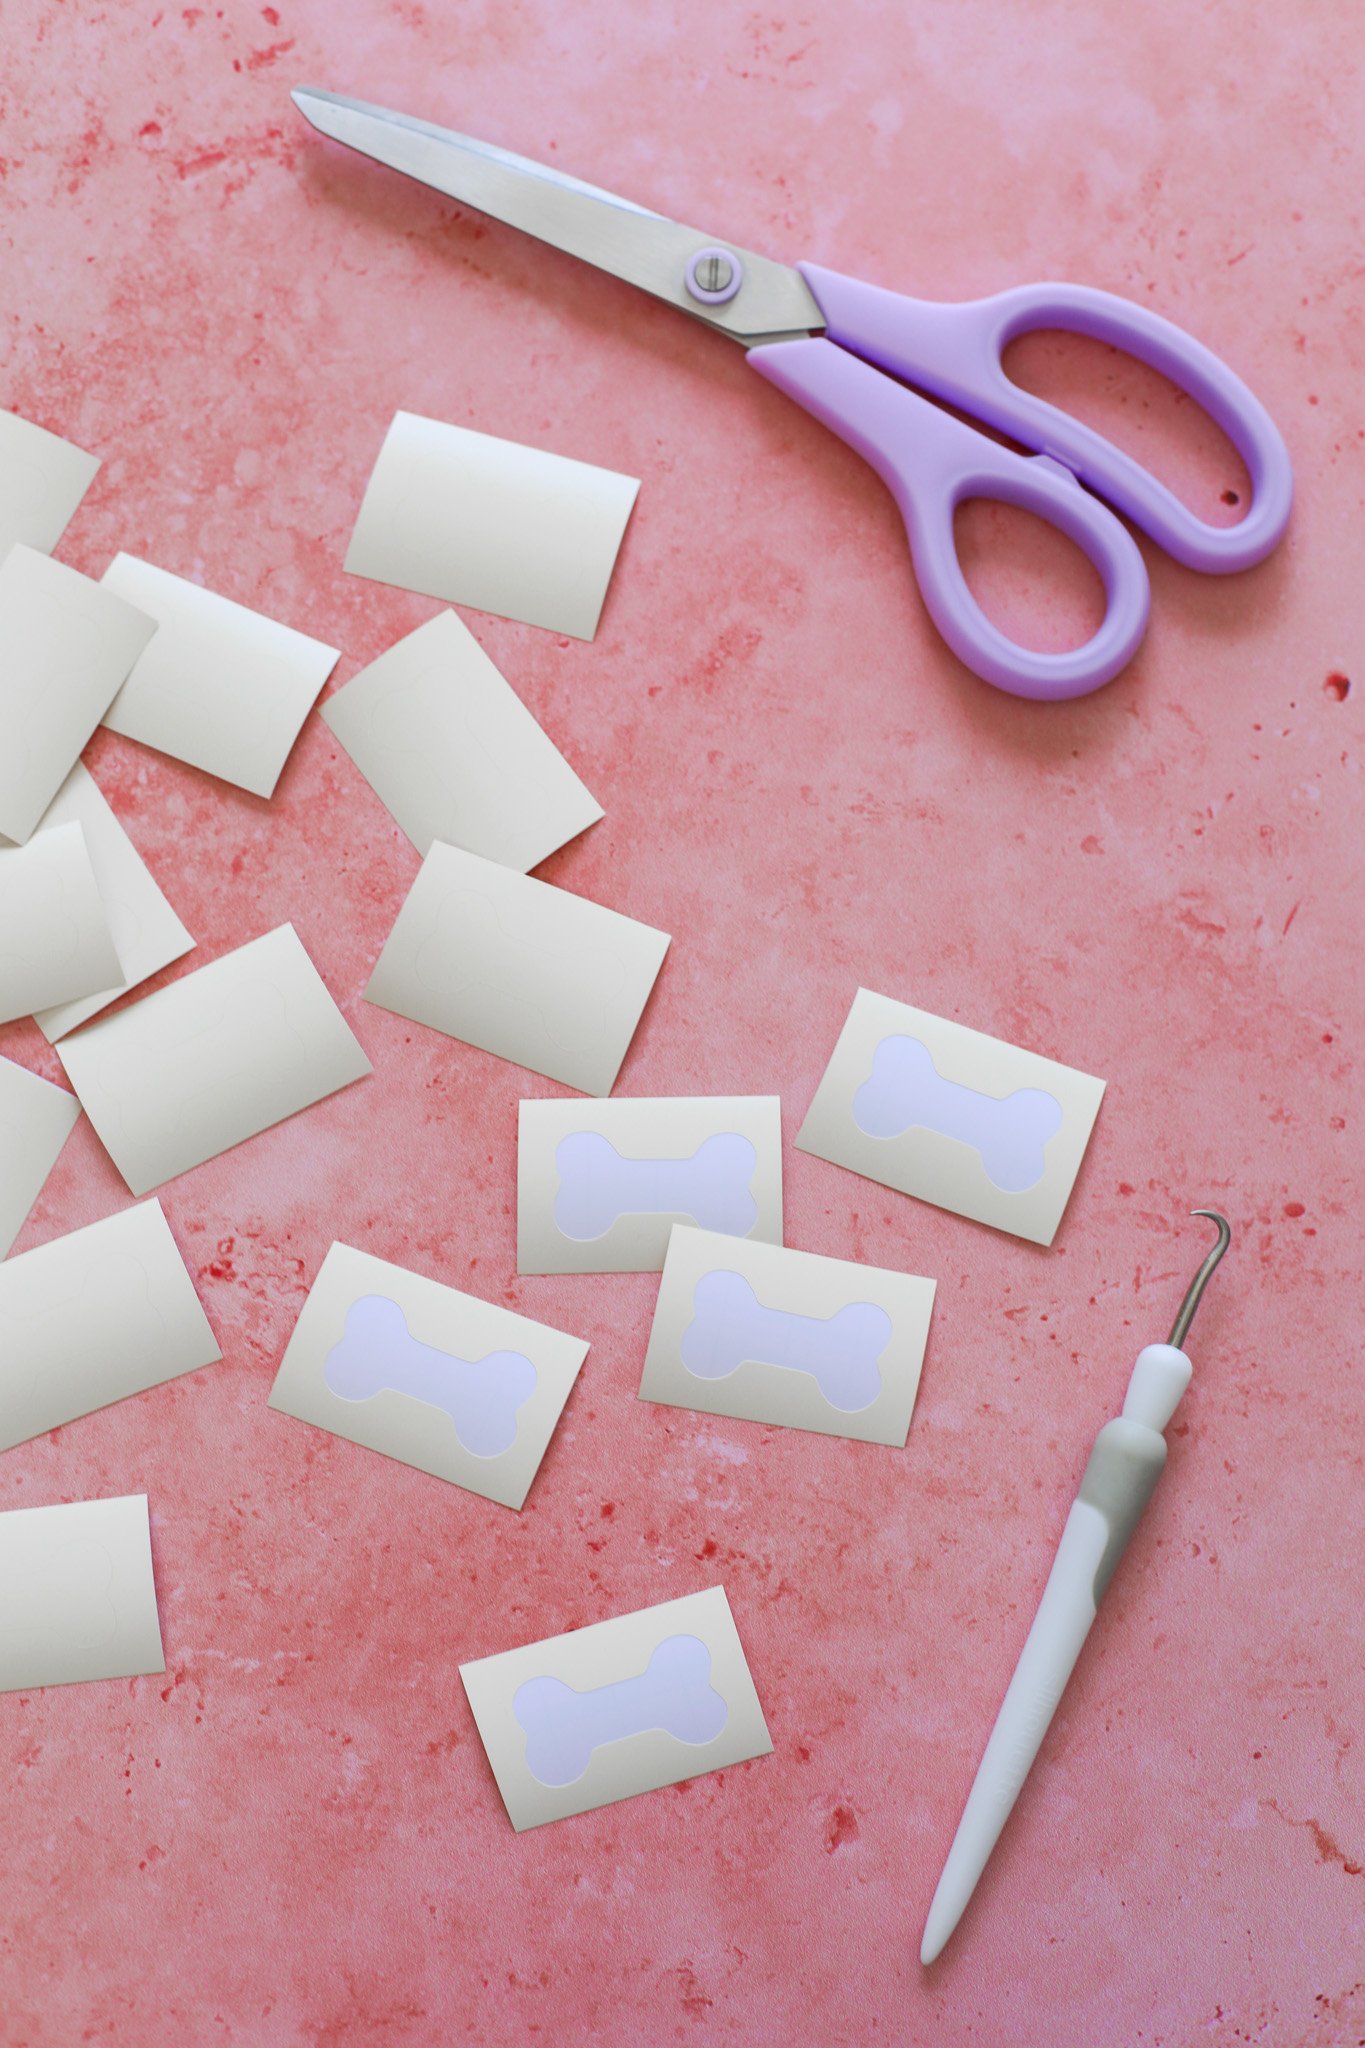
STEP 3: You should now see your dog bone shapes imprinted into the vinyl. Click “unload” on your machine and pull off your piece of vinyl from your sticky mat. Individually cut out each bone shape so you have a bunch of separate stencils.
Carefully pull out the interior dog bone shape of the vinyl sticker so that you are left with just a stencil of the bone shape now.


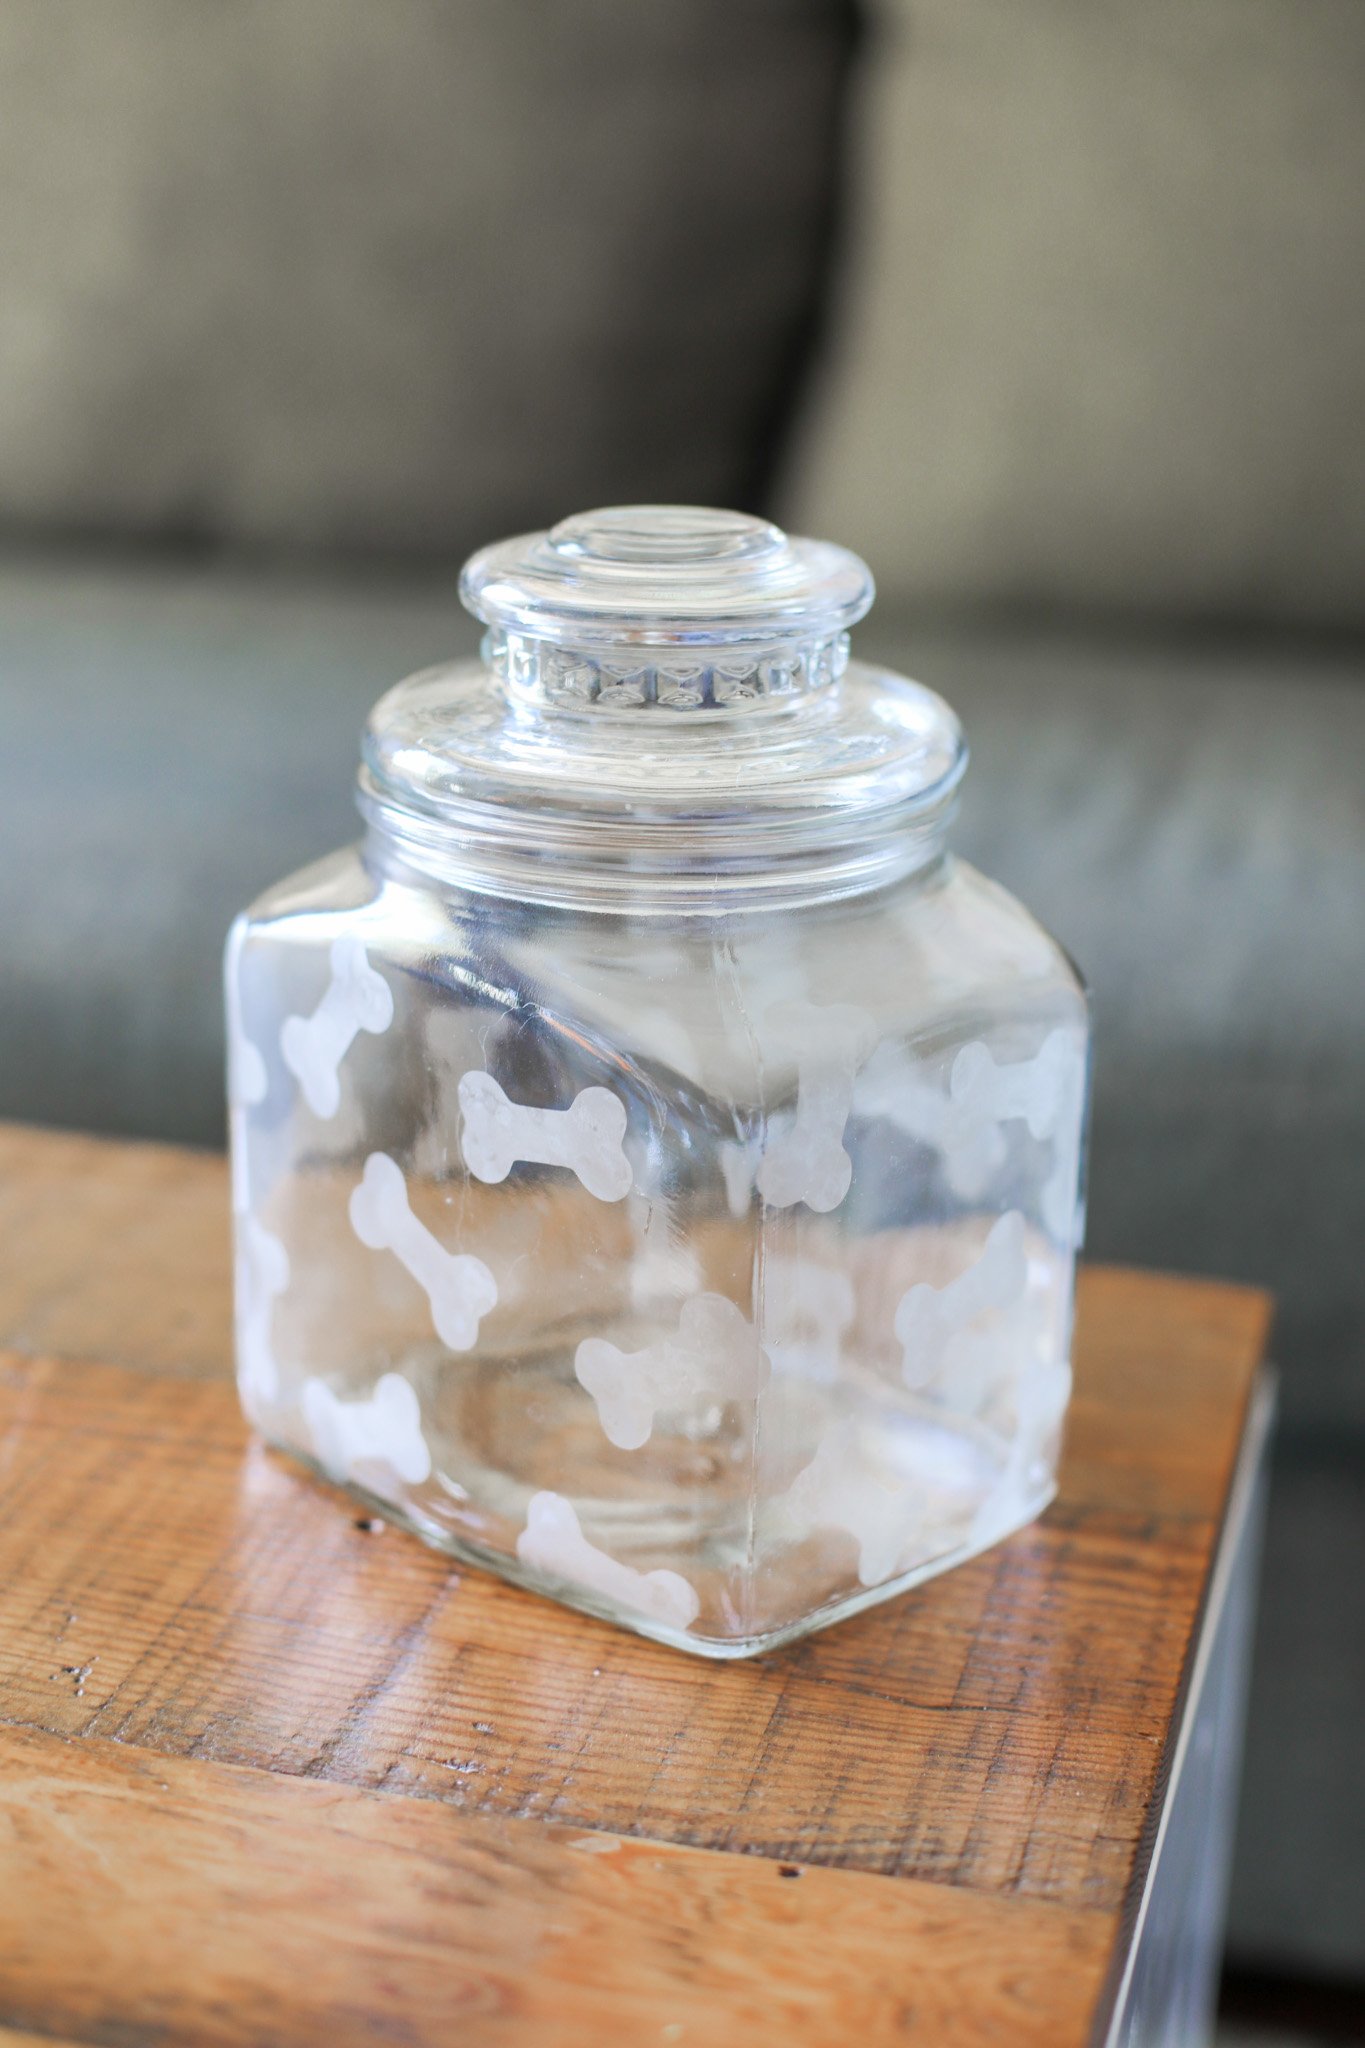
STEP 4: Next, you are going to position your stencils around the whole surface of your glass canister. Gently pull off the vinyl stencil from the white paper backing. I just did a random pattern making sure to adjust the angle of each bone and trying to keep the distance between bones consistent around the jar. Make sure to cover all sides of your jar where you would like to etch bone shapes. Press the sticker down firmly and use a scraper tool (or your fingernail) to make sure it is fully adhered, especially around the edges of the bone shape.

STEP 5: Now it is time to etch the glass! Be sure to put on a pair of protective gloves before working with the glass etching cream. Using a paint brush, dab on a large glob of etching cream over each dog bone stencil, making sure to cover the whole shape without going outside of the stencil rectangle.
Once you have covered every dog bone, go back around and use your paint brush to move the glass etching cream around each shape. This will ensure that you have covered the surface evenly with the chemicals. Leave the Armour Etch to work its magic for about 15 minutes.
STEP 6: Wearing your protective gloves again, take your glass jar over to your sink. Place the jar under running water to remove the glass etching cream. One the Armour Etch is fully removed from the jar surface, peel off your stencils to reveal your etched glass!
Put your glass jar in the dishwasher or give it a good clean with dish soap before use. And the etched jar is ready to be filled with your dog’s favorite treats!

Obviously, you can use this same technique using any shape stencil you would like! So if you want to create a jar or canister for some other purpose you could cover it with any etched shape you would like. I think a jar covered in etched pumpkins or bats would be very cute for this spooky time of year.

And if you are looking for any other dog DIY ideas, check out this old post from the blog to find out how I made a DIY Wedding Dog Bandana for Kevynn to wear for our wedding photos.
Let me know if you try out this etched glass project. And thank you again for supporting the Doggone short film!
xo Rachael

