
DIY Wedding Dog Bandana
In honor of 2022 being one of the most busy wedding seasons in a while, I thought it was appropriate to share some of the DIY projects that I did for my own wedding back in pre-pandemic times (Feb 2020). One of my favorite small details that I created for our wedding day was this sweet “Dog of Honor” hand-embroidered bandana for our French bulldog Kevynn to wear!
We had a pre-party the Friday before our wedding where we invited all our guests to come join us at a bar so we could spend more time with them while they were all in town for the big day. It was a dog friendly bar so Kevynn got all dressed up in her bandana and was the talk of the party, making her rounds to greet all our guests.
She also joined us on the wedding morning to be in a few of our wedding photos and they turned out so cute! Follow along below if you would like to embroider your own bandana for an upcoming wedding or really any occasion!


DIY WEDDING DOG BANDANA
You will need:
Bandana (I bought this one) — but you could also cut a piece of fabric into a square if you would like to make your own! My bandana was 17” x 17” but you could do any size depending on the size of your dog
Embroidery hoop
Embroidery floss
Embroidery needle
Scissors
Pencil


STEP 1: Fold your bandana in half into a triangle shape and lay flat on the table. Use a pen or pencil to carefully draw out your text. You will want it to be positioned centered in the bottom corner (as shown above).
**Tip! Depending on how busy the pattern or how dark the fabric, you could also print out the text in a font that you like and tape the paper to a bright window. Then hold your fabric in front and trace the font text onto the fabric.
STEP 2: Setup your embroidery hoop on the fabric. To do this, you will need to unscrew the metal clasp at the top of the hoop and remove the inner wooden hoop. Place the inner hoop on your table surface and then stretch your bandana fabric over the hoop so that your text is centered in the circle. Then place your larger hoop with the clasp on top of the fabric and press down so that you are sandwiching the fabric between the two hoops. Tighten the screw on the clasp until the fabric is pulled taut.

STEP 3: Now you will begin embroidering! Thread your embroidery needle with embroidery floss in your color of choice. Tie a knot at the end of your floss to secure the thread from pulling through the back of the bandana.
Starting from the back side of your fabric, thread up through the fabric at your first letter (I started with the D of dog at the top of the rounded part). Then you will continue to do your stitches to cover all your text. I used the STEM STITCH to get a thicker, more noticeable line. This video is super helpful to show you how to do this simple stitch!
Any time a word or letter ends and there is a break in the text, just make sure your last stitch is down through the fabric and then you can come back up through the next letter after the break, so any extra floss is on the backside where it won’t be seen. If you run out of floss, just tie a knot in the back and trim any extra then start again with threading new floss onto your needle.
STEP 4: Once your lettering is all embroidered, remove the embroidery hoop. Fold your square bandana in half to make a triangle so that your corner of fabric with your embroidery is at the bottom. Then roll the top of the triangle until you get a shape like the image above.
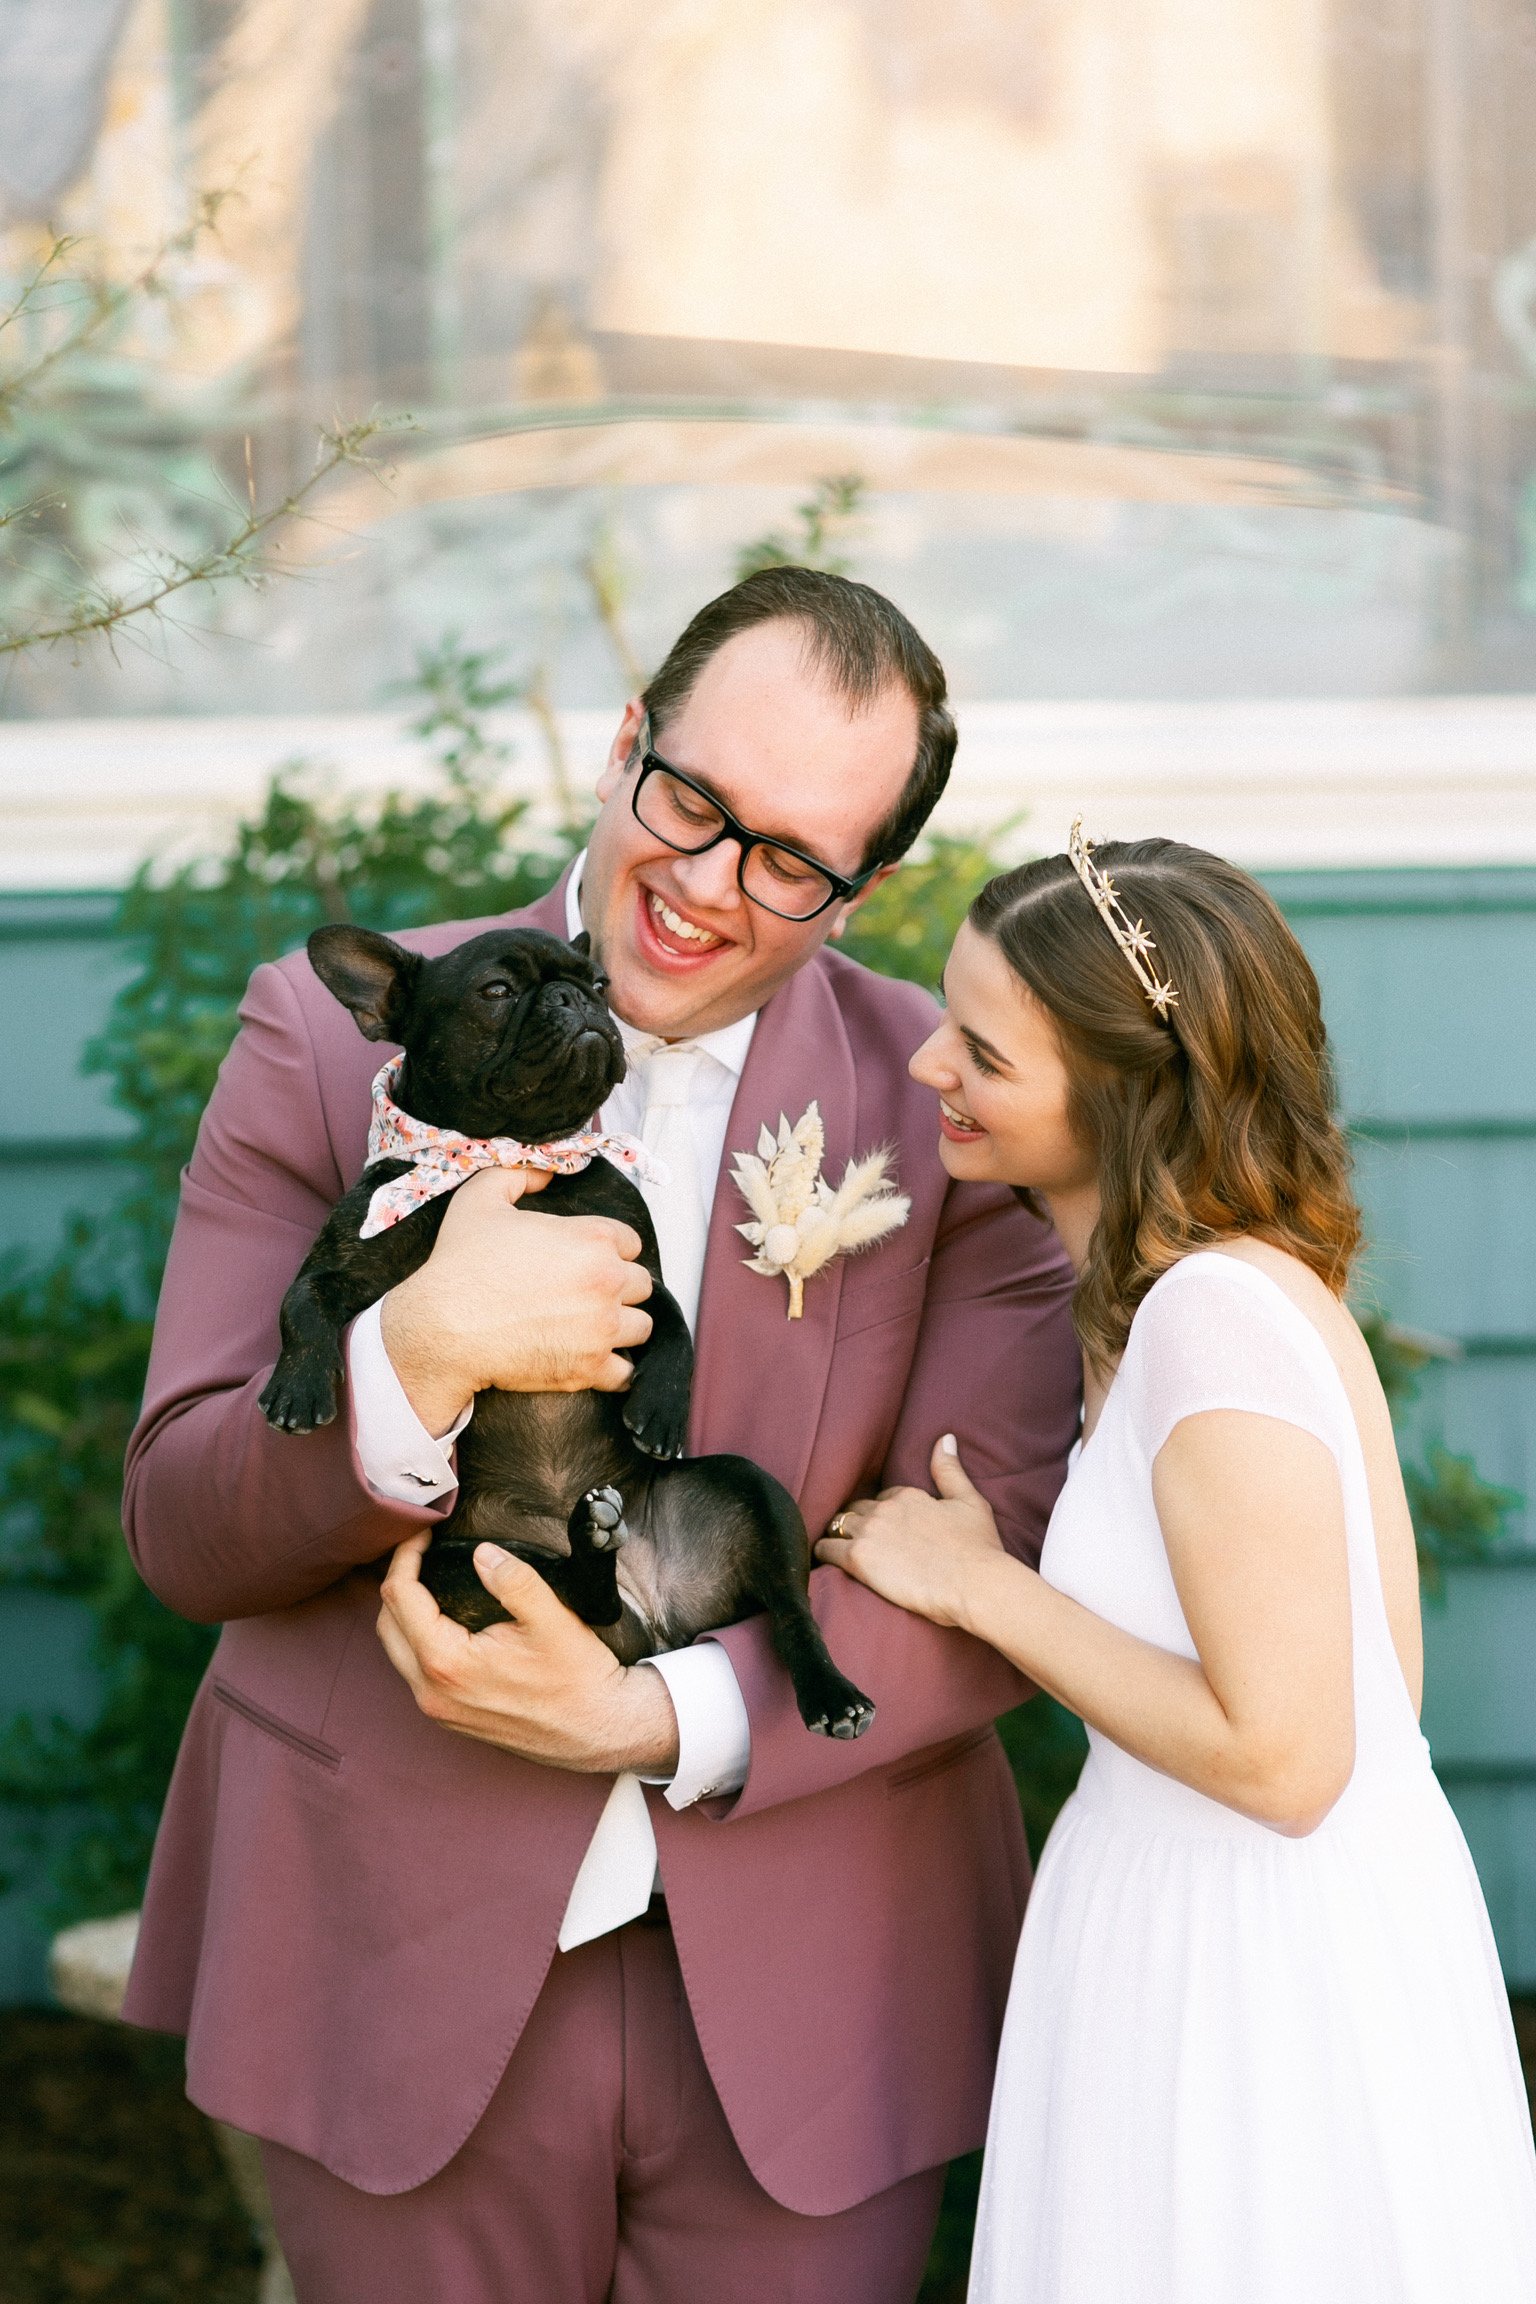
Then gently tie the ends of your bandana around your dog’s neck, like so — thank you model Kevynn haha! — and your dog is now all ready for their close up!

Here are some photos from our wedding day when our little dog of honor, Kevynn, made her special appearance for photos :)

(Photo by Laura Ford Photos)
(Photo by Laura Ford Photos)

(Photo by Laura Ford Photos)
This is such a simple way to add a personal touch to your wedding and allow your furry friend to be part of your special day as well! The bandana also makes a beautiful keepsake to store in your memory box after the wedding. Or it would make a thoughtful handmade gift to give a newly-engaged friend or family member with a special dog in their life.
If you try making this DIY, be sure to tag us on instagram @entertainidea or use the hashtag #entertaintheidea because we definitely want to see all your adorable pups :)
xo Rachael

