
How to Make Mini Frame Magnets
I hope your February is off to a great start! So far my year has been mostly full of projects, planning for future traveling (!!!), making a bunch of delicious Hello Fresh recipes, playing my daily wordle, and catching up on Succession (OMG this show, you guys. I think I have audibly gasped in every episode so far).
I know some of the country is currently snowed in, so if you’re feeling the winter blues, here’s an easy afternoon project that can add some life to your kitchen refrigerator door. Learn how to make these mini photo frame magnets below!
Affiliate disclosure: This post contains several affiliate links. As an Amazon Associate, I may earn commissions from qualifying purchases from Amazon.com. Thank you for your support!


You will need:
2” unfinished wooden craft rings (I used these)
Acrylic paints & paint brushes
Thicker paper of some kind, I used bristol board (but you could also use index cards, a file folder, etc)
Hot glue gun
Magnets (I originally got mine from the craft store, but they were not strong enough to hold anything up so I would recommend this type)
Printed photos

STEP 1: Paint your unfinished wooden rings with acrylic paint in any design of your choice! Let dry for at least 30 minutes.
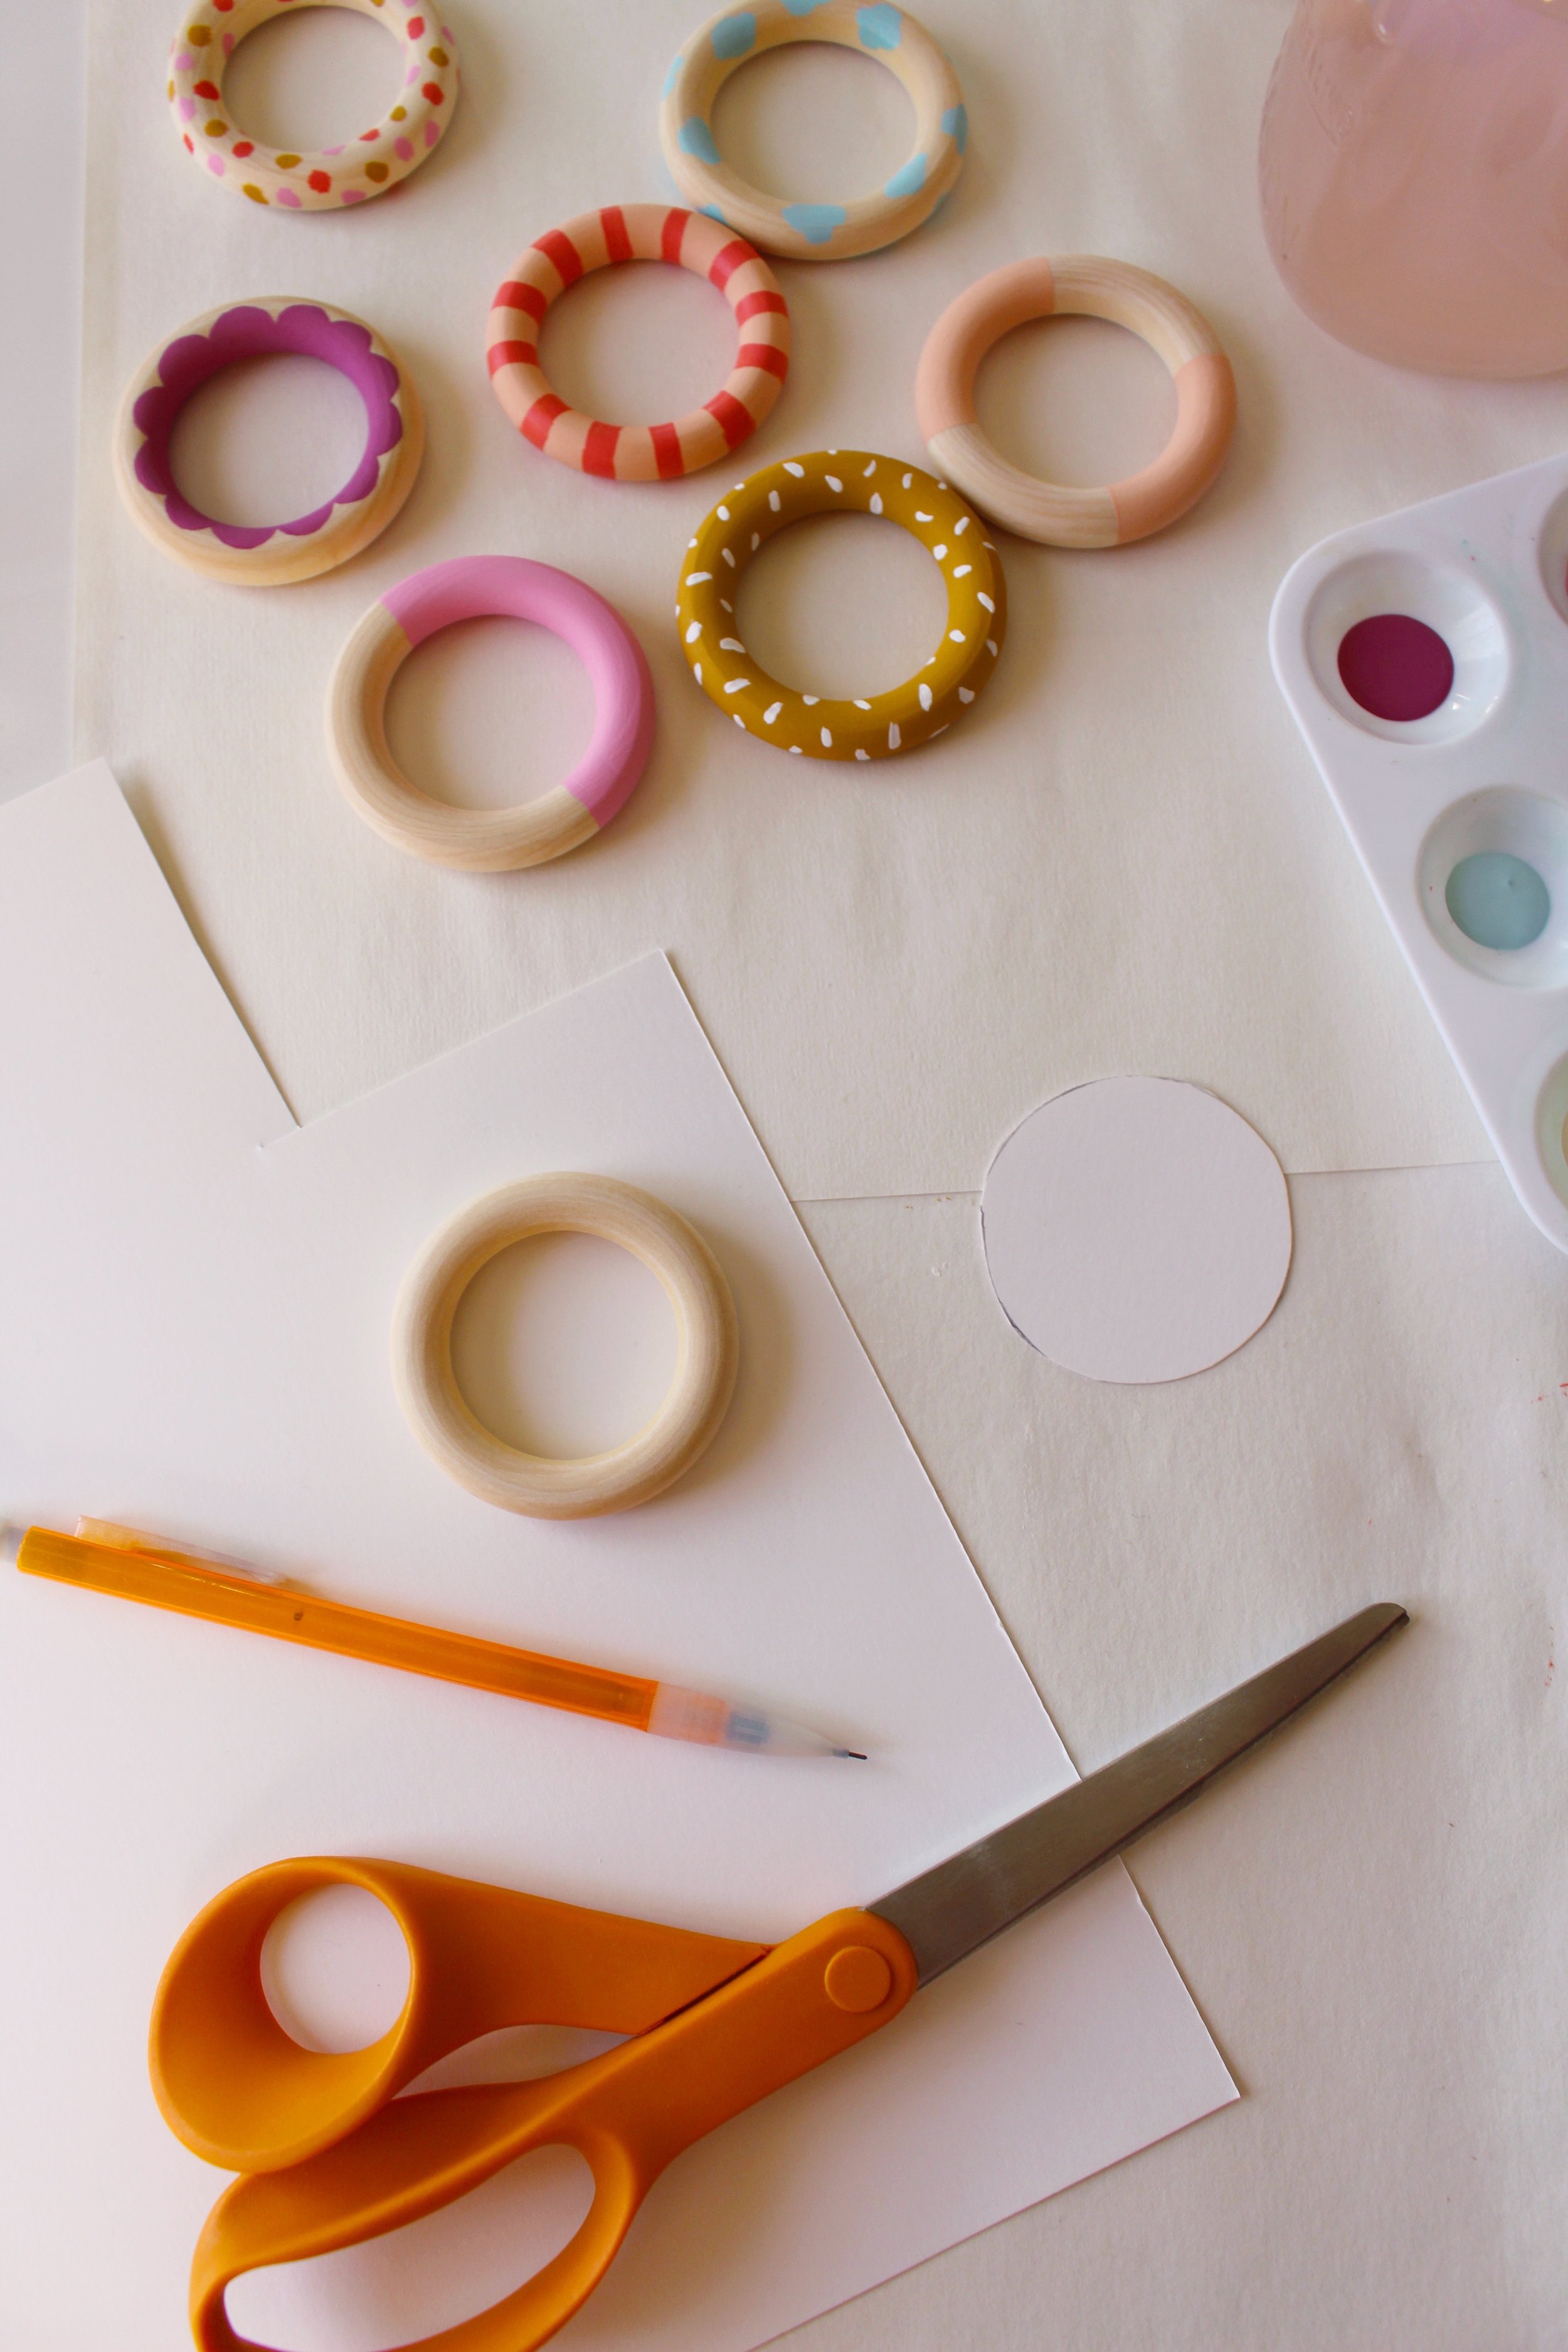
STEP 2: Trace around the outside of your wooden ring onto a thick cardstock or thin cardboard. Cut the circle out. I used a bristol board material for this but you could also use cardstock, poster board, index cards, an old folder, a cereal box, etc. I tried with a cardboard box originally but it made the frame a bit too thick so I wouldn’t recommend.


STEP 3: On the back of your painted ring, use a pencil to mark the two widest parts of your circle. Then use your hot glue gun to add a line of glue from the left point across the bottom to the right point. Immediately place your paper circle onto the hot glue, careful not to press down too hard. This will glue your paper to the frame but leave the top half open for a photo to slide in.
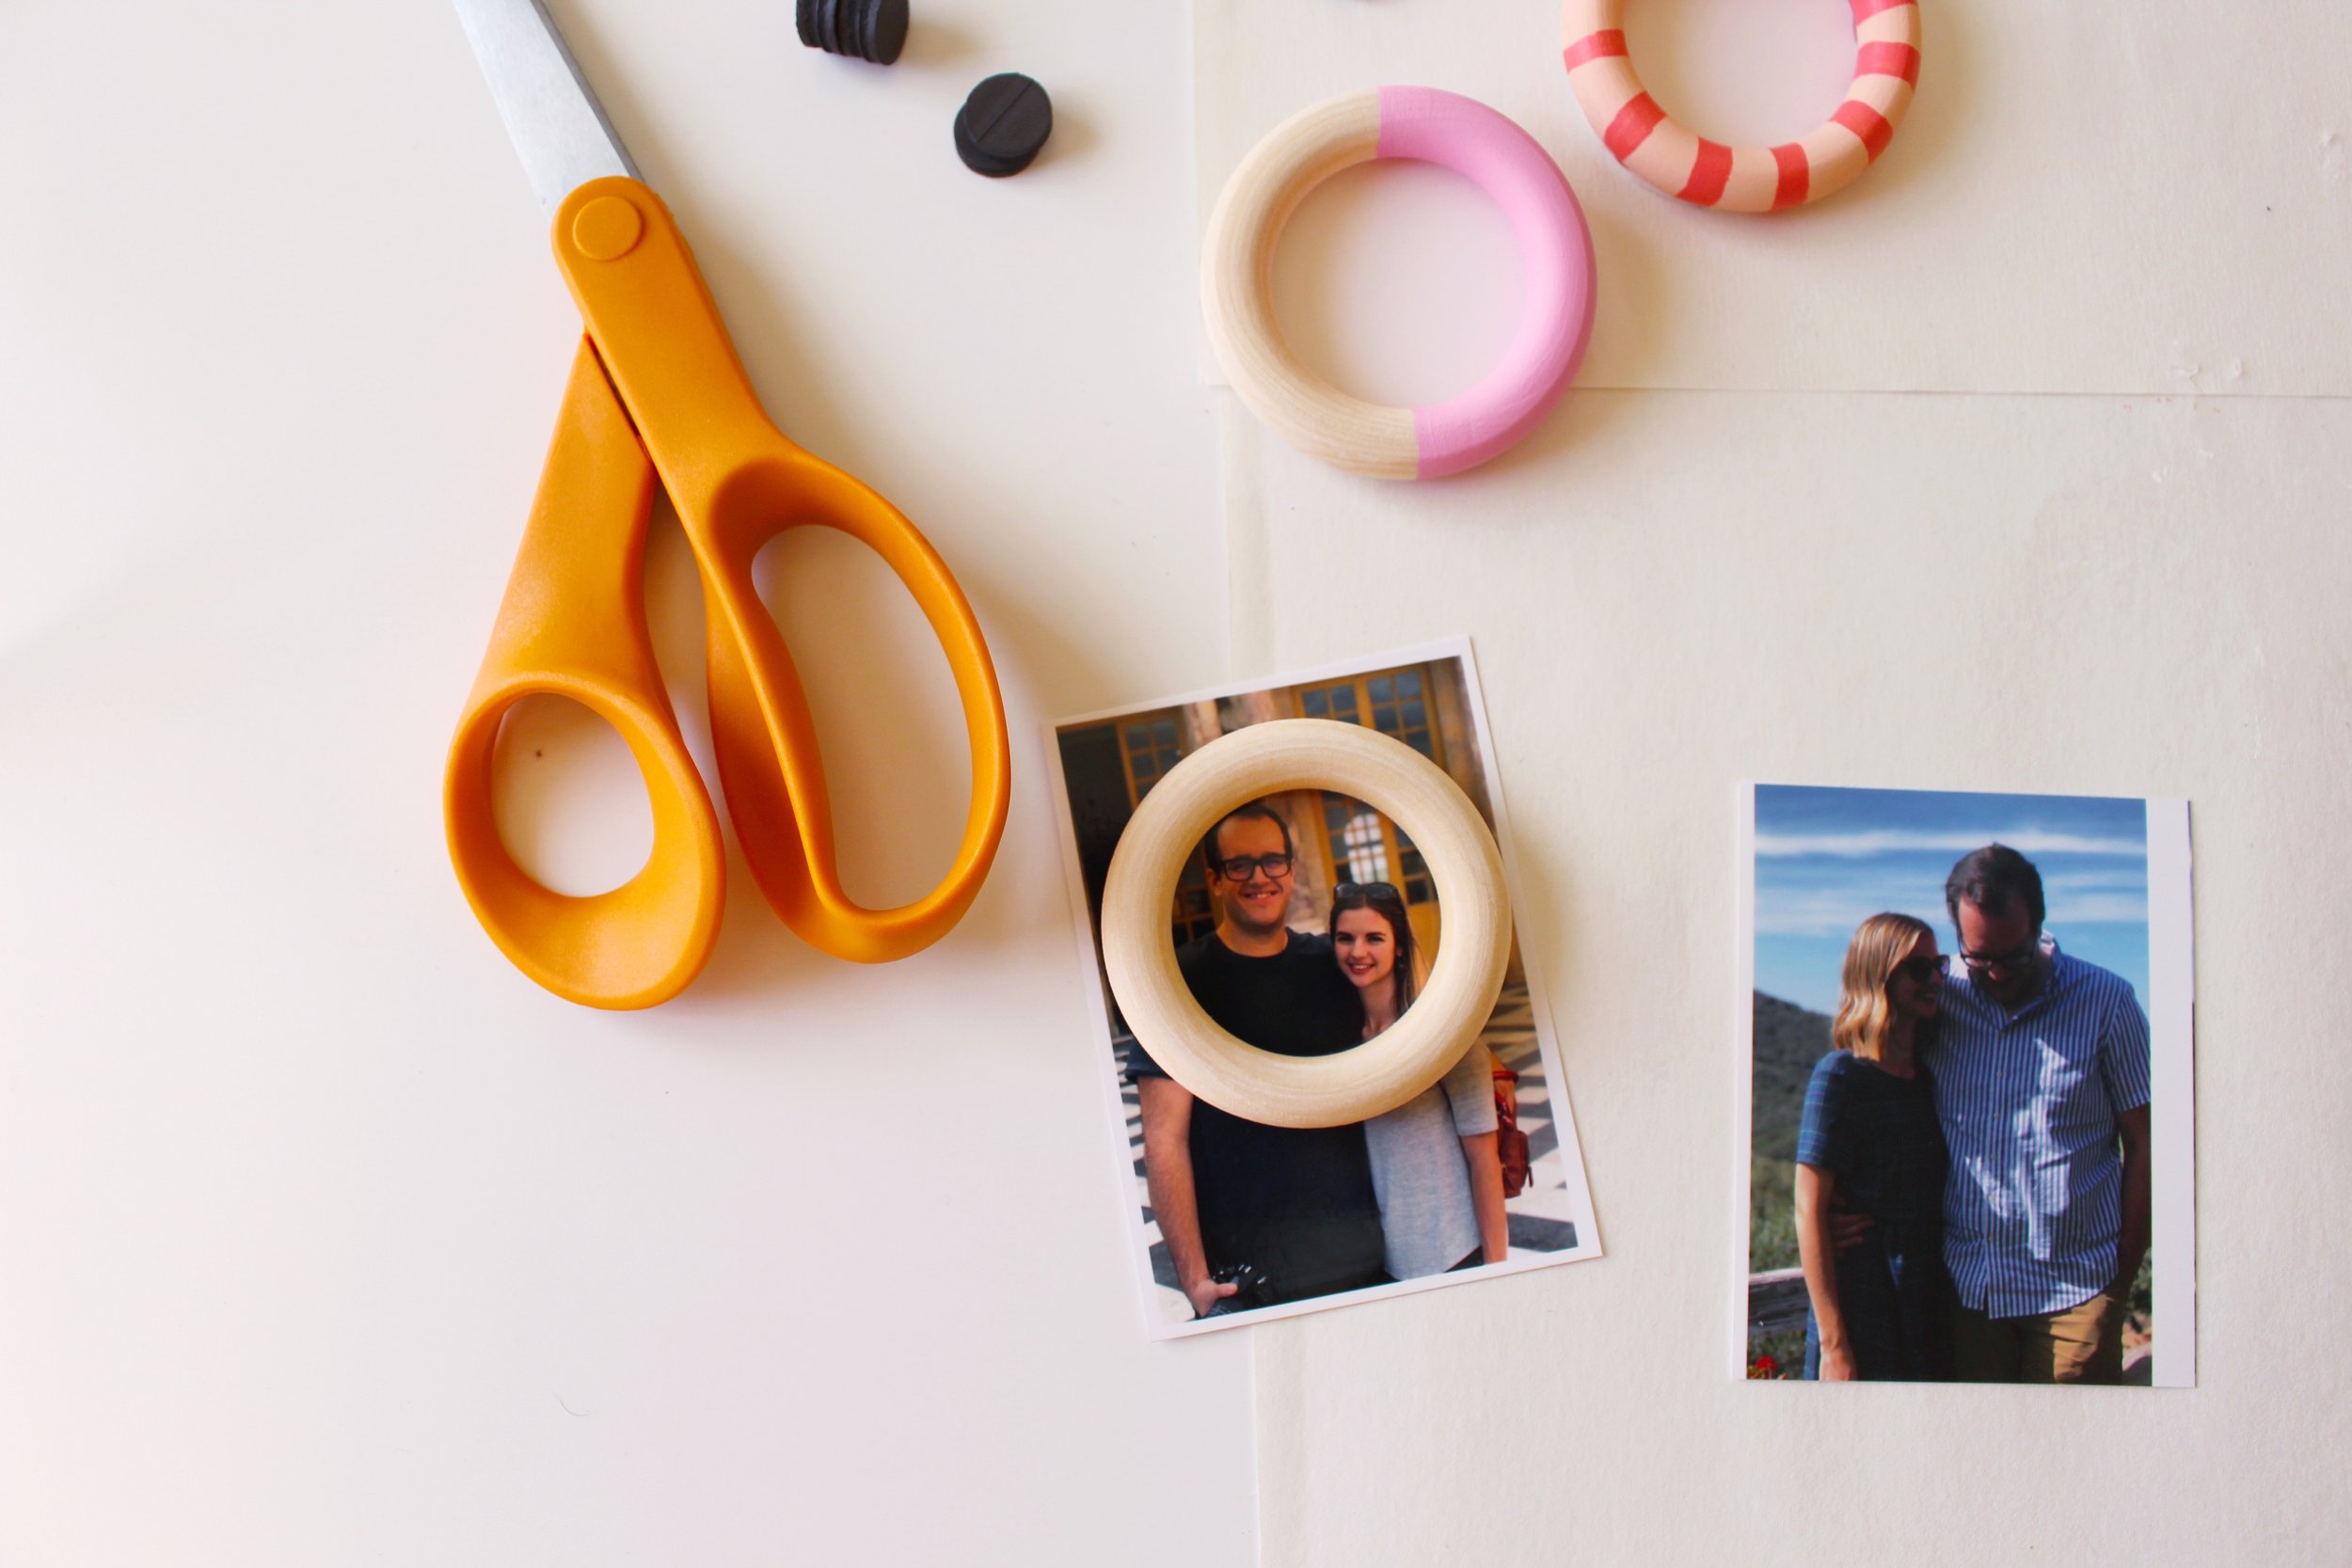
STEP 4: Next, trace a circle onto your printed photo using the inside of your wooden ring as a guide for size. Cut out your photo to fit in the frame. Remember to choose photos where your subject is further away or have the images printed in a smaller size because you can only fit about 1.5 in of the photo in the frame.

STEP 5: Hot glue a magnet on the back at the top of your cardstock. And slip in your photo between the cardstock and the wooden frame.

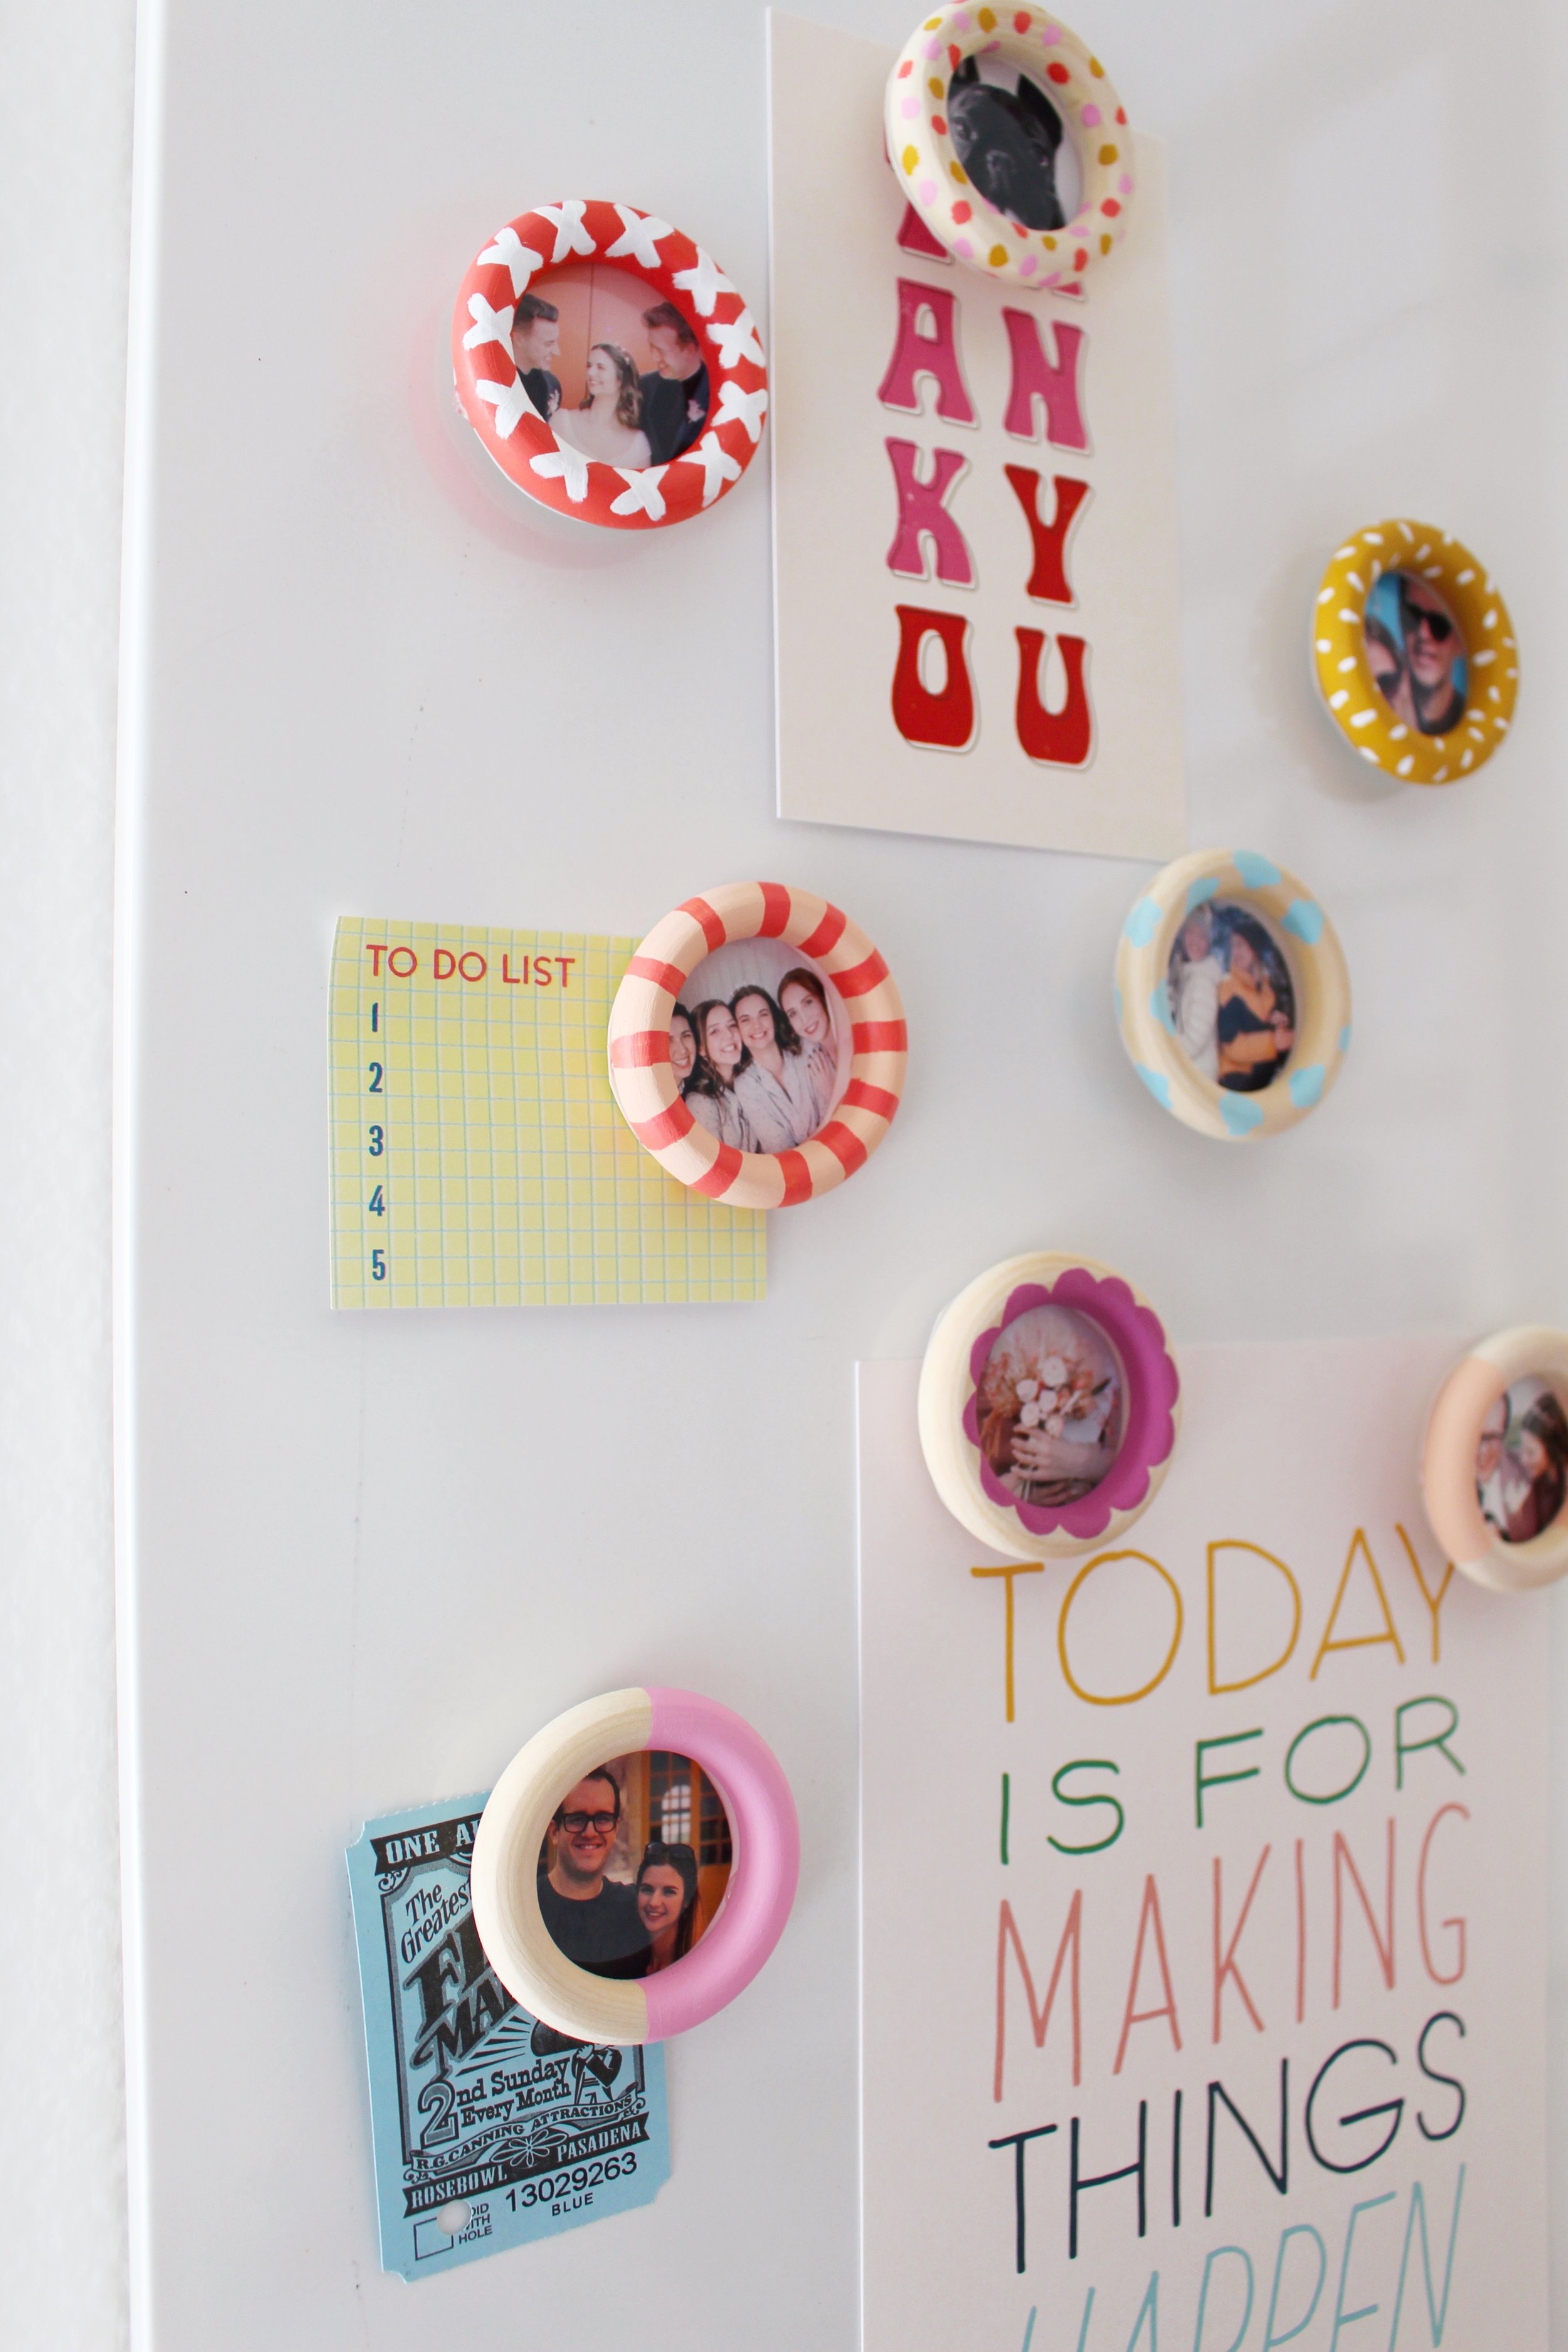
And here are my completed magnet frames! I love how these adorable mini picture frames turned out, and I love that I can switch out the frames as needed. I’m definitely going to be printing photos of my niece and nephews next!
These mini frames are also the perfect size if you have photo booth strips that you want to cut up, or it would be cute to cut family photos out of your old Christmas cards to fill the frames.
I hope you enjoy this easy afternoon project, and tag #entertaintheidea if you try it out yourself!
xo Rachael

