
DIY Valentine's Day Decor: Painted Quilt Block Garland
Does anyone else’s house feel completely bare without your holiday decor?? It is always a sad month once the Christmas decor comes down and you feel like you want to do a total home makeover to spruce up your space. Well, to stop myself from buying a bunch of new home decor (and to utilize an enormous pile of cardboard boxes leftover from holiday shopping) I set out to create a DIY cardboard garland to decorate for the next closest holiday… Valentine’s Day!
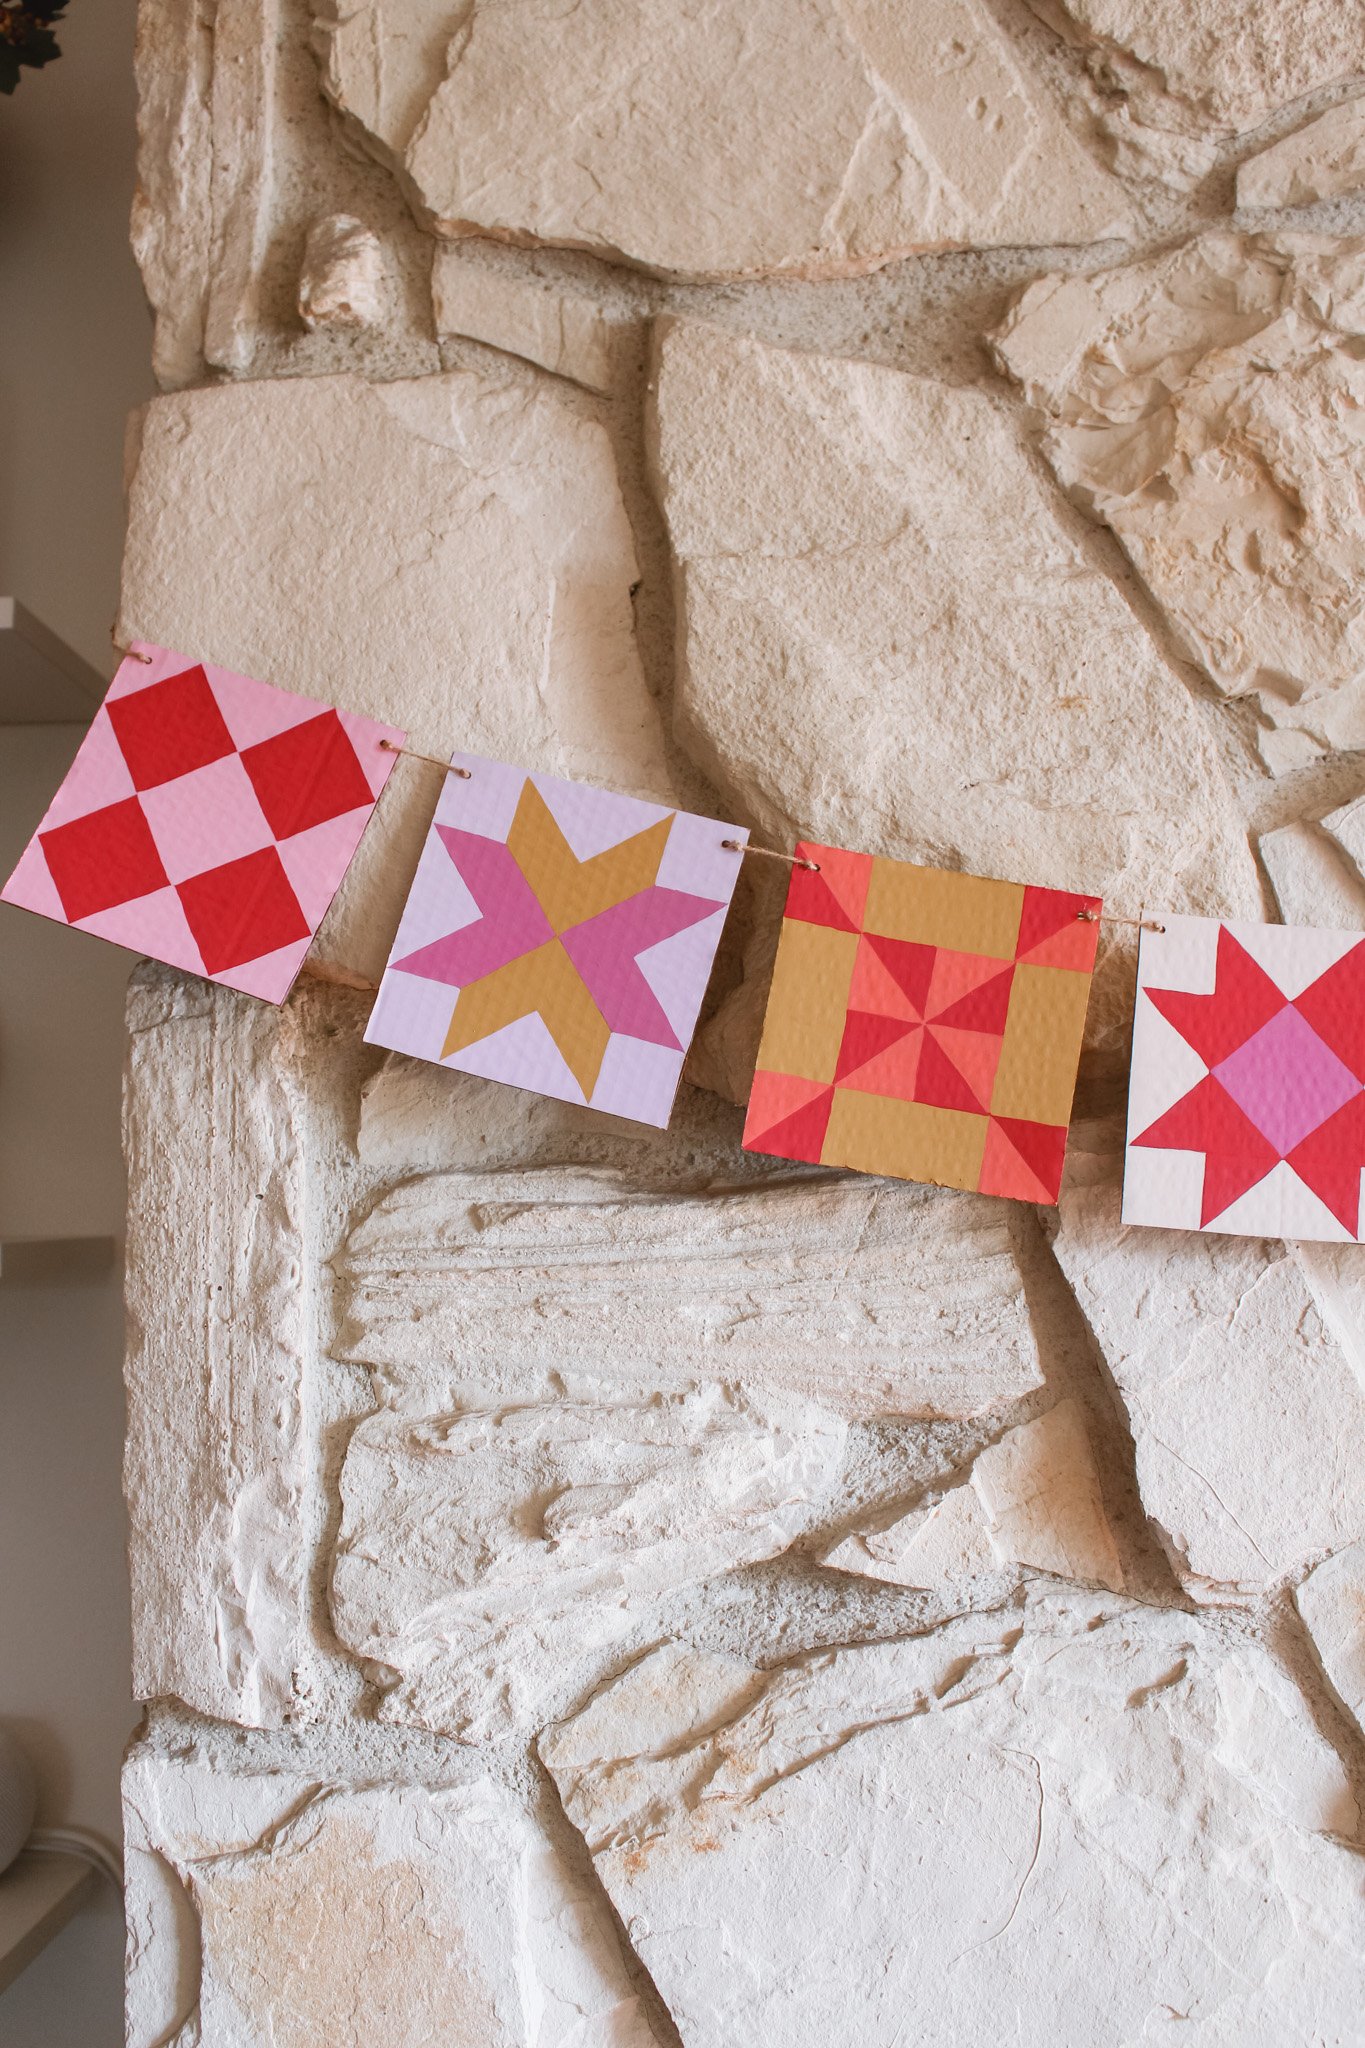
Now I love a cute heart garland for Valentine’s Day as much as the next person, but I think I have seen every single way this can possibly be done on Pinterest and craft blogs over the years. So I wanted to create something a little different that gives a nod to the red and pink colors without it being too in your face VALENTINE’S DAY.
I have recently been seeing so many cute quilting projects online, and while I have not mastered the craft of sewing yet, I thought I could do my own take with a bit of paint and cardboard. Follow along below if you want to create your own cardboard painted quilt block garland!

HOW TO MAKE A PAINTED QUILT BLOCK GARLAND
You will need the following supplies:
Cardboard
Sharp scissors or knife to cut cardboard
Ruler
Pencil
Acrylic paint
Paint brushes
Hole punch
String or twine
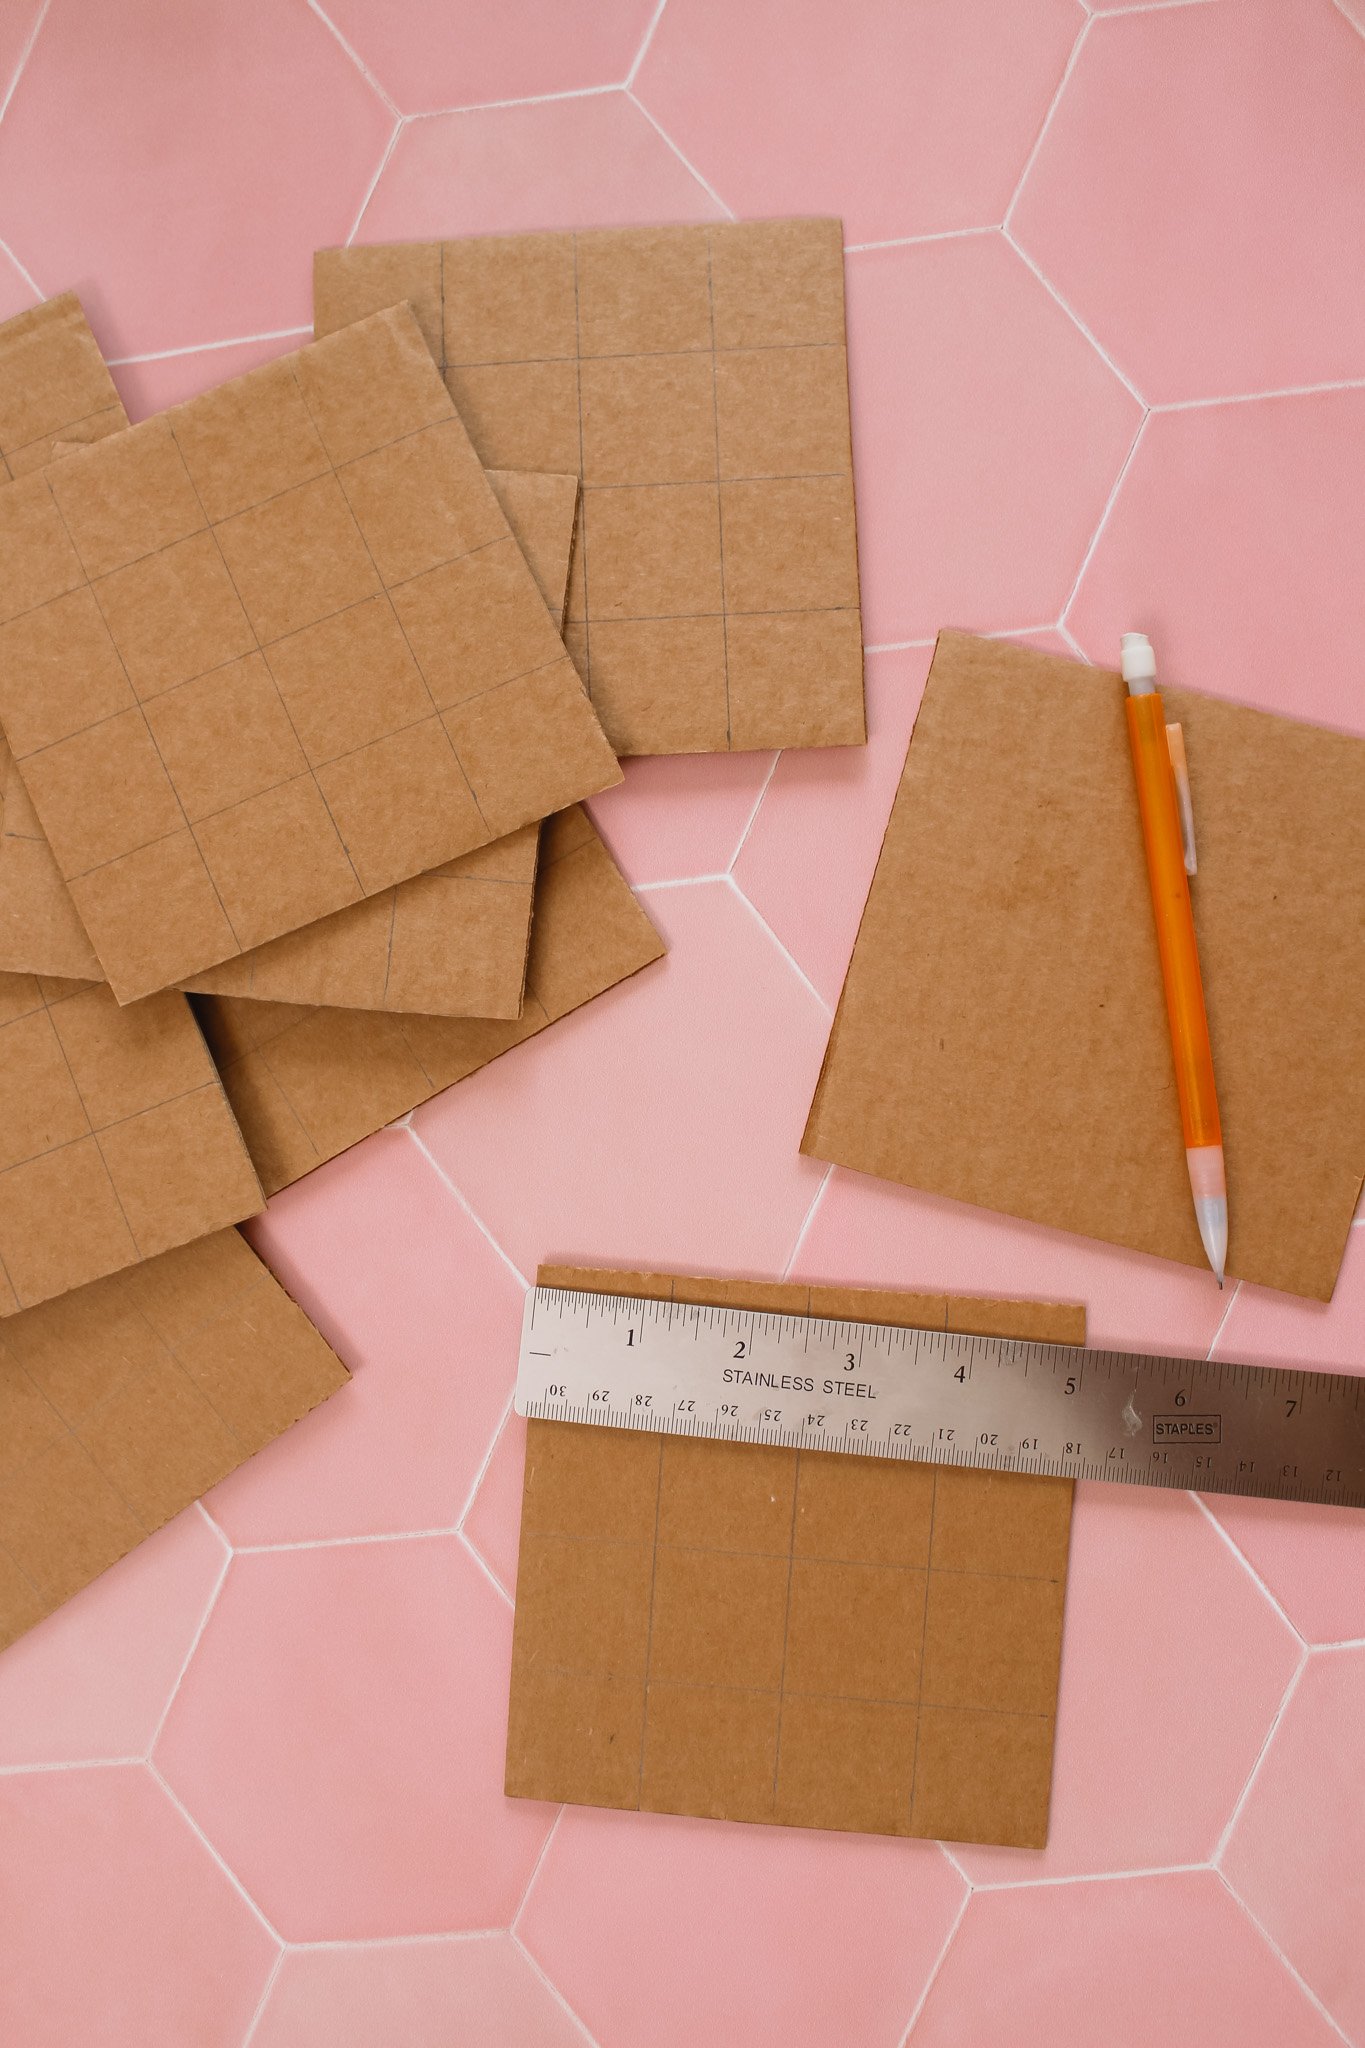
STEP 1: Cut your cardboard into 5 in x 5 in squares. Try to only use clean, flat pieces if possible. Cut out a total of 10 squares.
STEP 2: Using a ruler, draw out a grid on your square of 1.25 in x 1.25 in blocks. This will be a 4 x 4 grid of squares.

STEP 3: Now use your ruler or a straight edge to connect some lines throughout the block to make different quilt patterns. The image above shows the five different designs that I used for my project. I did two of each design.

STEP 4: Use acrylic paint to carefully paint the designs within your blocks. The cardboard required me to paint at least two coats of each color, sometimes three, to make sure it looked opaque.

STEP 5: Once your paint has fully dried, use a hole punch (I used a 1/8 in sized hole punch), to make a hole in the two top corners of each block.
STEP 6: Cut a piece of string or twine that is roughly 6.5 ft long. Make a loop on one end of the string and tie a knot. This should create a loop for you to hang the garland from.
STEP 7: Next tie a knot in the string about 2 in from the end loop. Now string your first cardboard block onto the garland starting from the front to the back. Pull it down to the knot.
Now thread the string through the second corner hole from the back to the front. Tie another knot in the string after the second hole to secure the quilt block in place. There should now be a knot in the string on the front side in each corner.
Leave about 1 in of space between quilt blocks when tying the next knot. Now continue to string on the next block and pull it to the knot. Repeat these steps until all 10 of your quilt blocks are knotted in place.

STEP 8: You should be left with just about 4 inches on the end. Create a second loop in the string on the very end and knot it together with itself. This will create a second loop on the other side to hang the garland from.


And that’s it! I’m very proud to say that I did this whole project for a whopping $0. I used all supplies that I had on hand — well I guess I had to buy a bunch of stuff to end up with cardboard boxes… but you could totally check a nearby recycling bin if you need to!
This garland turned out so cute despite being made out of literal trash!! I can’t wait to use it as decor for my upcoming Valentine’s Day party. You could totally make this quilt block garland for any season, maybe matching the paint colors with your home decor? Or make it for a birthday celebration with their favorite colors? I love the modern color block look of these quilt squares. Quilting is not just for Grandmas anymore! Lol
xo Rachael

