
10 Tips for Organizing Craft Supplies
The beginning of the year always sparks my “spring cleaning” mindset! It may not actually be spring yet, but post-holidays always feels like a fresh new start. So what better time than now to organize and get your spaces in order?!
I know a lot of creative people thrive with a very cluttered, artistic space. And I respect that… But I am not one of them. I am the type that is way more productive once everything has a home and is in it’s place. So that is just what I set out to do this past week, and I couldn’t be happier to have my work space (and, therefore, my mind) feeling much more clean and organized. As I went through the process I thought I would share some tips that I noticed along the way in case they help any other “organized maker-types” out there. Here are my top 10 tips to organizing craft supplies!
Affiliate disclosure: This post contains several affiliate links. As an Amazon Associate, I may earn commissions from qualifying purchases from Amazon.com. Thank you for your support!
1.Categorize your supplies based on “type of craft”
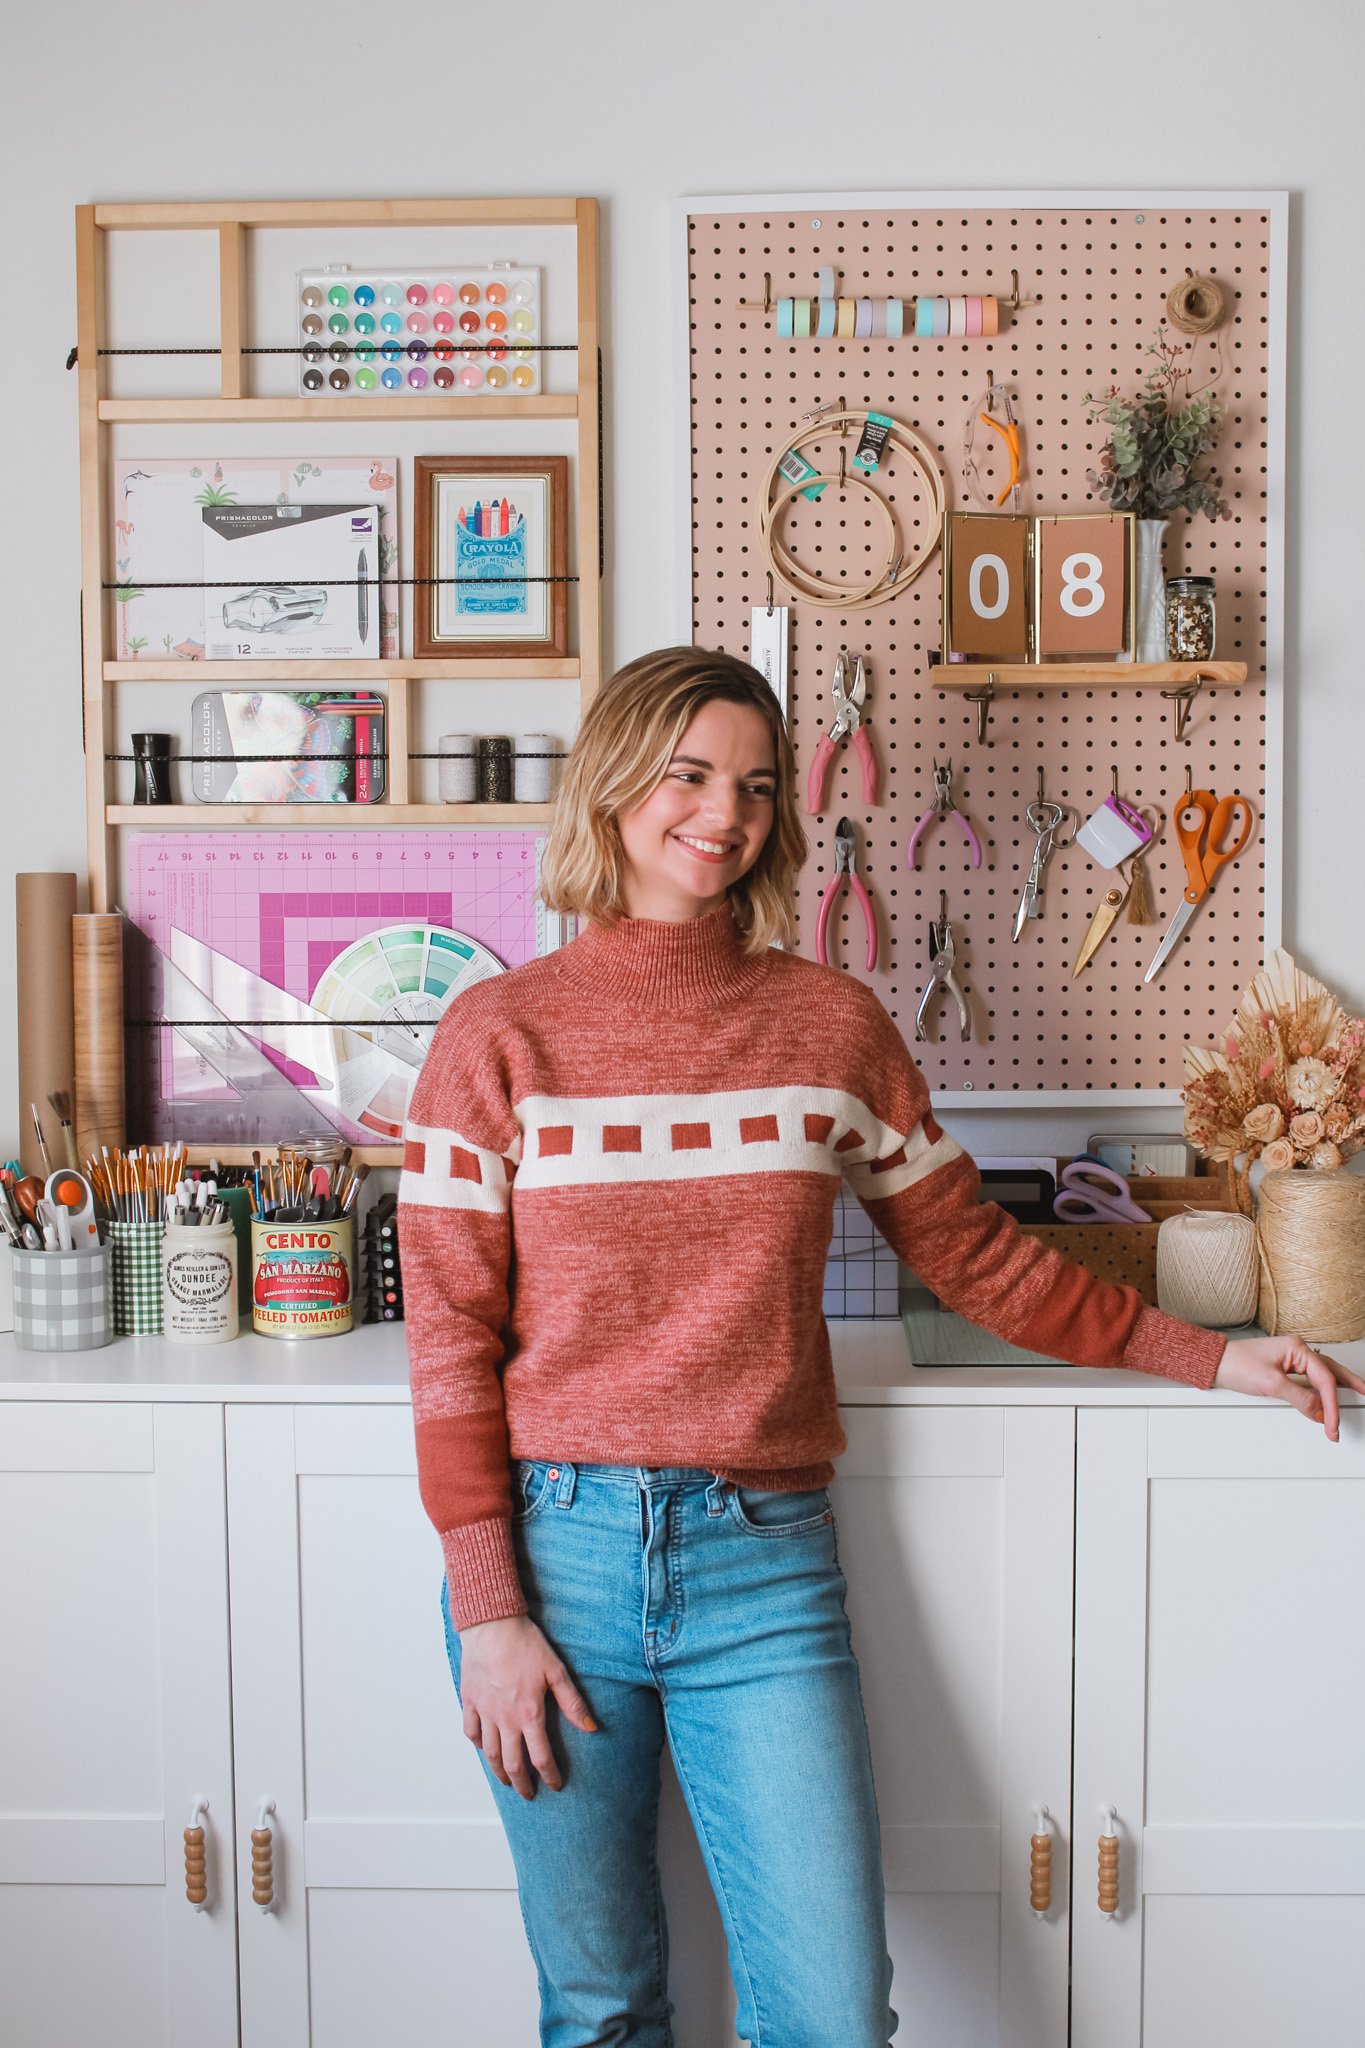
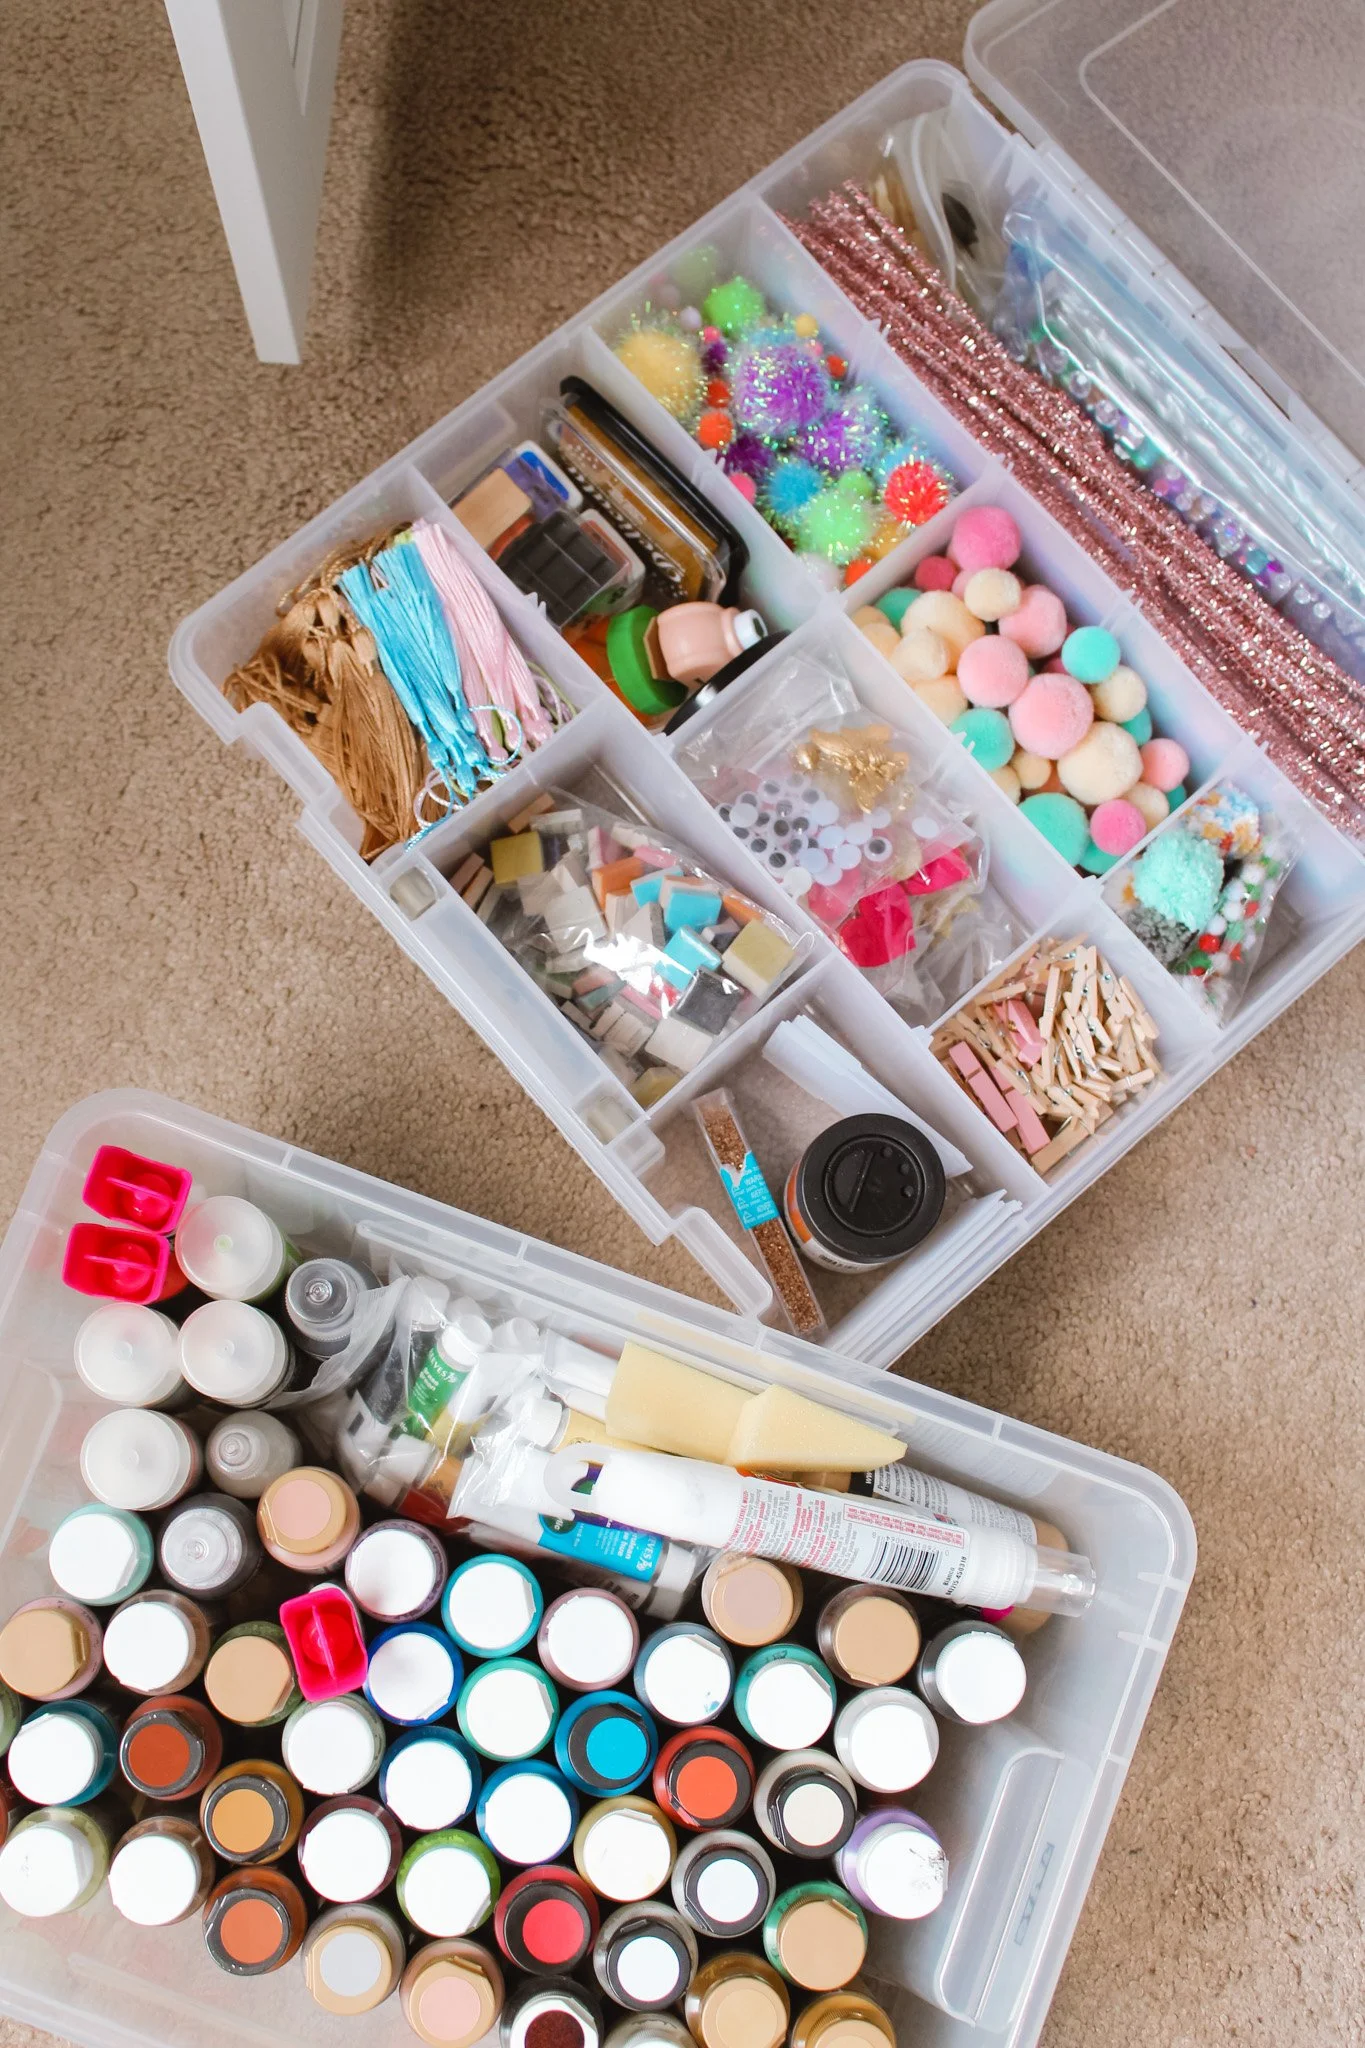
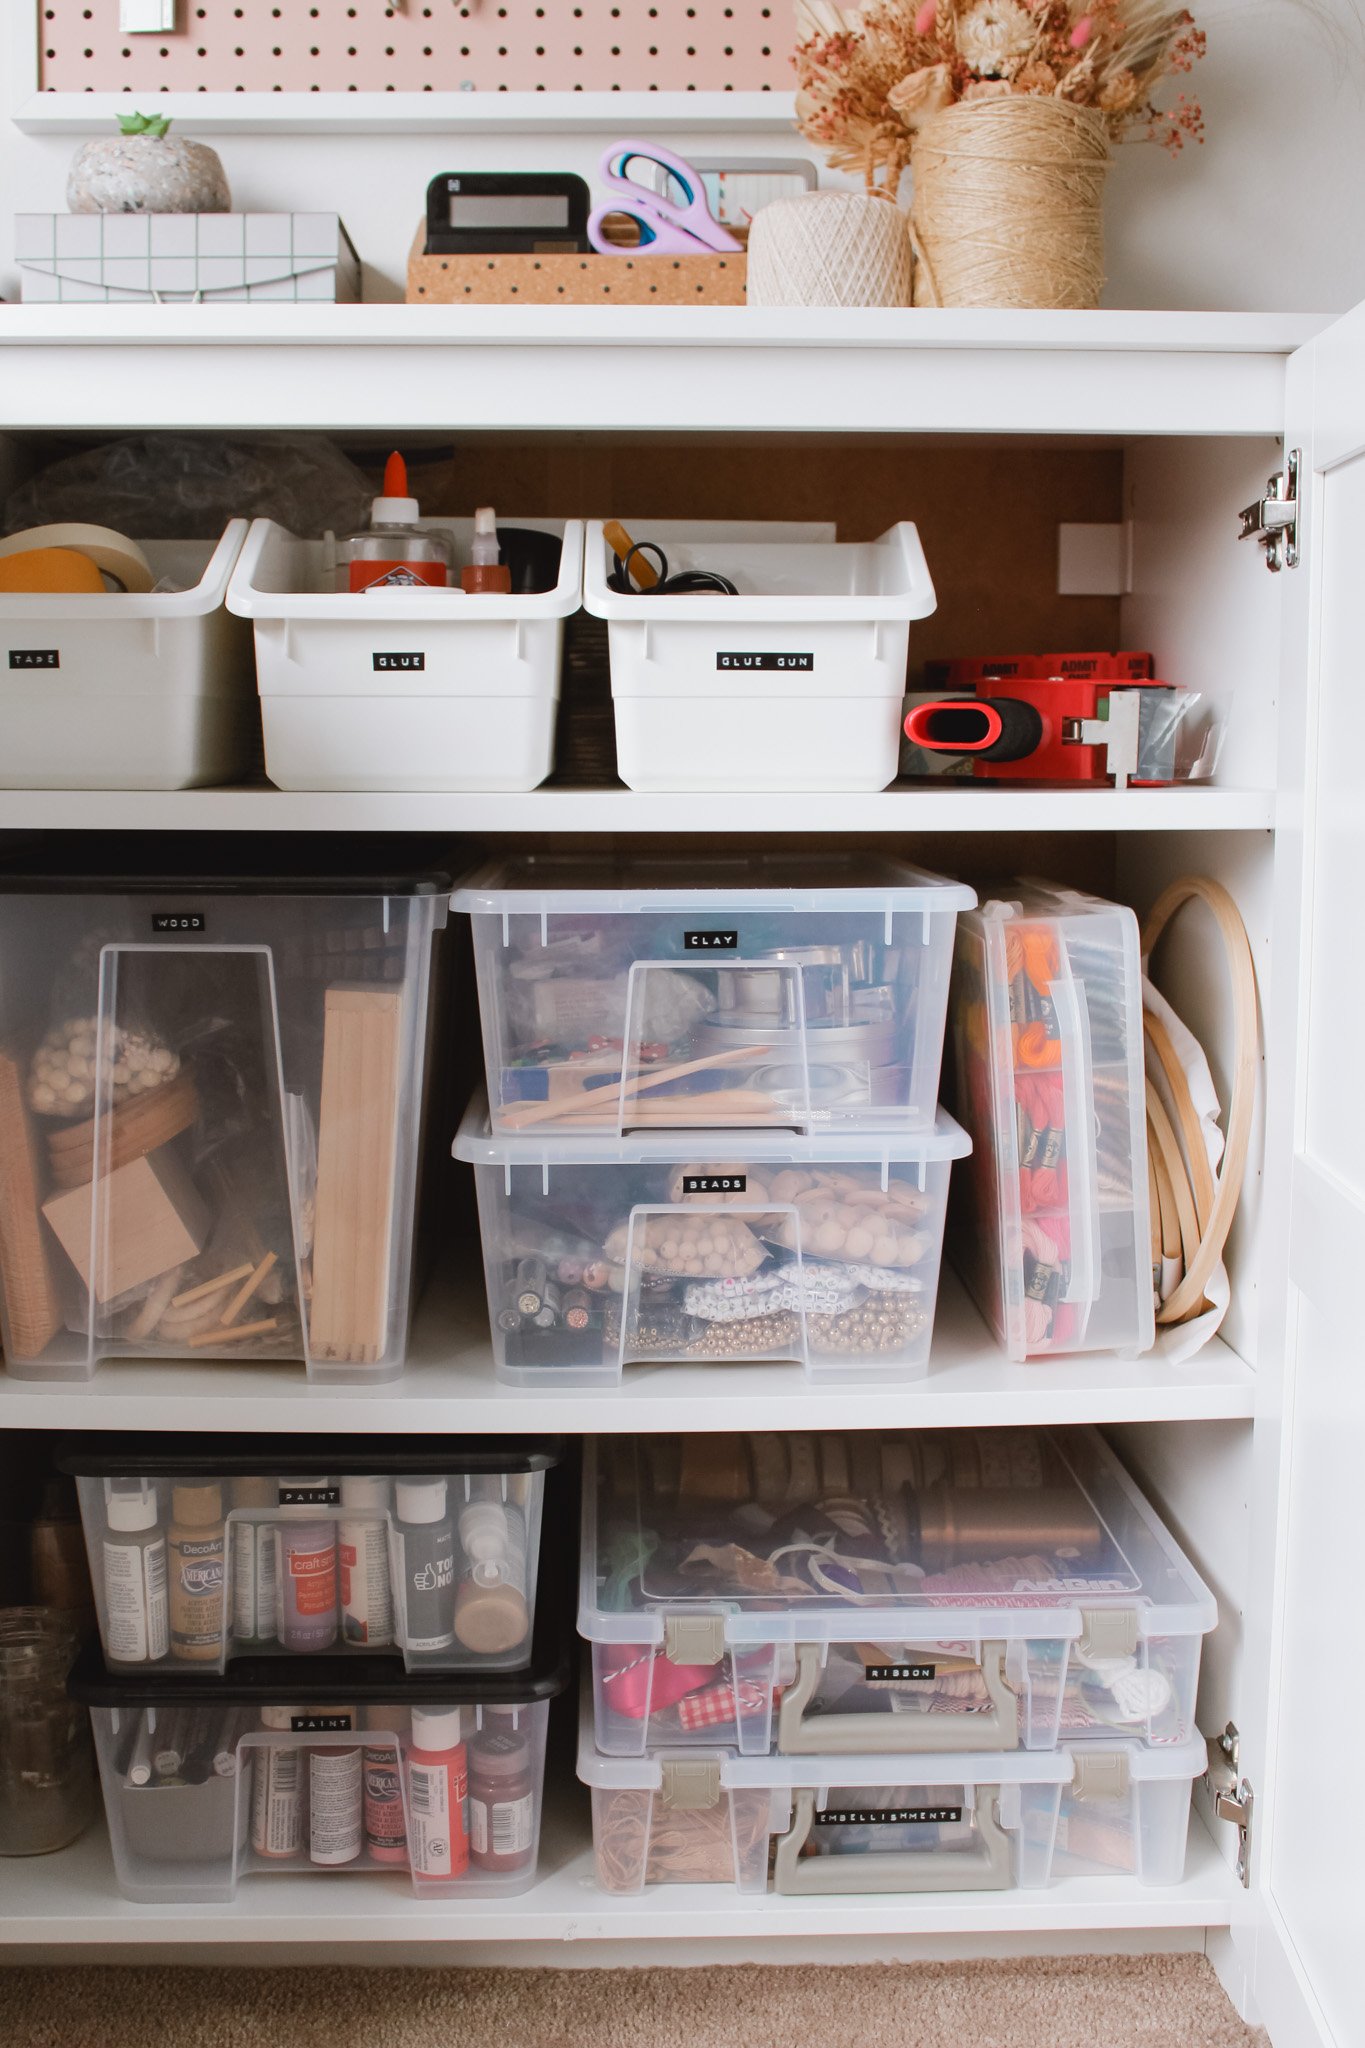
I find it helpful to categorize my craft supplies by “type of craft” (much like the way most craft stores are organized by aisle) — meaning I keep all supplies and tools needed for a specific craft all together. Chances are that when you’re doing a painting project, you will also need things like paint brushes, palettes, paint, etc. so this can all be stored together. You also want to avoid categorizing too small. Having too many organizing bins will actually take up way more space than you really need, so keep the categories broad. Some of my general categories include beading, yarn, florals, wood, paint, etc.
2. Collect organizing bins over time
Organizing bins can be super expensive, I hear ya! I have been collecting all these plastic bins over years and years. I would suggest only buying a few at a time and to utilize things like shoe boxes or small amazon boxes for the time being to store like items together. Keep an eye out for when stores do a sale on organization products (usually at the start of the year) or shop at discounted stores like TJ Maxx or Home Goods.
3. Sort “like items” before buying bins
Speaking of bins, another great reason to use empty shoe boxes or amazon boxes before investing in any kind of storage is so that you can see just how much you have of each category. This way you aren’t spending a fortune on a bunch of small bins just to find that nothing fits in them. Not that I’m speaking from experience or anything…. :P
4. Keep future supplies in mind
I would suggest buying containers that are slightly larger than you currently need for each category. If your supplies fit perfectly into a box, it is going to feel super satisfying in the moment, but it’s not going to be a functional organizational solution. When it comes time to buy more supplies there will be no where to put them. Your organization should be a system that is helpful and easy to use, otherwise it will all be for nothing.
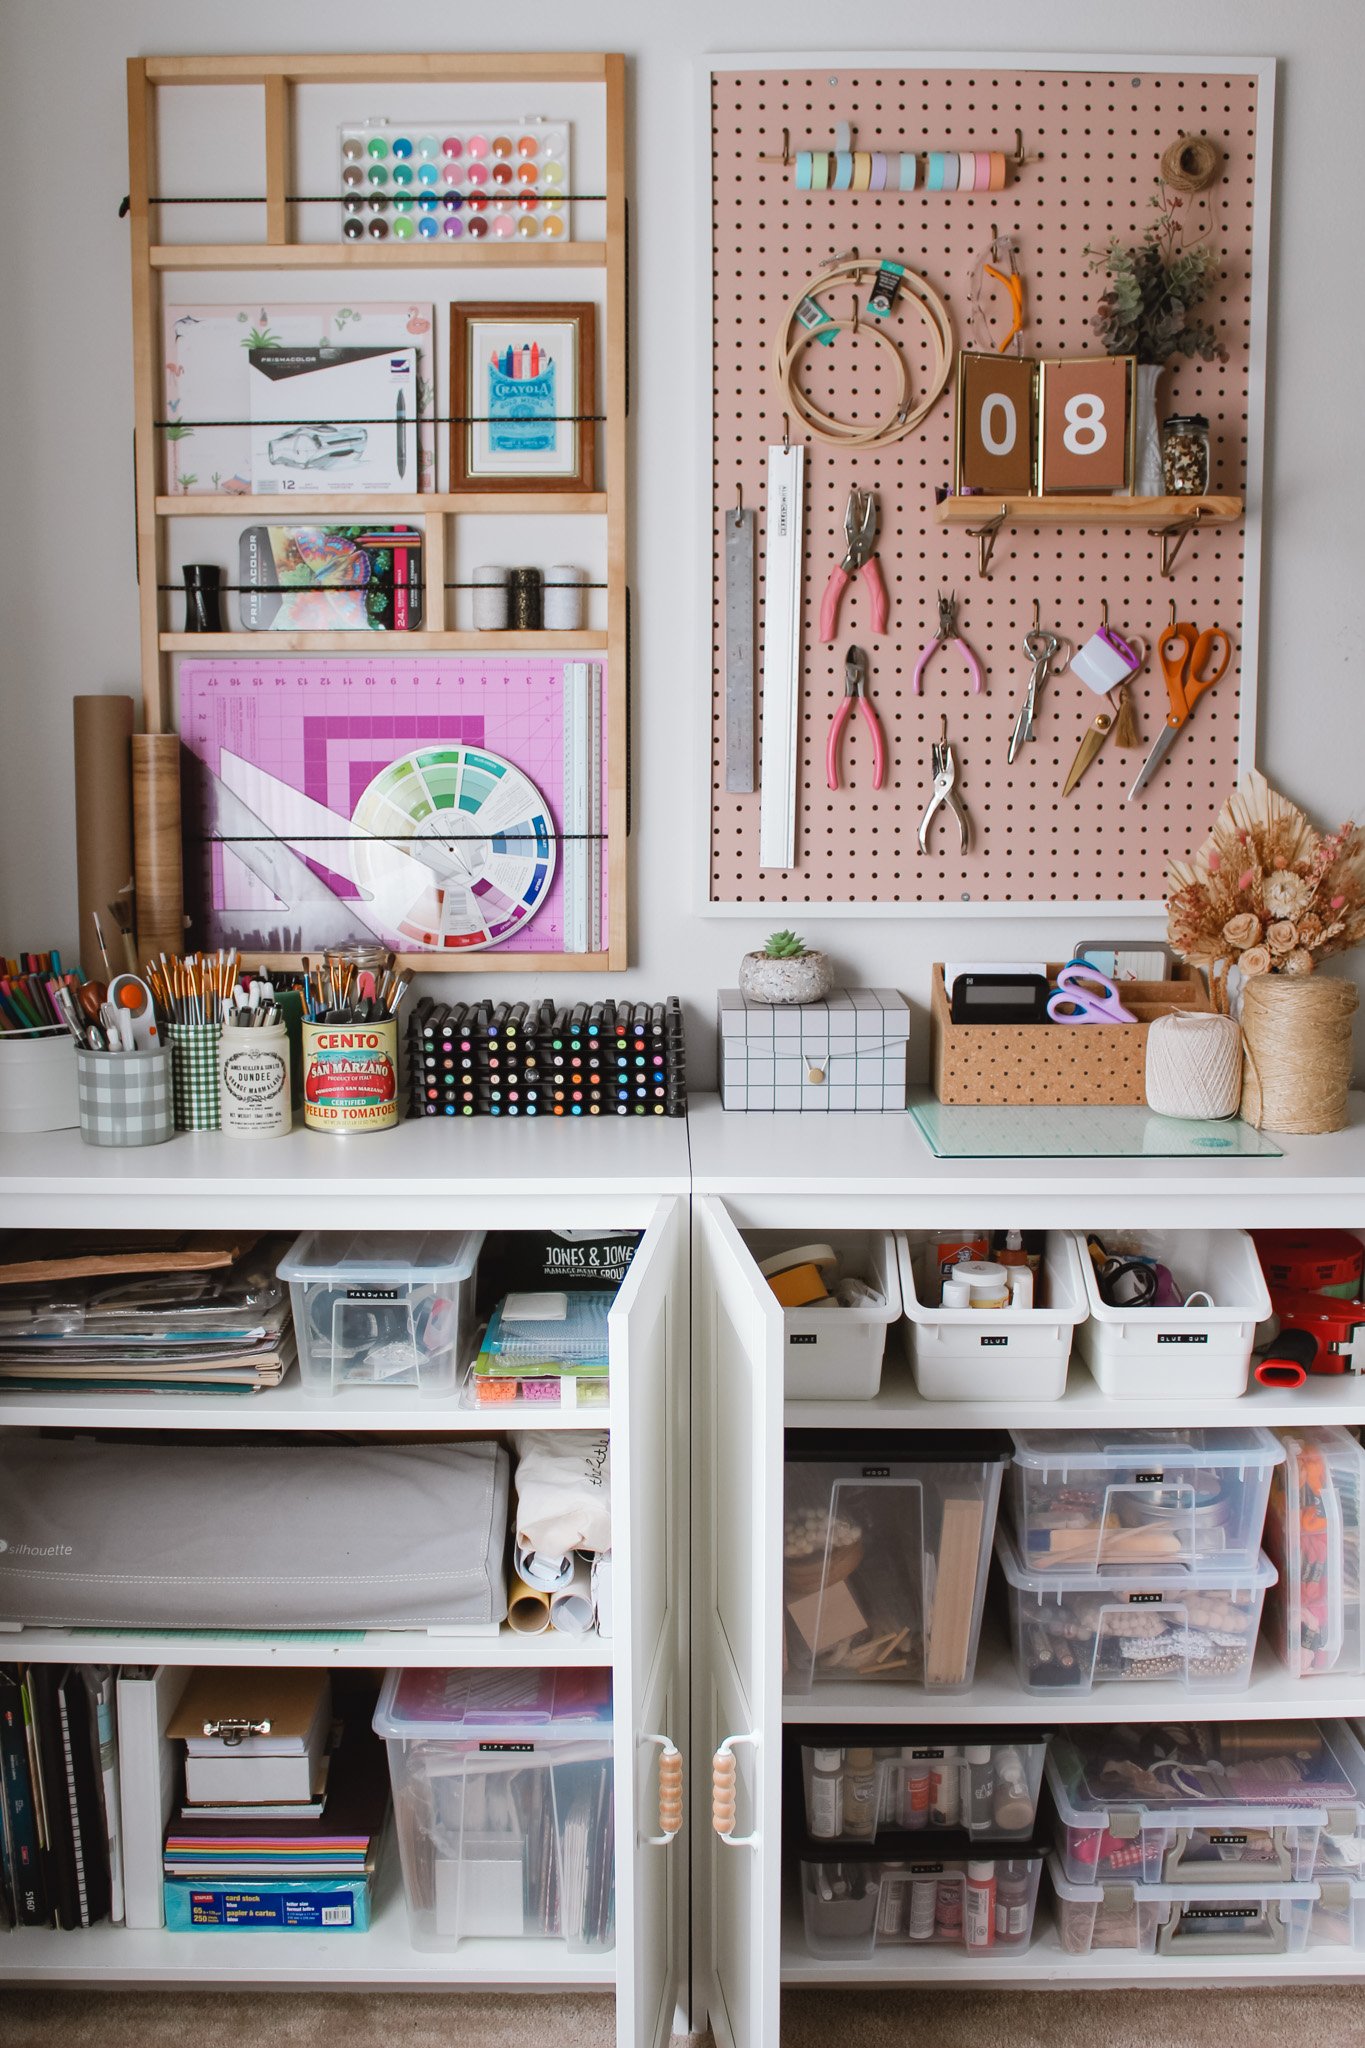
5. Utilize your vertical space
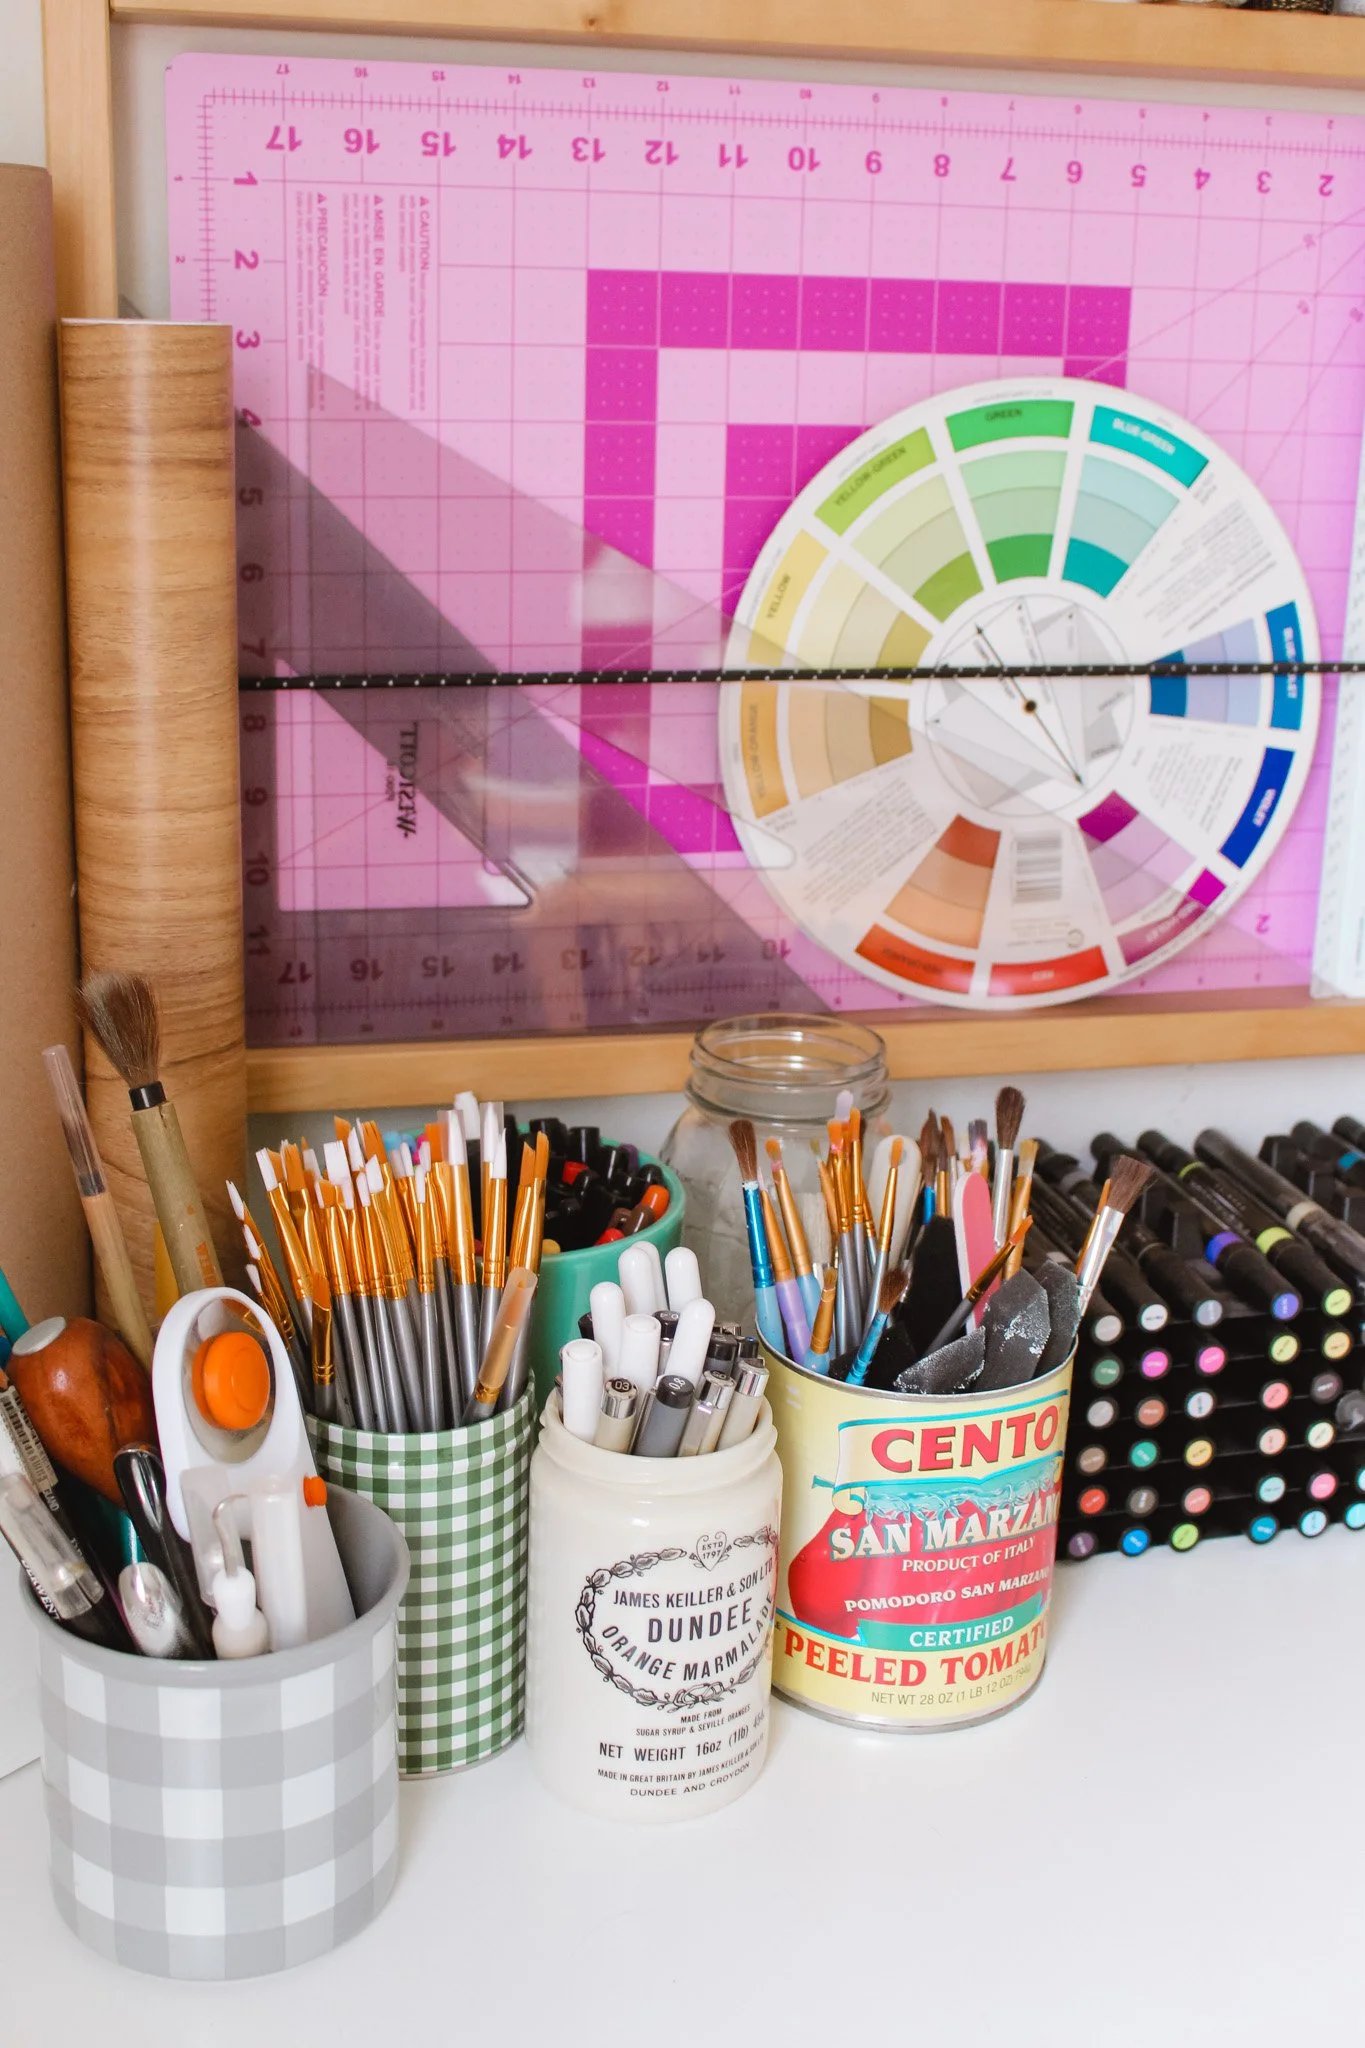
Hanging supplies and tools can be a nice way to keep things at an easy reach, especially the items you use often (like scissors or rulers for me!) and it also gives your workspace a very organized and creative vibe. I am still loving my art supplies pegboard that I created a few years back — check out the blog post here to find out how I made it!
6. Have a drop zone for current projects
If you are a constant crafter, you might be in the middle of a bunch of different projects at a time. I find it super helpful to have a drop zone for my current projects to help corral the supplies that I want to be able to access quickly and am not ready to fully put away yet. I use an IKEA utility cart for this which I love because I can wheel it around my studio space wherever I need it.
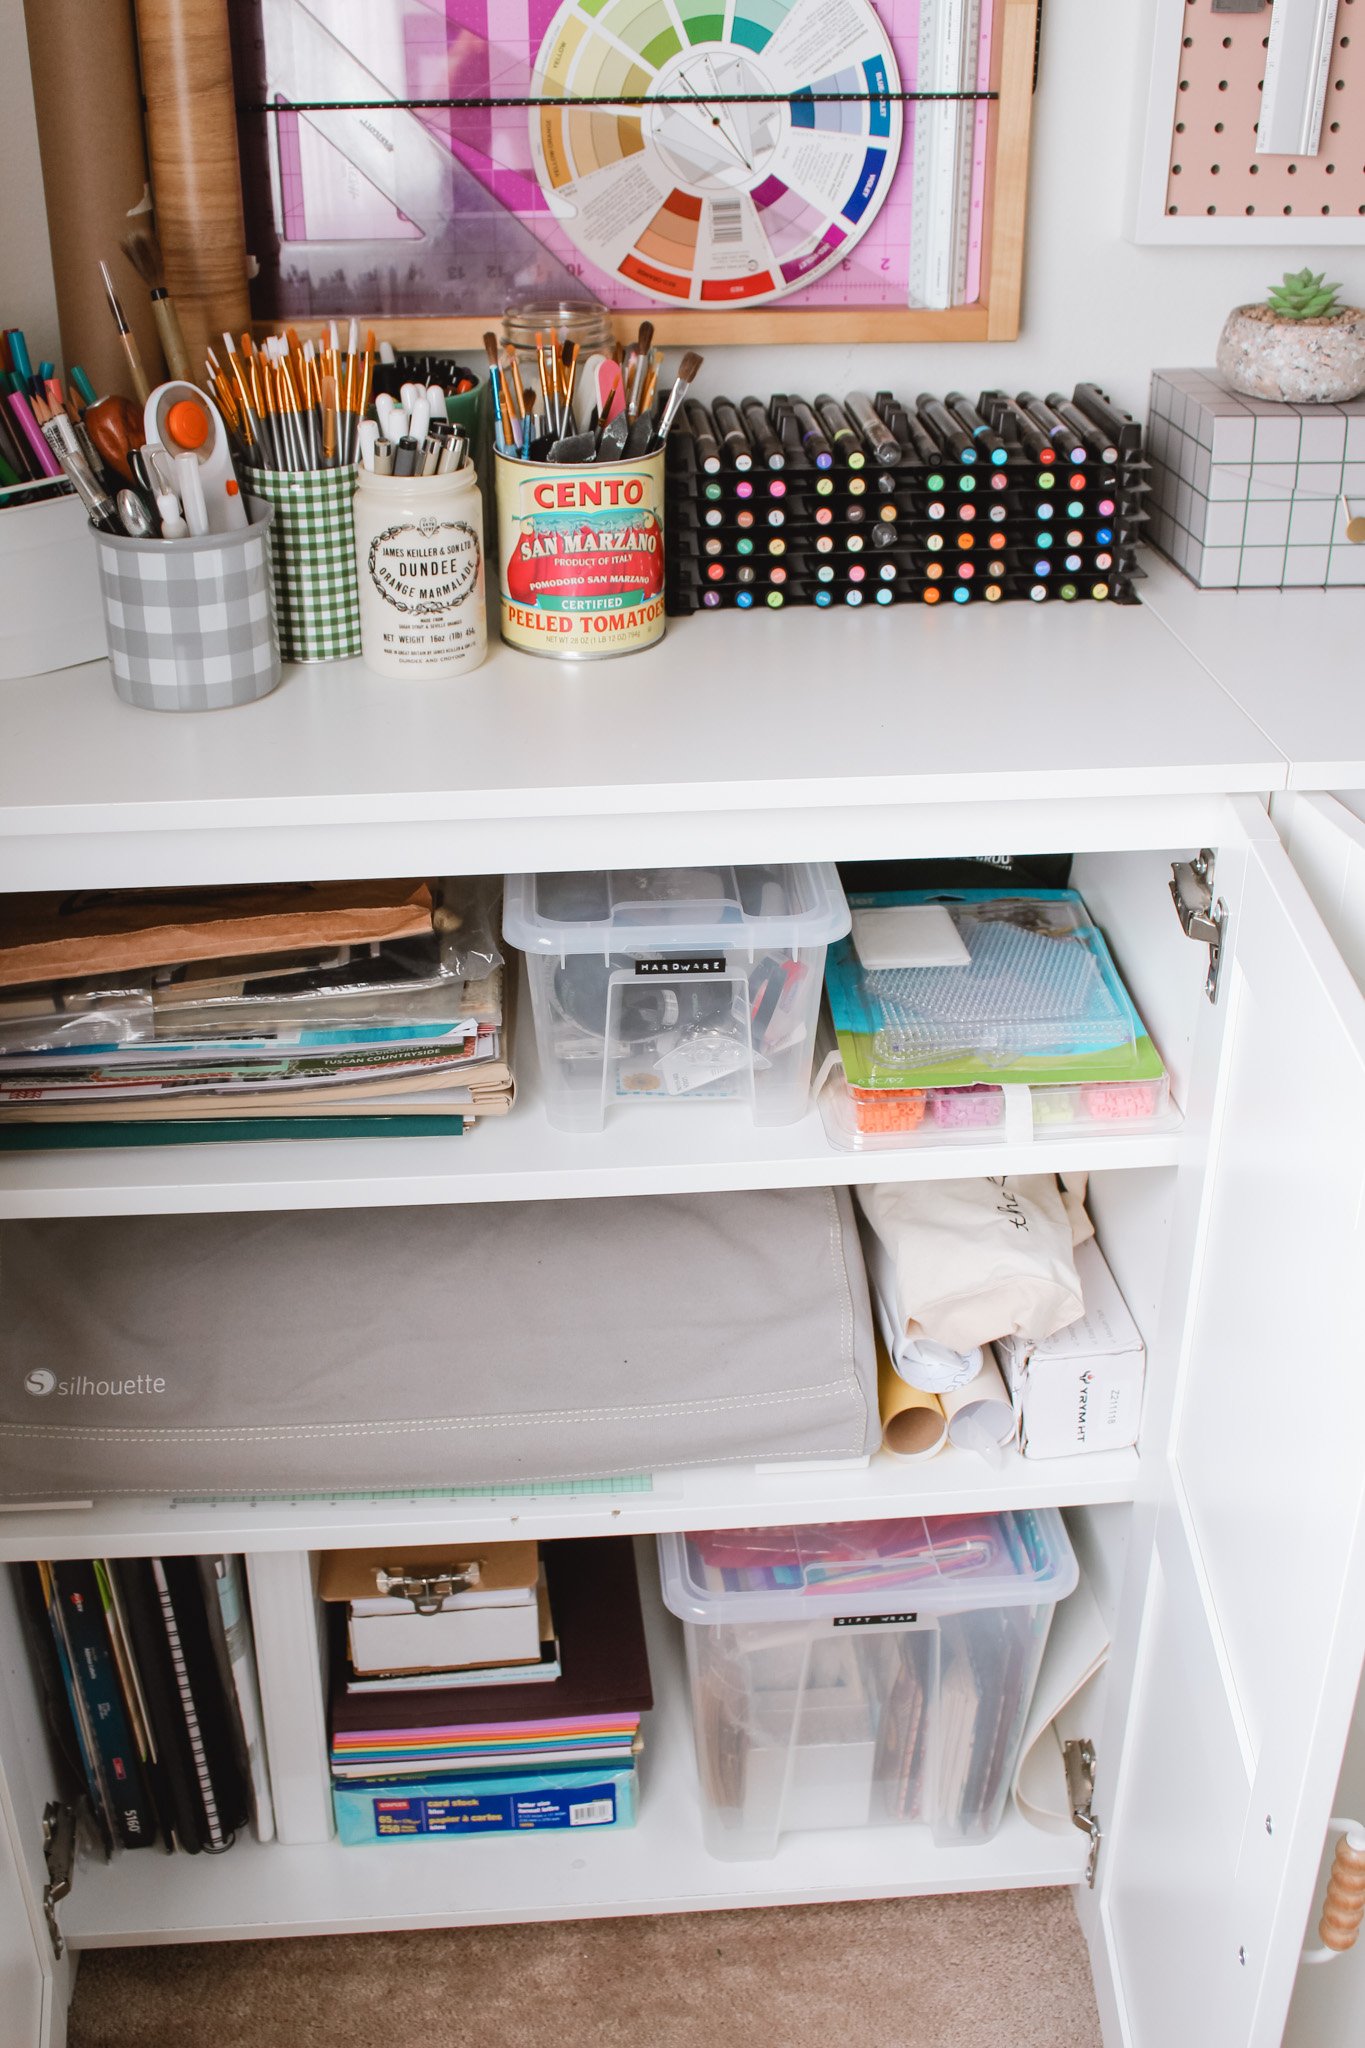
7. Use open-top bins for easy access
Sometimes you are in the middle of a project and just need to grab a roll of masking tape really quick and you don’t want to have to hunt through a large bin of stuff. I find open-top bins perfect for things like this (tape, glue, hot glue gun, etc.) that I access often.

8. Don’t be afraid of a miscellaneous box
There are going to be a ton of things that just don’t match with anything... I don’t care how good of an organizer you are. I always have at least one miscellaneous box for all the odds and ends. Once you collect more supplies you can always revisit your categories and maybe there is a whole category of items currently sitting in your miscellaneous box. But until then, these items will sit waiting for their time to shine — Side note: as a kid we had a toy closet in our house where my mom kept all our toys and games organized and we had a box just like this called the “interesting things” box — so feel free to steal that name too :P
9. Group categories even further (if possible)
Depending on the storage you are using, this may or may not make sense for you, but I find it helpful to take the organizing even a step further and sort bins based on even larger categories. So for example, I have three cabinets in a row in my studio space. The first one I tried to keep all paper type products, like colored paper, Silhouette machine, scrapbooking supplies, gift wrap, etc. Then the second cabinet is more general crafting categories, like beads, paint, wood, ribbons, embellishments, etc. Then the third cabinet is more textile based supplies like yarn, fabric, felt, etc. This one was not 100% successful given my limited amount of room (I had to fit bins wherever I could fit them), but if I had a much larger closet space I think this system would be extra helpful!
10. Labels are your friend
I love making labels (thrilling, I know), they just complete the organizing project so perfectly. I love how clean it looks to have a matching label on all your bins and it also helps you to know just where to find whatever you’re looking for. For my labels I used the DYMO embossing label maker. You could also print a piece of paper with the category name and tape it inside the front face of your bins if you’re using clear boxes. I have also used a white chalk paint pen before and handwritten the category on the outside of each box.
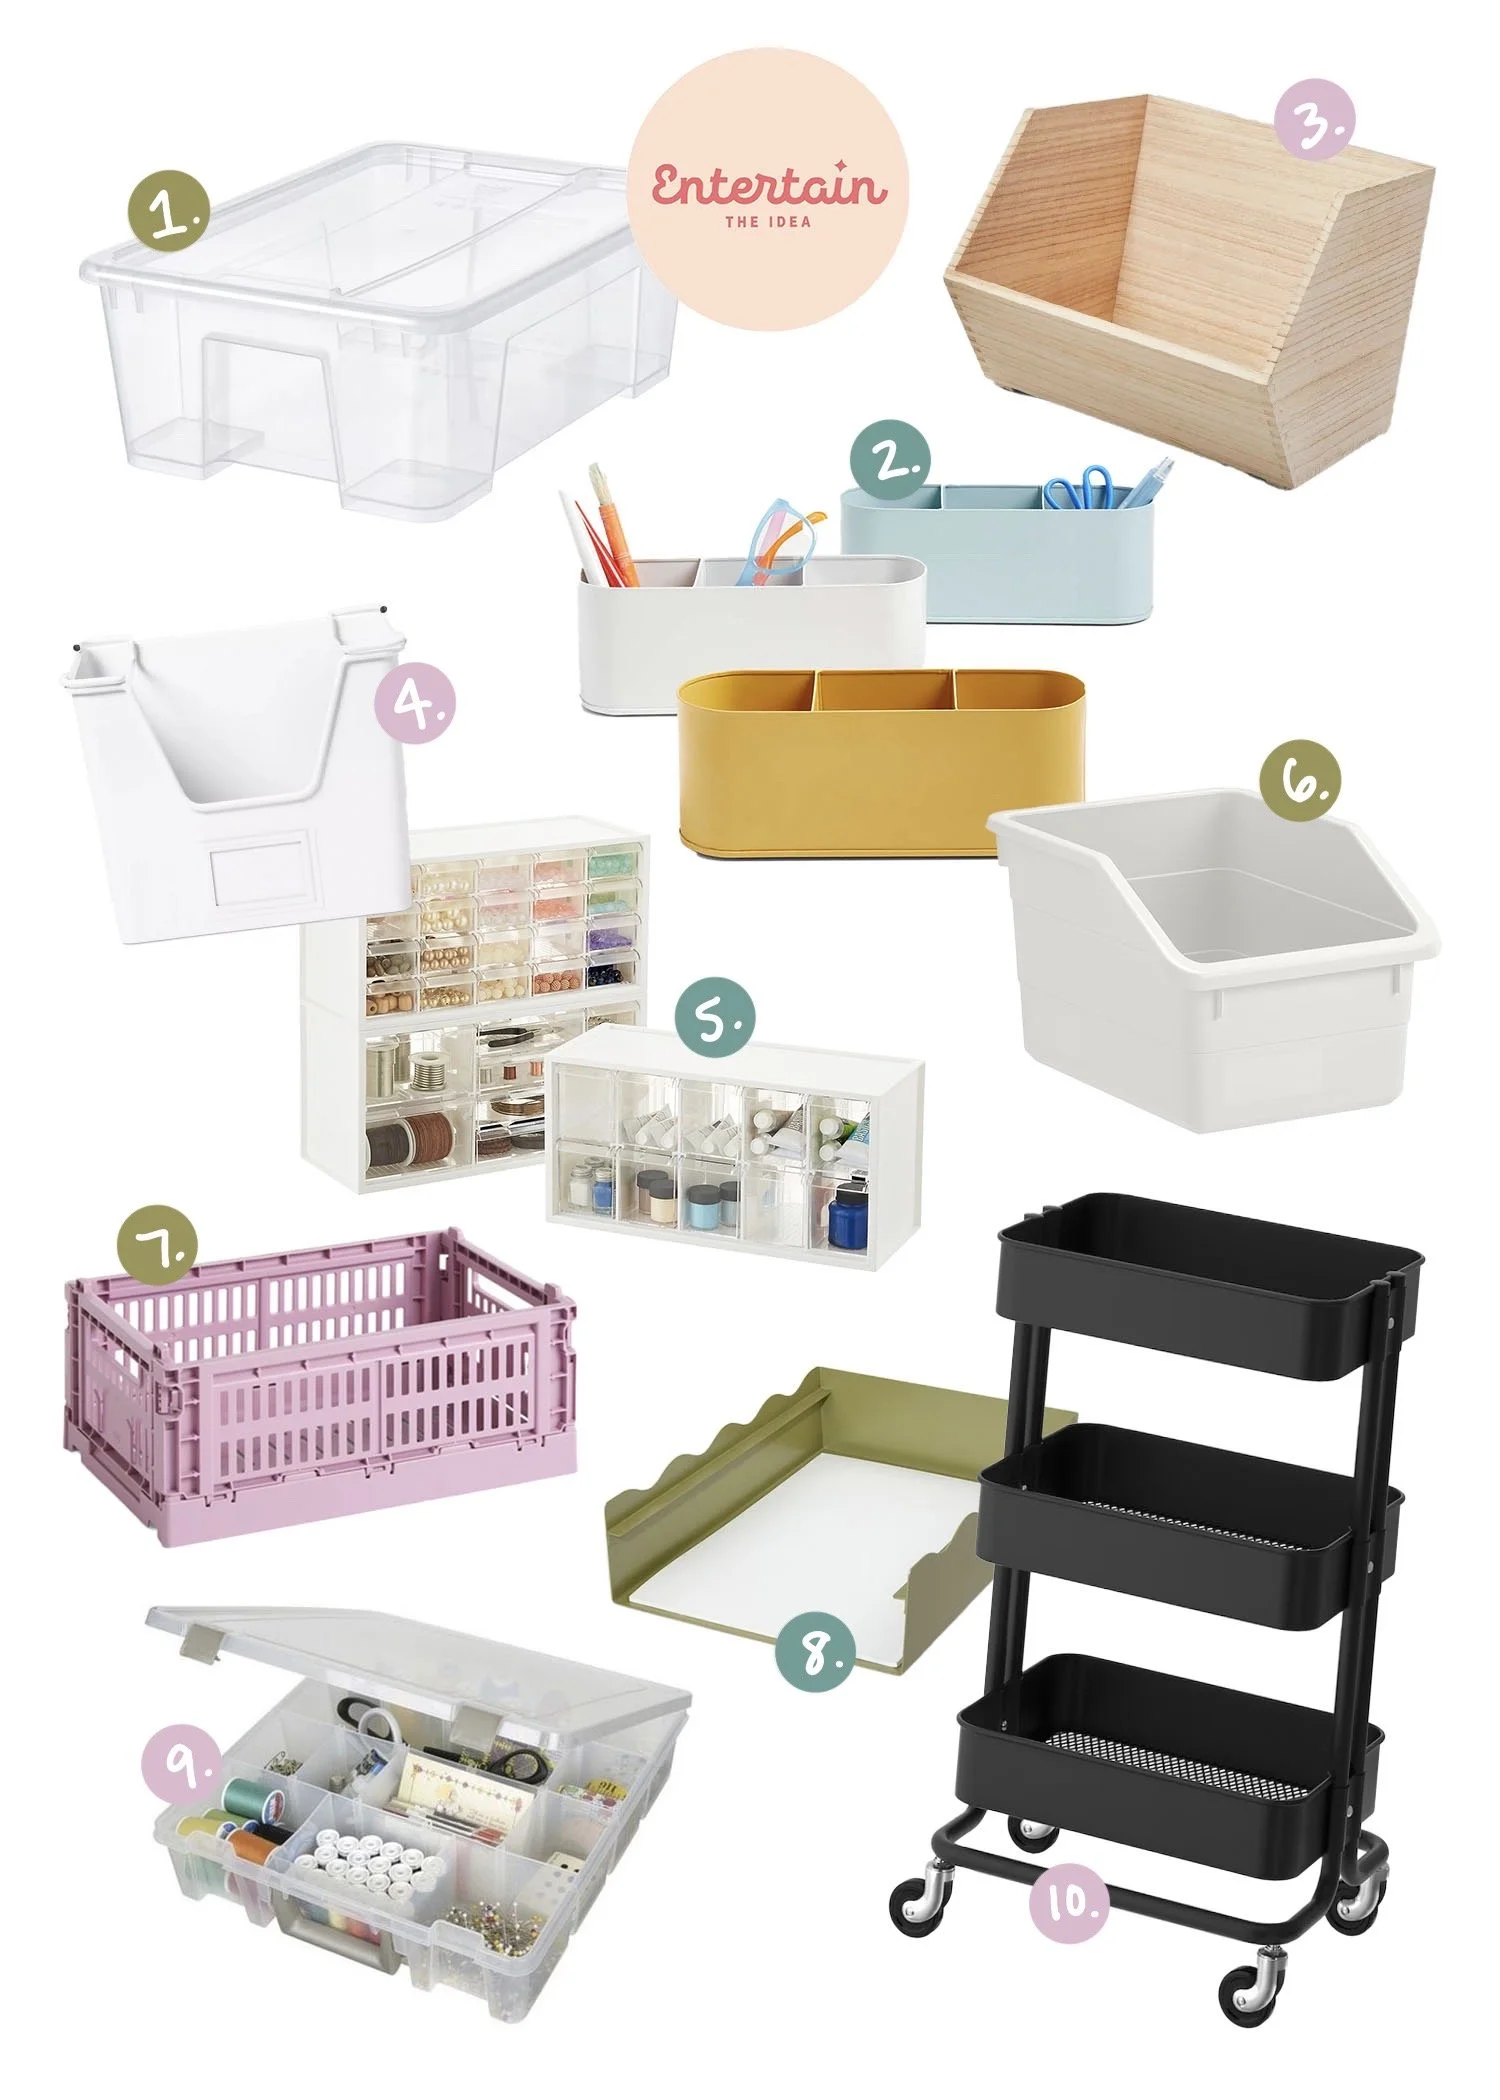
Here are a few of my favorite organizing bins and products to help keep your craft supplies in order:
FAVORITE ORGANIZING BINS FOR CRAFT SUPPLIES
I hope these tips were helpful to you and help inspire you to tackle your next organizing project — whether it’s art supplies or really anywhere in the house! Happy organizing :)
xo Rachael

