
DIY Easter Egg Place Card Holders (& Printable!)
Every Easter growing up, my siblings and I would dye Easter eggs with my Grandma. I loved the tradition and I loved coming up with cute color combinations and learning new tricks with taping off the egg or drawing designs with a wax crayon before dipping them into the dye.
As much as I loved the process of dying eggs, it can be quite the process to prepare the hard boiled eggs, setup all the glasses with dye, setup a drying station, etc. And without my family close by and no kids yet, I just can’t be bothered to set up the whole operation just for me and Daniel to enjoy (okay but would I do it to show Kevynn and take her photo with the eggs? … yes, yes I would).
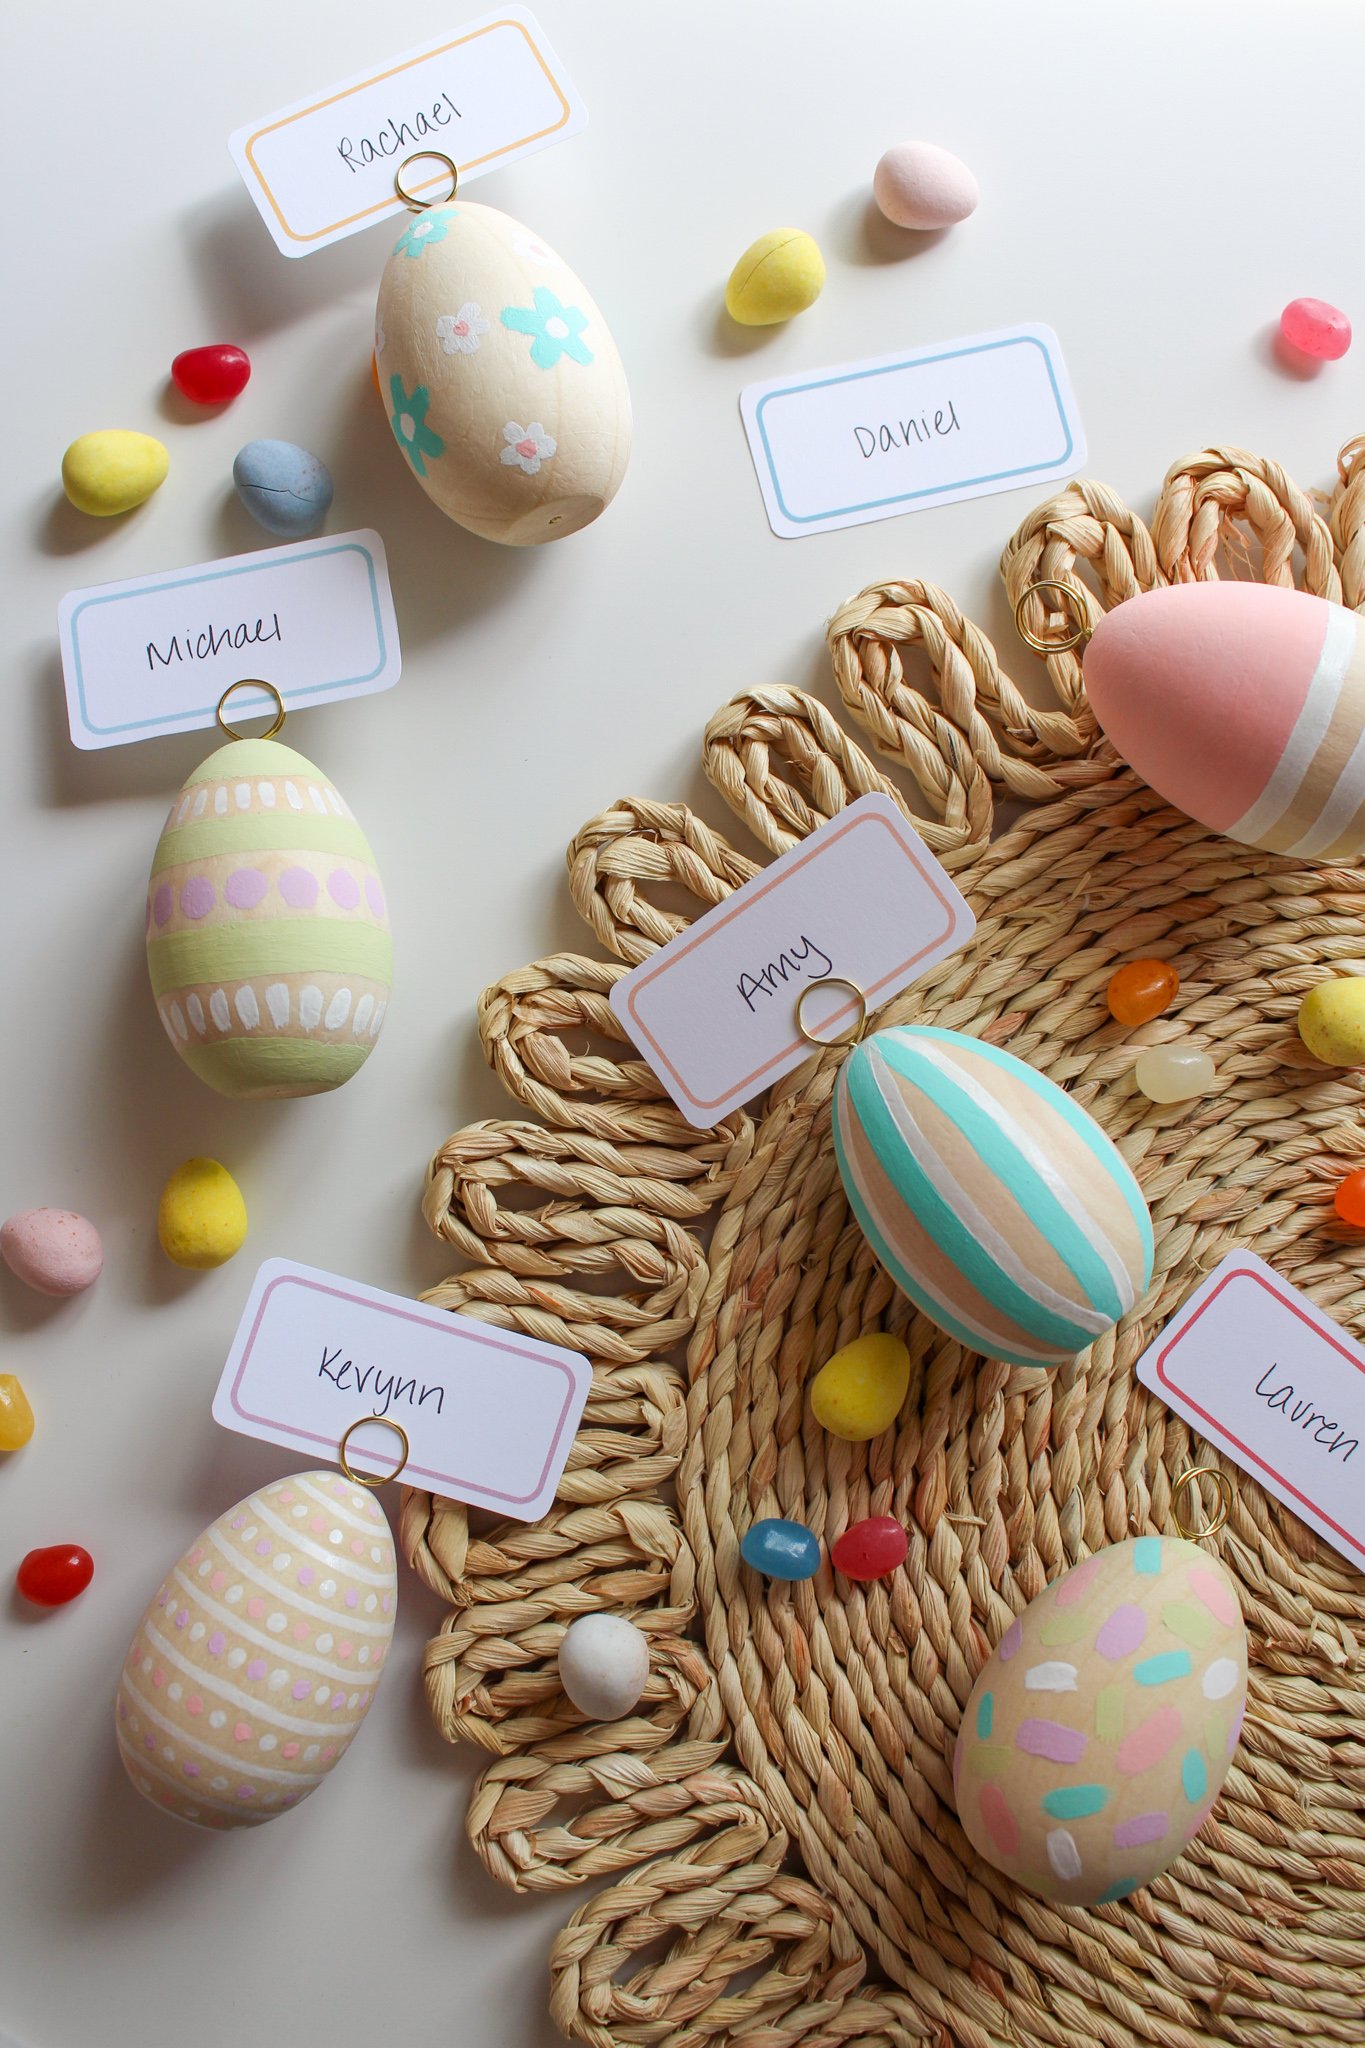
If you too are looking for a fun Easter project without the mess, you will love these cute painted wooden Easter eggs! They’re a great way to get creative this season and they are also a useful hostessing item to be used for years to come! Follow along on how I made these Easter egg place card holders below.
DIY EASTER EGG PLACE CARD HOLDERS & PRINTABLE
You will need:
Acrylic paint
Paint brushes
Thick wire
Needle nose pliers
Drill (with 1/16 drill bit)
Craft adhesive
ETI Printable Easter Place Cards (download below!)

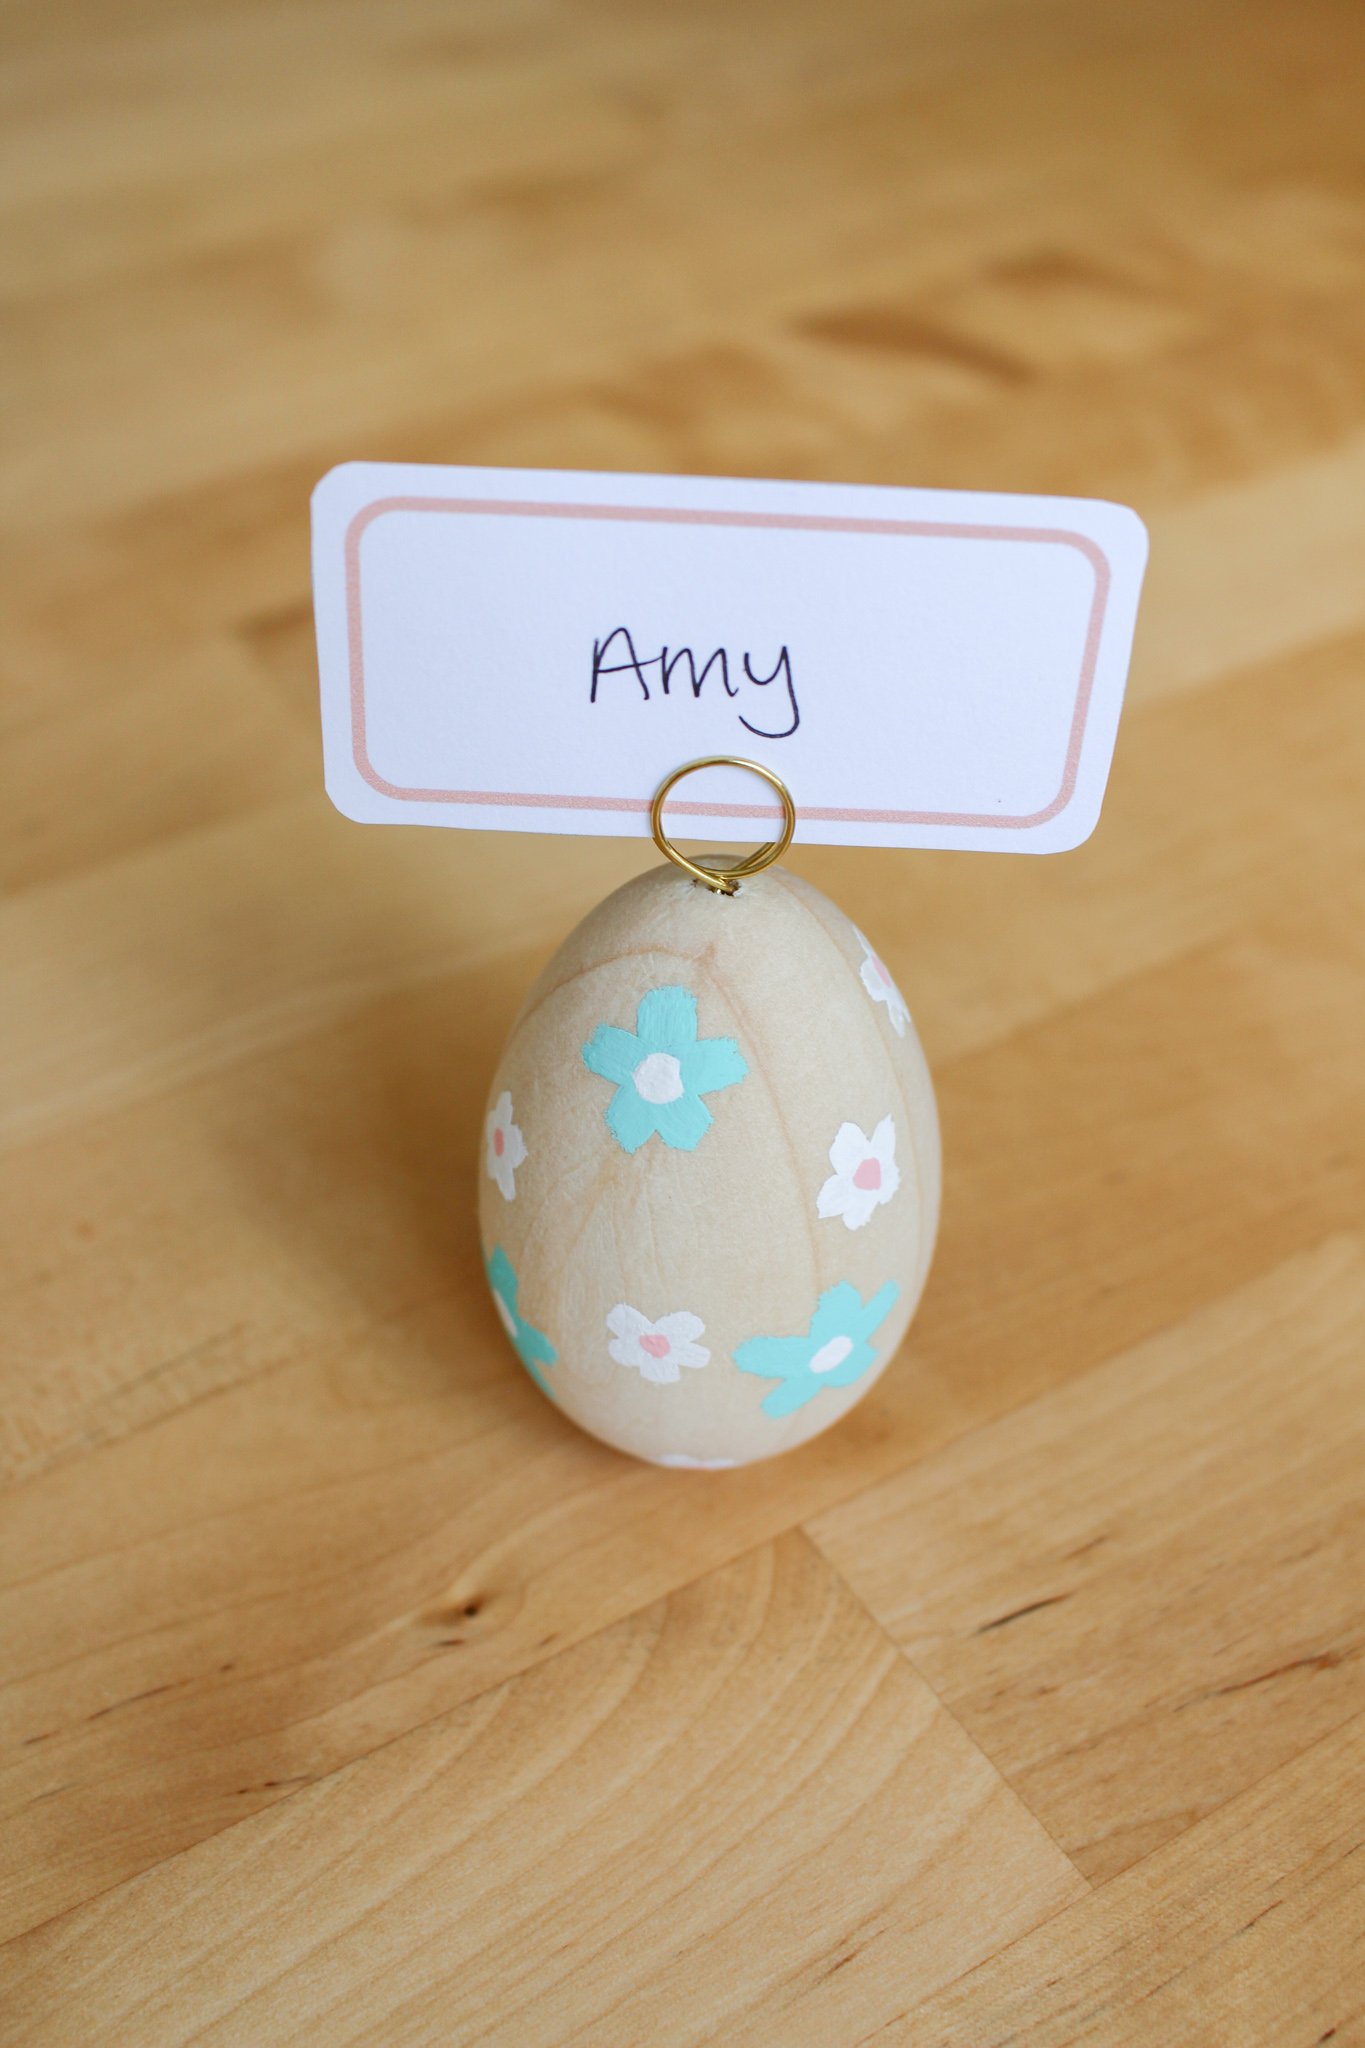
STEP 1: You will begin by painting your wooden Easter eggs with acrylic paint. Polka dots, stripes, color block, flowers, paint strokes, anything you want! I found that I really only needed one coat of the more vibrant colors, and maybe two at the most for white.
**Tip! If you want all your paint colors to look more cohesive together, try mixing them all into the same tint — for this project I wanted all my paint colors to be light pastel colors, so I started by pouring some white paint then adding a bit of the color to the white and mixing until I got to my desired pastel color. Always start with white paint and add your color, it is much easier than trying to add white paint to colored paint.

STEP 2: While your painted eggs dry (this should only take about 15 minutes for craft acrylic paint), let’s get started on the actual place card holder pieces. Cut about a 5” piece of your wire. Wrap the center of the piece of wire around a pen or pencil to create two loops right next to each other. Use your needle nose pliers to pull the wire tight around the pen and then to twist the two ends together.
As you’re twisting the ends together, make sure this is bringing the two loops very close to each other. You want the two loops to be touching so that they can properly hold your place card in place.
Repeat this step with as many place card holders as your would like to make.


STEP 3: Using your drill and a 1/16 drill bit, drill a hole through the top of your wooden Easter eggs straight down. You only need to go down about 1/2 inch or so.
Trim your wire pieces so they just have a small end (as shown in the photo below).

STEP 4: Add a drop of glue or craft adhesive into the hole, then push in the tail end of your wire piece. You may need to screw it in circles a bit to get it to fit so that all that is showing are the round loops. Allow the glue to set overnight.

STEP 5: And for the final step, print out our handy Blank Easter place cards printable that can be found above! Carefully cut out the place cards along the light grey line. Fill in your blank place cards with your guests names & carefully slide the card between the two wire loops of each place card. And you’re done!


These place cards are sure to add an adorable touch to your Easter tablescape! If you need some more Easter table decor inspiration, be sure to check out my friend Ashlee’s blog Bourbon & Rose for her delightful Easter brunch table. I’m especially loving the beaded bunny ear cake topper. So stinkin’ clever!
If you make your own Easter egg place card holders, I would love to see how your table turns out, tag us on instagram @entertainidea! Happy Easter, friends!
xo Rachael

