
Faux Ceramic Vase DIY (for Spring!)
Spring is just days away, and I’m so ready to fill every room of my apartment with an endless supply of fresh flowers. They are just an immediate mood booster and a fun pop of life and color into your space. I am a huge fan of the flowers at Trader Joes. You really can’t beat the price and you are there buying groceries anyway, so why not add a fresh bouquet to your cart on your way in… don’t mind if I do :)
I’ve recently been seeing this fun faux ceramic paint trend sweeping the interweb on TikTok, instagram, and the DIY blog community. If you haven’t seen it yet, people have discovered that they can get the look of a ceramic pot or vase by just adding a bit of baking soda to their acrylic paint and painting this on any old glass vases they have lying around. It is a super inexpensive way to get the look of a terracotta pot out of items you probably already have in your home!
I decided I wanted to try it out for myself, but to put a bit of a different spin on the project, I wanted to add an embossing element to give my vase some dimension. I was actually inspired by this vase that I saw from Urban Outfitters. I loved the 3D moons, but what better shape to use this time of year than a daisy flower!
Check out my version of the faux ceramic vase trend below!
HOW TO MAKE A FAUX CERAMIC VASE FOR SPRING
You will need:
Polymer clay (you will need 3 packets of the 2oz clay — I used Sculpey III)
Rolling pin
Small flower cookie cutter
Glass cylinder vase (I found mine on the clearance aisle at Joann Fabric but you could easily thrift this!)
E6000 glue or craft adhesive
Acrylic paint
Baking soda
Paintbrush

STEP 1: Gather your supplies and wash your vase with dish soap and water, then set aside to dry. Prepare a flat surface to roll out your clay (I like to use wax paper for easy cleanup).
STEP 2: Pull off a piece of your polymer clay and work it with your hands to make it more pliable. Now using your rolling pin, roll out the clay flat to an even 1/4” thickness.
*TIP: The first few times I tried to roll out my clay, I felt like the thickness was not consistent across the surface, so if you’re using a similar rolling pin to me, I found it super helpful to set a stack of sticky notes on either side (both sides 1/4 in thick) and roll the two ends of the rolling pin over the two stacks of sticky notes. This helped the pressure stay consistent on the clay that was positioned between the two sticky note stacks.


STEP 3: Carefully stamp your flower cookie cutter shape onto the flat clay surface. Remove the extra clay from the edge then gently push the shape out of the cookie cutter. Smooth any edges or imperfections as needed.
Repeat these steps until you have 24 identical clay flowers.

STEP 4: Place your first flower at the top middle position on the glass vase and carefully flatten the clay against the rounded surface. Make sure the clay is pressed down firmly enough to adhere to the glass but not enough to damage the flower shape. Continue adding 3 more flowers down the row.

STEP 5: Next, I found it easiest to stick on the first row of all the flowers so that I could make sure they were evenly spaced out before completing each column. Continue adding the flowers down each column trying your best to match up the height to the flowers on either side.
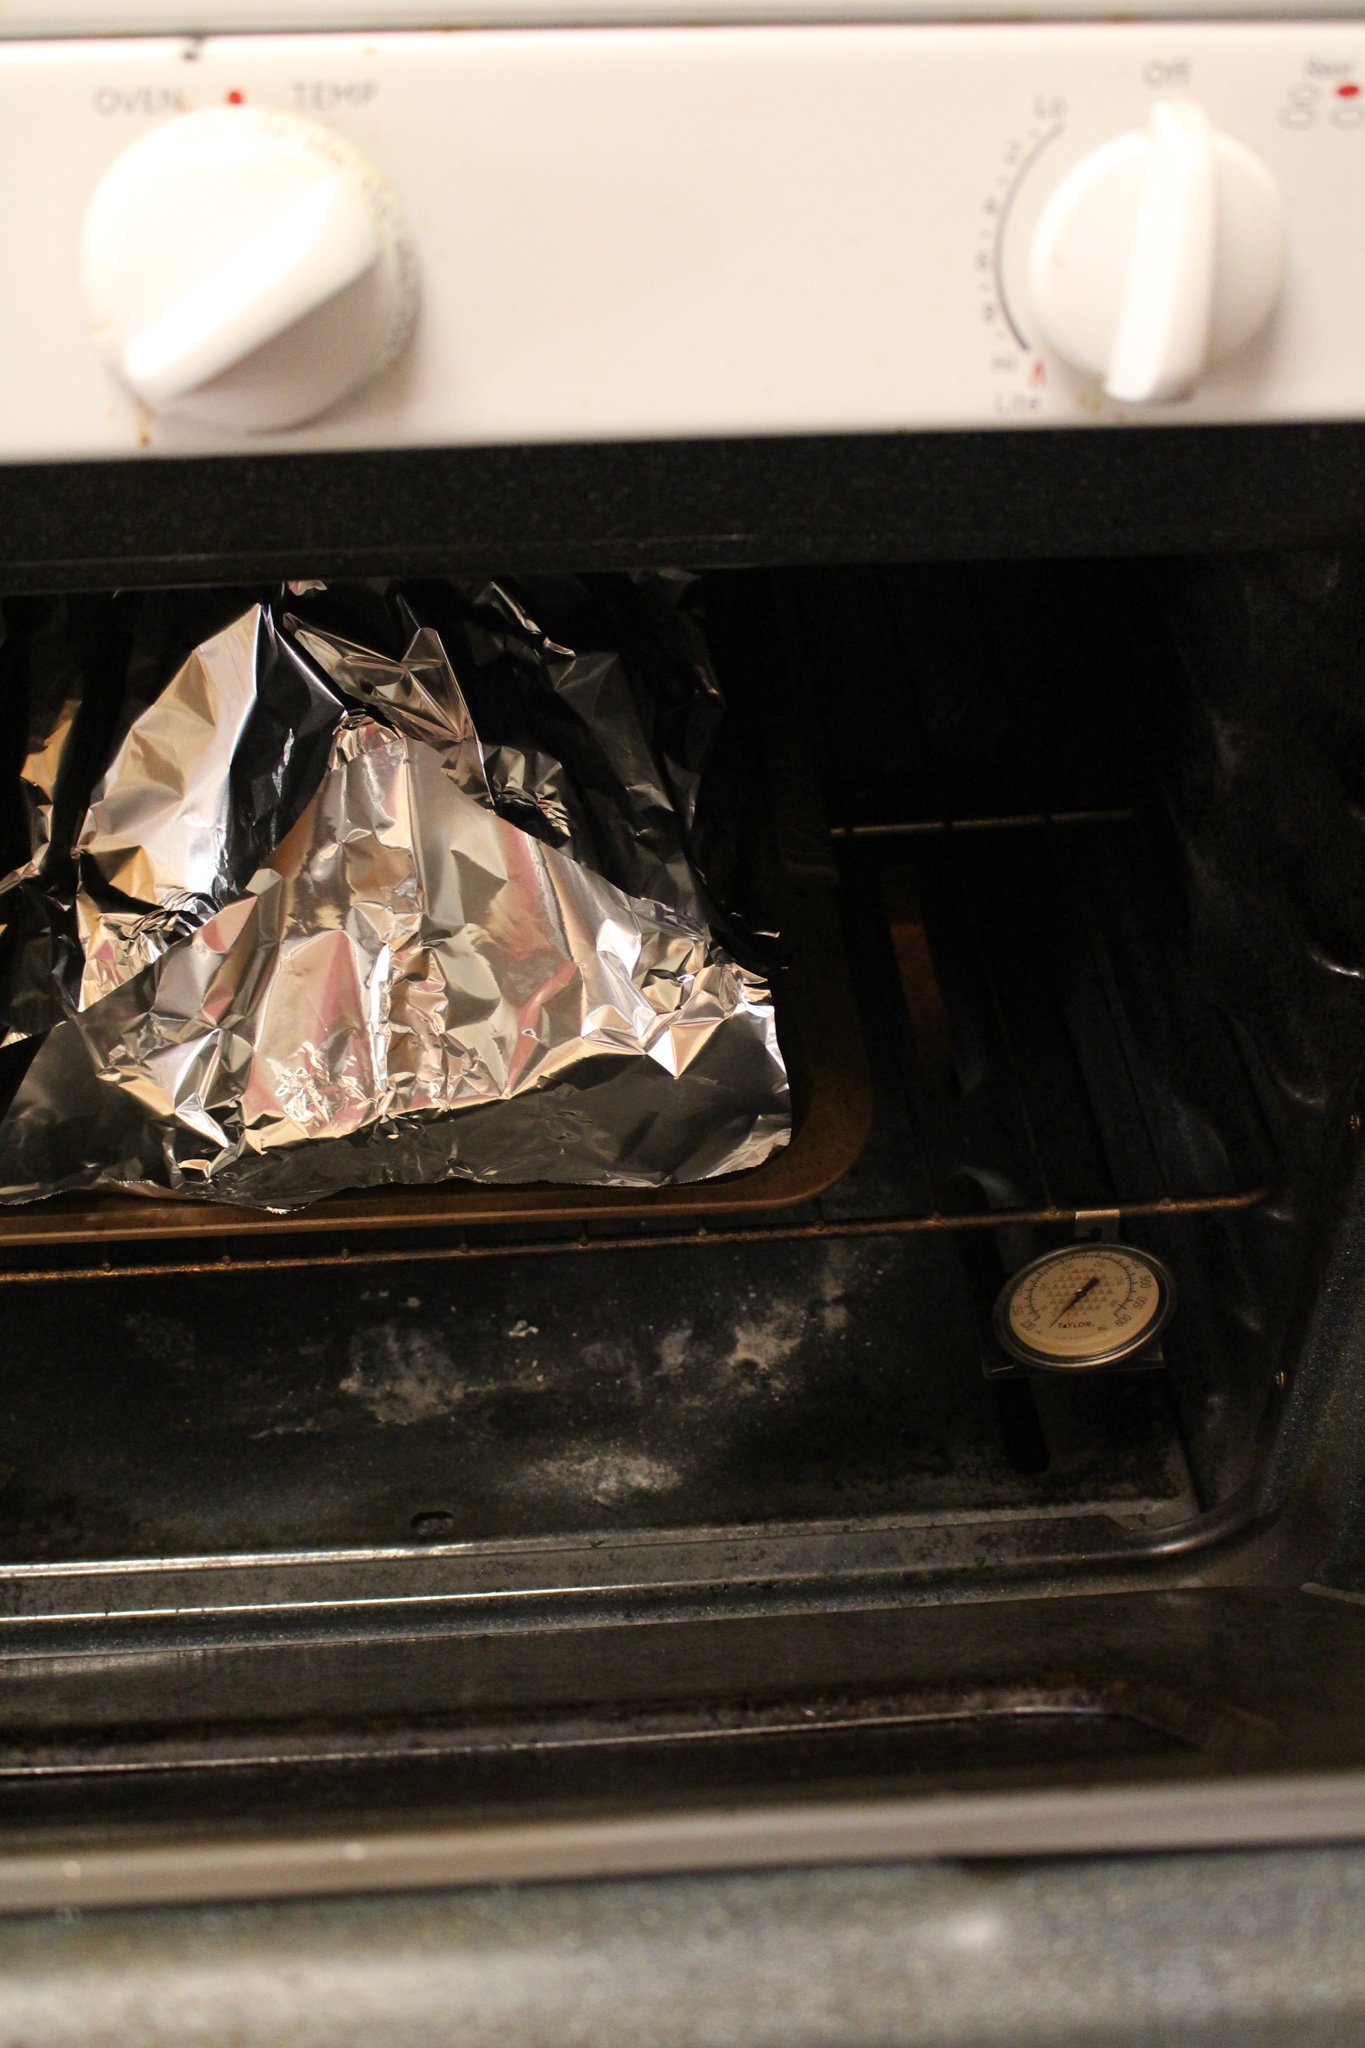
STEP 6: Once your vase is covered with the clay flowers, it is time to bake! I set my vase on a cookie sheet and I built an aluminum foil tent over the vase to protect the surface of the clay from burning. Stick your cookie sheet into the oven and then set your oven to the temperature on your polymer clay packaging (for me this was 275 degrees). You want the glass vase to heat up slowly as the oven heats to avoid the glass cracking.
Follow the baking instructions on your clay packaging. I baked my vase for 15 minutes then shut the oven off to allow the glass to slowly cool.
*Note - a few of my flowers did slide down or fall off during baking but that’s okay, we will be gluing them on permanently next!


STEP 7: Once your glass vase and clay has fully cooled, pull off each flower one at a time and then glue them down in place using a craft adhesive (I used E6000 glue). Hold each flower down for a minute as the glue is setting. Depending on the glue you use, you may also want to tape each flower in place because I found the flowers slid around while the E6000 was setting.
Allow the glue to set overnight.


STEP 8: Now it is time to mix up your paint. I used craft paint which comes in 2 oz size bottles so I dumped the entire bottle into a plastic cup, then I added 3/4 teaspoon of baking soda. This amount was able to cover my whole vase for three coats, with no problem. But if you are working with covering a larger surface, the trick is about 1 tablespoon of baking soda per 1 cup of paint.
STEP 9: Paint the entire surface of the vase and clay flowers with a thick coat of your baking soda paint mixture. Be sure to turn your vase in all directions as you’re painting to make sure you are getting in all the crevices between the flowers and the glass. Allow to dry for a few hours, then repeat with a second coat. Again, allow to dry, and then return for one final coat across the whole vase.
Since the texture of the paint is more fluffy and gritty than usual acrylic paint, you can definitely be more “messy” with your painting. I liked the look of small brush strokes in different directions once my vase dried, I think this gave it a more natural stone or ceramic feel.
Allow the paint to dry overnight, and you’re done!


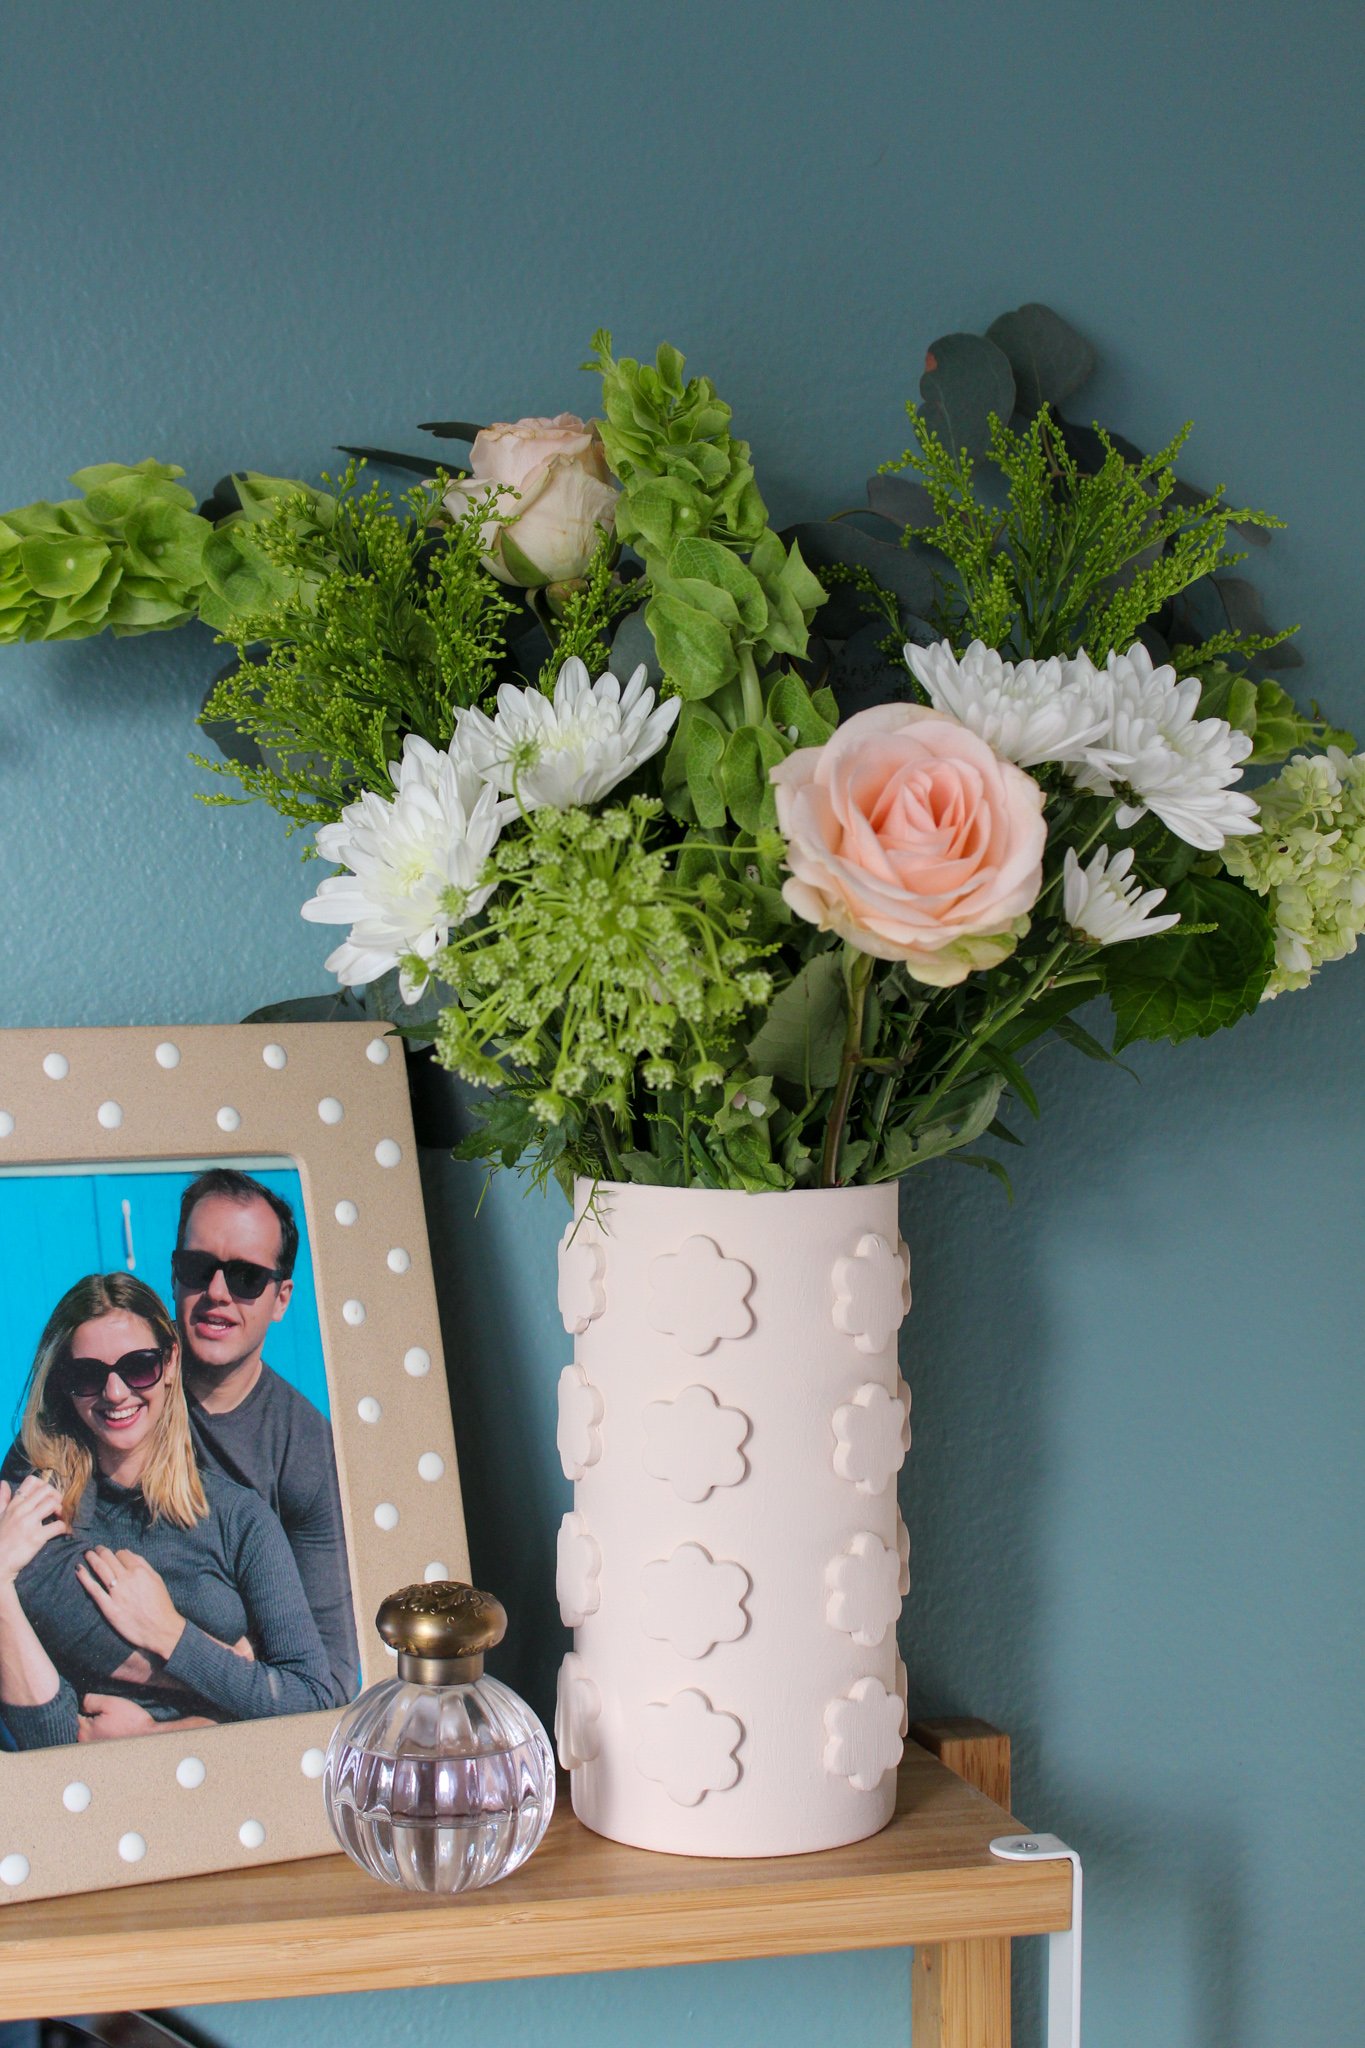
I love how this vase turned out! I would love to make a few more now with different clay shapes or different glass vase heights. I see now why people say they can’t stop doing this paint trick. It’s addicting! You definitely get an end product that looks much more expensive than it actually was to make.
What are your thoughts on the faux ceramic paint trend? Love it or over it?
xo Rachael

