
How to Tile a Serving Tray (DIY IKEA Fruktskal Hack)
Today we are sharing another Mother’s Day gift idea — or really any time of the year idea, because once you make one for mom you are definitely going to want to make one for yourself too!
I love a good IKEA hack, but having limited space in my apartment and limited access to power tools, I have been trying to think of a way that I could hack an IKEA product on a smaller scale. This project also gave me the opportunity to test out my penny tiling skills for the first time, and honestly it was super easy! I am confident that I could tile a much larger project in the future, like a bathroom floor or kitchen backsplash! The possibilities are endless.
If you’re in the same boat as me and are interested in larger DIY projects and learning new skills, this project is perfect for you to start. It took about 3 days to complete (including drying times) and I now have this adorable french bistro-inspired tiled tray for serving up a lovely Mother’s Day breakfast in bed or happy hour on the patio :) Let’s get started.

Here’s how I turned this basic IKEA Fruktskal bamboo tray into this fun & unique penny tiled serving tray!


HOW TO TILE A SERVING TRAY:
DIY IKEA FRUKTSKAL HACK
You will need:
IKEA Fruktskal tray (14” x 9”)
Spray paint in the color of your choice (I used Behr Breezeway)
Penny Tiles (one sheet of 11” x 13” size in glossy white and one sheet of 11.375” x 12.25” in matte grey)
Scissors
Measuring tape or ruler
Safety glasses
Painter’s tape
Marker
X-Acto knife & cutting mat
1 Qt. AcrylPro Tile Adhesive
1 Qt. SimpleGrout (I used the natural gray color)
Flat margin flooring trowel (6” x 2” size since we are working on a small surface)
Sponge & clean rags


STEP 1: Lay your sheet of white penny tiles inside your tray to determine how much you will need to trim off. I measured that I would need my sheet to be about 12.5” x 8.125” so cut off any penny tiles outside of that dimension. This particular penny tile sheet has small glue pieces between each tile that were very easy to cut with basic scissors.
STEP 2: Next you will want to spray paint your tray if you want to change the color. The plain bamboo color is also really nice so you could definitely leave it as is if you would like!
Make sure you move outside or to a well ventilated area to spray paint, and make sure to keep your spray paint can moving side to side as you spray to avoid excess paint that will drip down all over your project. You should be spraying small light sprays and add additional coats as it dries instead of one thick coat. I think in total I ended up doing just two coats on all sides of the tray. You don’t have to worry too much about the coat of paint on the interior of the top of the tray since that is what we are covering with tile. But do make sure to turn the tray around as you spray to get all the small details covered, like inside the tray handles.
Allow the spray paint to dry overnight.

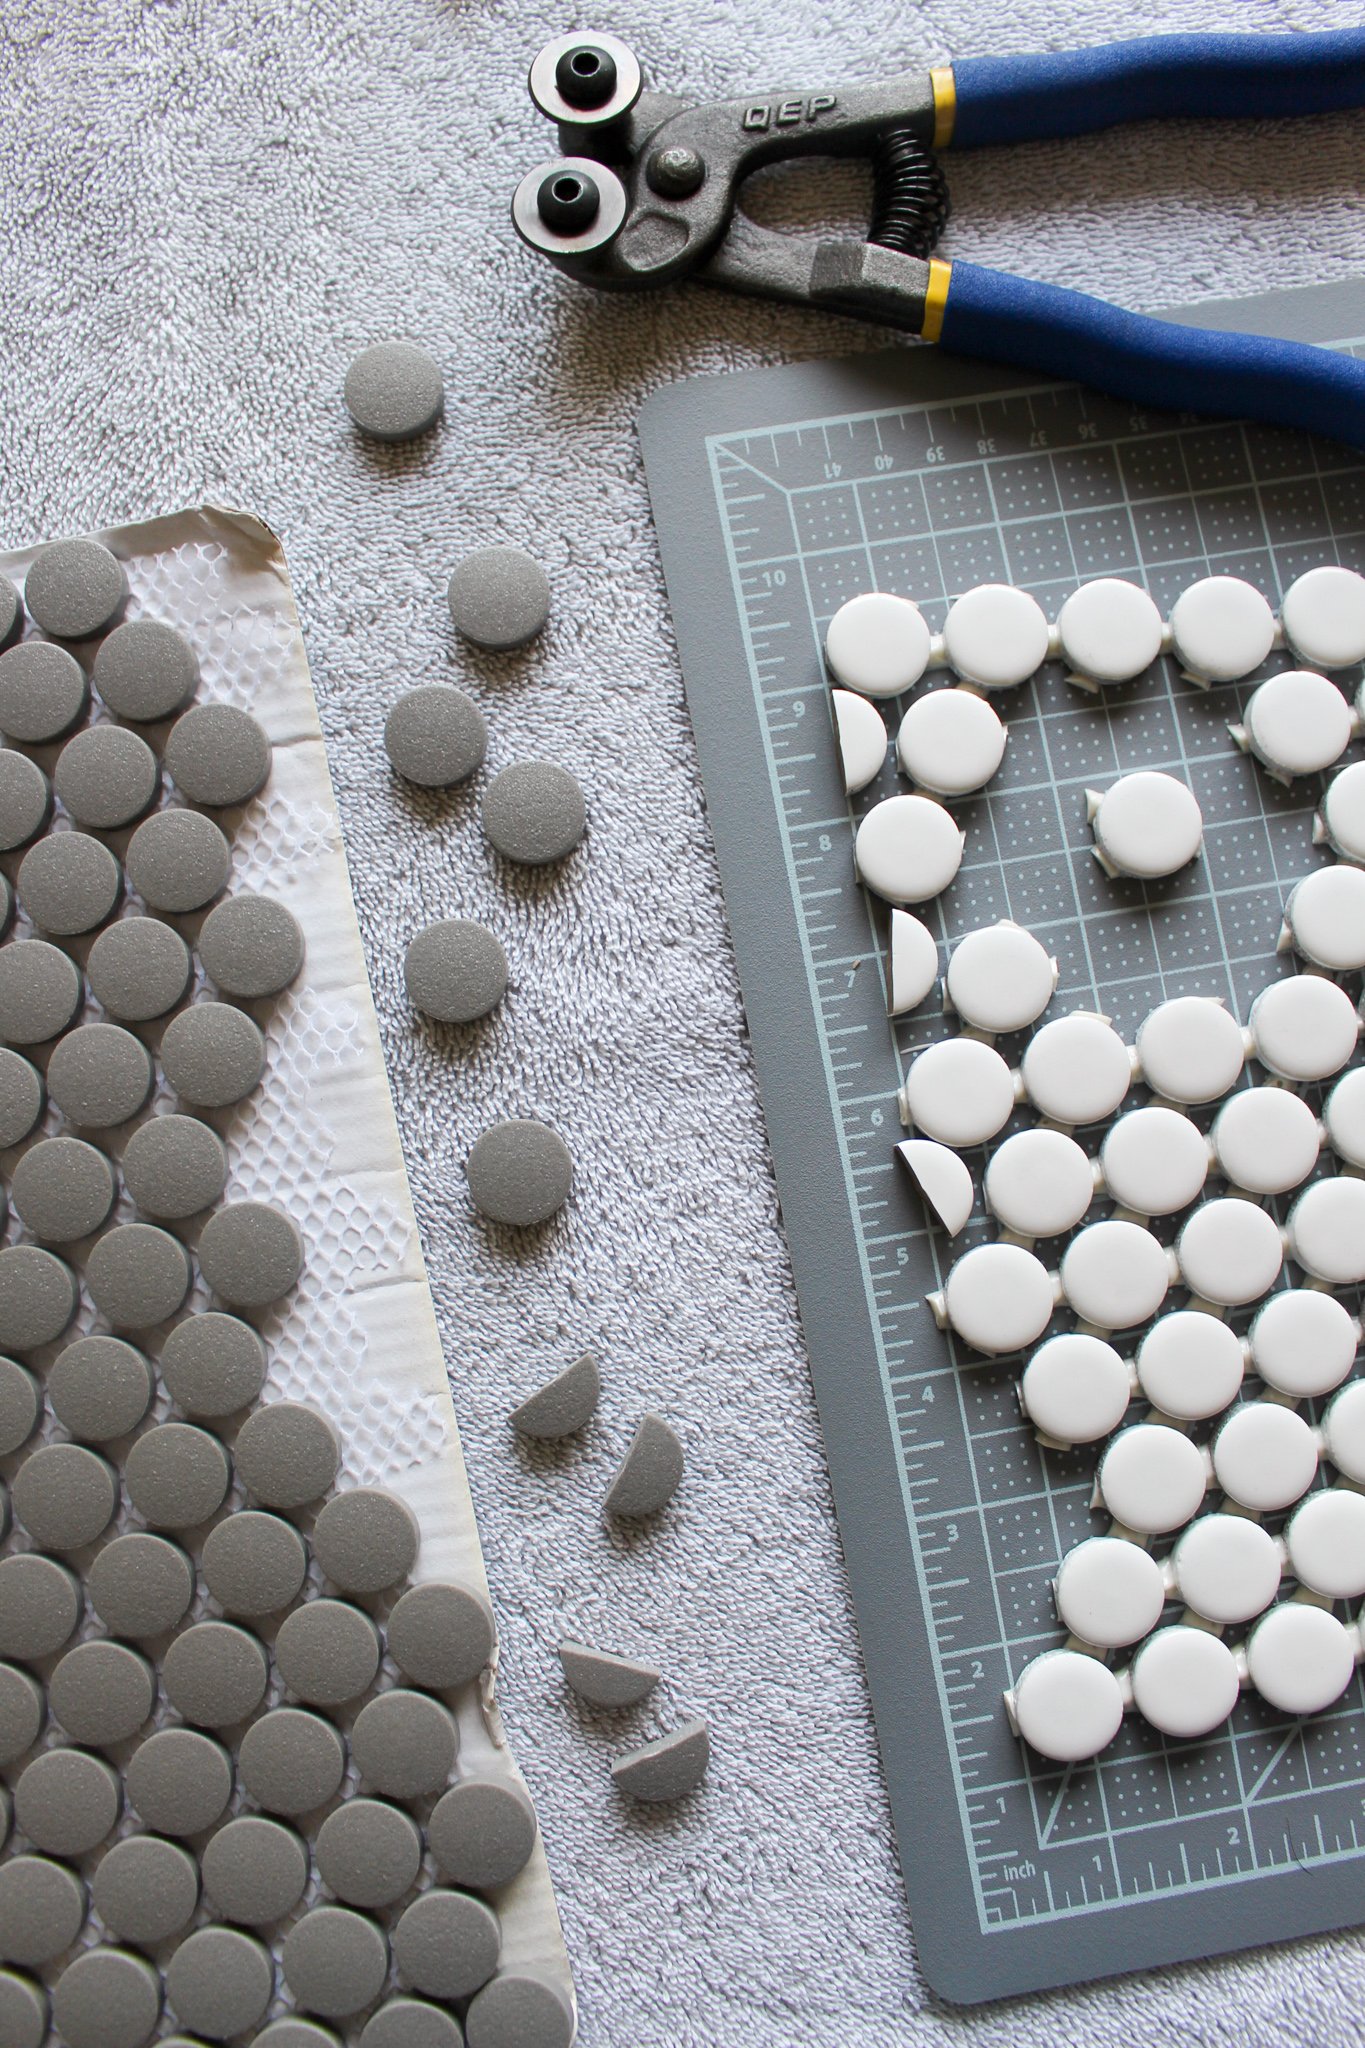
STEP 3: While the paint is drying, you can now work on cutting any penny tiles that are outside of the dimensions that you need for the tray. I found that I only needed to cut the 5 tiles on the right side of my tile sheet in half. And then I could use those excess halves to fill in the missing half slots on the left side of the tray.
To cut your tiles, I found it helpful to first lay a pieces of painters tape across the column that I am going to be cutting to give myself an edge guide of where to cut. This will help keep the tiles from shattering and flying everywhere if they do not cut correctly. **NOTE: You should be wearing safety glasses for this step of the project!
I was super nervous for this step, but the tiles all broke fairly evenly and easily. You just need to place the blade of your tile nippers against the very middle of the tile and make sure all the pressure is applied right in the very center of the tile. Give the nippers a few pumps of pressure to start the break, then squeeze them tightly in one strong quick motion and they will hopefully break right down the middle.
No worries if it doesn’t work out the first few times, you should have extra tiles remaining from your first trimming of the sheet and can try again and fill in any broken ones with new tiles.

STEP 4: Now you will want to determine which tiles will be staying and which will be removed to create your french bistro inspired flower pattern. I used a dry erase marker to mark which tiles I needed to remove before I began cutting them out using an X-acto knife. Follow along with the pattern in the photo above if you are going for the same look as my tray, but also feel free to do any pattern you want!
STEP 5: Pull off the penny tiles you will need from your sheet of grey tiles to fill in the pattern. This tile sheet came on a netted backing and it was super easy to just rip the penny tiles I needed from the sheet. For my repeated pattern I found I needed a few half size grey pieces as well, so repeat the tile cutting process on however many pieces of grey tile you need.

STEP 6: Once the paint has dried completely on your tray and your tile pattern is all prepared and ready, it is time to attach the tiles to the tray! Use your v-notch adhesive spreader tool to lay an even layer of AcrylPro tile adhesive down into the bottom face of the tray.
It is super important that this is a very thin layer so that it doesn’t seep up through the grout lines when you press the tiles in place. I made this mistake at first with using way too much adhesive and it was a mess and I had to essentially pull off all the tiles, clean them, and start again. So learn from my mistakes! Lol
You will want to use the jagged end of the tool to create these notched lines in the adhesive to help the tile attach to the surface.
Once the thin layer covers the bottom of the tray, set your tiles in place on the tray and fill in with any of your loose grey or half tiles as needed to get your pattern in place. Press all the tiles down until they are against the bottom of the tray so that all the tiles lay evenly. The adhesive takes about 24 hours to set, so you have time to slightly move the tiles around to get them all looking straight and in place once you set them in the tray.
Allow the adhesive to set for 24 hours.

STEP 7: Next it is time to grout your tile! I used premixed grout and it was super easy. Use your trowel to get a generous scoop of the grout on top of your tiles. Then use the trowel to move the grout around to cover up your entire surface. Repeat this process until all your tiles are no longer visible and covered in an even layer of grey grout.
Once you think you have enough grout covering the project, hold your trowel at a 90 degree angle against the tray and slide the trowel along the penny tiles to evenly remove the layer of grout covering the tiles. At this point it should look something like the photo above.
Now, lightly wet your sponge and run the sponge along the top of your tiles to clean off any grout still remaining on the tile surface. You will want to do this very gently to try not to pull up any grout in between the tiles. This is the grout that you want to stay.
Continue this process of sponging off the grout, rinsing out the sponge in between each brush. Once I got most of the grout off with the sponge, I found it helpful to also use a wet rag to do the same thing to really clean up the tile surfaces.
Once you are happy with your uncovered tiles, your grouting is done! Allow to set for 24 hours, but make sure to clean up all your tools as soon as you’re done to prevent the grout from hardening and becoming stuck all over them.
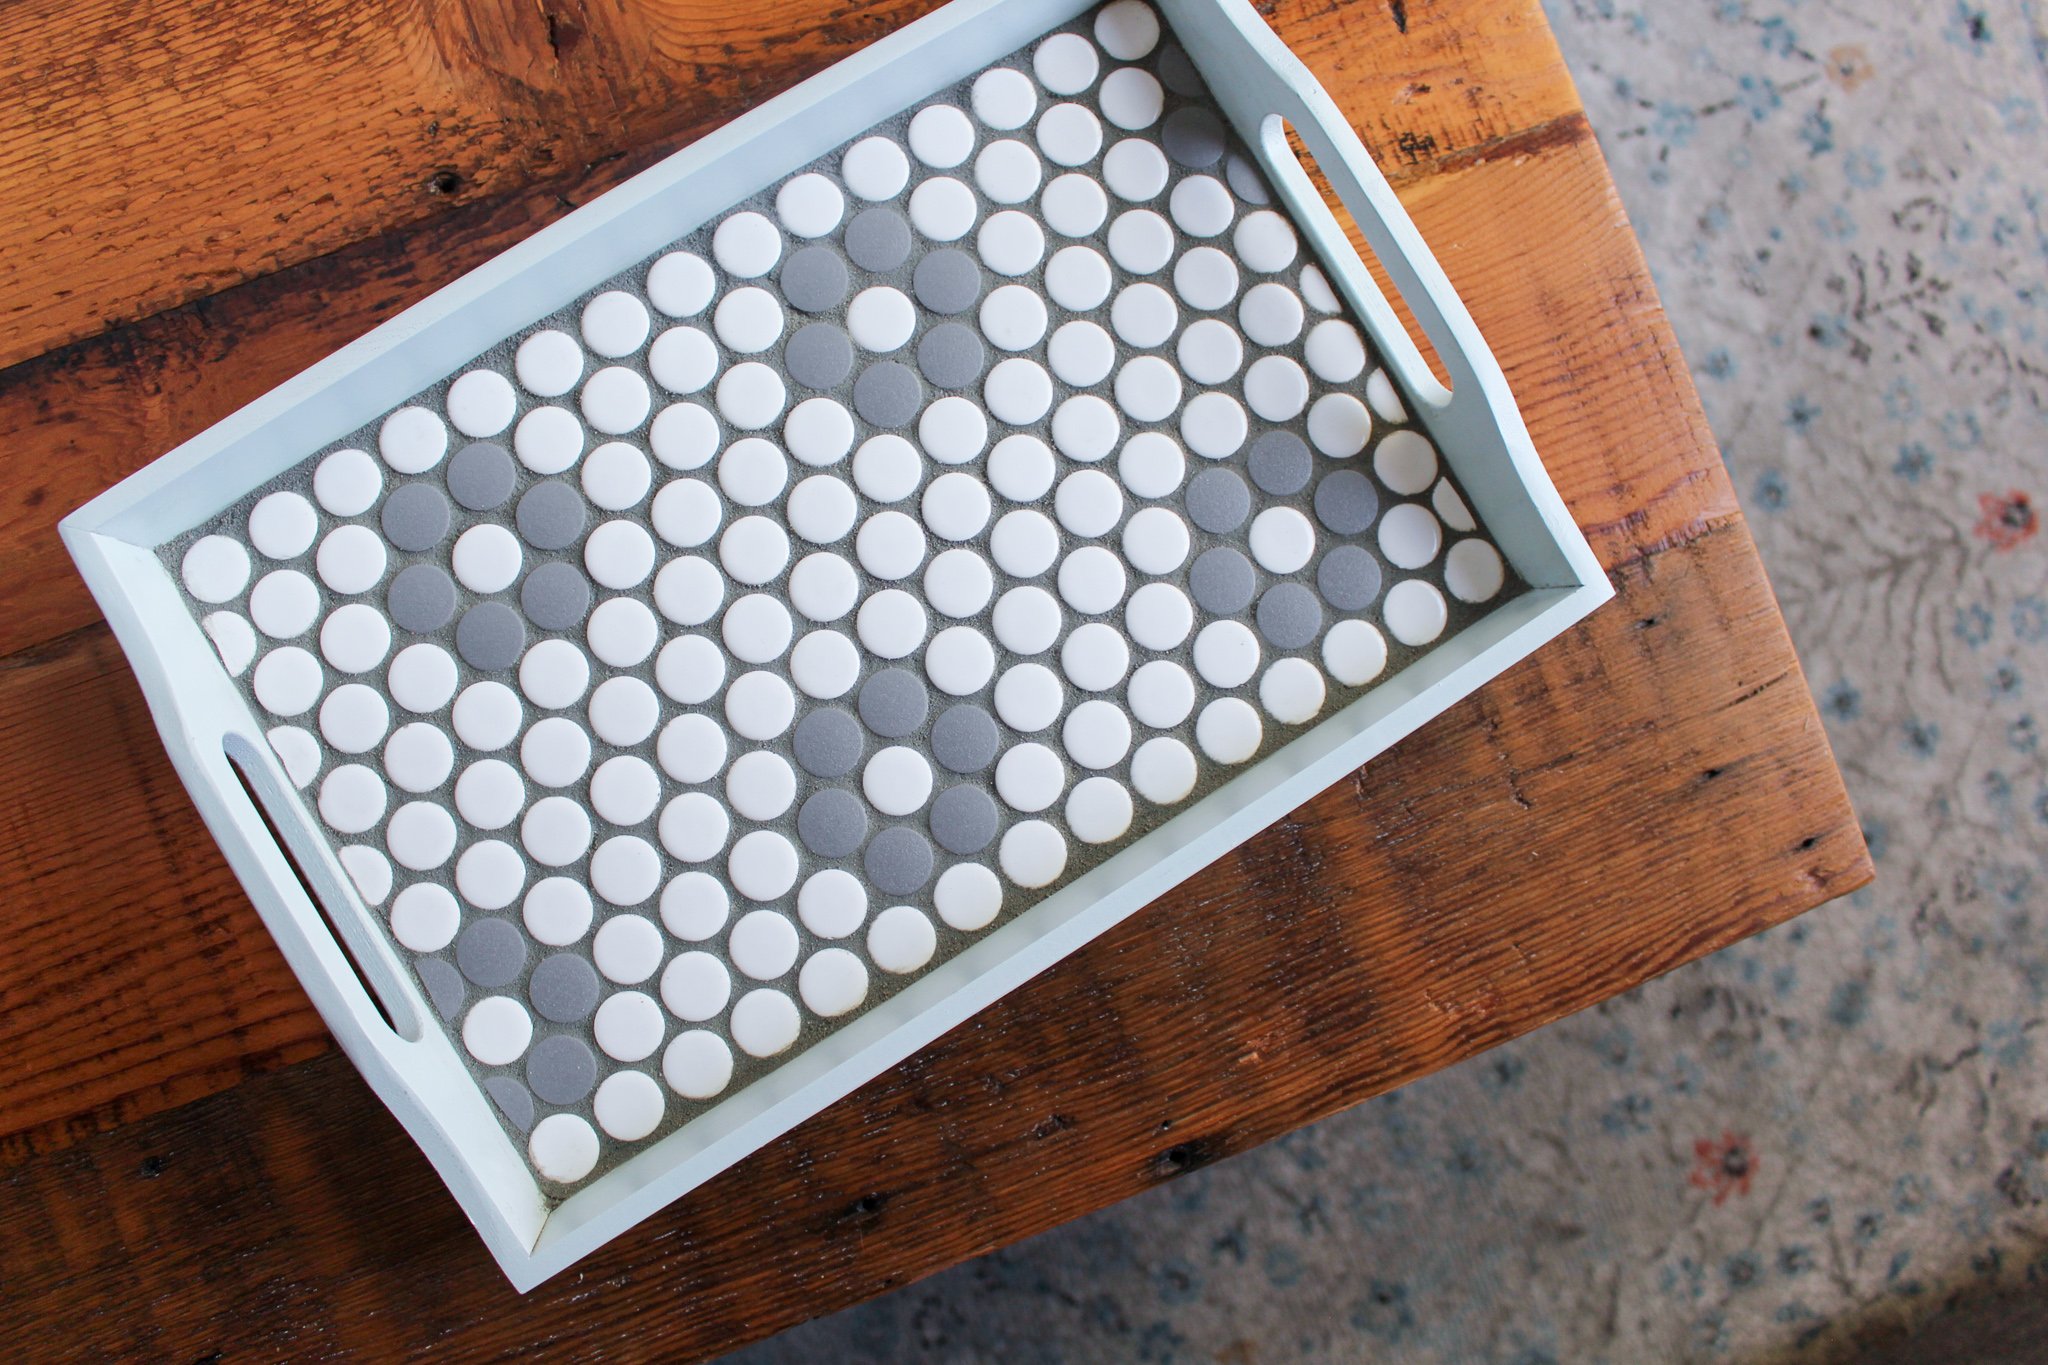
Once your grout has successfully set, your tray is complete and ready for use!! I love how this turned out and I’m so proud of my first tiling project :)
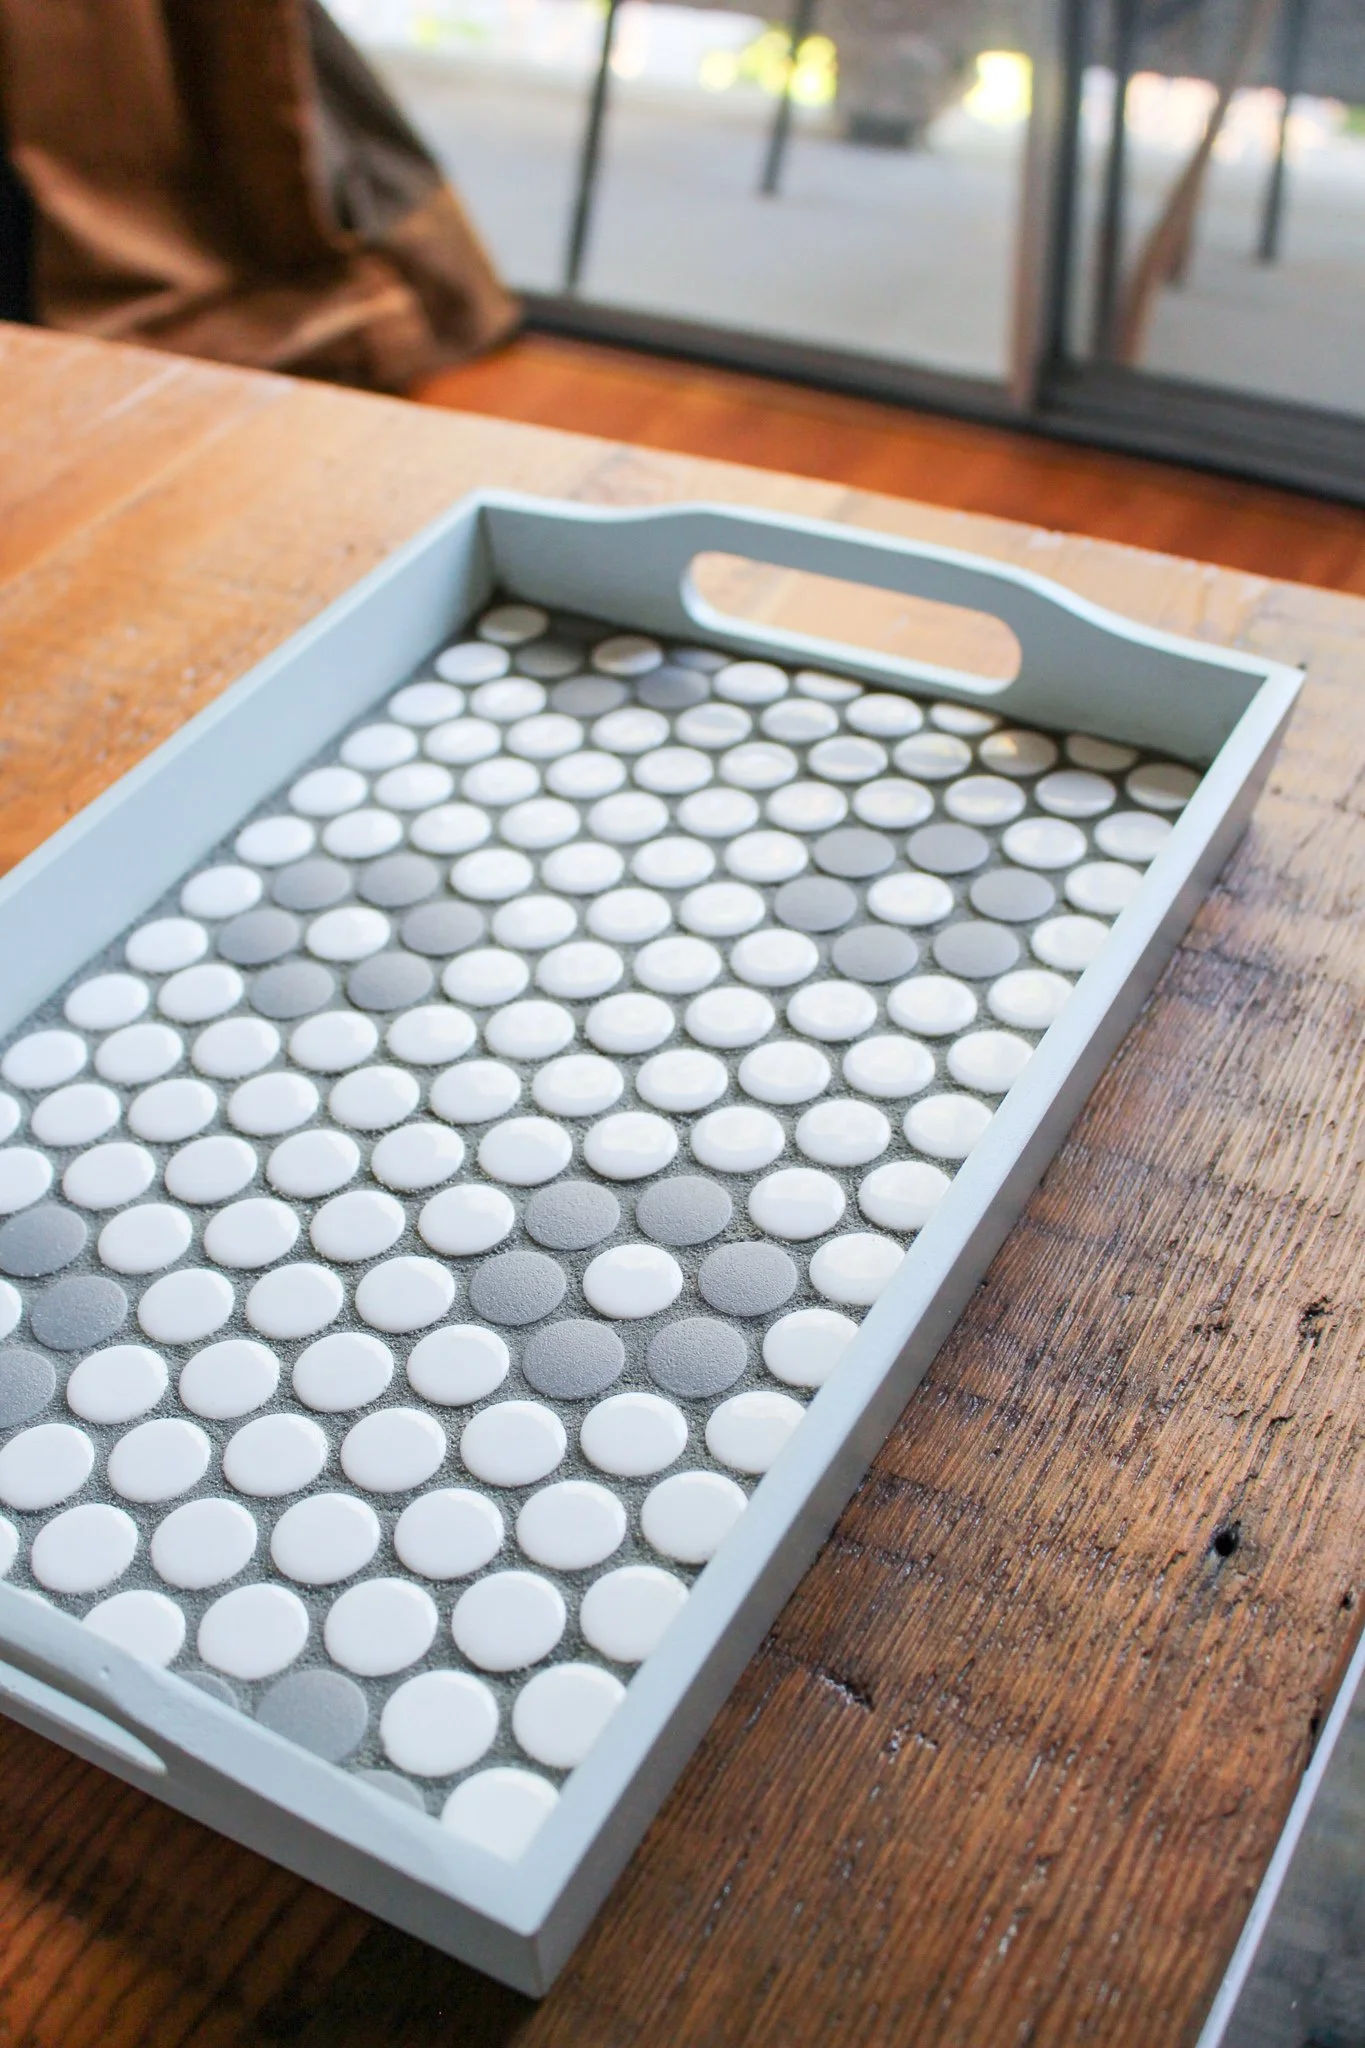


Now all that is left to do is prepare the ultimate breakfast-in-bed meal for mom! Do dog mom’s count? Because I am waiting for my breakfast, Kevynn!
Happy Mother’s Day to all the moms and mother figures out there. You all are superstars & we love you so much!!
Xo Rachael

