
Embellished Christmas Basket (IKEA Risatorp Hack)
The IKEA Risatorp basket is a crowd favorite. It’s useful for so many things; home organizing, gifting, toiletries, pantry goods, etc. etc. and it looks great while doing it! So it is no wonder that a lot of people have one of these simple baskets lying around the house.

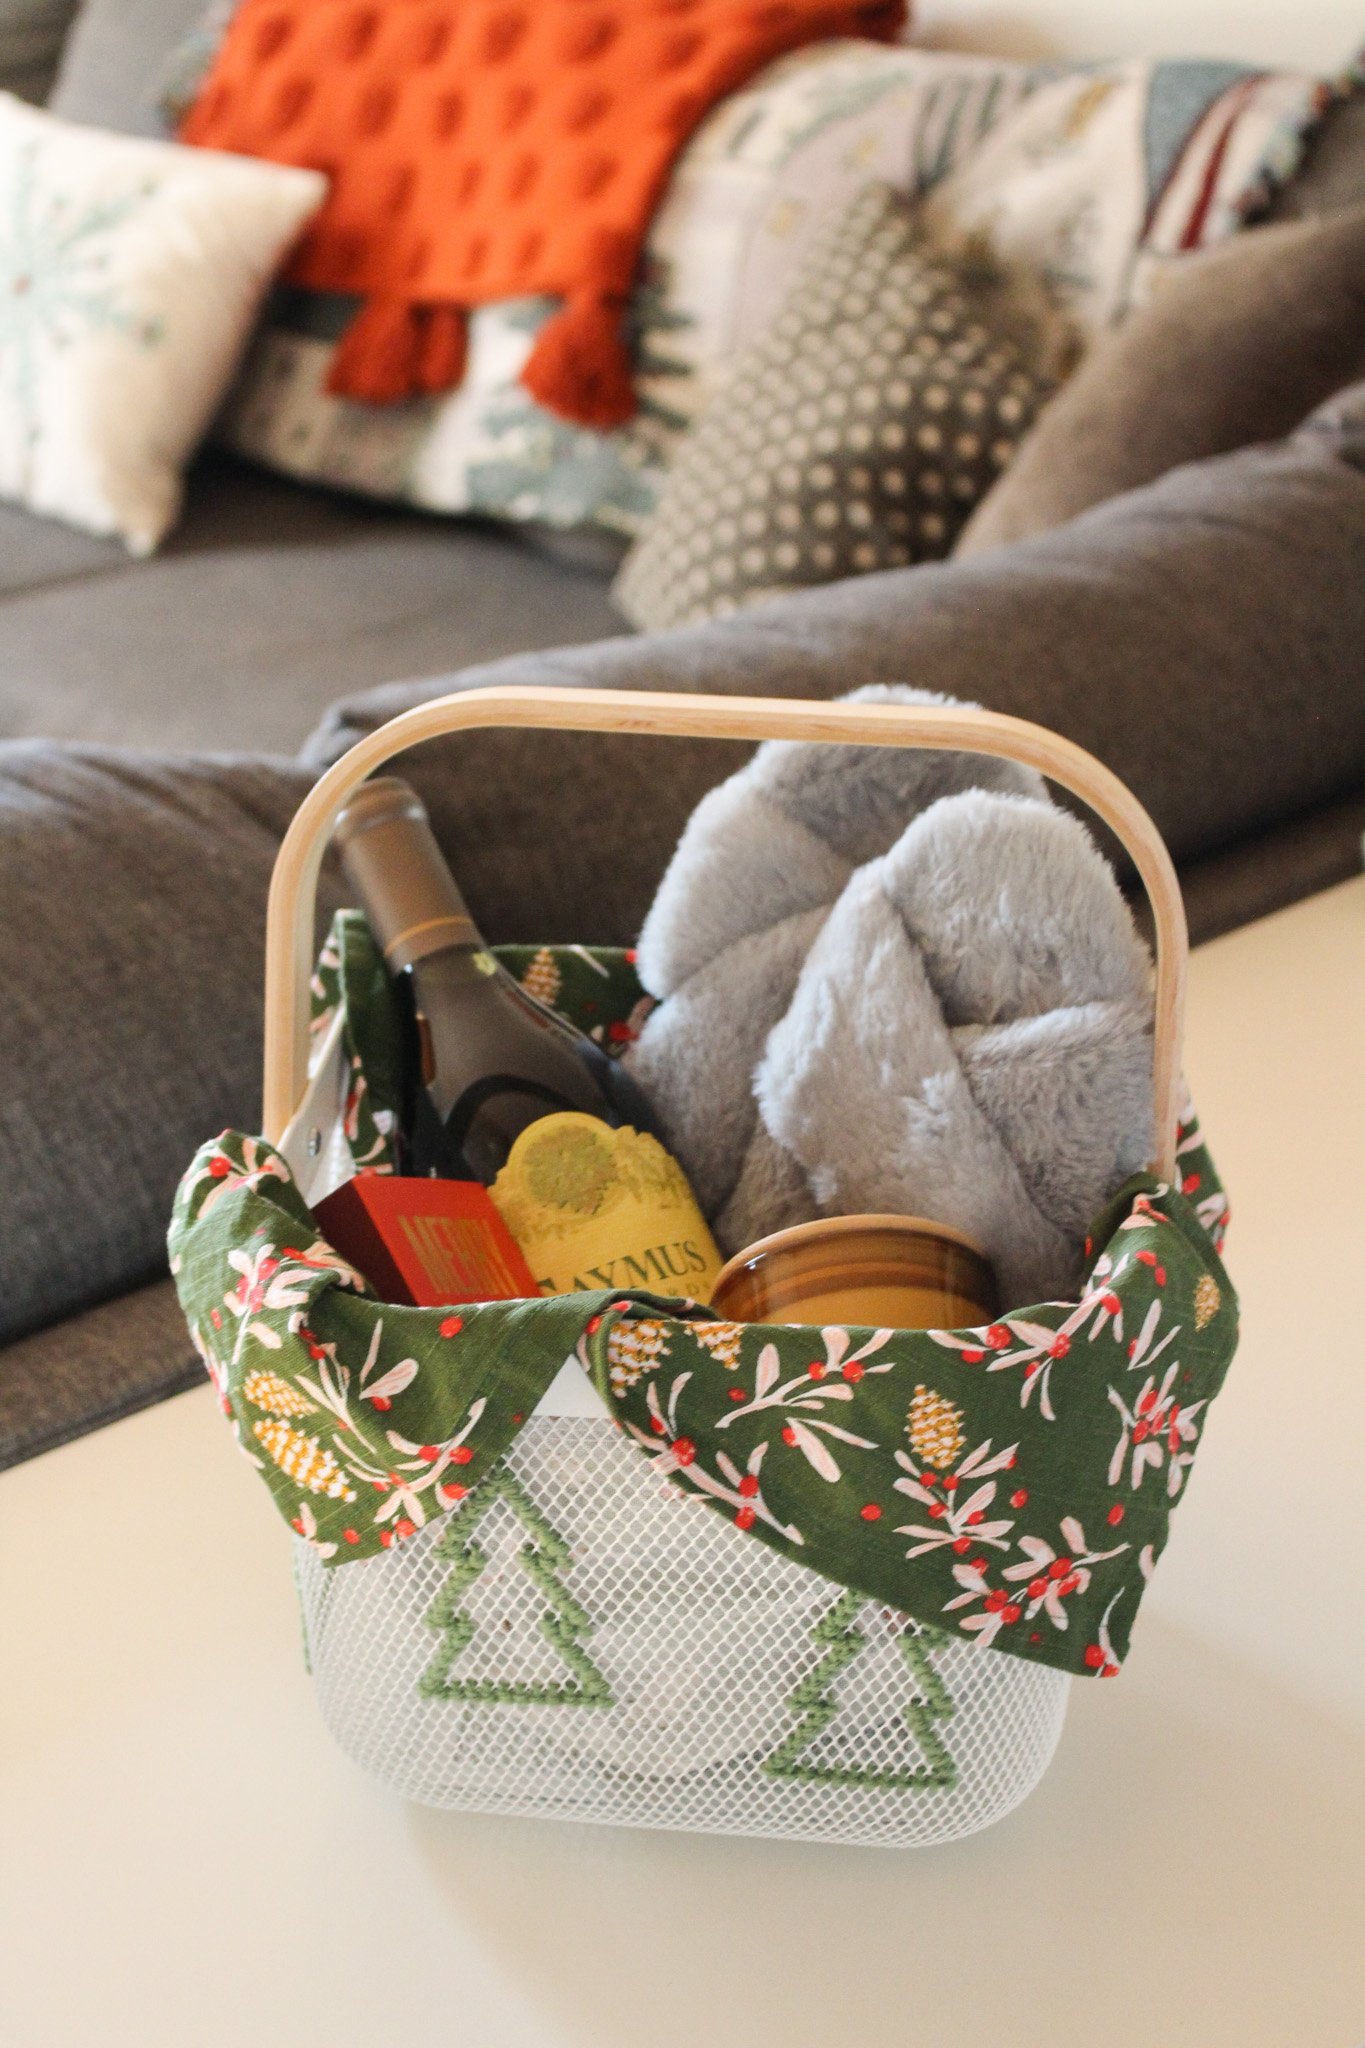
I’m always up for using what you have to decorate your home for the holidays! So this year I’m showing you how to transform this plain IKEA Risatorp wire basket into a holiday version perfect for storing wrapping supplies, creating a gift basket, collecting holiday cards, or displaying your kids’ favorite Christmas books. Follow along below to see how I added these sweet Christmas tree embellishments… enjoy!
IKEA RISATORP BASKET CHRISTMAS HACK

You will need:
Green yarn
STEP 1: Cut a piece of yarn about 5-6 ft long. Thread one end of the yarn through your yarn needle.
STEP 2: Find a spot on your basket where you would like to create your first tree pattern. Thread your needle from inside the basket towards the outside in your first wire hole. Pull the thread fully through until you only have about a 4 inch tail remaining inside the basket. Leave that tail end loose for now.
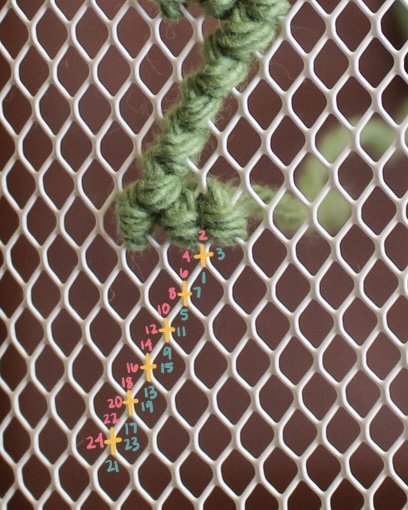
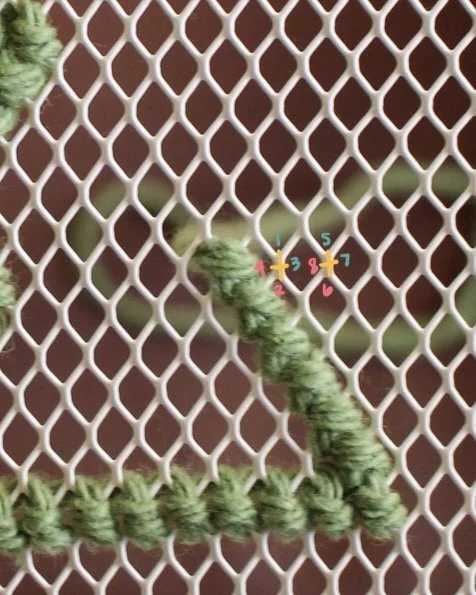
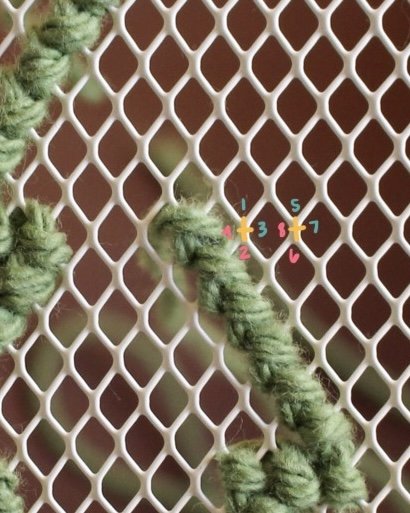
STEP 3-13: To create your woven Christmas tree shape, you are going to make a series of cross stitches through the wire holes to create your outline. To better understand the process of creating this X-shaped stitch, I have included diagrams below showing the yellow Xs that you will make with your yarn.
Follow the numbers in the images below to demonstrate each stitch. Blue numbers are times your needle will go up from inside the basket out towards you. Pink numbers are when the needle will go down into the basket.

(STEP 3)

(STEP 4)

(STEP 5)

(STEP 6)
(STEP 7)

(STEP 8)

(STEP 9)
(STEP 10)

(STEP 11)

(STEP 13)
(STEP 12)

(STEP 14)
STEP 14: Before you do your final stitch to complete your tree shape, pull the tail end of the yarn that should still be hanging inside the basket towards the right side. Now complete the last stitch and that tail end should now be secured inside your final stitch.
Double knot the two tail ends of the yarn on the inside of the basket together. Then trim any extra yarn.

And there you have it! Cover your wire basket with as many of these Christmas trees as you would like. Or get creative with different shapes and different colors of yarn — I’m thinking a gingerbread man or candy cane version would be super sweet too!

Here are a few of my ideas for ways to use your decorated basket this season:
Display your kids’ Christmas and holiday book collections.
Store gift wrapping supplies like ribbons, gift tags, tape, scissors, etc. for quick access this season!
Throw in a few of your favorite items and gift a basket to your family or friends.
Store and display your holiday baking supplies — This would look so cute filled with a rolling pin, oven mit, cookie cutters, and more.
Leave this at your front entrance to collect all the beautiful holiday cards you will receive in the mail this season.
Corral your favorite board games to play at your next family gathering.
or even use in place of a stocking! Fill it up with some fun stocking stuffers under the Christmas tree.

And the best part of this hack is that you can easily cut out the yarn at the end of the holiday season to use the basket for it’s normal organizational purposes. So it’s all the benefits of a cute piece of holiday decor without the trouble of having another bulky item to store for 11 months of the year.
Hope you enjoyed this easy holiday IKEA hack! I’m curious, what other ways would you use this festive basket?
xo Rachael

