
Make an Embossed Metal Butterfly Wreath (DIY Spring Decor Idea)
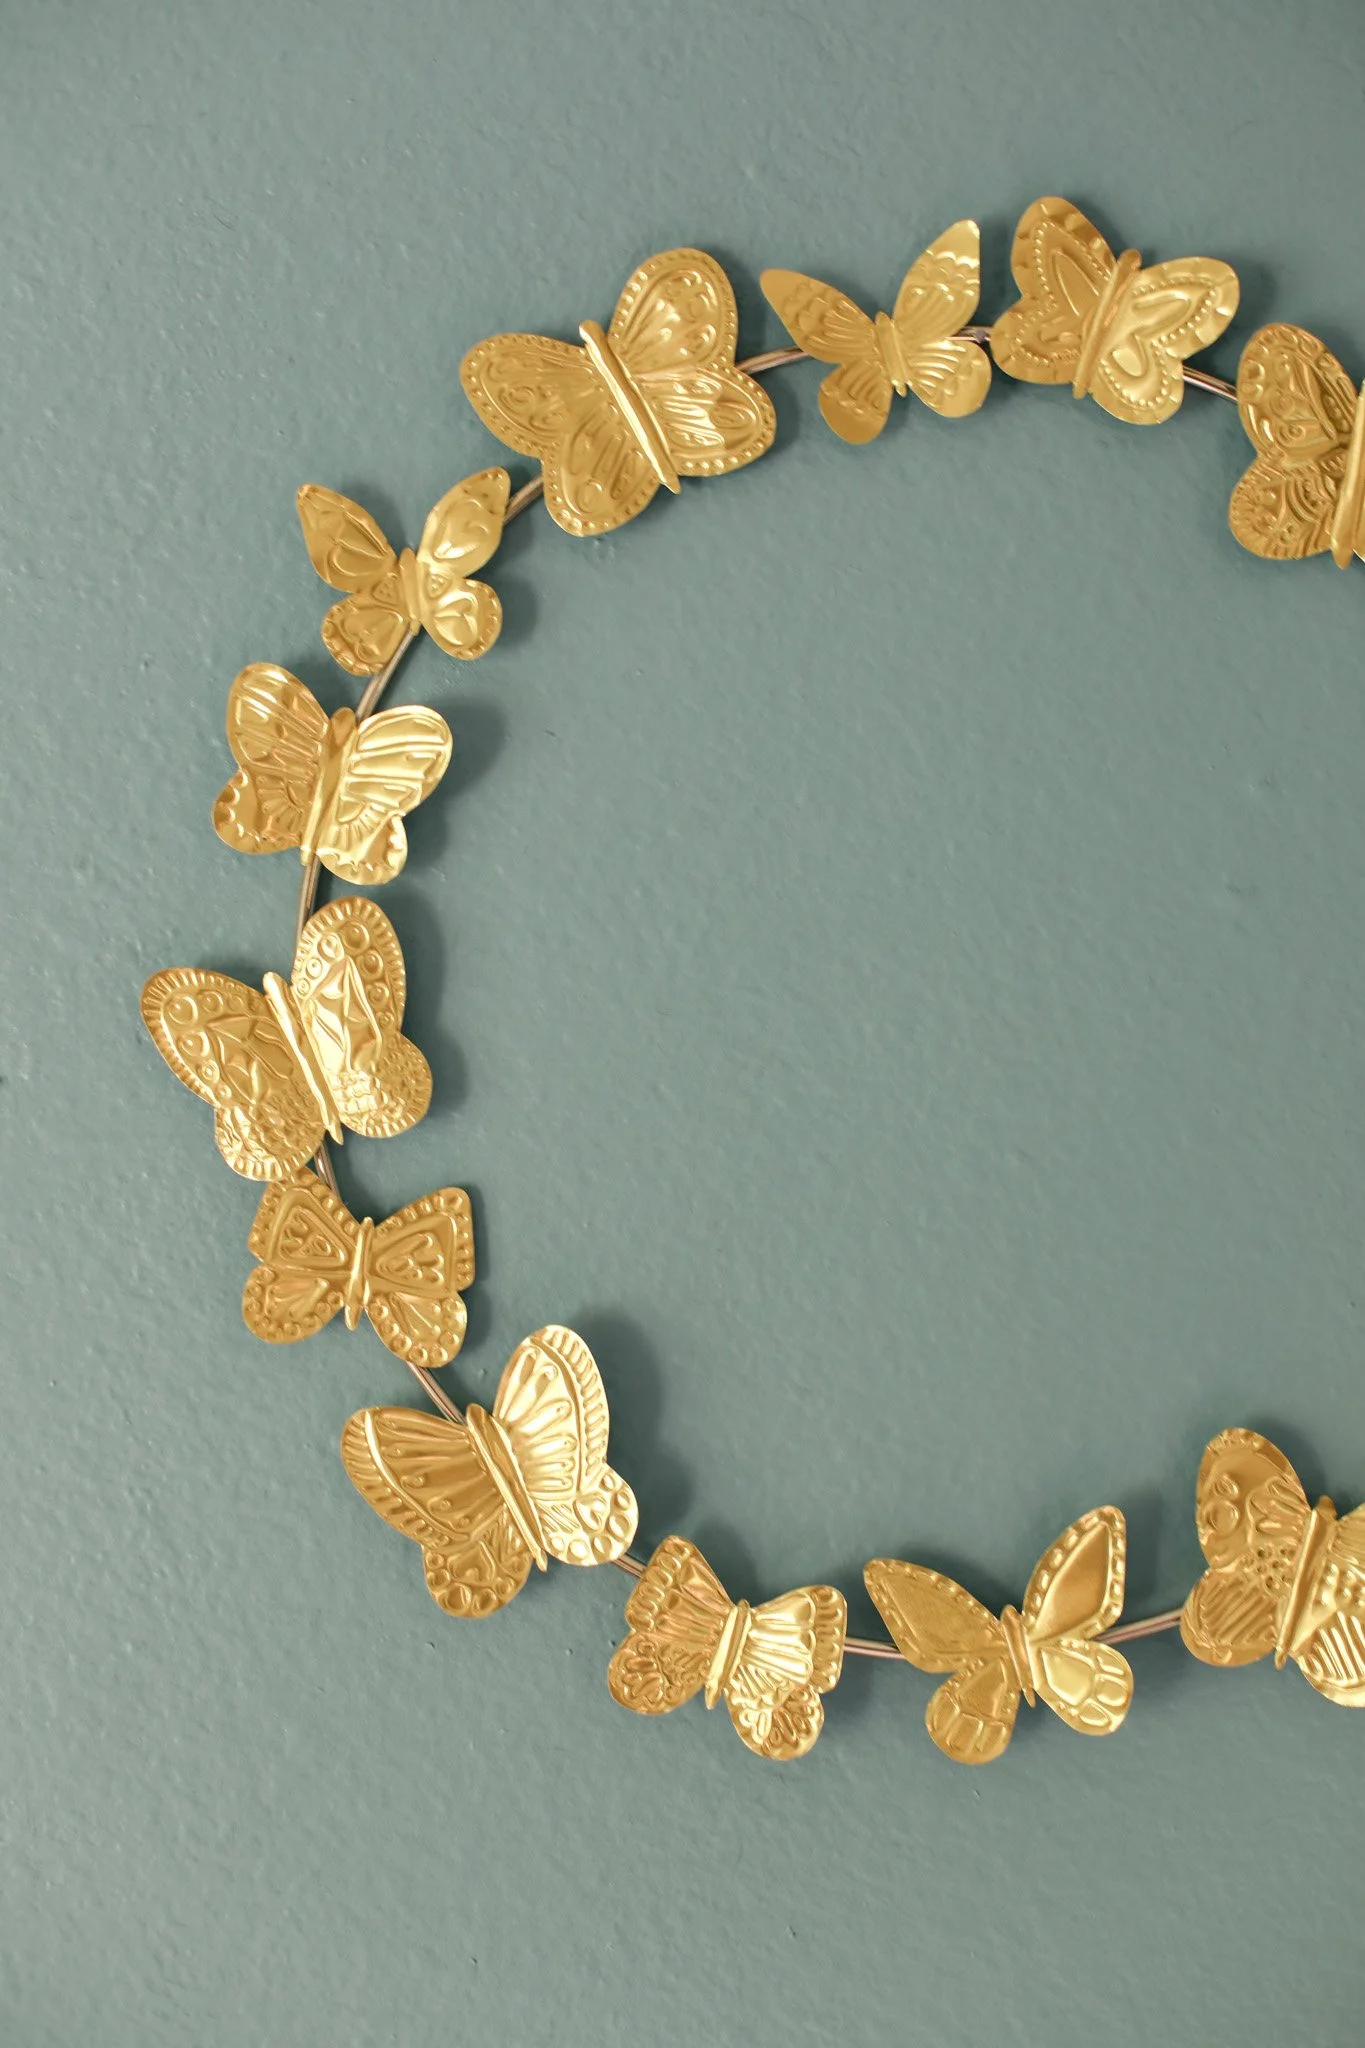
Spring is almost here! And I’m so excited to start sharing more spring-inspired decor and craft projects with you all. I’m obsessed with my newest creation, which is this embossed metal butterfly wreath!

This was my first time doing any kind of metal embossing, but this project ended up being way easier than I thought it would be, and I really enjoyed the process! I think it is also a piece of decor that I will totally keep and use again and again while decorating my home for spring each year. Read along below to see how I made it.
Affiliate disclosure: This post may contain affiliate links. When you buy from these links, I may earn a small commission, at no additional cost to you. As an Amazon Associate, I may earn commissions from qualifying purchases from Amazon.com. Thank you for your support!
HOW TO MAKE AN EMBOSSED METAL BUTTERFLY WREATH FOR SPRING
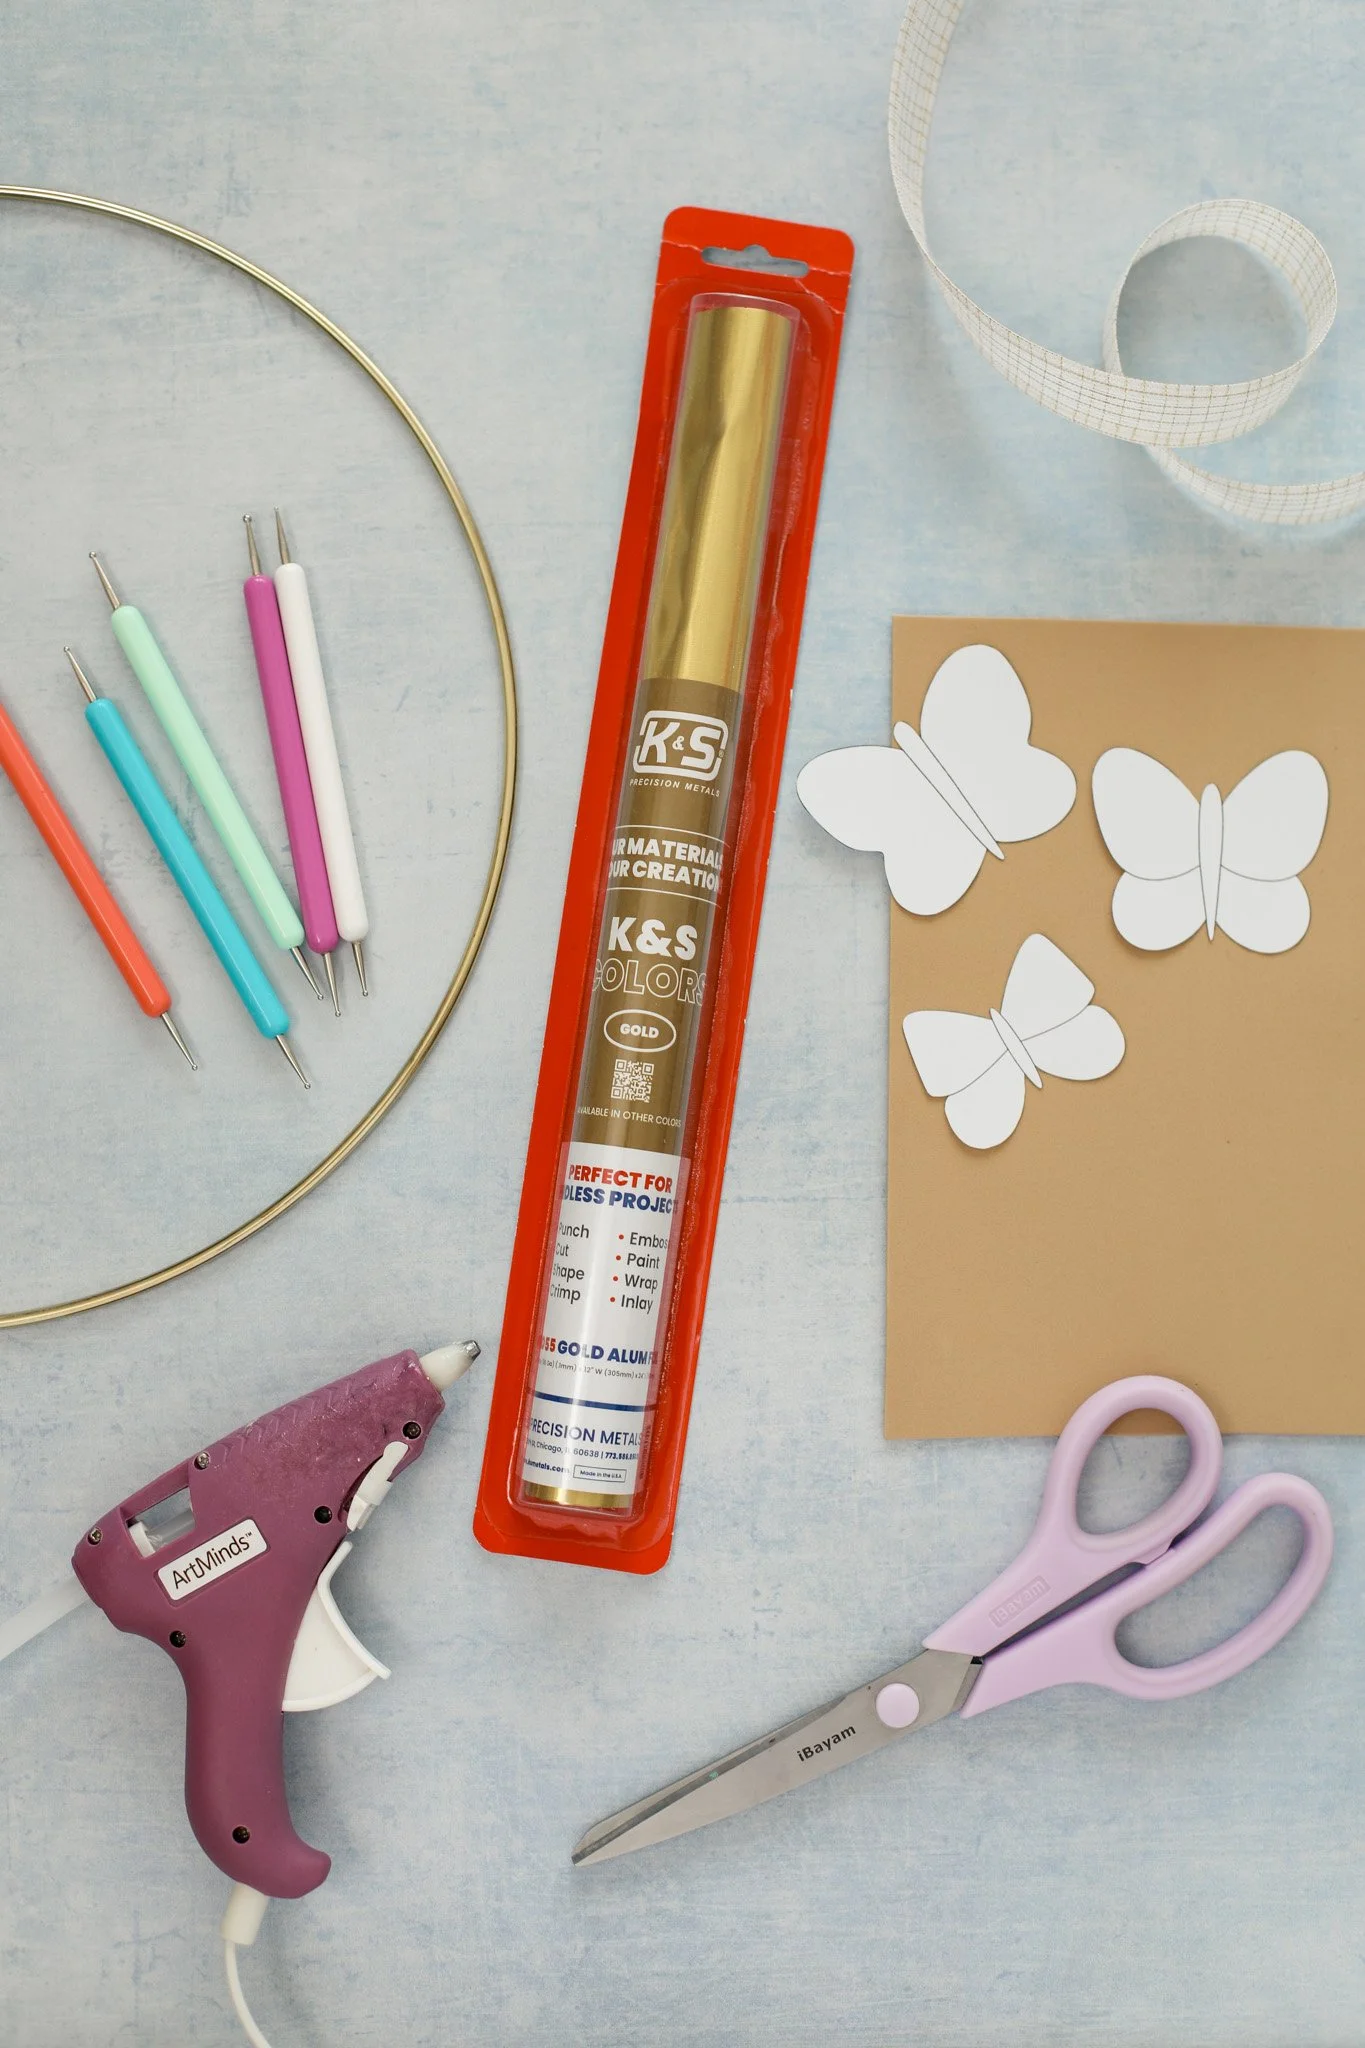
Supplies:
Embossing stylus (this set with various sizes is great!)
Scissors
White cardstock paper
Hot glue gun
Ribbon or Twine (optional — to hang up the wreath)
ETI’s Embossed Butterfly Wreath Template Printable PDF (download below!)
STEP 1: To begin, download the Embossed Butterfly Wreath Template Printable (above) and print out the PDF onto thick white cardstock paper. Carefully cut out the outline of each butterfly shape that you would like to use. I found the wreath looked best with a mix of different shapes and sizes.

STEP 2: Unroll your gold aluminum crafting foil and cut out a small square just a bit bigger than the paper butterfly you will be tracing. Place your first cardstock butterfly template on top of the aluminum foil and use the smallest embossing stylus you have to lightly trace along the outline of the butterfly. You do not need to add much pressure at this point because you are not trying to emboss the outline, you just want to mark the foil so you can see where to cut.

STEP 3: Using your scissors, carefully follow your lightly embossed outline and cut out your butterfly shape from the foil.

STEP 4: Smooth out your foil butterfly and set it gold side up on your sheet of craft foam. This foam will work as your embossing mat.
Now comes the fun part! Using your embossing stylus, get creative by drawing lines and patterns and dots all over the metal surface. The more pressure you apply while embossing, the thicker and more prominent the line or dot will appear. I would recommend using a smaller stylus for more intricate details.
If you are nervous to get started on your design, you could always use your tiniest stylus tip and just lightly draw on what you are thinking and then you can go back with more pressure or a thicker stylus to emboss the exact lines into the metal foil.
STEP 5: Once your butterfly is complete, you may want to play with the foil in your hands a bit until you get the correct shape. For my wreath, I wanted the wings of the butterflies to be slightly forward and the center body to be near the back. I used my stylus to gently curl some of the butterfly wings too to make them more 3D. You can play around and bend the butterfly as much as you want until you get the desired shape.

STEP 6: Repeat steps 2-5 making as many butterflies as you would like to add to your wreath! I completely filled the perimeter of my wreath, making 16 butterflies total. But I think it would look really cute and delicate to just have a few flying up the side of the hoop as well!
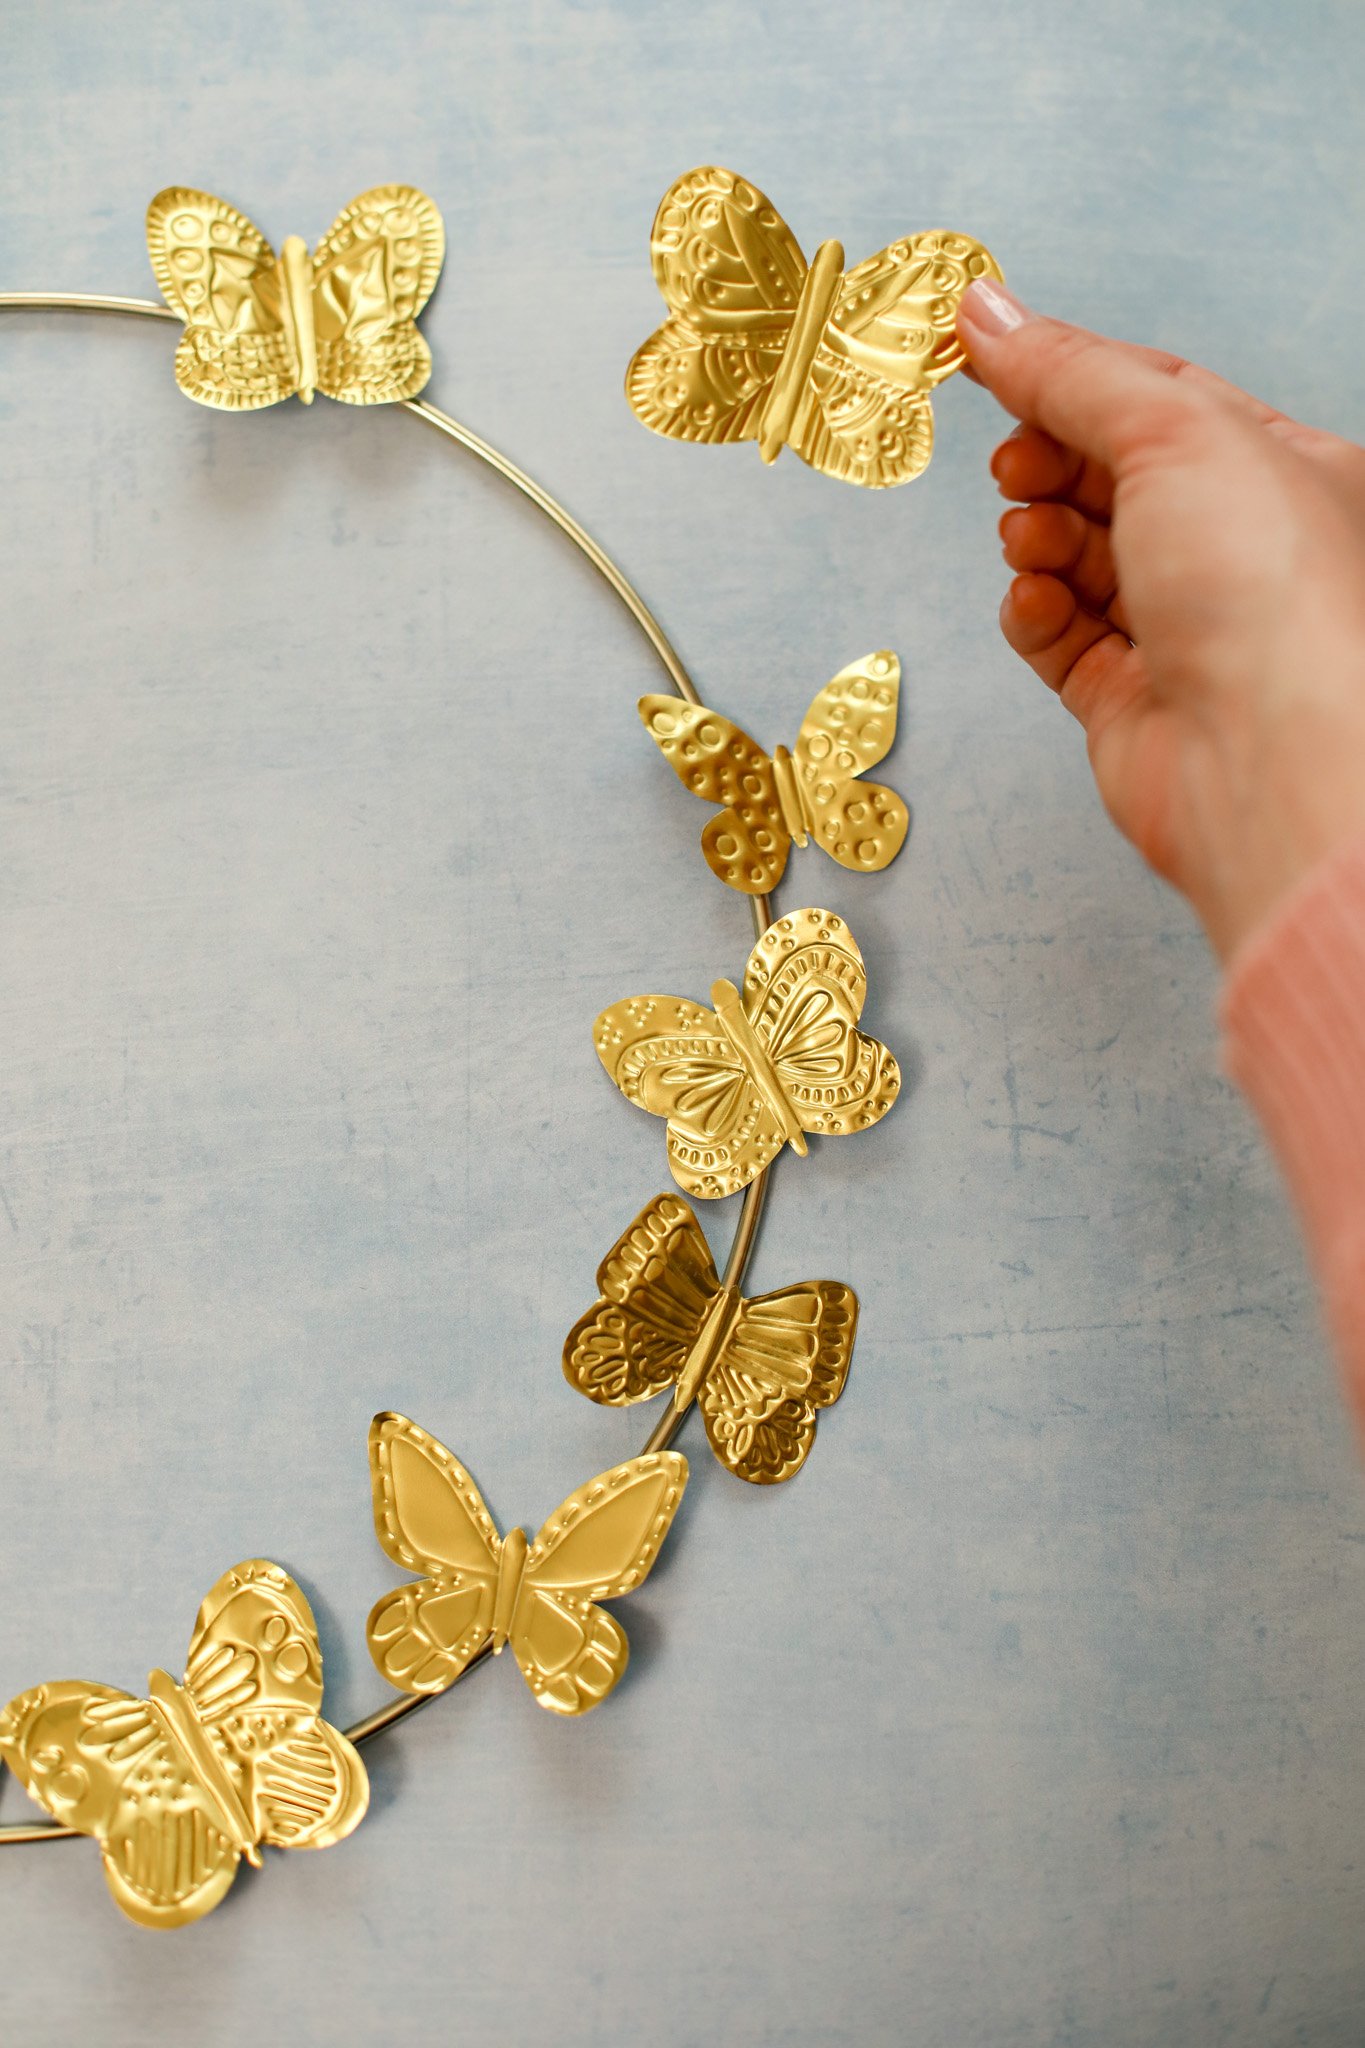
STEP 7: And now it is time to glue your butterflies to your hoop! Lay your hoop flat on your work surface and play around with the placement of your butterflies. I liked having different sizes mixed every other and I also liked to alternate the angle of the butterflies for a more haphazard look.

Once you are happy with your placement. Carefully add a dot of hot glue to the hoop wreath wherever your butterfly will be adhered to the hoop and press the butterfly into the glue. Hold for a few seconds until the hot glue dries. Continue around the whole wreath!
STEP 8: Hanging your wreath! I ended up just placing the top of the my hoop over a small nail in the wall to hang it up, but you could also tie a bow with some ribbon or you could even use a piece of fishing line to hang up the hoop so that it looks like it is floating!

And now you have a unique homemade piece of spring decor to celebrate the season and show off in your home! I love how this project turned out, I think it totally looks like something you could buy at Anthropologie! And it is also a very easy and low-mess craft, which you know I am all about :)

If you try this one out, I would love to see how you styled it! Tag me on instagram @entertainidea or #entertaintheidea. Happy spring crafting!
xo Rachael

