
DIY Christmas Cracker Place Cards (with the Glowforge Aura!)
I love any excuse to host a fun party, and what better time than the holiday season! So I am so excited to be trying out a new crafting machine, kindly gifted by Glowforge®, today to bring you a really fun DIY craft project that you can use for any upcoming holiday entertaining.
The Glowforge Aura™ is the newest desktop Craft Laser that is perfect for precisely cutting, scoring, and engraving hundreds of materials. The craft project possibilities are endless when it comes to the Glowforge Aura and right now is the best time to get your hands on one of these machines while they have some amazing Holiday Magic offers — like $200 off the Glowforge Aura (in-stores at Best Buy, JOANN, Michaels, and on Glowforge.com) and flexible monthly payment options.
I recently hosted a fun “Favorite Things” party with my friends to celebrate the holiday season and I wanted a way to show people to where they were seated but also serve as a little party favor. So I thought party crackers were the perfect fit! And I knew this was a great project to try out my new Glowforge Aura.
So I got to work using the Proofgrade® Eco Iron-On material in metallic gold to customize these cute reusable party crackers! Check out how I made them below.

Affiliate disclosure: This post may contain affiliate links. When you buy from these links, I may earn a small commission, at no additional cost to you. As an Amazon Associate, I may earn commissions from qualifying purchases from Amazon.com. Thank you for your support!
HOW TO MAKE YOUR OWN (NO SEW) CHRISTMAS CRACKERS WITH THE GLOWFORGE AURA
Supplies:
Glowforge Personal Filter™ (or vent your Glowforge Aura through a window with the included hose!)
Proofgrade® Eco Iron-On Material in gold
Cotton fabric in assorted colors/patterns
Parchment paper
Scissors and/or rotary cutter
Ruler
Cutting mat
Iron & ironing board
Ribbon
Cardboard rolls (empty toilet paper or paper towel rolls work great!)
Candy or gifts to package inside the crackers

STEP 1: The first step is to make your Iron-On names for the party cracker fabric. The cool thing about the Proofgrade materials that Glowforge sells is that your Glowforge Aura machine can recognize them using the built in Aura Vision™ camera so all you have to do is set the piece of Eco Iron-On material into the Glowforge and it will automatically scan the attached QR code sticker and setup the correct corresponding settings in the Glowforge App.
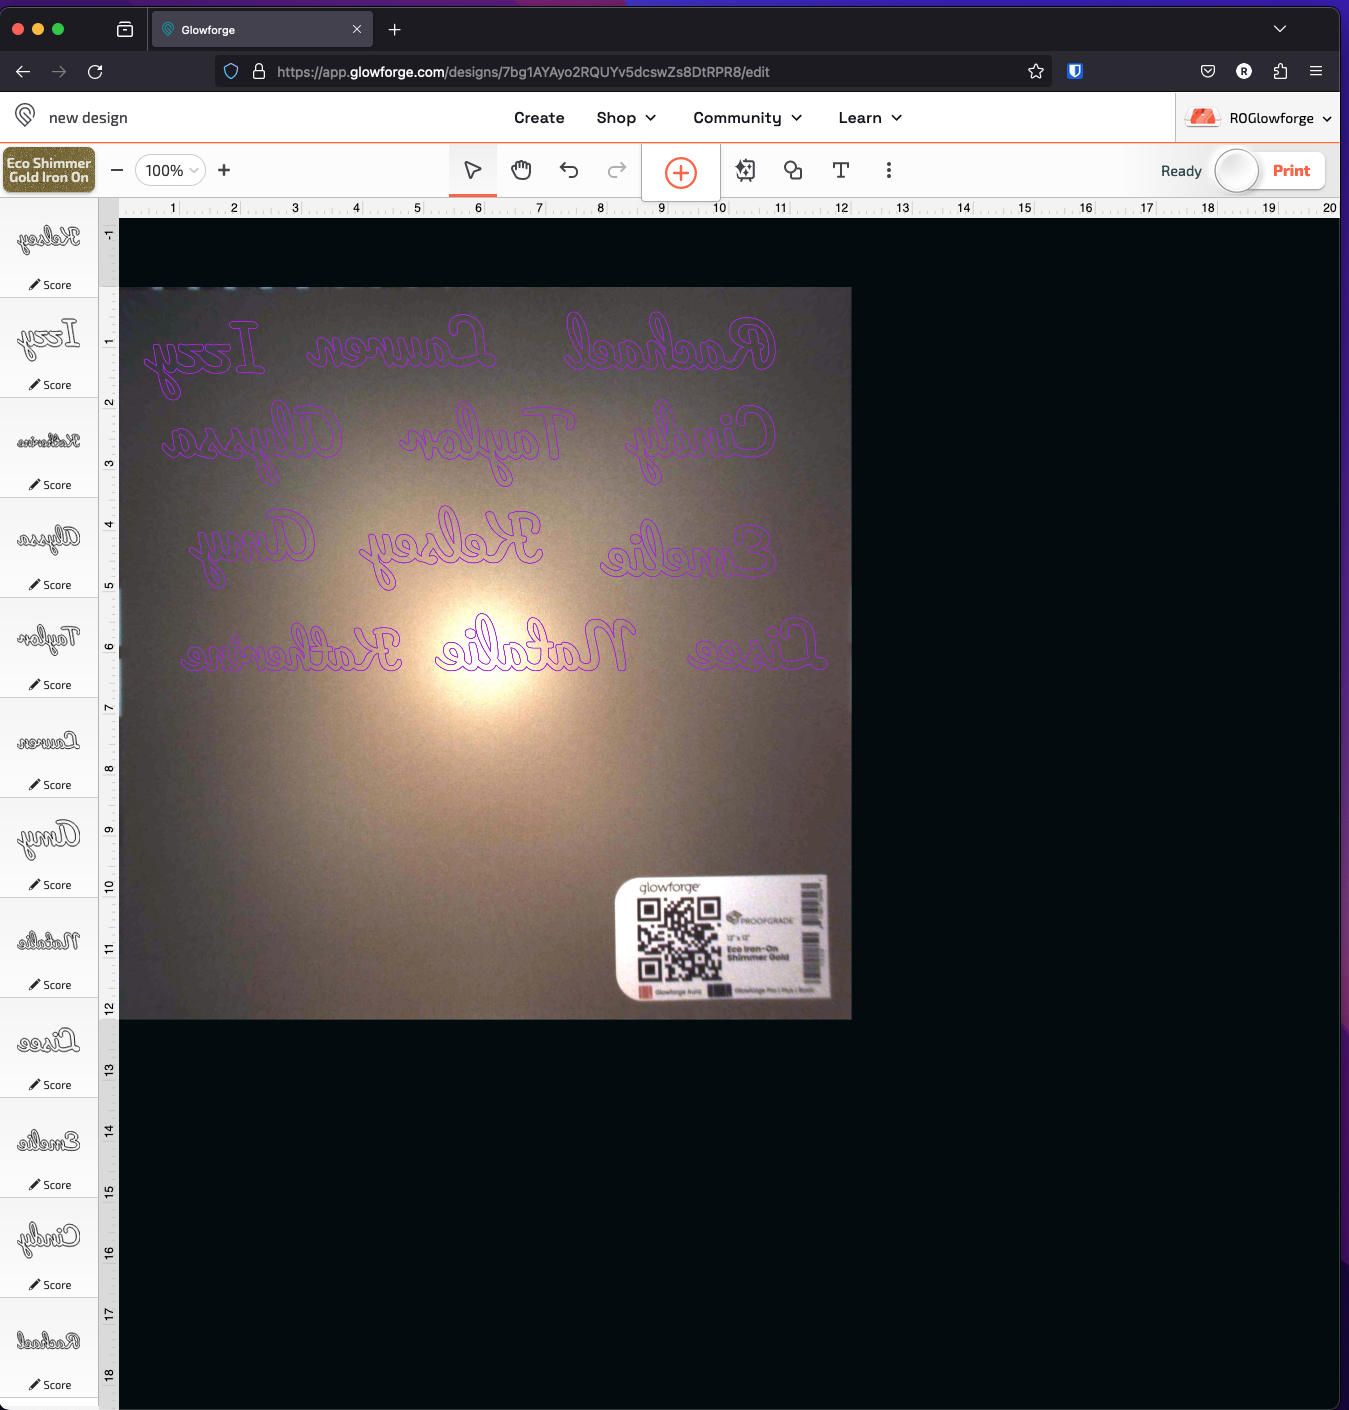
STEP 2: Next, begin designing your name text in the Glowforge App. I used a built in font (Pacifico) to spell out all my guest’s names and then I sized them to fit correctly onto my party crackers. They ended up being about 1 in tall and 3 in wide each. In the Glowforge App, you can actually see your material through the machine’s camera so you know exactly where to lay out the names on your material.
**IMPORTANT: Make sure to mirror image your text (using the flip horizontal button on the right) since you are going to be ironing these onto fabric.
STEP 3: Once the names are all written out, flipped, and placed on your material image, make sure that all of the names are listed as “Score” on the left side. If they are not, click each individually and change the setting to “Score”. This tells the laser which type of cutting it will be doing.
And you’re ready to print, click the “Print” button at the top right of the app. Then head over to your Glowforge Aura machine and click the big blinking button.

And you should end up with something like this once the machine has gone through and scored all your lines!

STEP 4: Next, it is time to prepare the fabric pieces. Cut all your fabric pieces to 10 in wide and 13 in long either using scissors or a rotary cutter.
Iron out these fabric pieces to remove any wrinkles.

STEP 5: Now you are going to hem the edges to give the project a very finished look. For this process you are going to use an iron-on hem tape. Begin by folding about 1/2 in of fabric up from one side of your rectangle and ironing the hem line into place. Cut a piece of your hem tape to the matching length and place the tape into the new folded hem.
Place your iron on the fabric and hold it in place for about 8 seconds along the edge. Then turn the fabric over and hold the iron on the edge for another 3 seconds. Repeat with all 4 sides of your rectangle until your fabric looks like the image above.

STEP 6: Next, you are going to iron on your guest names. Roughly cut around each name individually and then carefully pull up the extra outer material so you are left with just the text on the clear plastic backing. I used a weeding tool to help remove all the little extra pieces of the iron on material inside the letters.

Place your iron-on name face down onto your fabric, centered about 2 inches up from the bottom. Then place a small piece of parchment paper over the plastic. Move your iron over the parchment paper for about 8 seconds to adhere the gold name to the fabric. Lift the parchment paper off and carefully pull off the plastic to reveal the adhered name. If there are any edges of the name still lifting off the fabric, just place your parchment paper back over the name and hold your iron on it for a few more seconds.

STEP 7: Now it’s time to fill your party crackers! Put the fabric face down on your work surface and place your cardboard roll at the top. Carefully roll the fabric around the cardboard roll. Use a piece of masking tape to hold the fabric closed temporarily.
Tie a ribbon around one end of the cardboard tube and tie into a bow. Drop in your candy/gifts into the open end of the cardboard tube then tie a bow around that end to close up the party cracker. Remove the piece of masking tape.

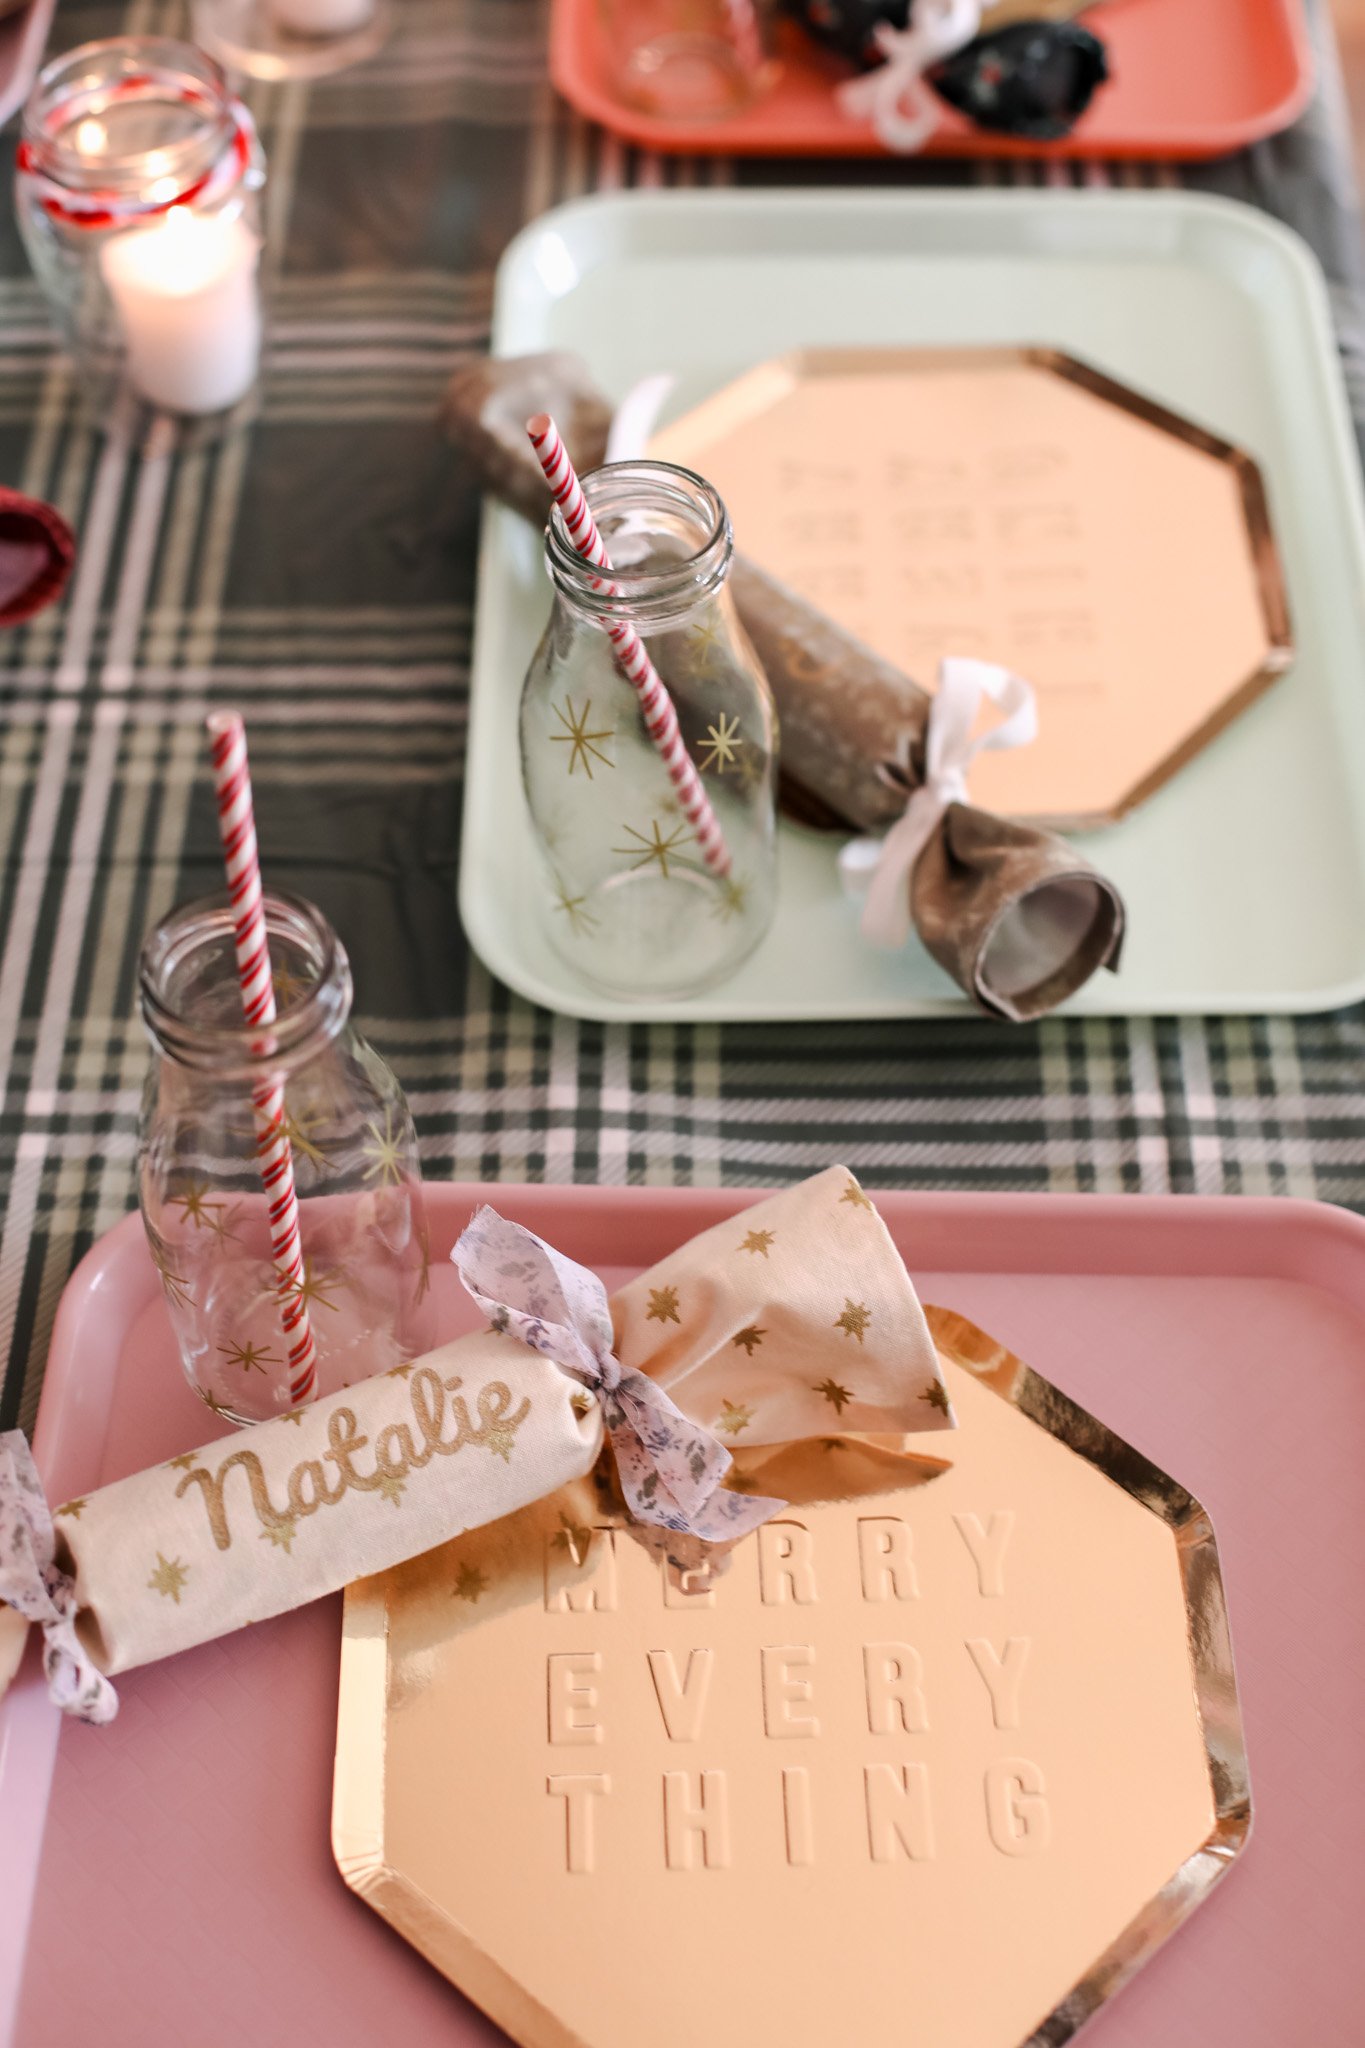
And your party crackers are complete and ready to place on your holiday table setting!
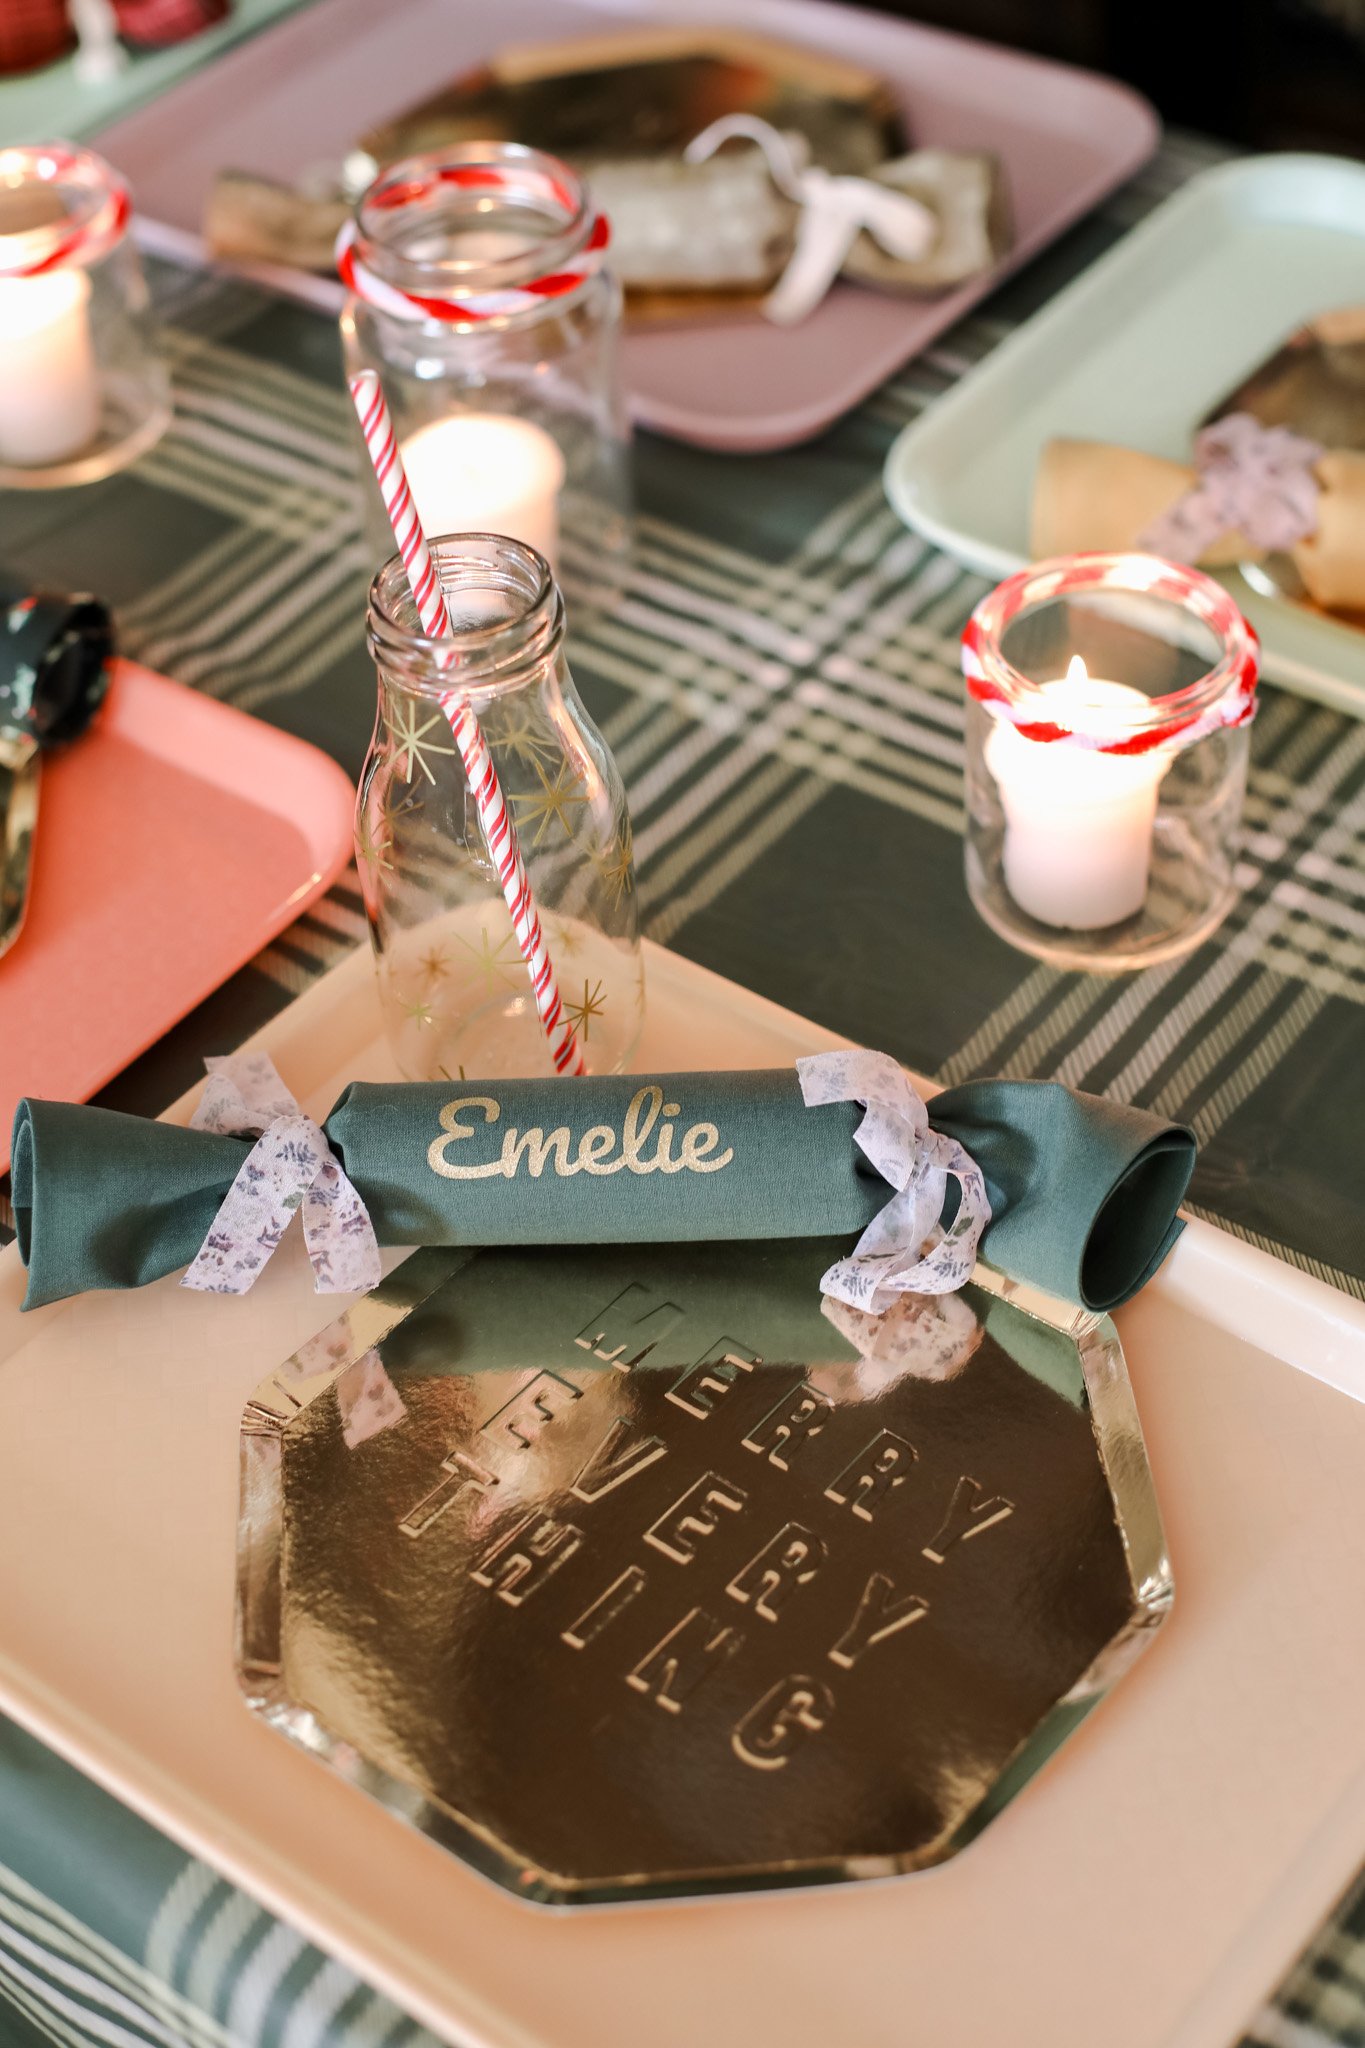
These party crackers were a hit at my holiday party! And I love that they are reusable if you host the same family members year after year. What little gifts would you add to these party crackers??

I’m so excited to see what other fun holiday projects I can make with my Glowforge Aura, so stay tuned for more ideas to come. And be sure to check out Glowforge’s Holiday Magic offers this season!
Happy crafting! xo Rachael

