
DIY Autumn Decor: Acorn String Art
Is there a better feeling than hauling out your seasonal decor boxes and rediscovering fall decor you completely forgot that you purchased in previous years? Maybe I’m just forgetful, but it truly feels like I’m shopping for free in my own home! :)
Besides coming up with ways to repurpose old seasonal decor, the next most affordable option when it comes to decorating for a new season is to DIY your own decor. Not only do you get a unique final product to proudly display around your home in the end, but you also get the creative experience of the process of making the decor too, a win-win!
This year to celebrate the changing of the season, I decided I wanted to make a new piece of fall wall art. I feel like the more woodsy-style autumn decor has been the most hardcore trend this year in all the home decor shops. I’m loving all the cute whimsical acorns, pinecones, mushrooms, and woodland creatures that are filling the shelves! I mean look at this wood acorn jar and this mushroom tapestry — so darling!
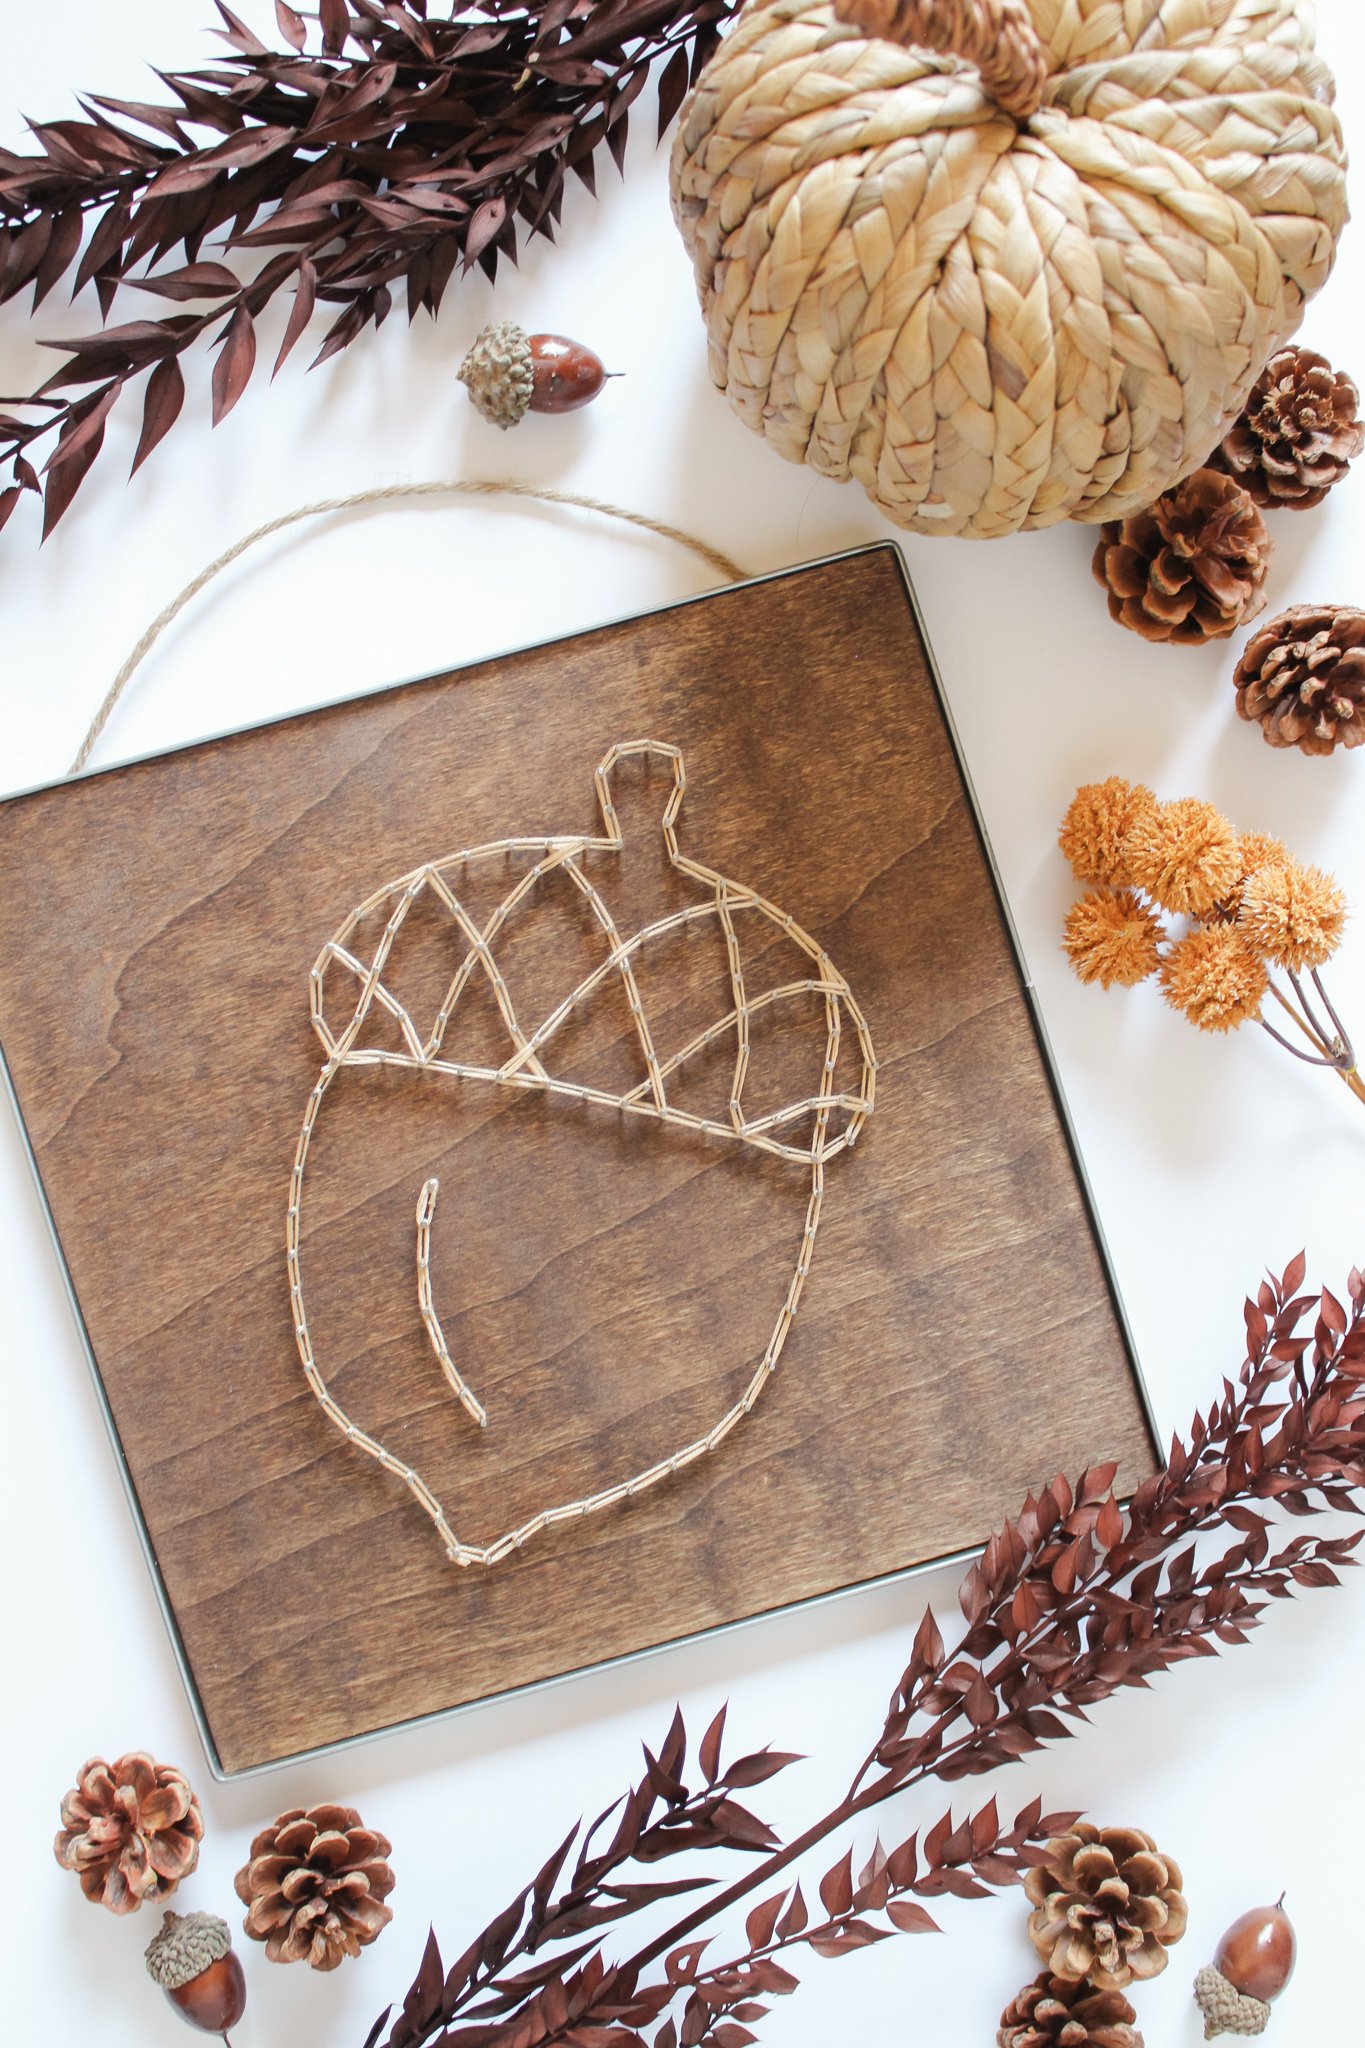
So I set out to make my very own piece of acorn decor, this DIY Acorn String Art! Follow the tutorial below if you would like to make your own wall art this season. Enjoy :)

HOW TO MAKE AN AUTUMN ACORN STRING ART PIECE

You will need:
A wooden plaque (this was an old piece I got from Joanns a few seasons back but any wooden sign would work — like this one)
Wood stain (I used Minwax Wood Finish in Early American 230)
Sponge brush & rag or paper towels
Hammer
Small nails (I used wire brad nails 19 x 1/2”)
Embroidery floss (I used DMC 738 Very Light Tan)
Acorn design — you can either draw out your own design on a piece of paper, print out a design you find on google, or purchase a design from Etsy — this is the design I used!
Masking tape
Scissors
White pen
Craft glue

STEP 1: Open up your wood finish and stir. Sponge a generous but even layer of the finish onto your wood surface. Remove any extra stain with a rag or paper towel. Allow the stain to dry overnight.

STEP 2: Find an acorn design (or any other fall shape you would like to do — a leaf or a Halloween bat would be cute!) and make sure to size the design correctly before printing it. To do this, I usually use photoshop, but you could also just open a blank Word or Pages document and drag the picture to be the correct size. You want the image to just be a bit smaller than your wooden plaque size.
Print the design and loosely cut out the shape around the outer line. Place the design on your wooden plaque and tape the edges to secure.

STEP 3: Now go through your line drawing and roughly sketch in dots with your white pen where you would like to place the nails. I ended up realizing I drew in too many dots too close together, so I only put a nail at every other dot. So you can estimate about 1/2 inch between dots.
You want to make sure that there is a clear dot at every intersection point of your design. So if lines connect in the drawing, make sure you position a nail there. The distance between nails does not have to be exact, but make sure they aren’t too far apart that you lose details of your design’s shape.
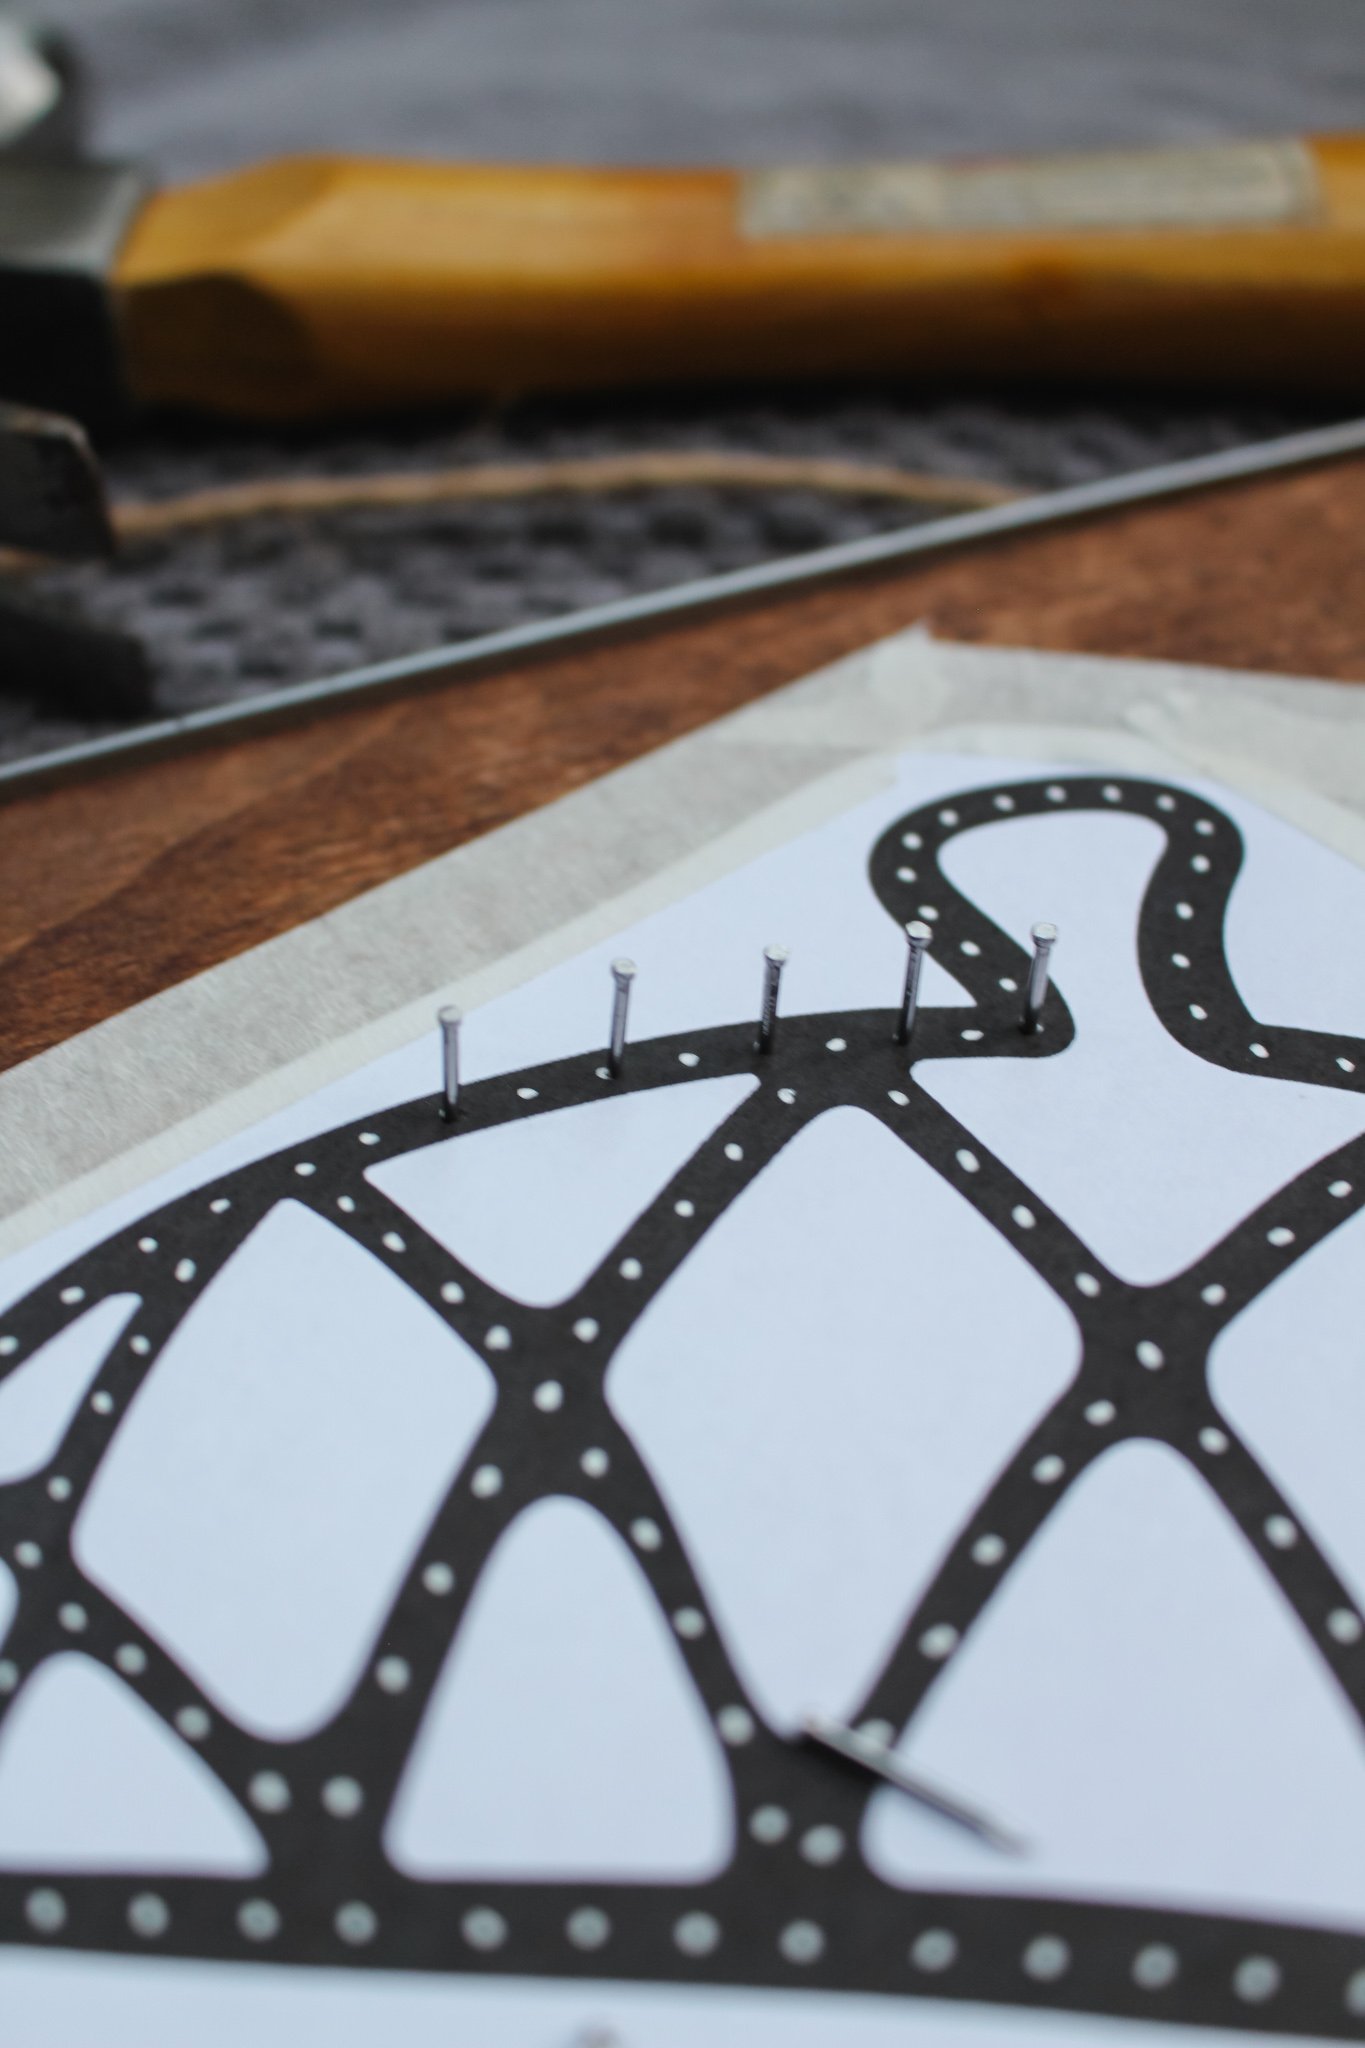
STEP 4: Now is the hammering part of the project! Go through and hold a nail at each dot that you drew (or every other dot in my case) and carefully hammer the nail into the wood. You just need enough of the nail to go into the wood that the nail feels strong and secure standing up.
I found it easier to quickly go through and add all the nails and then go back and hammer them all in a bit further to be safe. The smaller the hammer you use, the better. I only had a large hammer and it made hammering these tiny nails very difficult.
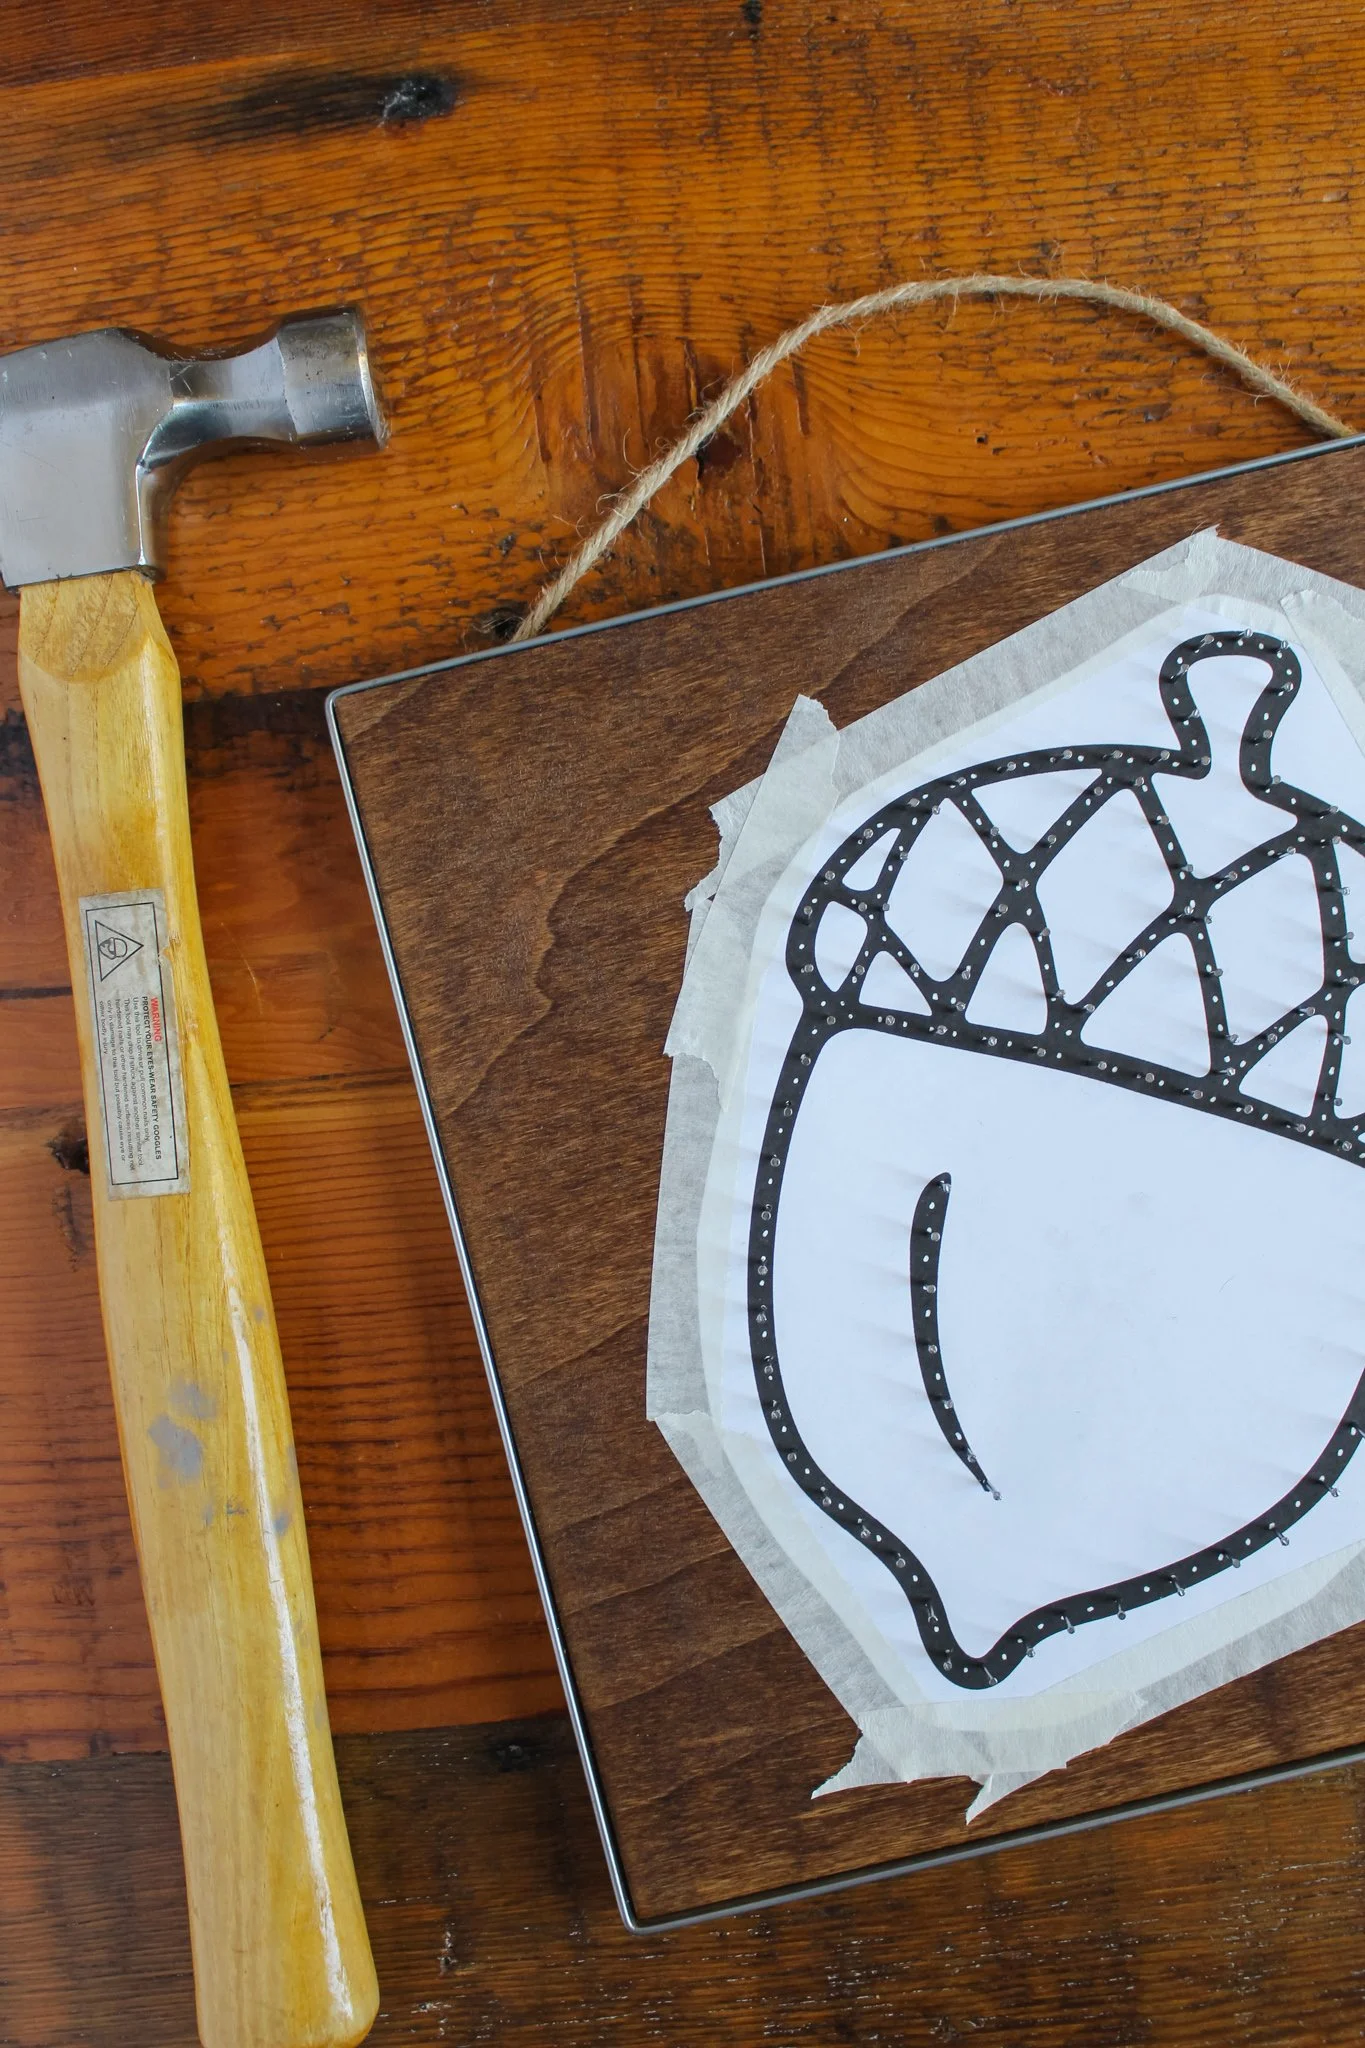
STEP 5: Once you have covered the entire design with nails (including any inside design details), you can remove the tape from the wood plaque and gently pull off the paper. Don’t worry if you lose a few nails in the process, that just means they weren’t hammered in far enough. So stick them back into the hole they fell out of and hammer them in a bit more.

STEP 6: Now that your design is hammered into the wood, it is time to add the “string” to the string art equation! Start by tying a double knot into the end of your embroidery floss around whichever nail you would like to start with. I started from the bottom of the acorn.

STEP 7: Carefully pull your string and loop around the next nail to the right, then back around your original nail. Then loop a second time around the next nail ONLY to complete your first loop in the chain.
Repeat this process as you make your way around the perimeter of the entire project. Once you get back to where you started, doubly knot again on your last nail. You will need to start the process over again with the lines on the interior of your design (like the crisscross lines on top of the acorn). Try your best not to have to start the string over, just connect lines where possible. But if you have to start in a new place, just repeat the process by tying a new knot at the nail you’re starting with.

STEP 8: Once you have completed a chain of loops, finish the chain with a double knot around the last nail. Then go back with a small dab of craft glue and add a bit of glue to secure your end knots in place. Once secured go ahead and trim off any extra string tails.
Hang up your project, then step back and admire all your hard work!


I think this string art turned out super cute and looks like something you could buy at Joann’s or HomeGoods! I love to add a new piece of fall decor to my collection each year, and if I can make it myself that’s even better!
Do you prefer to buy seasonal decor or make it yourself? Or a little bit of both? xo Rachael

