
Decoupage Dollar Tree Candles
I’m always so impressed when I see a good Dollar Tree hack or project. I love how creative people can get with some very basic supplies and products. And since it is a very expensive time of year with all the cooking, traveling, and gifting going on, I’m trying my best to save money by not ALSO buying all of the beautiful holiday home decor that I see everywhere.
Instead, I set out to make my own holiday decor using all Dollar Tree supplies. And I ended up creating these cute gingham decoupaged Dollar Tree candles! So, although this is a super simple project that probably doesn’t even require a full tutorial, I thought I would share how I made them to give you a fun and inexpensive craft project idea to get you in the holiday spirit.

Affiliate disclosure: This post may contain affiliate links. When you buy from these links, I may earn a small commission, at no additional cost to you. As an Amazon Associate, I may earn commissions from qualifying purchases from Amazon.com. Thank you for your support!
HOW TO DECOUPAGE DOLLAR TREE CANDLES
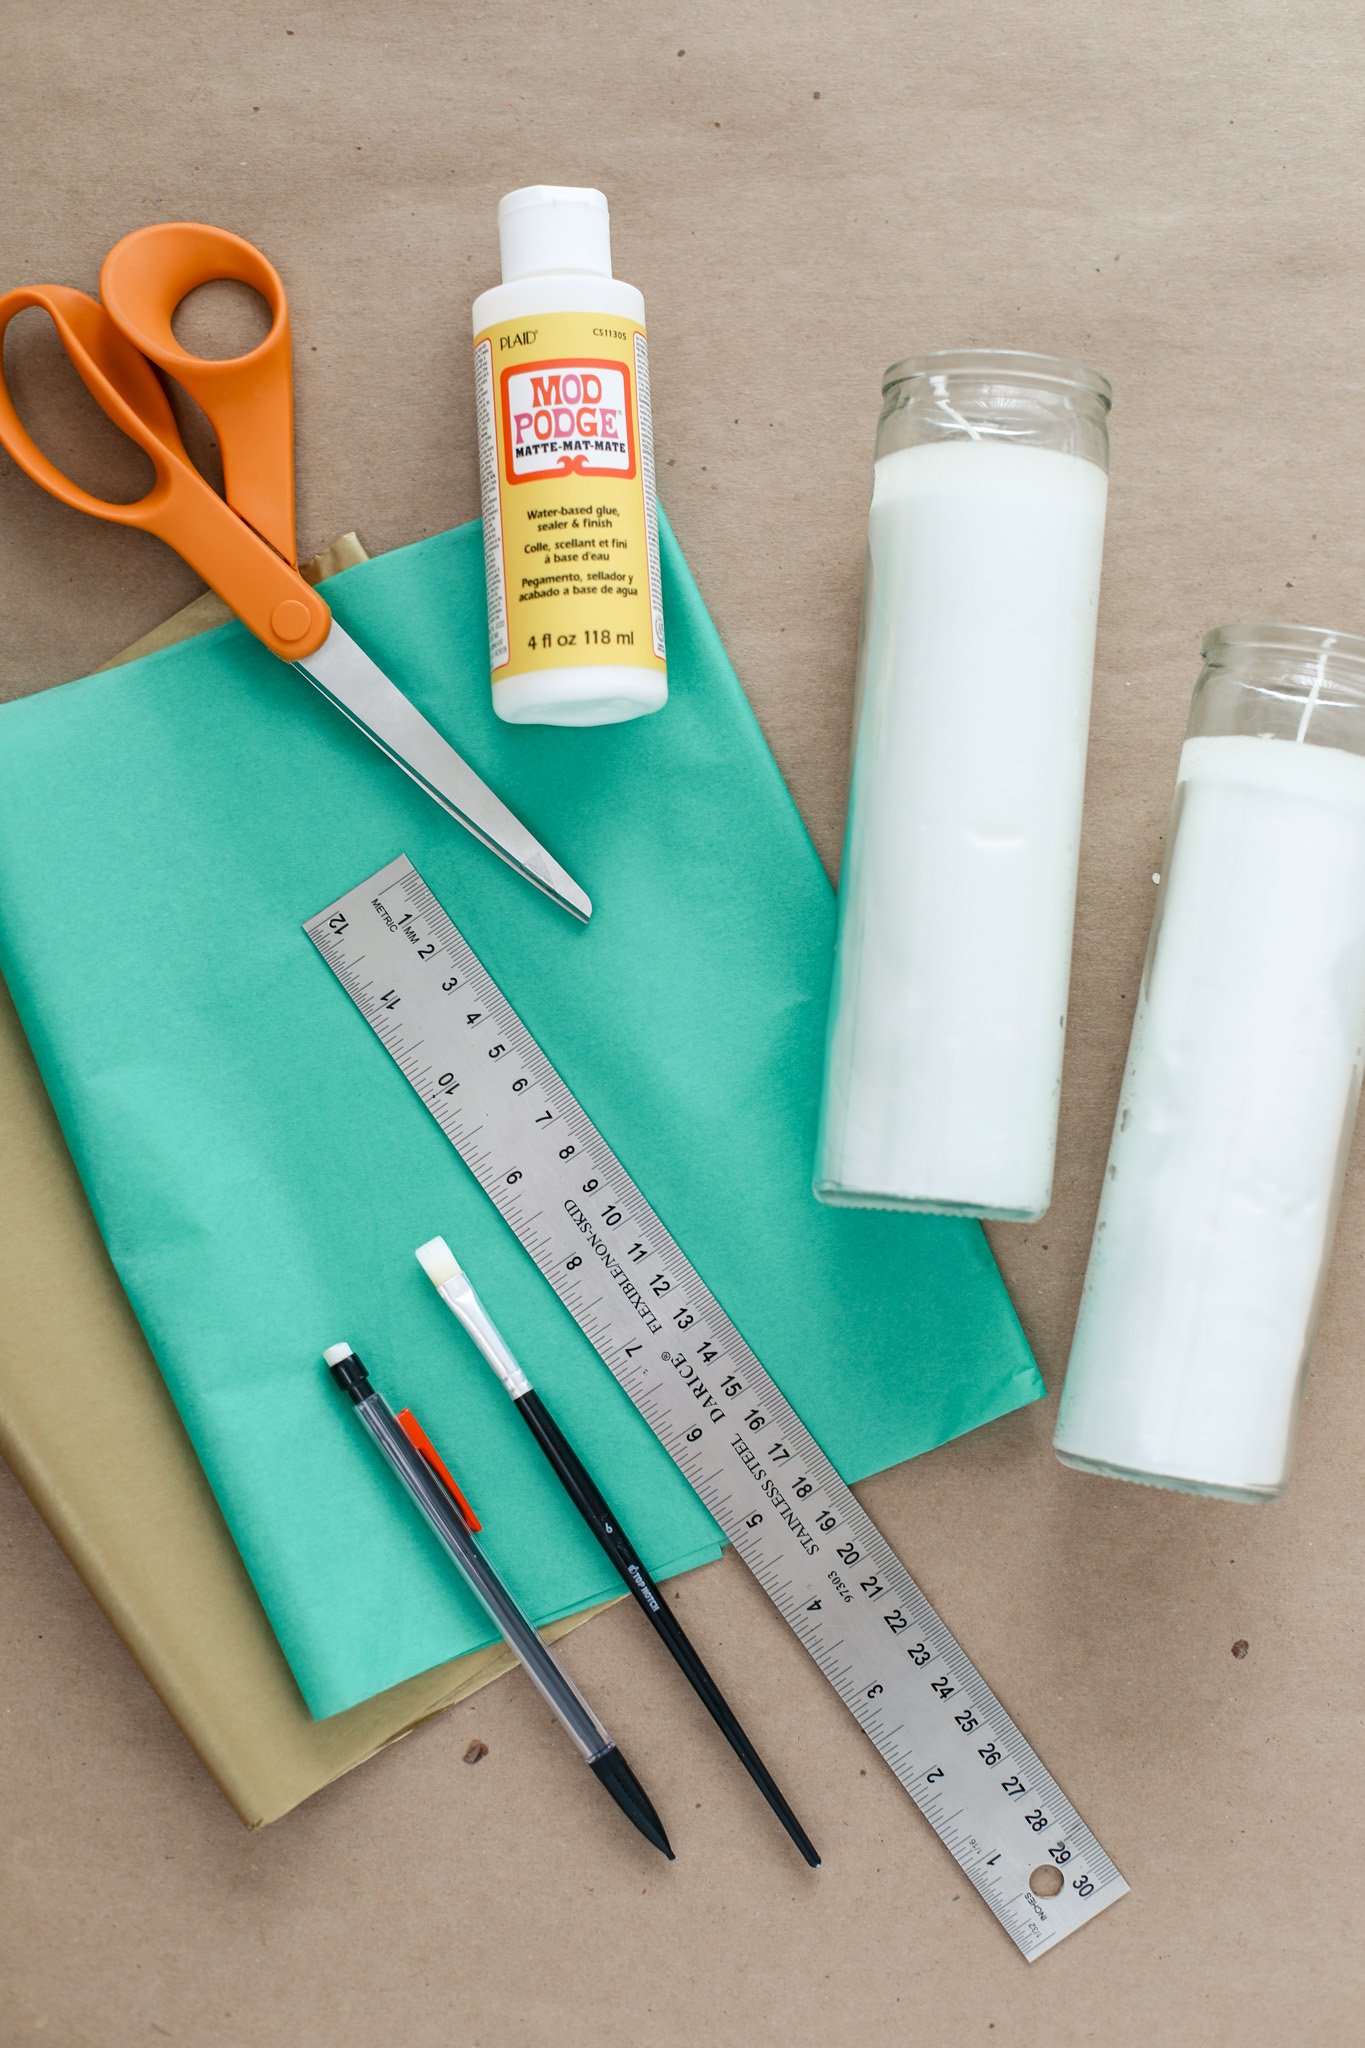
Supplies:
Paint brushes
Ruler
Pencil
Scissors

STEP 1: The first step is to measure and cut out your strips of tissue paper. You will want to be very delicate when drawing your lines on the super thin paper. Use a ruler to measure out strips about 9” long and 3/4” wide. You will cut them down to the correct length as you go, so 9” will give you a bit extra to work with. You will need to cut at least 10 strips, but I would cut a few extra just in case you rip any.

STEP 2: Now we are going to begin adhering the horizontal tissue paper strips. You will start by painting on a thin layer of Mod Podge to the glass surface, then gently lay down your tissue paper strip. You will want to work section by section so the Mod Podge does not dry too quick. So starting in the center of your candle, paint on an even coat of matte Mod Podge to the surface of the candle all the way around in a line where you will place your first strip. Gently press down the end of the tissue paper against the Mod Podge glue and carefully lead the strip of tissue paper to stick down as you turn the candle.
The most difficult part is getting the end of the tissue paper to line up with the beginning so just try to keep the paper strip running straight as you press it down and you should be able to gently pull it either up or down as you stick it down if you need to adjust the angle slightly. You may also have to do it a few times until you get it to line up closely. Cut off any extra tissue paper once the two ends meet up.
Continue adding horizontal strips until you have 5 some-what evenly spaced stripes (2 above and 2 below the center stripe).
STEP 3: Once you have attached all your horizontal strips of tissue paper, you are going to want to paint on another light, even coat of Mod Podge over the top of the tissue paper to make sure it is fully adhered to the candle. Do this very gently with your paint brush so you do not rip the tissue paper, it is very delicate once it is wet from the glue. You will probably also notice a lot of air bubbles forming, but just push them down the best you can with more Mod Podge on your paint brush. Any air bubbles will be less noticeable once the Mod Podge dries fully.
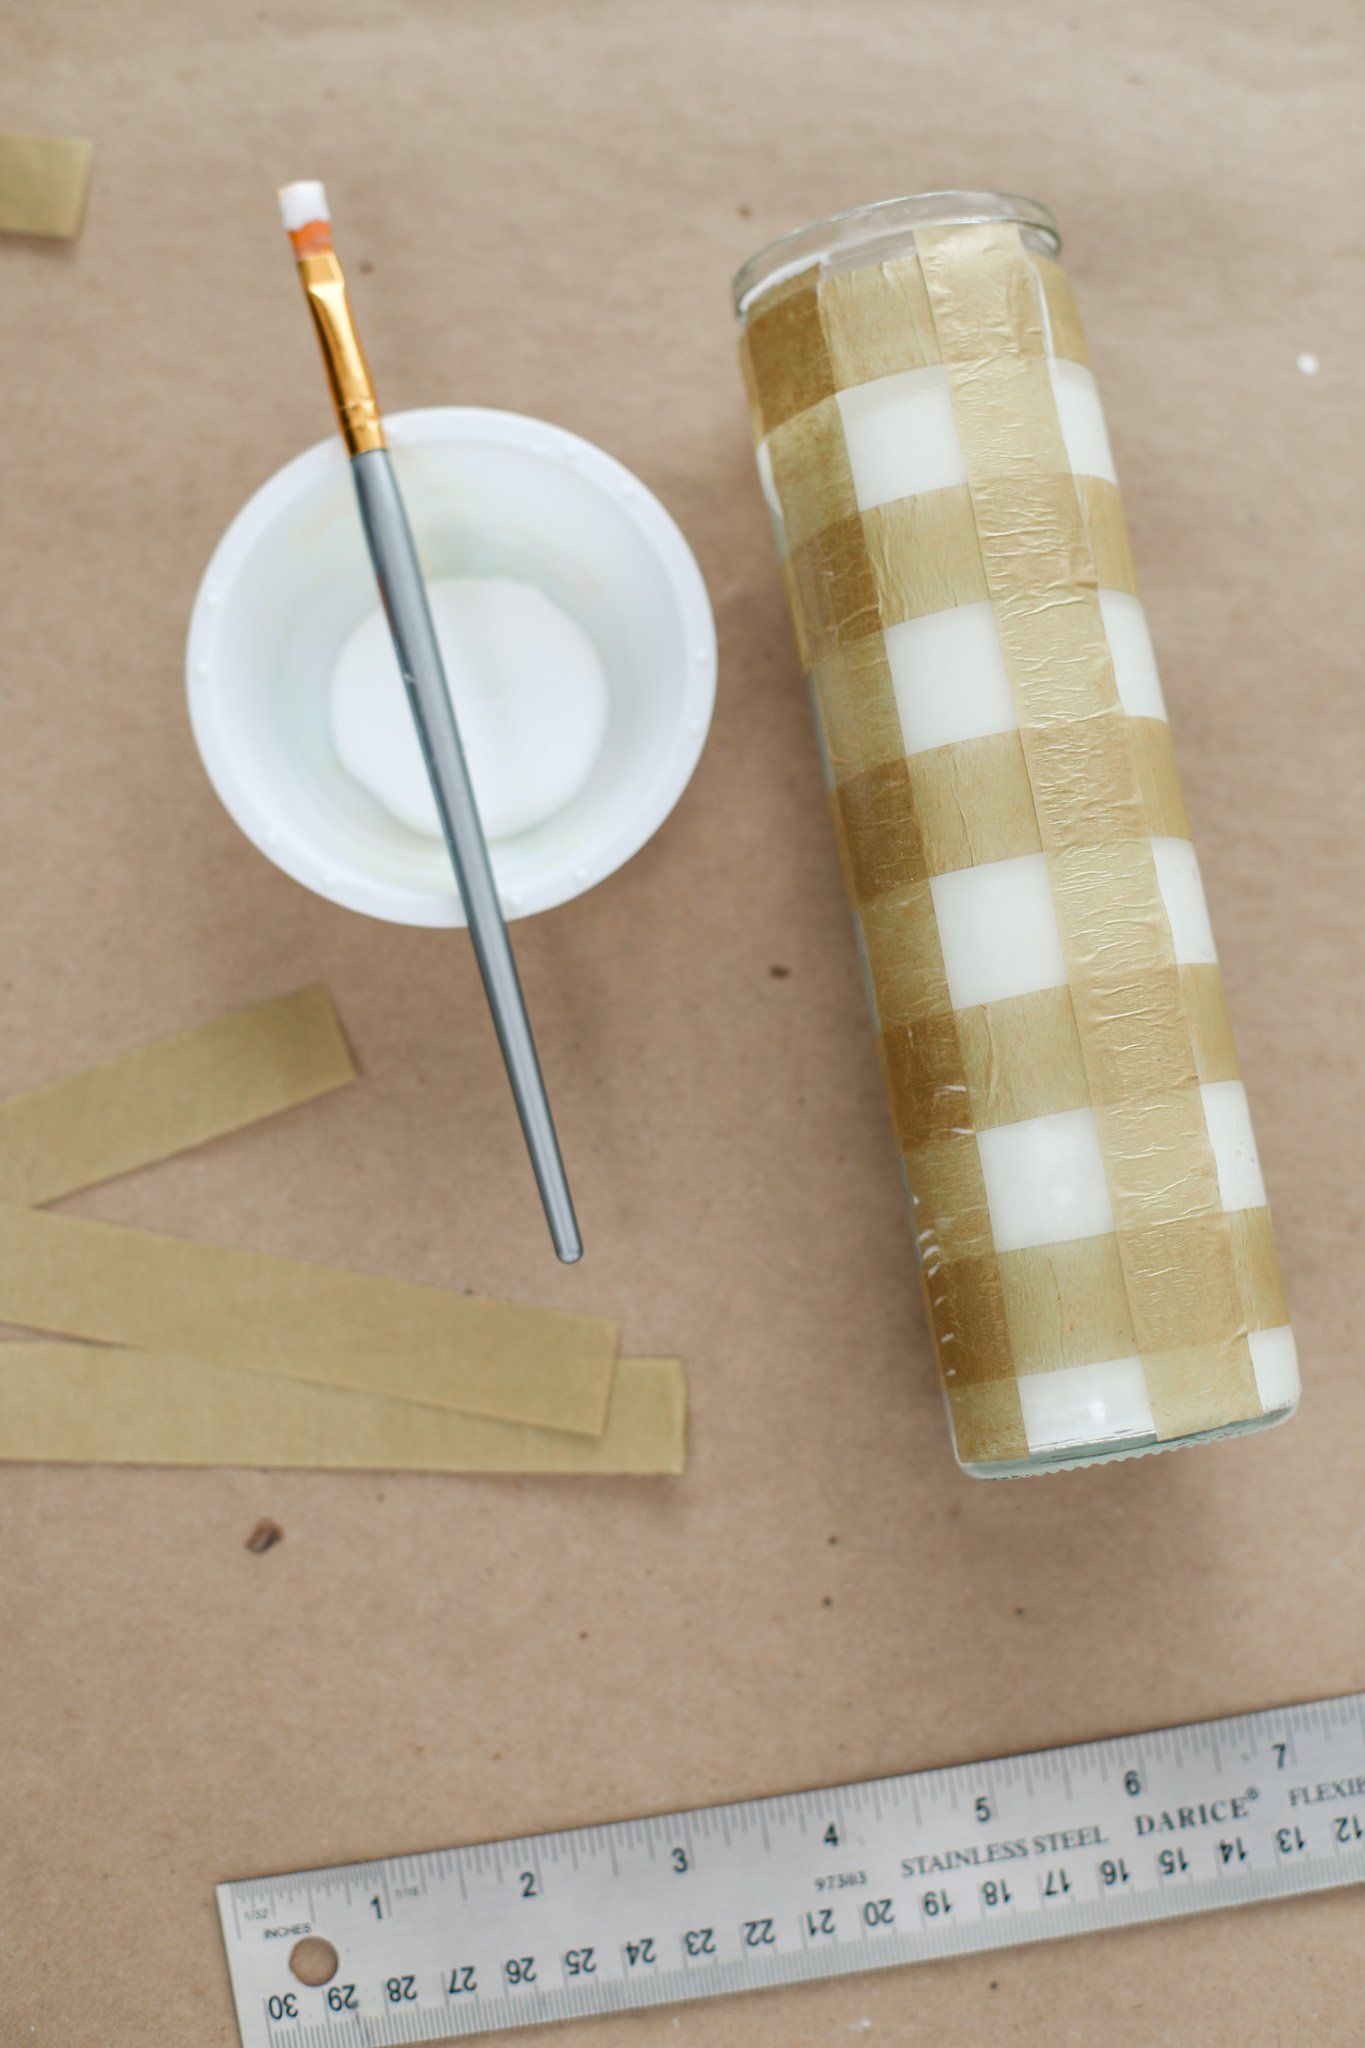
STEP 4: Let the horizontal stripes dry completely. Then it is time to adhere your vertical stripes. I used 5 tissue paper strips to cover the entire surface. So trim down 5 of the tissue paper strips to about 7 1/2”. That is the length from the bottom edge of the candle to just below the rim. Using the same process, paint on a line of Mod Podge where you are placing your vertical tissue paper stripes. As you lay down your first strip, try to keep the line completely perpendicular to the horizontal stripes.
Try your best to evenly space out the 5 vertical stripes as you go, but if the last two end up being a little too close together (this happened to me too!) then you can just turn that side to the back when displaying your candle. It doesn’t have to be perfect (I remind myself lol)!!
Repeat the process of covering the vertical tissue paper strips with a layer of Mod Podge to fully adhere them to the candle. You will want to make sure you cover the whole candle with Mod Podge at this point, so that the whole surface (including the blank spaces) have the same matte finish once it all dries.

And there you have it! Repeat these steps with as many candles as you would like to make. If you are using a metallic tissue paper, like I did with the gold, just make sure you are adhering the correct side to the candle so the metallic side is visible on the outside. Regular colored tissue paper does not have a “front” and “back” like that though.

I really like how these holiday inspired gingham candles turned out! I totally remember gluing tissue paper pieces to glass candles growing up. I think we did this a lot in church, like at Sunday School and Vacation Bible School. So this is a fun way to take that easy childhood skill and turn it into a beautuful piece of decor for your home!
I would not recommend making this exact pattern with kids though, it can be very frustrating and tricky to keep the lines straight and you have to be very gentle in order to not rip any of the tissue paper while gluing. So if you are doing this craft with little kids, maybe you make the ones with the gingham pattern and leave them to make a more abstract design! lol
Hope you enjoyed today’s dollar store project! And wishing you a wonderful Thanksgiving week.
xo Rachael

