
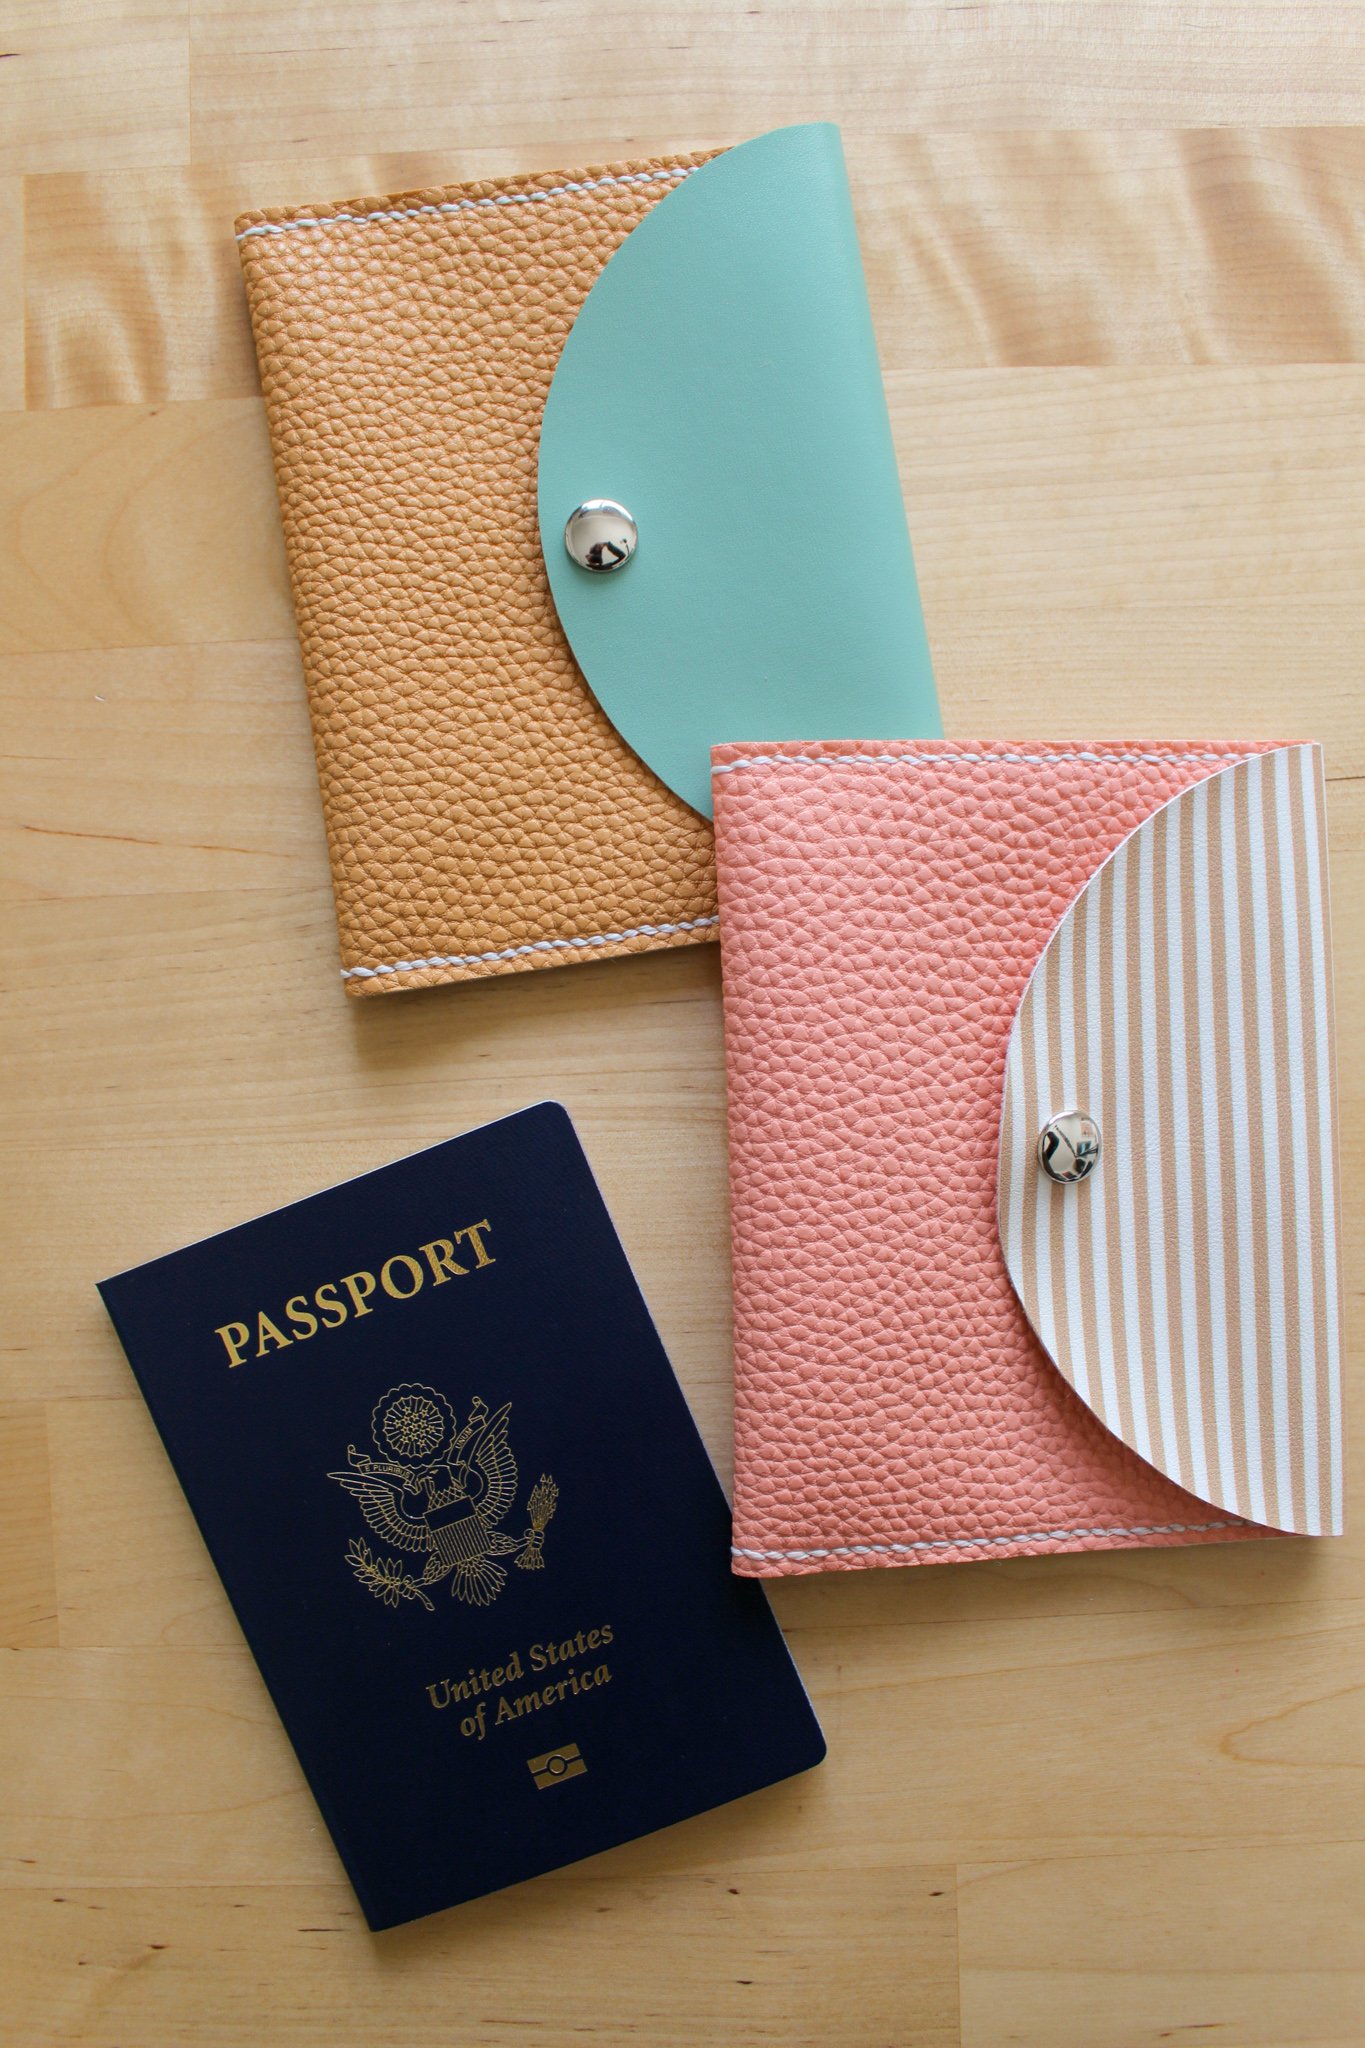
DIY Passport (& Vaccine Card) Holder
I’m back with another travel-related post today (can you tell that I’m excited about finally being able to travel again this year??). From my experience traveling abroad over the last few weeks, many places (at least in Italy) are asking to see your vaccine card for entry so I thought it would be smart to create a nice leather passport holder that has a convenient slot for your vaccine card too. Maybe one day we can just use this slot for a nice family photo or something?? (wishful thinking?)
…anyway, this DIY is a fairly straight forward process so don’t be scared off by the long list of supplies or steps. This was my first time working with (faux) leather so I did have to purchase some new supplies that I didn’t have on hand, but I’m excited to add them to my DIY tool belt for future projects as well. Without further ado, check out the tutorial below!
HOW TO MAKE A LEATHER PASSPORT (& VACCINE CARD) HOLDER
You will need:
Card stock paper
Printer
DIY Passport Holder Template (download below!)
Scissors
X-acto knife & cutting mat
Faux leather (colors of your choice — I used this brand and did two A4 sized colors/patterned sheets per passport holder)
20L snap setter kit & mallet
Small sheet of plastic — you can use whatever you can get your hands on, but I happened to have an old box of these clear name badges and one of these worked perfectly
Craft glue/adhesive
Ruler
Roll of waxed thread
2 strong/thick needles (I used embroidery needles)
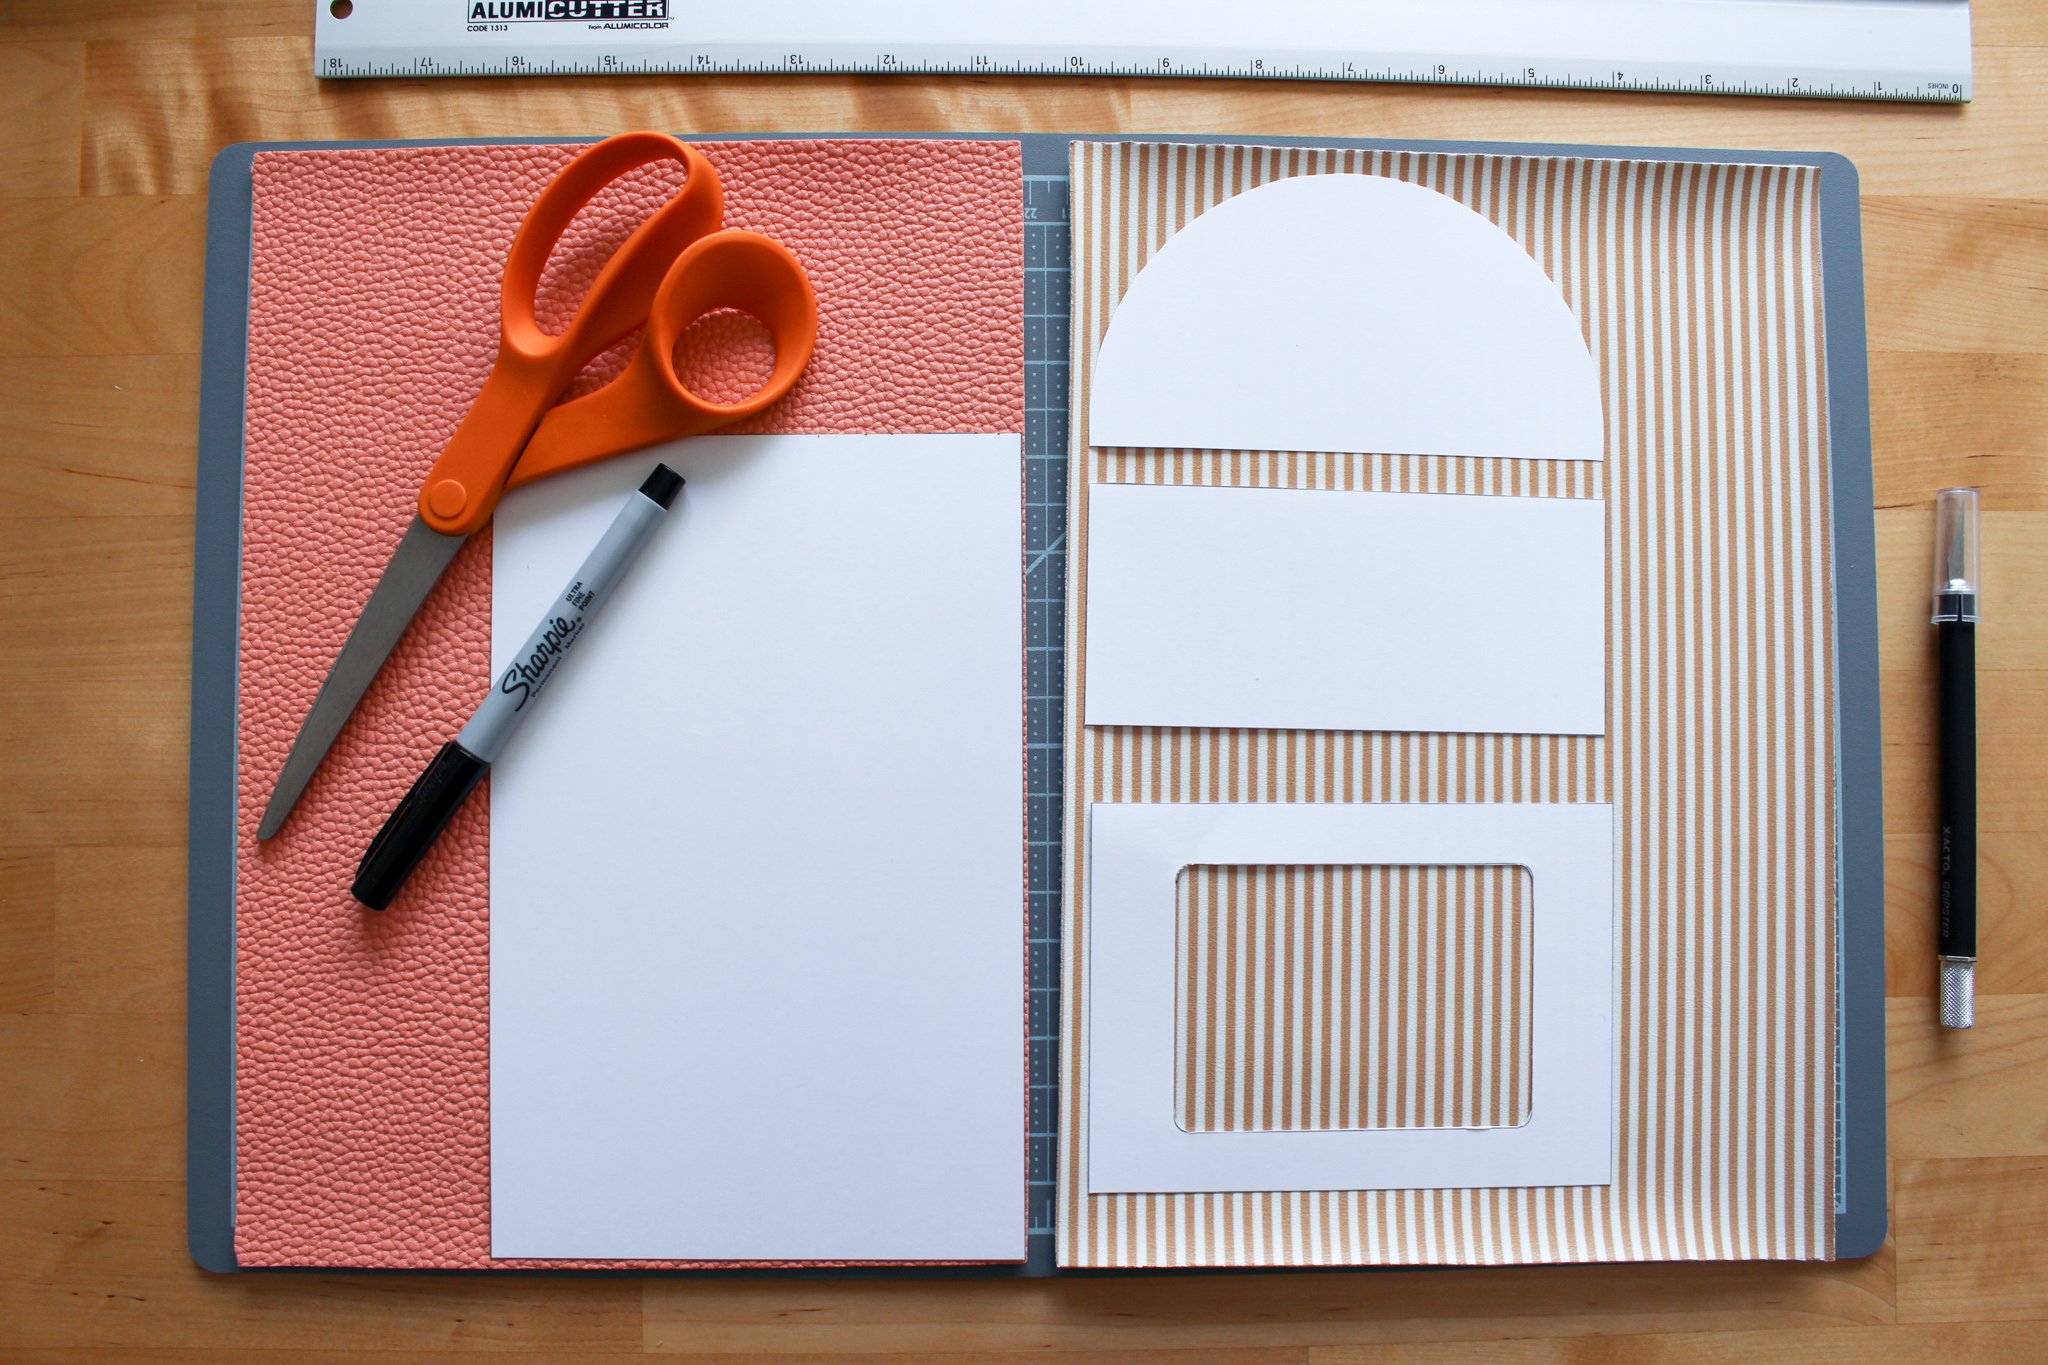
STEP 1: To begin, print out the DIY Passport Holder Template PDF you will find above. It is helpful to print this on a thicker card stock paper to make a stronger template. Using a pair of scissors or an x-acto knife, cut out the 4 shapes.
STEP 2: Place the paper templates on top of the leather sheets and trace out the shape with a sharpie. Then use your scissors to carefully cut out the shapes. Cut within the sharpie line so that you don’t have any sharpie showing on the edges.
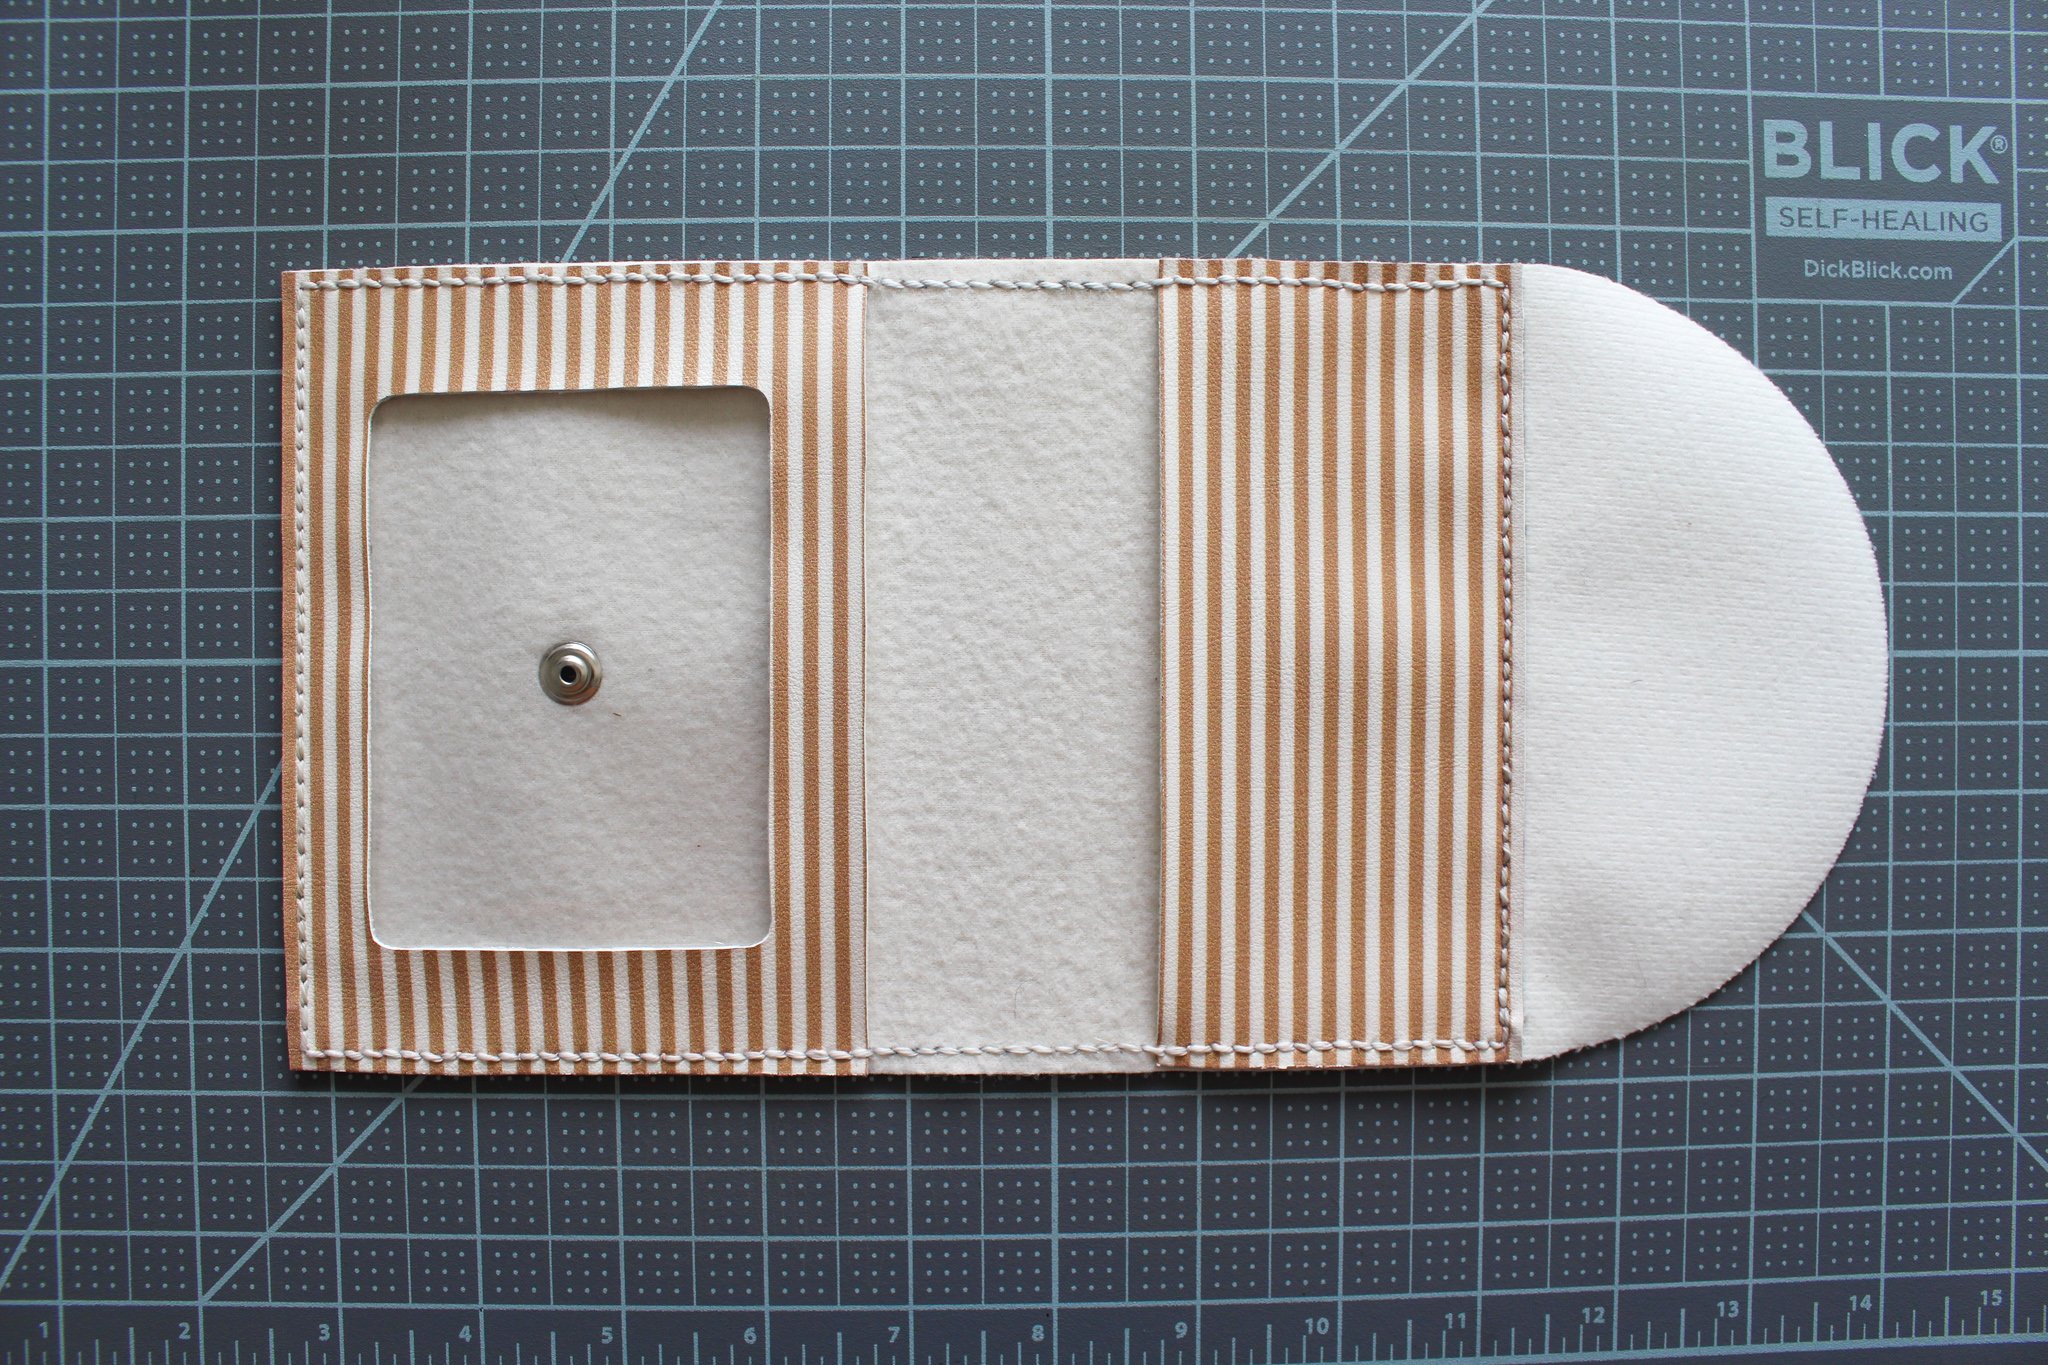
I cut the largest rectangle out of the first color (coral) and the other 3 shapes from the second accent color (striped). Don’t forget to also cut out the inside window from the second largest rectangle shape. When you are finished your pieces should look like the image on the left below.


STEP 3: Turn your largest rectangle horizontally and measure about 2” in from the left side in the very middle. Punch a hole. Follow the directions on your snap setter kit to attach the stud & post sides of the snap in this hole.
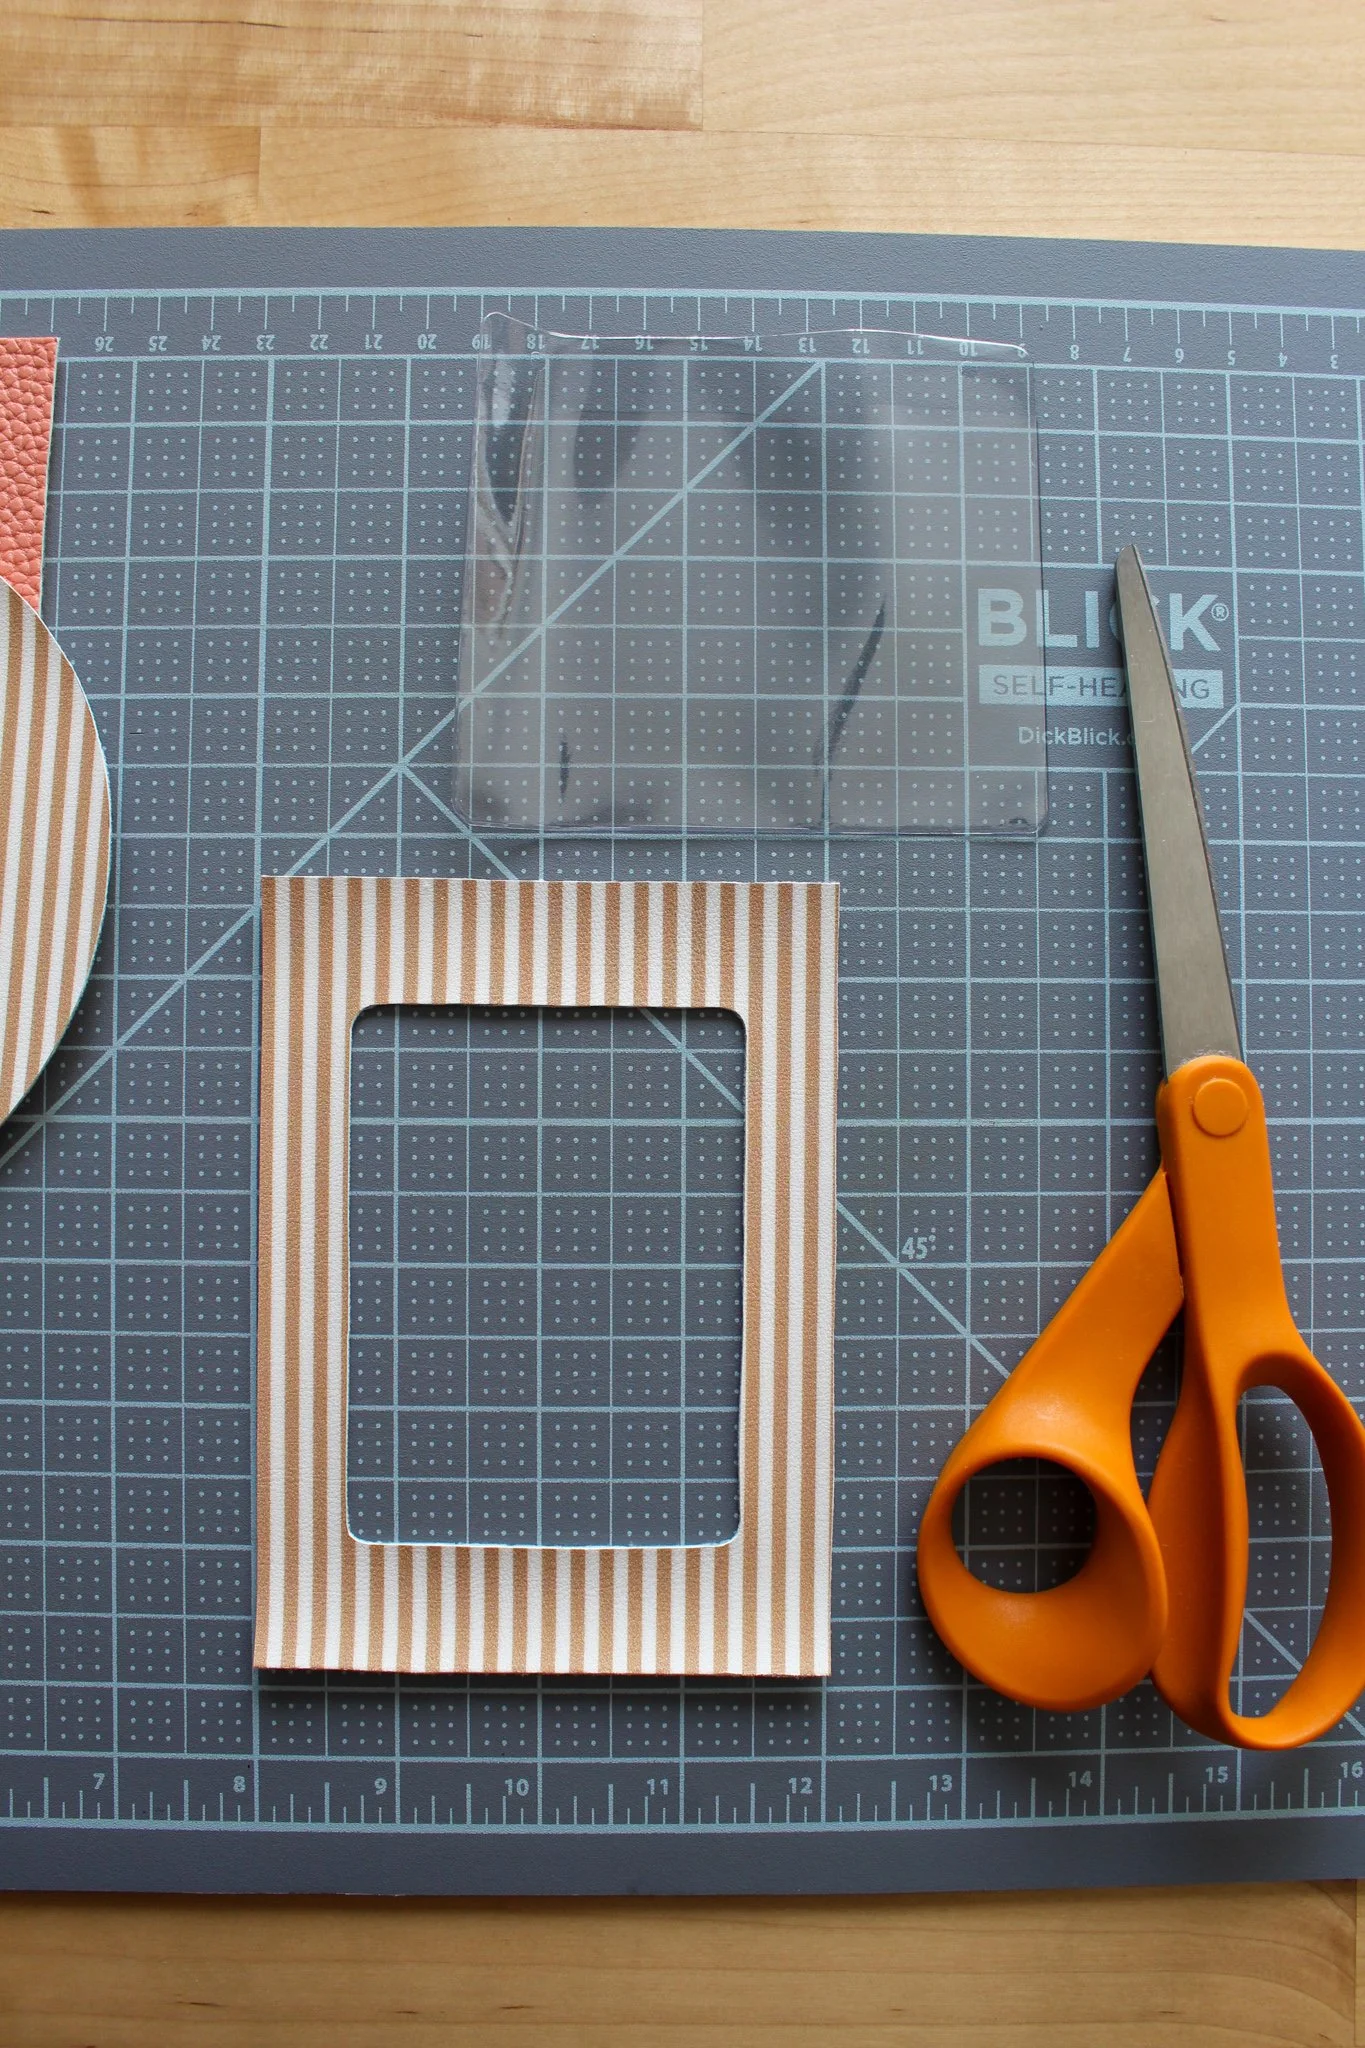
STEP 4: Next you are going to create the window for your vaccine card holder. Cut a piece of clear plastic material just a bit bigger than the window of the leather piece. Using a hot glue gun, add a thin line of glue around the entire perimeter of the window on the backside of the leather and stick down your plastic. Allow to dry for a few hours.

STEP 5: Turn your large rectangular piece of leather over so the backing is facing you. Add a thin line of glue where you will be attaching the window piece of leather (as shown below). Press this piece into place.
*REMINDER: Keep the right side of the window piece unattached so that you can slide your vaccine card in.

STEP 6: Before gluing down the next piece, use a ruler to measure 1/8” from the edge of your half circle leather piece and draw a line on the back of the leather as shown in the image below. This will show you how much of the half circle should be attached to the main piece of leather. Now, add a thin line of glue on the far right side of your main leather and glue on the edge of the half circle.


STEP 7: Add a final line of glue around the 3 sides of where your final piece of leather will be attached (this will require you to glue on top of the edge of your half circle). This final leather piece will hold your passport in place, so make sure you keep the left side open to slide the passport backing in.
Allow the glue to set overnight. I found it helpful to place something heavy like a stack of books on top of your pieces to flatten everything while drying.
Now that your pieces are glued down, it will be much easier to do your sewing because the pieces should be secured in place. If you wanted to create this DIY with a no-sew version, you could actually now skip down to STEP 12. But for extra reinforcement and that leather wallet look, I will show you how I sewed the edges.

STEP 8: Use your ruler to measure 1/8” from the edge of the right side of your smallest leather rectangle. Now firmly roll your stitch spacer (using your ruler as a guide) along the edge to mark where your stitches will be made. You will continue this process around the entire perimeter of the rectangle (omitting the half circle shape).
*NOTE: In the small sections where you are not attaching two pieces of leather together, I still wanted the stitching to continue just for the look so I used my ruler and sharpie to just mark the stitch holes since the stitch spacer wheel was not making a mark on the leather backing in these places.
STEP 9: Cut a piece of your waxed thread roughly the length of your wingspan. Thread the two needles on either side of your piece of thread.


STEP 10: Now is time to begin sewing. For this project we are going to use a saddle stitch. The process is a bit different from regular fabric hand sewing, but once you get the hang of it after a few stitches it becomes easier. Begin each hole (starting from the bottom right corner next to your half circle side) by carefully stabbing your awl through the stitch mark to open up your hole.
*NOTE: I started in this spot because this is the most difficult section to sew since you’re attaching 3 pieces of leather together. All the other sides are much easier!


STEP 11: Next sew one of your needles through the first hole from the back to the front and pull through so that half your thread is on either side (as shown in the photo above on the left).
Take your awl and punch the next hole, going in the same direction (from back to front) as the first hole. Now take your left needle and thread through back to front through this hole. Both needles will momentarily be on the same side now.
To complete the saddle stitch, now take your needle on the right side and go back through the same hole that you just went through with the left needle, front to back. Pull both needles tight until you have a strong clean stitch. Now the two needles are positioned back to one on each side of the leather but they are reversed.

Continue this saddle stitch around the whole perimeter of your rectangle (as shown in the photo below). Each time starting by opening up the hole with your awl then stitch the left needle back to front, then the right needle front to back. & pull tight. You are basically creating two mirror image stitches for extra strength.
To end your thread, do a few overlapping stitches where you began and then instead of sewing through the entire last hole, pull your left thread from back to front only through the first piece of leather. Then pull your right thread from front to back but only through the back piece of leather. Now both strings will be sticking out of the seam of your leather. Create a tight double knot and then trim the edges so the end is hidden in that 1/8” edge of your leather.
*NOTE: You may have to do this ending process somewhere in the middle as well if you run out of thread halfway through like I did. Just start again the same way you did in STEP 10.
STEP 12: You’re almost there, last step!! Now it is time to put on the socket and cap side of your snap. Fold up your passport holder, bringing the half circle shape around the front and mark a dot where you can feel the stud and post below. Punch a hole. Then follow your snap setting kit directions and attach the socket and cap part of the snap through this hole. Now the stud and the socket should line up and snap together!

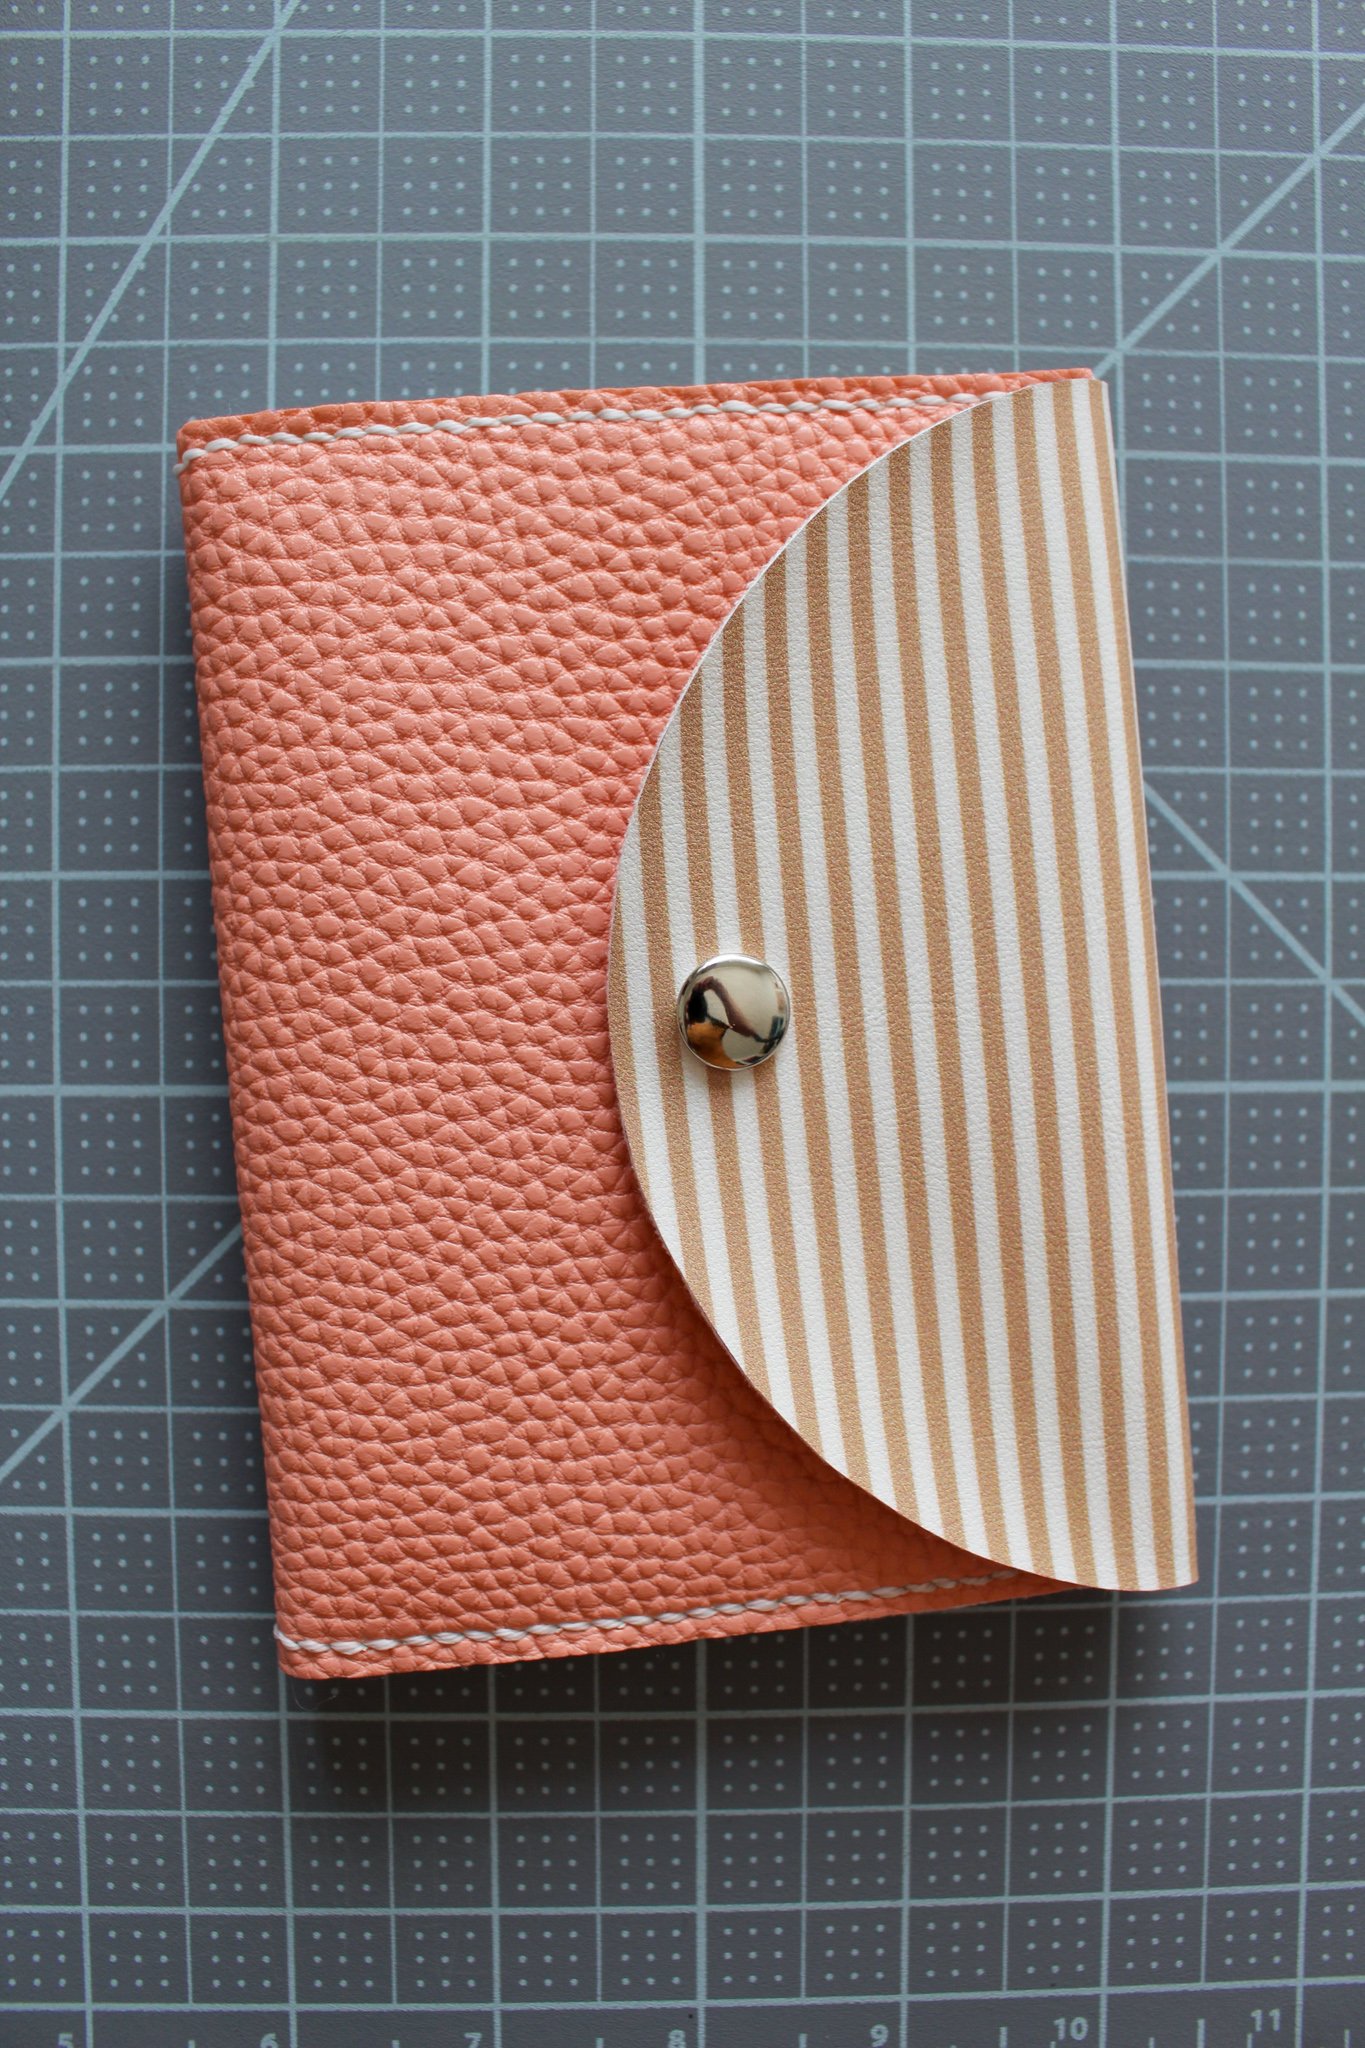
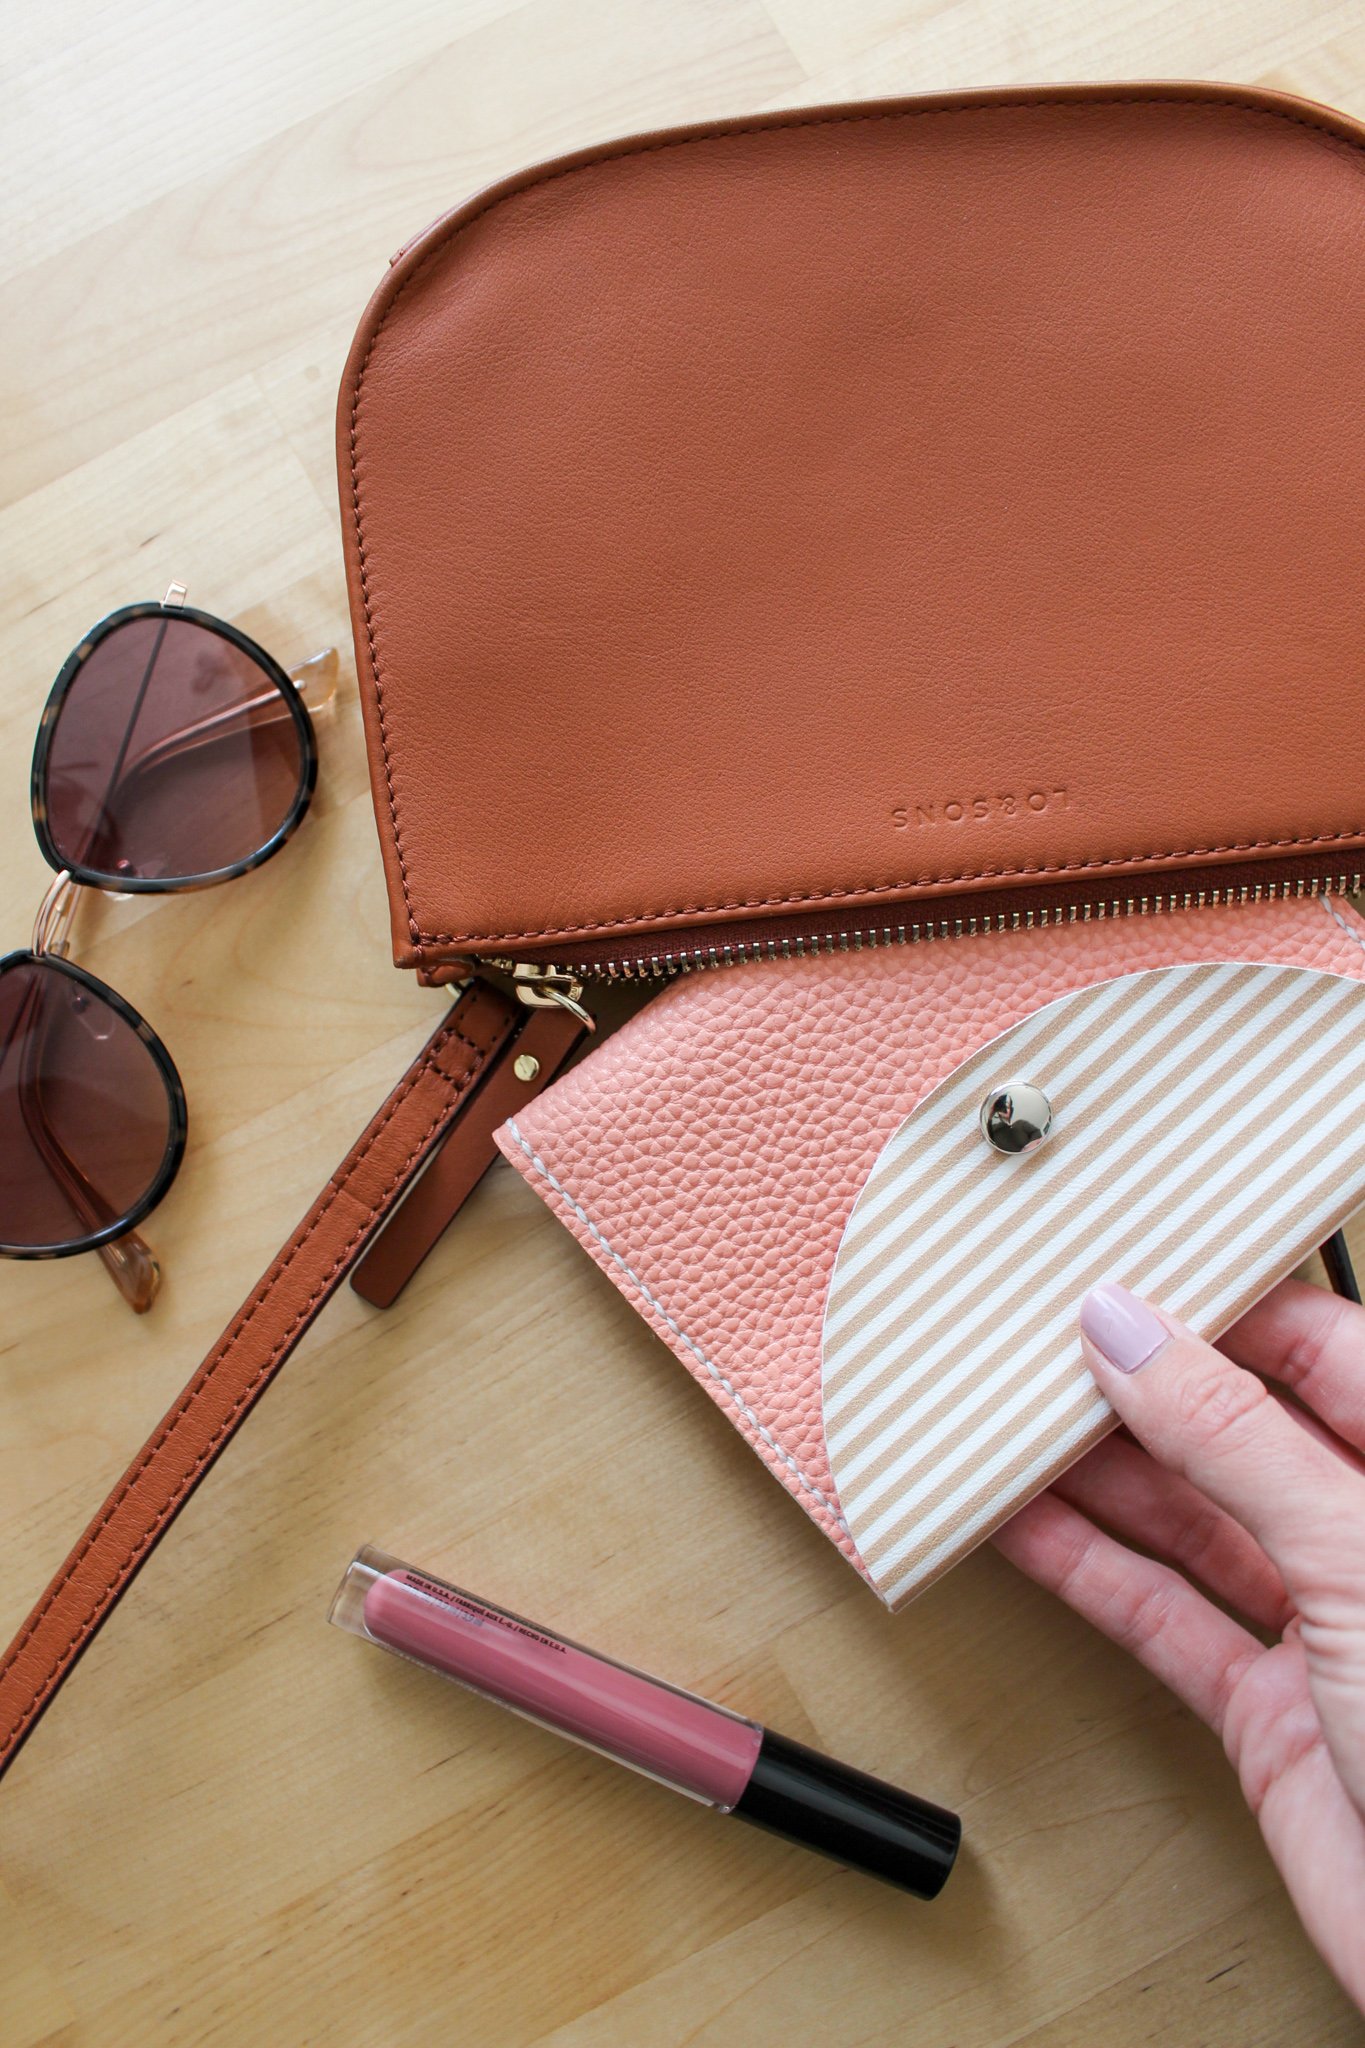
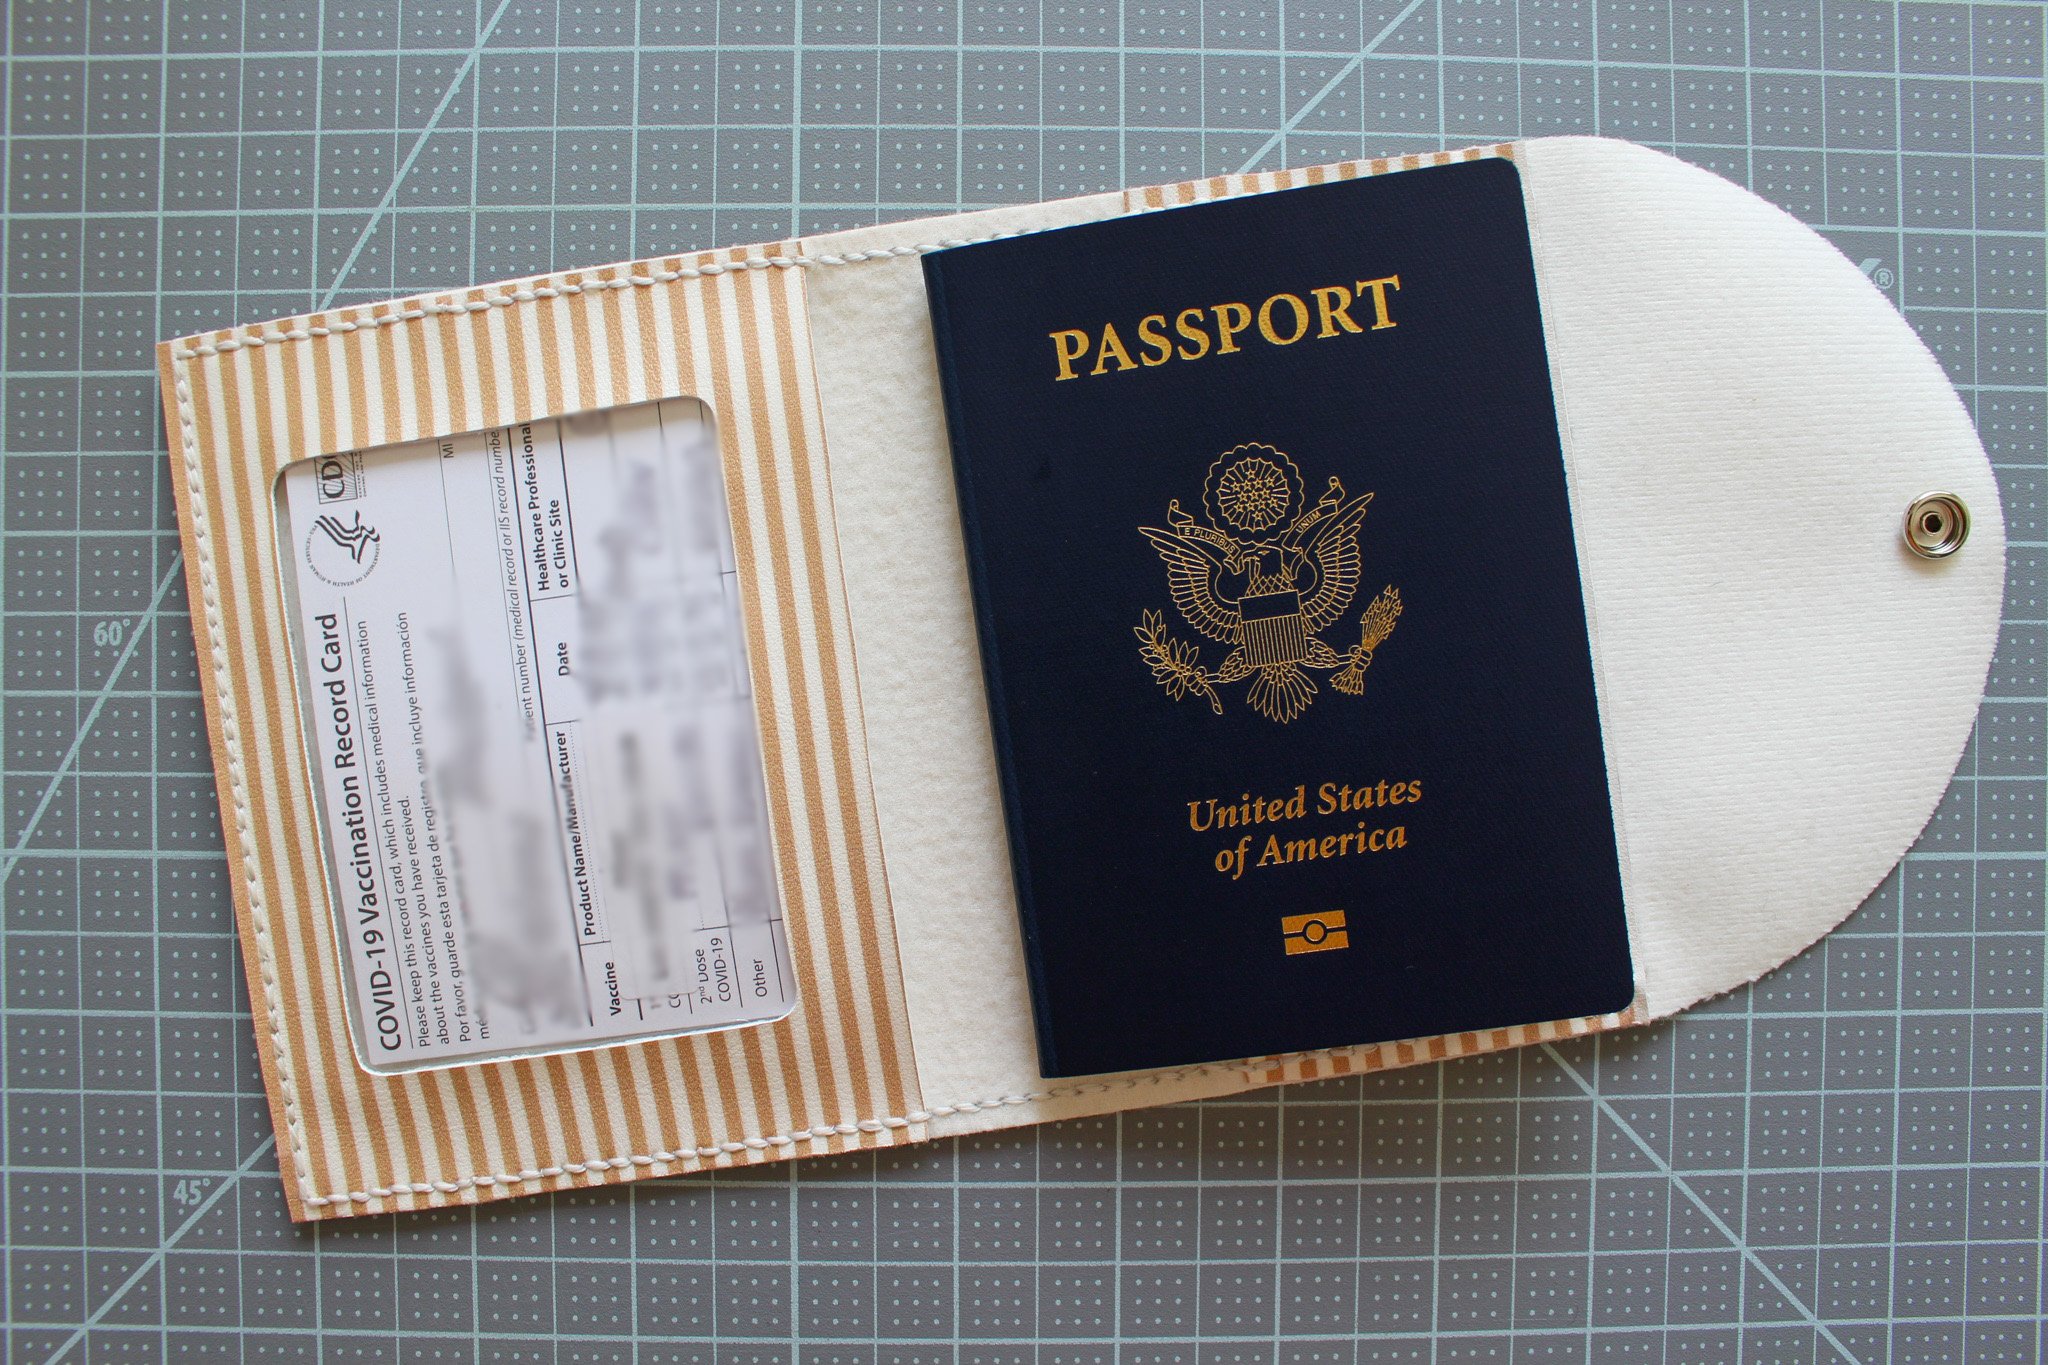
And you’re all done!! Slide your vaccine card into the left pocket with the window so your info is quickly visible, and slide the back cover of your passport book into the right pocket. Close it up and pack your bags! You’re ready for your vacation abroad :)

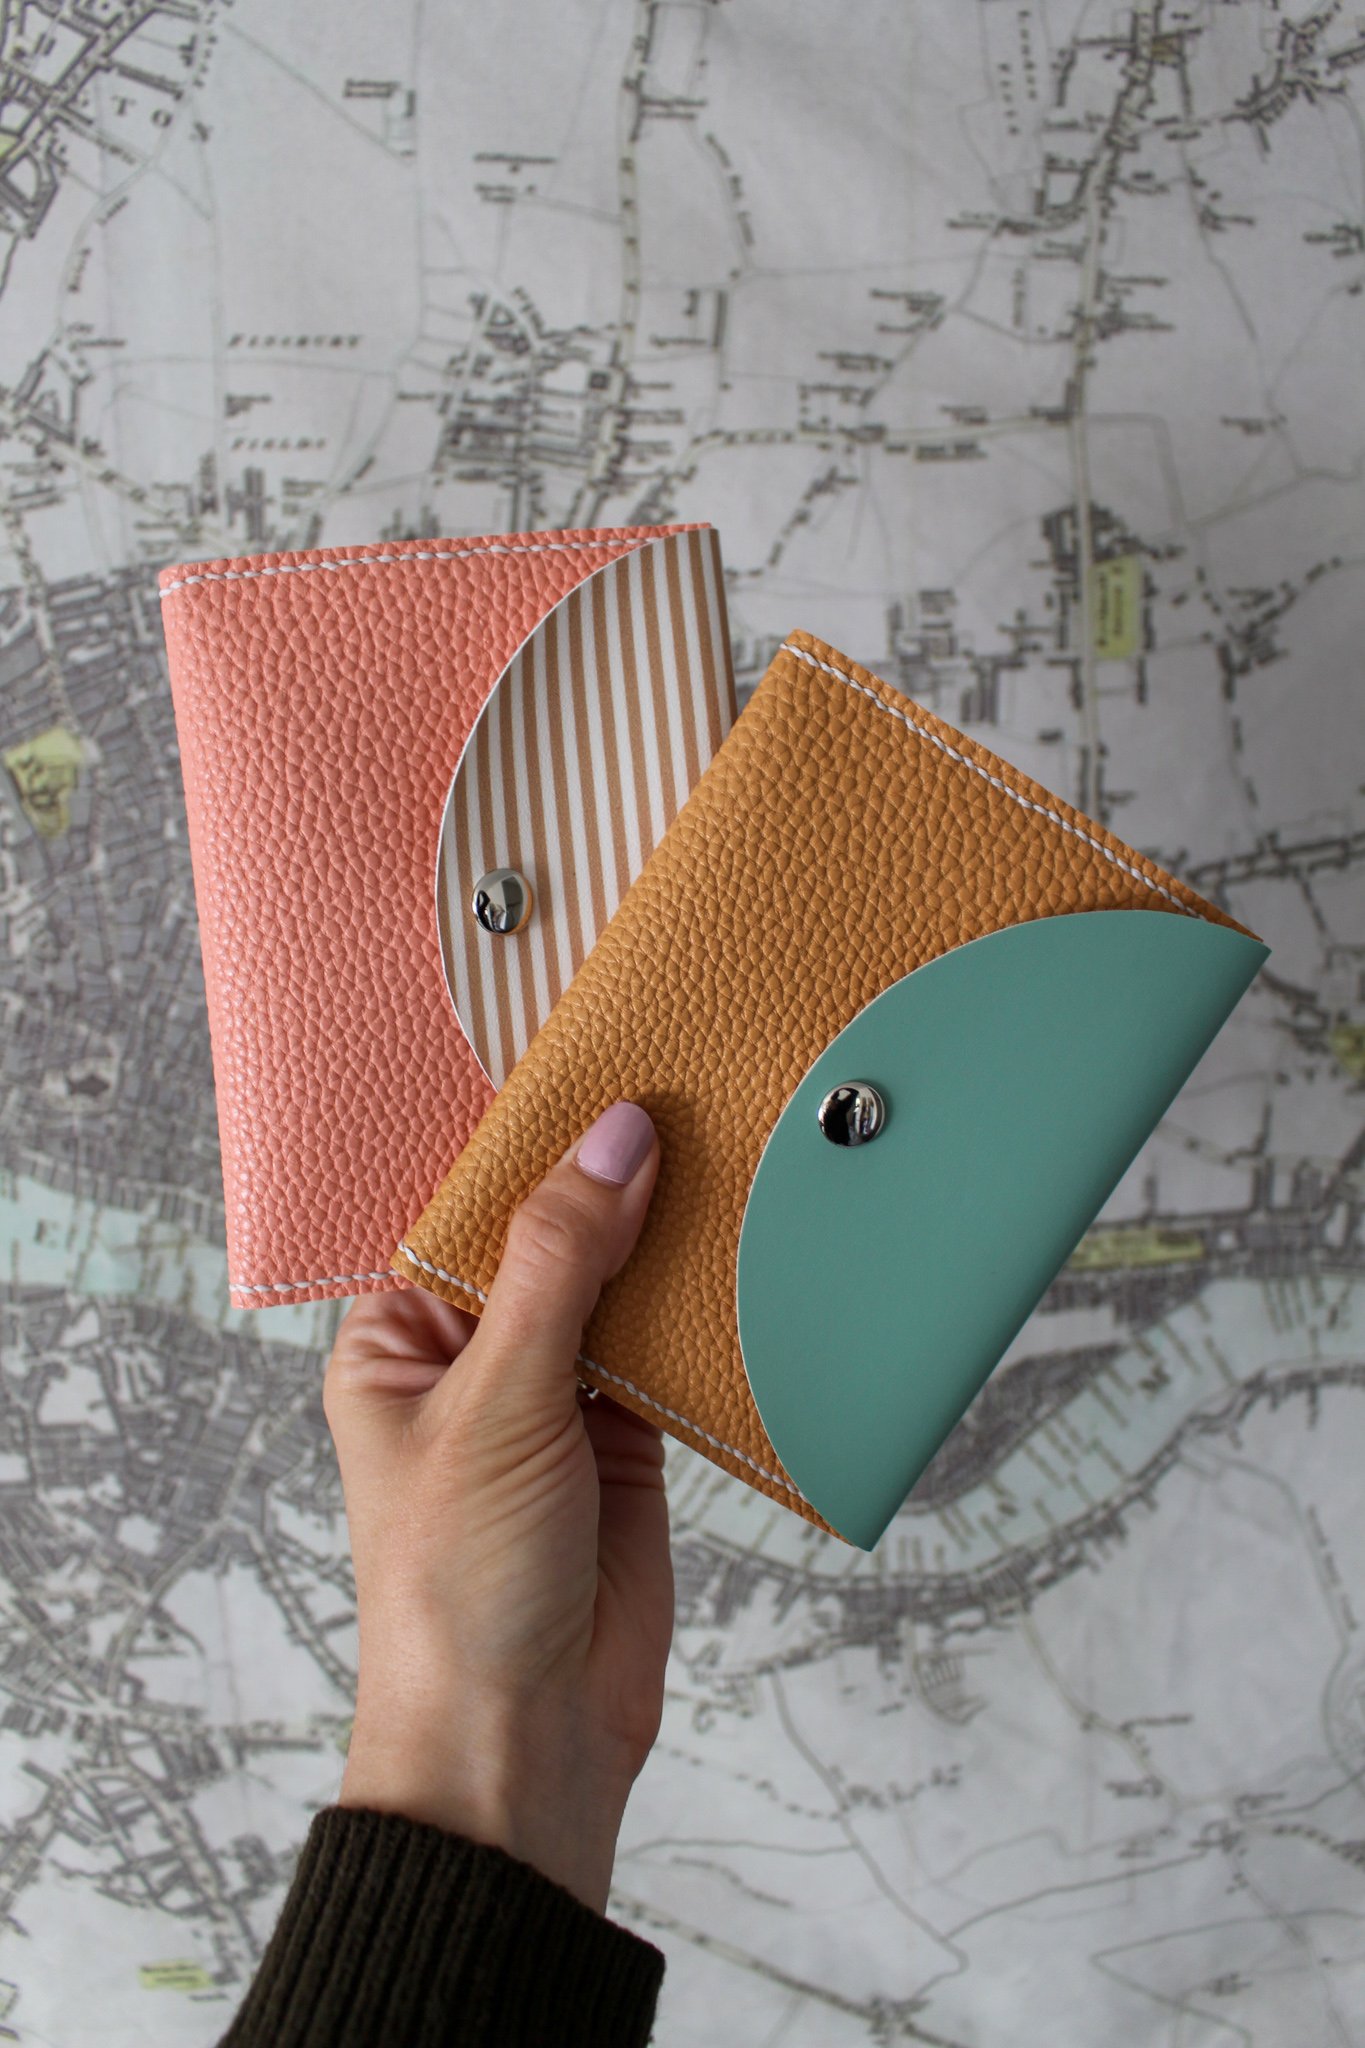
These passport & vaccine card holders worked perfectly for us on our recent trip to Italy! I can’t wait to take them on their next adventure soon.
What is your dream vacation destination?
xo Rachael

